
“Why is the kitchen smelling like a bakery all of a sudden?” my roommate asked, poking her head in as I nervously pulled a loaf from the oven. Honestly, I wasn’t sure this “rustic bread” would even rise properly — I was trying to whip up something simple after a hectic morning, and this recipe was more of an experiment than a plan. The original goal was just to have some homemade bread fast, without fussing over fancy ingredients or complicated techniques.
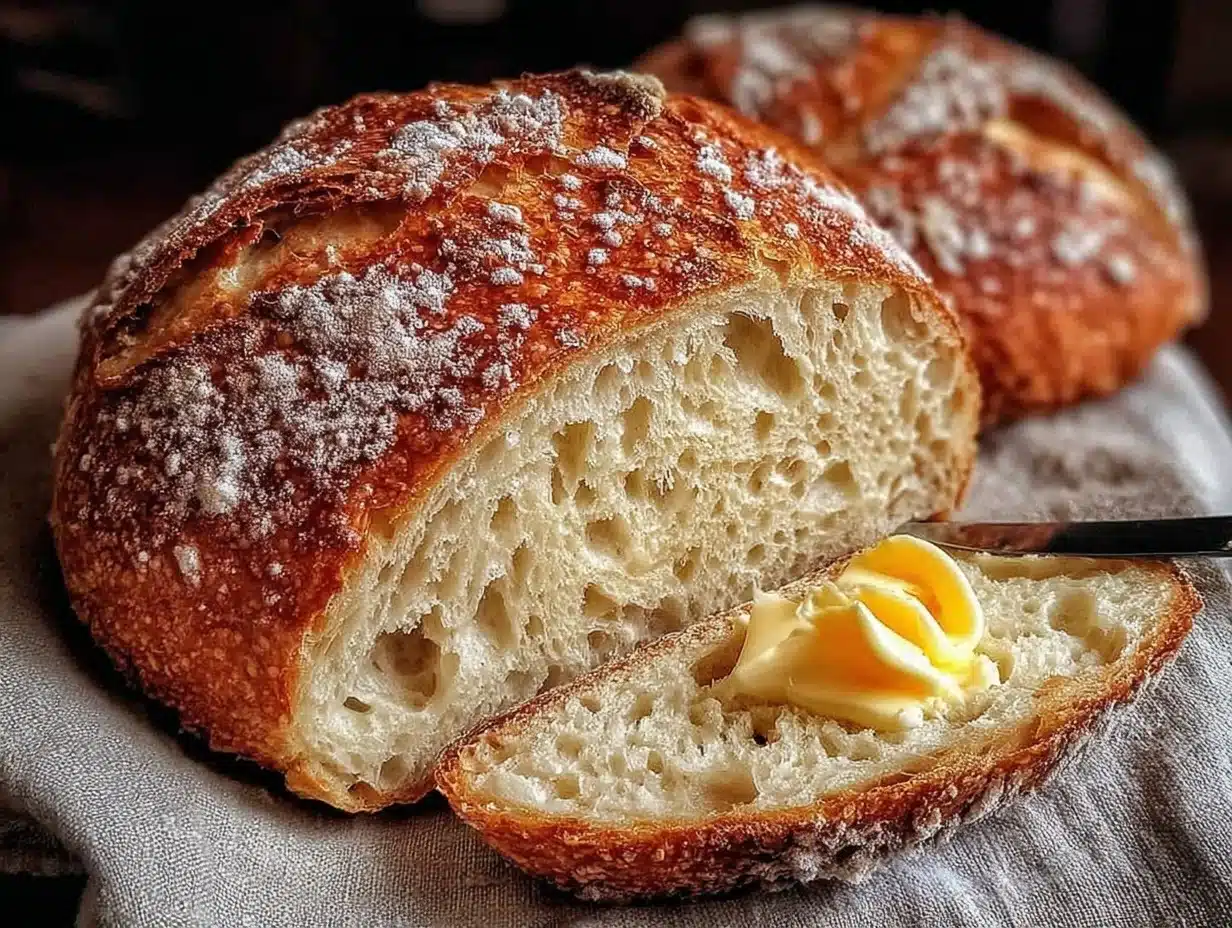
That first crust? It crackled loud enough to make me jump. The crumb was chewy but tender, and the flavor had that slightly tangy depth I’d only ever tasted at fancy bakeries. I remember thinking, “Well, this turned out way better than I expected.” Since then, this classic rustic bread with a crispy artisan crust has become my go-to, especially when I’m craving that warm, comforting feeling only fresh bread can bring.
It’s funny how something so simple can feel like a small victory in the middle of a busy week. I’ve made it late at night after long shifts and early on weekends when the house feels quiet. The smell fills the air, and suddenly everything feels a little more grounded. You don’t need any special skills or a dozen ingredients — just a bit of patience and this recipe. And trust me, once you pull that loaf from the oven, you’ll understand why it’s stuck around in my kitchen routine.
Whether you’re a “not really a baker” kind of person or just looking for that perfect crust, this recipe has a way of making the whole process feel doable and rewarding. Plus, it pairs beautifully with everything — from savory spreads to sweet jams, and even alongside dishes like the creamy baked feta pasta recipe I love for dinner. It’s the kind of bread that invites you to slow down, take a bite, and just enjoy the moment.
Why You’ll Love This Classic Rustic Bread Recipe
After making this rustic bread dozens of times (seriously, I lost count), I can say with confidence it’s one of the easiest, most satisfying homemade breads out there. Here’s why it stands out:
- Quick & Easy: The dough comes together in under 15 minutes, and with a simple rise, you’re ready to bake. Perfect for busy weeknights or last-minute cravings.
- Simple Ingredients: No fancy flours or additives here. Just all-purpose flour, water, yeast, salt, and a pinch of patience. I usually grab King Arthur flour for consistent results, but any good-quality brand works.
- Perfect for Any Occasion: Whether it’s Sunday brunch (try it with a creamy custard toast), a casual dinner, or just a cozy snack, this bread fits right in.
- Crowd-Pleaser: From kids to adults, everyone loves the crispy crust and chewy crumb. It’s one of those recipes that gets asked for again and again.
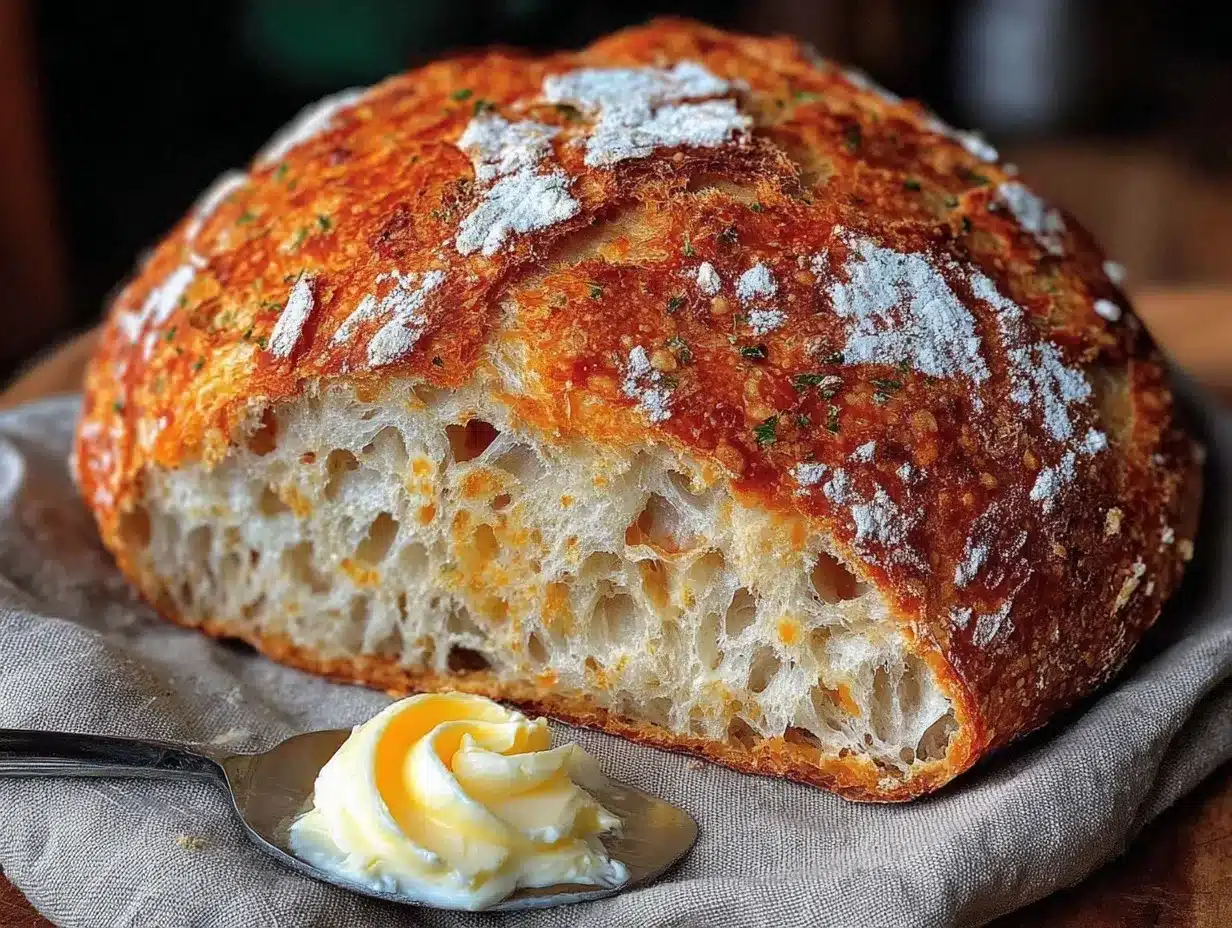
- Unbelievably Delicious: The secret lies in the crispy artisan crust with just the right amount of crackle — you’ll get that bakery-quality crunch every time.
This recipe isn’t just another loaf of bread. The magic happens in the way the dough is handled — a gentle stretch and fold that builds strength without kneading, and baking it in a hot, covered Dutch oven that traps steam to create that signature crust. It’s rustic but refined, with a flavor that makes you close your eyes and savor every bite.
And honestly, it’s comforting in a way that makes you want to share it with friends or savor it quietly with a pat of butter. After trying this, you might find yourself craving homemade bread more often than you expected.
What Ingredients You Will Need
This classic rustic bread recipe uses simple, wholesome ingredients to deliver bold flavor and a satisfying texture without the fuss. Most are pantry staples, so chances are you have them on hand already.
- All-Purpose Flour (500g / 4 cups) – The foundation of this bread. I prefer a high-protein flour like King Arthur for a chewier crumb.
- Warm Water (375ml / 1 1/2 cups) – Helps activate the yeast and hydrate the flour for that open crumb.
- Active Dry Yeast (7g / 2 1/4 teaspoons) – The leavening agent. You can use instant yeast too, but adjust proofing times slightly.
- Sea Salt (10g / 1 1/2 teaspoons) – Enhances flavor and balances the sweetness of the flour.
Optional but recommended:
- Olive Oil (1 tablespoon) – Adds a subtle richness and helps with crust color if you like.
Substitutions and tips:
- For gluten-free options, try swapping all-purpose flour with a gluten-free baking blend, but note the texture will differ.
- Use filtered water if your tap water is heavily chlorinated to avoid affecting yeast activity.
- If you want a tangier flavor, try replacing 50g (1/3 cup) of all-purpose flour with whole wheat flour.
Equipment Needed
You don’t need a fancy setup for this rustic bread, but a few key kitchen tools make the experience smoother and the results better.
- Large Mixing Bowl: For combining and proofing the dough. Glass or stainless steel works well.
- Dutch Oven or Heavy Oven-Safe Pot with Lid: This is crucial for that crispy artisan crust. The lid traps steam during baking, which crisps up the crust beautifully.
- Kitchen Scale: For precise measurements, especially of flour and water. Baking is a science, you know!
- Bench Scraper or Spatula: Helps with folding and handling the sticky dough.
- Kitchen Towel or Plastic Wrap: To cover the dough during rising.
If you don’t have a Dutch oven, a heavy cast-iron skillet with a metal bowl to cover it can work as a makeshift steamer. I’ve tried baking this bread on a pizza stone before, but the Dutch oven method consistently produces a better crust.
Preparation Method
- Activate the yeast: In your mixing bowl, combine warm water (about 105°F/40°C) with the active dry yeast. Stir gently and let it sit for 5-10 minutes until foamy. This step confirms your yeast is alive and kicking.
- Mix the dough: Add the all-purpose flour and sea salt to the bowl. If using olive oil, add it now. Stir with a wooden spoon or spatula until a shaggy dough forms. It will look sticky and rough — that’s perfect.
- First rise: Cover the bowl with a kitchen towel or plastic wrap. Let the dough rest at room temperature for 1 to 2 hours until it doubles in size and bubbles appear on the surface. The dough should feel light and airy.
- Stretch and fold: Lightly flour a clean surface. Turn the dough out and gently stretch one side, folding it over the middle. Rotate and repeat 3-4 times. This develops gluten without kneading, giving your bread that chewy texture. Don’t worry if it’s sticky — use a bench scraper if needed.
- Second rise: Shape the dough into a round loaf and place it on a piece of parchment paper. Cover and let rise for another 30-45 minutes until puffy but not quite doubled.
- Preheat your oven and Dutch oven: While the dough rises, place your Dutch oven with the lid inside the oven and preheat to 450°F (232°C). This ensures a blazing hot surface for the bread to bake on.
- Score and bake: Once preheated, carefully remove the Dutch oven. Using a sharp knife or razor blade, score the top of the dough with a few shallow cuts to allow expansion. Transfer the dough with the parchment paper into the Dutch oven. Cover with the lid and bake for 30 minutes.
- Finish baking: Remove the lid and bake for another 10-15 minutes until the crust is deeply golden and crackly. The internal temperature should reach about 205°F (96°C).
- Cool: Transfer the bread to a wire rack and let cool completely before slicing. This step is important—cutting too early can make the crumb gummy.
Pro tip: If you notice your bread isn’t rising enough during the first proof, it might be your yeast. Try proofing it separately in warm water next time or check the expiration date.
Cooking Tips & Techniques for Perfect Rustic Bread
Making rustic bread at home can feel intimidating, but a few lessons I’ve learned the hard way might save you some headaches:
- Don’t skimp on proofing time: Patience is key. The dough needs to double in size to develop flavor and texture. Rushing leads to dense bread.
- Use a hot Dutch oven: That initial blast of steam traps moisture, which helps the crust form beautifully. Preheat the pot thoroughly for best results.
- Handle dough gently: The sticky dough can be intimidating, but resist the urge to add too much flour. Lightly flour your hands and surfaces to avoid tough bread.
- Score thoughtfully: Scoring isn’t just decorative—it controls expansion. Shallow, confident cuts work best.
- Cool completely: I’ve cut my bread too soon before and ended up with a gummy texture inside. Waiting is tough but worth it.
Once, I baked the loaf without covering it in the Dutch oven, thinking I’d save time. The crust turned out hard and cracked in places, not that lovely crackle I wanted. Lesson learned: the lid traps steam and makes all the difference. Also, multitasking while the dough rises helps — prepping a quick breakfast like fluffy single-serve baked oats or a creamy custard toast can make the wait more enjoyable.
Variations & Adaptations
This classic rustic bread is a wonderful base for experimentation. Here are some ways you can make it your own:
- Whole Wheat Twist: Replace half the all-purpose flour with whole wheat flour for a nuttier flavor and heartier texture.
- Herb Infusion: Add 1-2 tablespoons of fresh chopped rosemary, thyme, or oregano to the dough for a fragrant, savory loaf.
- Seeded Crust: Before baking, brush the loaf with water and sprinkle sesame seeds, poppy seeds, or sunflower seeds for extra crunch.
- Gluten-Free Version: Use a gluten-free flour blend designed for bread baking, but note the crumb will be less chewy.
- Sourdough Starter Swap: For those with a starter, replace yeast with 150g of active sourdough starter and adjust water accordingly for a tangier loaf.
One variation I love is adding a handful of chopped olives and sun-dried tomatoes to the dough for a Mediterranean spin — it pairs beautifully with a fresh green goddess salad for a light meal. If you want something sweeter, try mixing in cinnamon and raisins for a rustic morning bread.
Serving & Storage Suggestions
This rustic bread shines best when served fresh and slightly warm. Letting it cool fully on a wire rack helps the crust stay crisp while the crumb sets just right.
- Serving: Slice thick and enjoy with butter, honey, or your favorite jam. It’s also fantastic alongside soups, stews, or dishes like creamy baked feta pasta.
- Storage: Wrap cooled bread in a clean kitchen towel and store at room temperature for up to 2 days. For longer storage, place in a paper bag inside a sealed container in the fridge.
- Freezing: Slice the bread and freeze in an airtight bag for up to 3 months. Toast slices directly from the freezer for best results.
- Reheating: To refresh the crust, heat slices in a toaster oven or under the broiler for a minute or two before serving.
Keep in mind, the flavors deepen a bit the next day, making it perfect for leftover sandwiches or toast the morning after. I often pair it with a creamy custard toast recipe for a cozy breakfast treat.
Nutritional Information & Benefits
Each slice of this rustic bread (about 60g) contains approximately:
| Calories | Carbohydrates | Protein | Fat | Fiber |
|---|---|---|---|---|
| 160 kcal | 32g | 5g | 1g | 1g |
This recipe is naturally low in fat and free of added sugars. Using sea salt and high-quality flour adds essential minerals and nutrients. Whole wheat variations increase fiber content, supporting digestion.
For those with gluten sensitivities, this recipe isn’t suitable unless adapted with gluten-free flour blends. It contains wheat and yeast, common allergens to keep in mind.
I appreciate how this bread fits into a balanced diet, offering wholesome energy without preservatives or additives. Baking at home lets you control ingredients and avoid unnecessary extras — something I value as a health-conscious but realistic eater.
Conclusion
Classic rustic bread with a crispy artisan crust isn’t just bread — it’s a little ritual of patience, warmth, and simple ingredients that rewards you with something truly comforting. Whether you’re new to baking or a seasoned home cook, this recipe is approachable and dependable.
Feel free to tweak it to your taste — add herbs, seeds, or whole grains to make it yours. For me, it’s become a quiet pleasure, a way to slow down and enjoy the process. I hope it finds a place in your kitchen, too.
When you try this rustic bread, let me know how it turns out or what variations you loved most. Your feedback always makes my day, and I’m excited to hear about your baking adventures.
Happy baking, and may your crust always be perfectly crispy!
FAQs About Classic Rustic Bread with a Crispy Artisan Crust
How long does it take to make this rustic bread?
From start to finish, including rising and baking, it takes about 3 to 4 hours. Active hands-on time is under 20 minutes.
Can I use instant yeast instead of active dry yeast?
Yes! If using instant yeast, you can mix it directly with the flour and skip the initial yeast proofing step. Adjust rising times as needed.
What if my dough is too sticky to handle?
That’s normal! Lightly flour your hands and work surface, but avoid adding too much flour, or the bread will be dense.
Can I bake this bread without a Dutch oven?
You can use a heavy baking sheet or pizza stone, but the crust won’t be quite as crisp. Covering the dough with a metal bowl during the first half of baking helps trap steam.
How should I store leftover bread to keep it fresh?
Wrap it in a kitchen towel and keep at room temperature for up to 2 days. For longer storage, freeze sliced bread in an airtight bag.
Pin This Recipe!

Classic Rustic Bread Recipe Easy Homemade Crispy Artisan Crust Tutorial
- Total Time: 3 to 4 hours
- Yield: 1 loaf (about 8 servings) 1x
Description
A simple and easy homemade rustic bread recipe with a crispy artisan crust and chewy crumb, perfect for any occasion and requiring minimal ingredients and effort.
Ingredients
- 4 cups (500g) all-purpose flour
- 1 1/2 cups (375ml) warm water (about 105°F/40°C)
- 2 1/4 teaspoons (7g) active dry yeast
- 1 1/2 teaspoons (10g) sea salt
- 1 tablespoon olive oil (optional)
Instructions
- Activate the yeast: In your mixing bowl, combine warm water (about 105°F/40°C) with the active dry yeast. Stir gently and let it sit for 5-10 minutes until foamy.
- Mix the dough: Add the all-purpose flour and sea salt to the bowl. If using olive oil, add it now. Stir with a wooden spoon or spatula until a shaggy dough forms.
- First rise: Cover the bowl with a kitchen towel or plastic wrap. Let the dough rest at room temperature for 1 to 2 hours until it doubles in size and bubbles appear on the surface.
- Stretch and fold: Lightly flour a clean surface. Turn the dough out and gently stretch one side, folding it over the middle. Rotate and repeat 3-4 times.
- Second rise: Shape the dough into a round loaf and place it on a piece of parchment paper. Cover and let rise for another 30-45 minutes until puffy but not quite doubled.
- Preheat your oven and Dutch oven: While the dough rises, place your Dutch oven with the lid inside the oven and preheat to 450°F (232°C).
- Score and bake: Once preheated, carefully remove the Dutch oven. Score the top of the dough with a few shallow cuts. Transfer the dough with parchment paper into the Dutch oven. Cover and bake for 30 minutes.
- Finish baking: Remove the lid and bake for another 10-15 minutes until the crust is deeply golden and crackly. The internal temperature should reach about 205°F (96°C).
- Cool: Transfer the bread to a wire rack and let cool completely before slicing.
Notes
Use a hot Dutch oven to trap steam for a crispy crust. Do not rush proofing times to avoid dense bread. Score the dough with shallow cuts to control expansion. Cool bread completely before slicing to prevent gummy texture. If no Dutch oven, use a heavy cast-iron skillet with a metal bowl to cover or a pizza stone with a metal bowl to trap steam.
- Prep Time: 15 minutes
- Cook Time: 45 minutes
- Category: Bread
- Cuisine: American
Nutrition
- Serving Size: 1 slice (about 60g)
- Calories: 160
- Fat: 1
- Carbohydrates: 32
- Fiber: 1
- Protein: 5
Keywords: rustic bread, homemade bread, artisan bread, crispy crust, easy bread recipe, no knead bread, Dutch oven bread
