

“Are you seriously making bread at midnight?” my roommate asked, poking their head in the kitchen, half amused and half confused. Honestly, I couldn’t blame them. After a long day of juggling work and a million little errands, all I wanted was something comforting, something I could tear into with my hands and savor—no fuss, just pure, simple satisfaction.
I’d been craving a sub sandwich, but the store-bought rolls always felt a bit… lifeless. So, on a whim, I decided to try making my own sub rolls, but with a little twist—a herb-garlic crust that would give it that magical crusty edge. I was skeptical at first; who has time to bake fresh bread after 11 PM? But I figured, why not? The kitchen was quiet, the yeast was ready to work, and that savory aroma promised to turn the night around.
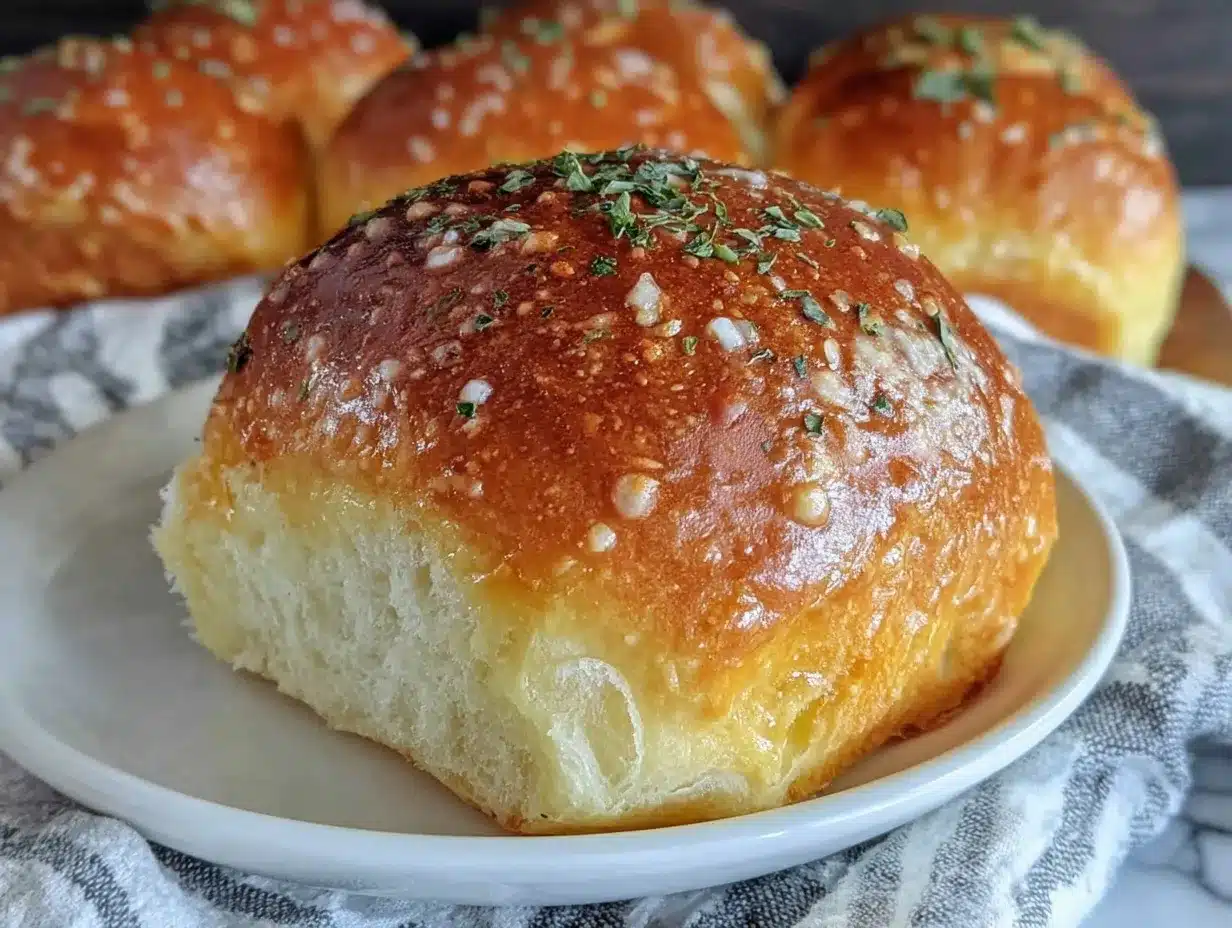
What surprised me most was the fluffiness inside—pillowy soft, almost cloud-like, with that golden crust bursting with fresh garlic and herbs. It wasn’t just bread; it was the kind that makes you close your eyes after the first bite, savoring every crumb. Since then, these fluffy homemade sub rolls with herb-garlic crust have become my go-to for everything from impromptu sandwiches to weekend dinners. Sometimes, it’s those unexpected kitchen moments that stick with you the longest.
Why You’ll Love This Recipe
If you’ve ever thought homemade bread was complicated, this recipe will pleasantly surprise you. I’ve tested it countless times to nail the perfect texture and flavor, and here’s why it stands out:
- Quick & Easy: Ready in about 2 hours including rise time, making it manageable even on a busy afternoon or relaxed weekend.
- Simple Ingredients: No exotic items needed—basic pantry staples with fresh herbs and garlic for a flavor punch.
- Perfect for Any Occasion: Whether you’re preparing sandwiches for a cozy family dinner or hosting friends, these rolls are a crowd-pleaser.
- Crowd-Pleaser: Kids love them soft and buttery, while adults appreciate the herby garlic crust—everyone asks for seconds.
- Unbelievably Delicious: The crust has just enough crunch and aromatic garlic without overpowering the soft, fluffy interior—comfort food that feels special.
This isn’t just another sub roll recipe. The herb-garlic crust comes from brushing a simple butter, garlic, and herb blend right before baking, giving that irresistible aroma and texture. Plus, the dough is enriched just enough to keep it tender but sturdy enough to hold your favorite fillings without falling apart.
Honestly, this recipe fits right into busy home cooks’ lives who want to bring a bit of bakery magic into their kitchens without stress. It’s the kind of bread that makes your sandwich taste like it came from a local deli, but better because you made it yourself. And if you’re looking for other comforting homemade treats, you might enjoy the creamy custard toast recipe or the hot honey butter biscuits I’ve shared before.
What Ingredients You Will Need
This recipe uses simple, wholesome ingredients to deliver bold flavor and satisfying texture without the fuss. Most are common pantry staples, with fresh herbs and garlic adding a fresh kick. Here’s a breakdown:
- For the Dough:
- All-purpose flour – 4 cups (about 480 g), sifted for lightness
- Active dry yeast – 2 1/4 teaspoons (one packet)
- Warm water – 1 1/2 cups (360 ml), around 110°F (43°C) to activate yeast
- Sugar – 2 tablespoons (adds slight sweetness to balance flavors)
- Salt – 1 1/2 teaspoons (for taste and yeast control)
- Olive oil – 2 tablespoons (adds moisture and tender crumb)
- For the Herb-Garlic Crust:
- Unsalted butter – 3 tablespoons, melted (I prefer Plugrá butter for richness)
- Fresh garlic – 3 cloves, finely minced (the star of the crust flavor)
- Fresh parsley – 2 tablespoons, finely chopped (adds bright herbal notes)
- Dried oregano – 1 teaspoon (optional, for extra depth)
- Sea salt flakes – a pinch, for sprinkling on top
Feel free to swap olive oil with avocado oil if that’s what you have, and if you want to try a gluten-free twist, almond flour or a gluten-free all-purpose blend works, though the texture will be a bit different. For a dairy-free crust, use vegan butter or coconut oil melted with garlic and herbs.
Equipment Needed
- Large mixing bowl – for combining and proofing the dough
- Measuring cups and spoons – accuracy matters in baking
- Stand mixer with dough hook (optional) – speeds up kneading but hand kneading works fine
- Baking sheet or tray – lined with parchment paper
- Pastry brush – to apply the herb-garlic butter evenly
- Kitchen towel or plastic wrap – to cover dough during rising
- Cooling rack – essential for cooling rolls without sogginess
If you don’t have a stand mixer, no worries! Kneading by hand for about 8–10 minutes works wonderfully and helps you connect with the dough’s feel. A simple silicone brush is perfect for spreading the herb-garlic butter; I’ve found metal brushes tend to pull dough apart more easily. Also, investing in a good kitchen scale can really improve consistency if you bake often.
Preparation Method
- Activate the yeast: In your large mixing bowl, stir warm water (110°F/43°C) with sugar and yeast. Let it sit for 5-7 minutes until foamy. If it doesn’t foam, your yeast might be dead—best to start over.
- Mix the dough: Add olive oil, salt, and sifted flour gradually to the yeast mixture. If using a stand mixer, attach the dough hook and mix on low speed until combined, then knead on medium for 6-8 minutes. For hand kneading, turn the dough onto a floured surface and knead until smooth, elastic, and slightly tacky (about 8-10 minutes).
- First rise: Shape dough into a ball and place it in a lightly oiled bowl, turning once to coat. Cover with a damp kitchen towel or plastic wrap. Let it rise in a warm place for about 1 hour, or until doubled in size.
- Shape the rolls: Punch down the dough gently to release air. Divide into 6-8 equal pieces (about 120 g or 4.2 oz each). Roll each piece into a 6-inch (15 cm) sub roll shape, tapering ends slightly for that classic look. Place on a parchment-lined baking sheet, spaced an inch apart.
- Second rise: Cover the rolls loosely with a towel and let rise for 30-40 minutes until puffy and almost doubled.
- Prepare herb-garlic butter: While rolls rise, combine melted butter, minced garlic, parsley, oregano, and a pinch of sea salt in a small bowl.
- Preheat oven: Set oven to 375°F (190°C).
- Apply crust and bake: Brush each roll generously with the herb-garlic butter, leaving some for after baking. Bake for 18-22 minutes until golden brown and crusty. Rolls should sound hollow when tapped.
- Final touch: As soon as the rolls come out of the oven, brush again with the remaining herb-garlic butter to keep the crust soft and flavorful.
- Cool: Transfer to a cooling rack for at least 15 minutes before slicing. This helps set the crumb and prevents sogginess.
If you notice your dough is sticky during shaping, lightly flour your hands but avoid adding too much flour or the rolls will turn dense. The aroma of garlic and herbs baking is a pretty good sign you’re on the right track!
Cooking Tips & Techniques
Here’s what I’ve learned after making these rolls a dozen times:
- Water temperature matters: Yeast loves warmth but not too hot—110°F (43°C) is the sweet spot. Too hot and it dies, too cold and it won’t activate.
- Don’t rush the rise: Letting the dough double properly is key to fluffy rolls. If your kitchen is cold, create a warm spot by placing the dough bowl near a radiator or inside a slightly warmed (turned off) oven.
- Use fresh herbs: Fresh parsley and garlic make a huge difference compared to dried or powder versions. If you only have dried, increase quantity slightly and mix into melted butter well.
- Brush twice: Brushing before and after baking locks in moisture and flavor, giving that beautiful glossy, flavored crust.
- Don’t overbake: The rolls should be golden but not dark brown. Overbaking dries them out—so set a timer and check early.
- Try the hollow tap test: When you tap the bottom of a roll and it sounds hollow, it’s done. This is a much better indicator than just color.
Once, I forgot to punch down the dough after the first rise, and the rolls turned out super dense and tough—a mistake you want to avoid. Also, multitasking by preparing the herb-garlic butter during the second rise saves time and keeps everything flowing smoothly.
Variations & Adaptations
Feel free to tailor these rolls to your taste or dietary needs:
- Cheesy Herb Garlic Rolls: Sprinkle shredded mozzarella or parmesan on top before baking for a cheesy crust.
- Whole Wheat Option: Substitute half the all-purpose flour with whole wheat flour for a nuttier flavor and heartier texture.
- Spicy Garlic Twist: Add a pinch of red pepper flakes to the herb-garlic butter for a subtle kick.
- Vegan Version: Replace butter with vegan margarine or olive oil and use a flax egg (1 tbsp flaxseed meal + 3 tbsp water) to replace egg if you want a richer dough.
Personally, I once experimented by adding a little roasted garlic puree instead of raw garlic to the butter, which mellowed the flavor wonderfully. You can also shape the dough into smaller slider buns or longer hoagie-style rolls depending on your sandwich plans.
Serving & Storage Suggestions
These sub rolls are best served fresh and warm, but they also keep well:
- Serving: Slice rolls horizontally and fill with your favorite sandwich ingredients—grilled veggies, deli meats, or even a classic crispy cheeseburger wrap filling. The herb-garlic crust adds an extra layer of flavor that makes every bite exciting.
- Storage: Store cooled rolls in an airtight container or plastic bag at room temperature for up to 3 days. For longer storage, freeze them wrapped tightly in foil or freezer bags for up to 3 months.
- Reheating: To refresh frozen or day-old rolls, wrap in foil and warm in a 350°F (175°C) oven for 10-15 minutes. Avoid microwaving if you want to keep the crust crisp.
- Flavor Development: The garlic and herbs mellow slightly over time, making the crust less pungent but still delicious—perfect for making ahead for a party or meal prep.
Nutritional Information & Benefits
Each fluffy homemade sub roll (approx. 1/6th of the batch) contains roughly:
| Calories | Carbohydrates | Protein | Fat | Fiber |
|---|---|---|---|---|
| ~180 kcal | 34 g | 5 g | 3.5 g | 1.5 g |
Thanks to the olive oil and fresh herbs, these rolls add a bit of heart-healthy fats and antioxidants. Garlic is known for its immune-boosting properties, while parsley provides vitamin C and K. The recipe is naturally free of dairy (except for butter, which can be substituted) and can be adapted gluten-free with some tweaks. Just a heads up—these do contain gluten and garlic, so not suitable for those with allergies to these.
From a wellness perspective, making bread at home lets you control ingredients, avoid preservatives, and enjoy a wholesome, satisfying carb source that’s far better than store-bought options.
Conclusion
These fluffy homemade sub rolls with herb-garlic crust have become a staple in my kitchen because they’re simple, flavorful, and just downright satisfying. There’s something about tearing into a fresh, soft roll with that garlicky, buttery crust that turns any sandwich into a little celebration.
Don’t hesitate to tweak the herbs or try the cheesy version to find what you love most. Baking bread at home can be a relaxing break, and the reward is delicious every time. If you give this recipe a try, I’d love to hear how you make it your own or what fillings you pair with it. Sharing those moments makes it all the more special.
Remember, great bread is all about patience and a little love—so take your time and enjoy the process.
FAQs about Fluffy Homemade Sub Rolls with Herb-Garlic Crust
Can I make the dough ahead of time?
Absolutely. You can prepare the dough, shape the rolls, and refrigerate them overnight. Just bring them to room temperature before the second rise and baking.
What if I don’t have fresh herbs?
Dried herbs work fine—just use about one-third the amount and mix well into the melted butter for the crust.
Can I use instant yeast instead of active dry yeast?
Yes. If using instant yeast, you can mix it directly with the flour and skip the proofing step. Adjust the rise time accordingly.
How do I store leftover rolls?
Keep them in an airtight container at room temperature for up to 3 days or freeze for longer storage. Reheat in the oven wrapped in foil to refresh.
What sandwiches pair best with these rolls?
They’re versatile! Try classic Italian subs, grilled chicken with pesto, or a hearty veggie and cheese combo. For inspiration, you might enjoy the creamy spicy vodka pasta as a side dish for a dinner party featuring these rolls.
Pin This Recipe!
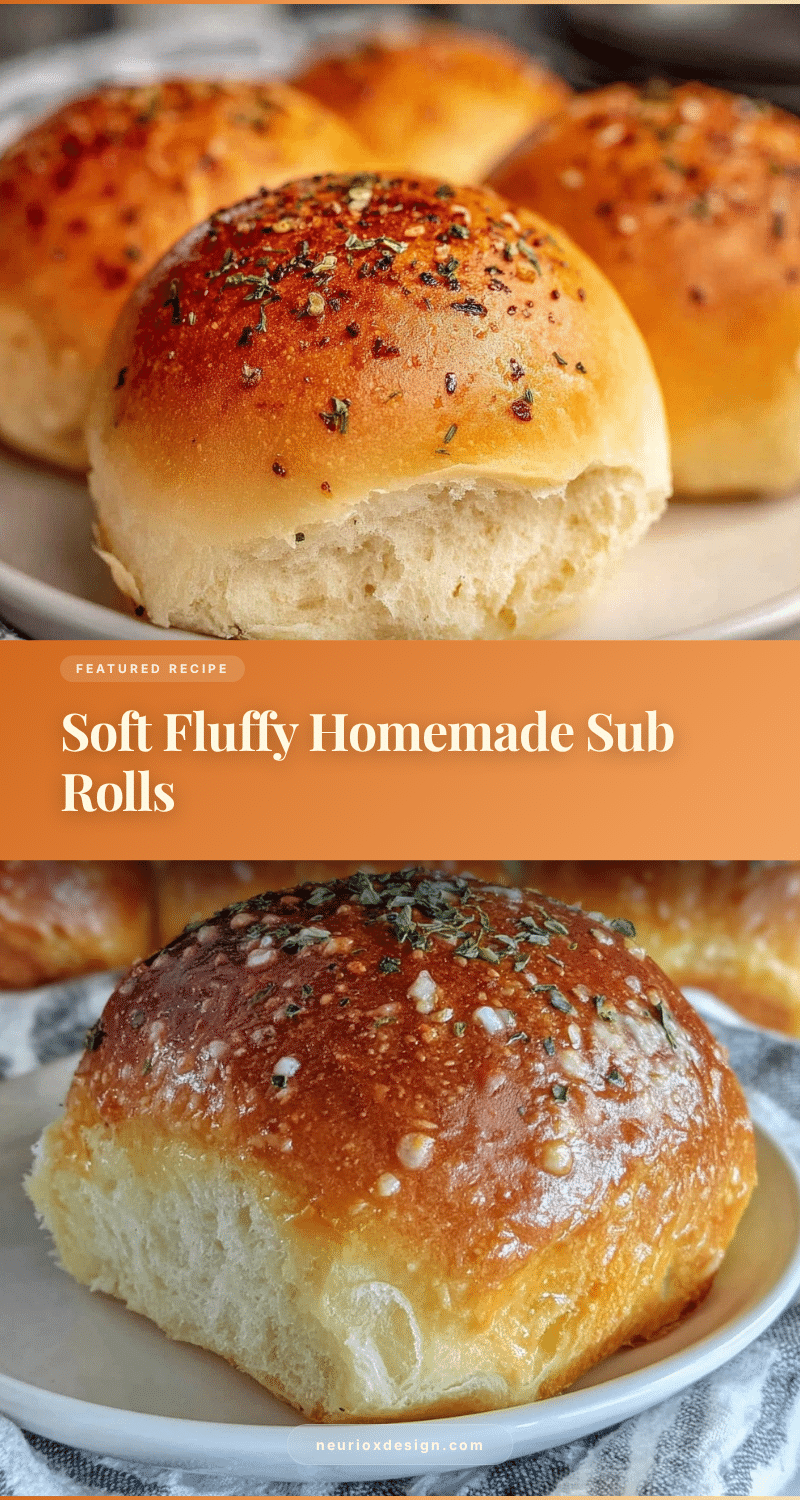

Fluffy Homemade Sub Rolls with Herb-Garlic Crust
- Total Time: 2 hours
- Yield: 6-8 rolls 1x
Description
These fluffy homemade sub rolls feature a pillowy soft interior with a golden, herb-garlic crust, perfect for sandwiches or weekend dinners. The recipe is quick, easy, and uses simple pantry staples with fresh herbs and garlic for a flavorful crust.
Ingredients
- 4 cups all-purpose flour (about 480 g), sifted
- 2 1/4 teaspoons active dry yeast (one packet)
- 1 1/2 cups warm water (110°F / 43°C)
- 2 tablespoons sugar
- 1 1/2 teaspoons salt
- 2 tablespoons olive oil
- 3 tablespoons unsalted butter, melted
- 3 cloves fresh garlic, finely minced
- 2 tablespoons fresh parsley, finely chopped
- 1 teaspoon dried oregano (optional)
- Pinch of sea salt flakes
Instructions
- Activate the yeast: In a large mixing bowl, stir warm water (110°F/43°C) with sugar and yeast. Let sit for 5-7 minutes until foamy.
- Mix the dough: Add olive oil, salt, and sifted flour gradually to the yeast mixture. Mix until combined. Knead by stand mixer on medium speed for 6-8 minutes or by hand on a floured surface for 8-10 minutes until smooth and elastic.
- First rise: Shape dough into a ball and place in a lightly oiled bowl, turning once to coat. Cover with a damp towel or plastic wrap and let rise in a warm place for about 1 hour or until doubled in size.
- Shape the rolls: Punch down dough gently. Divide into 6-8 equal pieces (about 4.2 oz or 120 g each). Roll each piece into a 6-inch sub roll shape with tapered ends. Place on parchment-lined baking sheet spaced 1 inch apart.
- Second rise: Cover rolls loosely with a towel and let rise for 30-40 minutes until puffy and nearly doubled.
- Prepare herb-garlic butter: Combine melted butter, minced garlic, parsley, oregano, and a pinch of sea salt in a small bowl.
- Preheat oven to 375°F (190°C).
- Apply crust and bake: Brush each roll generously with herb-garlic butter, reserving some for after baking. Bake for 18-22 minutes until golden brown and crusty. Rolls should sound hollow when tapped.
- Final touch: Brush rolls again with remaining herb-garlic butter immediately after baking.
- Cool: Transfer rolls to a cooling rack for at least 15 minutes before slicing.
Notes
Use water at 110°F to activate yeast properly. Knead dough until smooth and elastic for best texture. Brush herb-garlic butter before and after baking for a flavorful crust. Avoid overbaking to keep rolls soft inside. Use fresh herbs for best flavor; dried herbs can be substituted at one-third the amount. Dough can be prepared ahead and refrigerated overnight.
- Prep Time: 20 minutes
- Cook Time: 20 minutes
- Category: Bread
- Cuisine: American
Nutrition
- Serving Size: 1 roll
- Calories: 180
- Fat: 3.5
- Carbohydrates: 34
- Fiber: 1.5
- Protein: 5
Keywords: sub rolls, homemade bread, herb garlic crust, fluffy rolls, sandwich rolls, easy bread recipe
