

“You know, I wasn’t exactly planning to make mini chicken pot pies that night,” I admitted to my roommate as the aroma of buttery crust filled our tiny kitchen. It was one of those evenings when the fridge was nearly empty, and exhaustion had me eyeing the takeout menus with a mix of laziness and guilt. But then, while digging through the freezer, I found a forgotten stash of cooked chicken and a half-used pie crust. Honestly, I was skeptical—mini pot pies sounded like a lot of work for a tired cook like me.
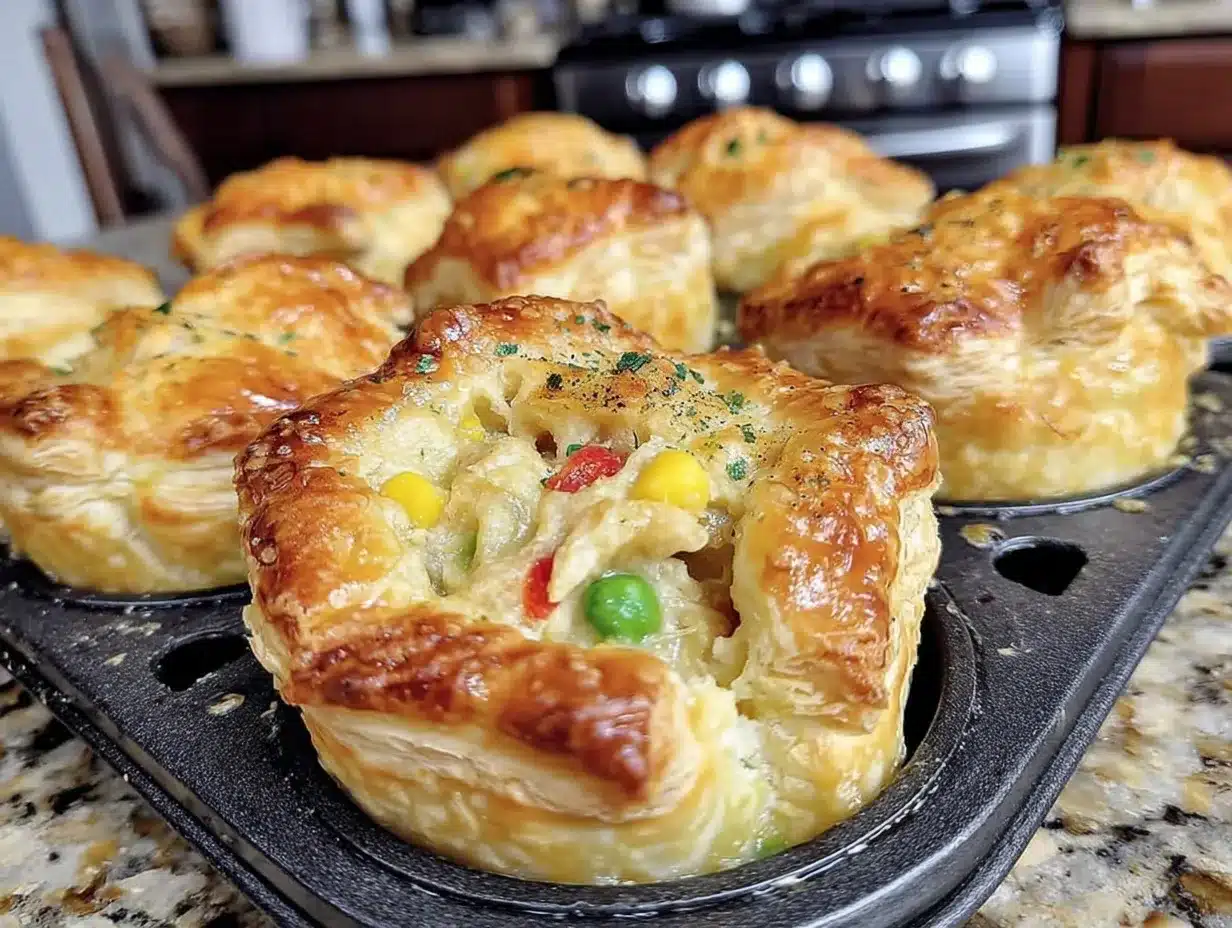
Fast forward an hour, and the flaky golden crusts were crisping beautifully in the oven, steam rising from the bubbling, savory filling. My roommate took a bite and just grinned, saying, “Okay, this might be the best comfort food you’ve made in… forever.” The surprise was mine. What started as a low-effort rescue meal became a new favorite, and I couldn’t stop tweaking the filling and crust for days—there’s something about the perfect crispy crust hugging that creamy chicken filling that just hits the spot. If you’ve ever thought pot pies are too fussy or old-fashioned, these mini versions will change your mind.
There’s a quiet, cozy magic in these little pies—the kind you want to pull out when friends drop by unexpectedly or when you need a reset after a hectic day. The crust’s golden crunch paired with a rich, savory filling is exactly the kind of comfort food that feels like a warm hug from the inside. And the best part? They’re easy enough to pull together even when your kitchen energy is low. That’s why this recipe stuck around—and why I’m happy to share it, hoping it becomes your go-to for those moments when you need a little crispy, flaky joy.
Why You’ll Love This Recipe
This crispy mini chicken pot pies recipe isn’t just another pot pie—it’s the one I’ve made countless times, perfected for flaky crust and comforting filling. Here’s why it’s quickly become a kitchen staple:
- Quick & Easy: From start to finish, you’re looking at about 40 minutes, which is perfect for busy weeknights or when unexpected guests arrive.
- Simple Ingredients: No need for fancy or hard-to-find items; you’ll mostly use pantry staples and whatever cooked chicken you have on hand.
- Perfect for Any Occasion: Whether it’s a cozy dinner, a potluck contribution, or a nostalgic snack, these mini pot pies always hit the mark.
- Crowd-Pleaser: Kids love them, adults can’t get enough, and they vanish fast at any gathering.
- Unbelievably Delicious: The flaky golden crust has just the right crunch, while the creamy, savory filling balances every bite.
What sets this recipe apart is the flaky golden crust—a bit buttery, tender, yet crisp enough to hold the filling without sogginess. I use a cold butter and shortening combo for the crust to get that ideal texture. The filling is seasoned just right with fresh herbs and a splash of cream, making it richer than your average chicken pot pie but never heavy. Plus, making individual mini pies means everyone gets their own perfectly portioned pie, which honestly makes the whole experience feel a little more special.
It’s the kind of comfort food that doesn’t weigh you down but still satisfies that craving for something hearty and homemade. If you’ve ever loved the cozy vibes of a classic chicken pot pie but hesitated because of the prep, this recipe is your shortcut to flaky, crispy success.
What Ingredients You Will Need
This recipe uses simple, wholesome ingredients to deliver bold flavor and satisfying texture without the fuss. Most are pantry staples, making this an easy, approachable dish any day of the week.
- For the Crust:
- All-purpose flour – 2 ½ cups (300 g), for that tender, flaky base
- Unsalted butter, cold and cubed – ½ cup (113 g), for richness and flakiness (I prefer Kerrygold for the flavor)
- Vegetable shortening, cold – ¼ cup (56 g), helps keep crust tender and crisp
- Ice-cold water – 6-8 tablespoons, to bring the dough together without melting the fats
- Salt – 1 teaspoon, for balance
- For the Filling:
- Cooked chicken breast, shredded or diced – 2 cups (about 300 g), you can use leftovers or rotisserie chicken
- Carrots, diced – ½ cup (75 g), adds sweetness and texture
- Frozen peas – ½ cup (75 g), for freshness and color
- Celery stalks, diced – ½ cup (75 g), classic flavor base
- Yellow onion, finely chopped – 1 medium, for depth
- Garlic cloves, minced – 2, a small punch of flavor
- Chicken broth – 1 cup (240 ml), homemade or store-bought
- Heavy cream – ½ cup (120 ml), for richness (substitute with whole milk if preferred)
- All-purpose flour – 3 tablespoons, to thicken the filling
- Butter – 3 tablespoons, for the roux
- Fresh thyme leaves – 1 teaspoon, finely chopped (or ½ teaspoon dried thyme)
- Salt and pepper – to taste
- For Egg Wash:
- Large egg, beaten – 1, to brush the crust for that golden finish
- Water – 1 tablespoon, mixed with the egg
If you’re feeling adventurous, swap the peas for fresh green beans in season, or use almond flour in the crust for a gluten-free version. I’ve also tried mixing in a bit of sharp cheddar into the filling for a cheesy twist that my kids adore. For herbs, fresh rosemary can be a nice alternative to thyme, lending a piney aroma. When it comes to chicken, pre-cooked rotisserie chicken is a lifesaver if you want to speed things up.
Equipment Needed
- Mixing bowls – for dough and filling preparation
- Pastry cutter or food processor – helpful for cutting cold butter into flour, though two forks or your fingers work fine too
- Rolling pin – to roll out the crust evenly
- Mini pie tins or a standard muffin tin – I use mini tins for perfectly shaped pies, but a muffin tin works great in a pinch
- Skillet or saucepan – for cooking the filling
- Measuring cups and spoons – for precision
- Baking sheet – to catch any drips and make transferring pies easier
- Pastry brush – for applying the egg wash
If you don’t have a pastry cutter, no worries—using two knives in a crisscross motion or rubbing butter into flour with your fingertips works just as well. For rolling the crust, a silicone rolling mat helps keep things tidy and prevents sticking. I keep an extra baking sheet handy to place under the mini tins during baking; it helps catch spills and makes handling easier, especially when the pies are hot.
Preparation Method
- Make the crust dough: In a large bowl, whisk together 2 ½ cups (300 g) flour and 1 teaspoon salt. Add the cold cubed butter (½ cup/113 g) and shortening (¼ cup/56 g). Use a pastry cutter or your fingertips to cut the fats into the flour until the mixture resembles coarse crumbs with pea-sized pieces. Slowly add 6 tablespoons ice-cold water, mixing gently until the dough just holds together. Avoid overworking it to keep it flaky. Form into a disk, wrap in plastic, and chill for at least 30 minutes.
- Prepare the filling: Melt 3 tablespoons butter in a skillet over medium heat. Add the diced onion, carrots, and celery; cook for 5-6 minutes until softened. Stir in minced garlic and cook for 1 minute. Sprinkle 3 tablespoons flour over the veggies, stirring to coat and cook out the raw flavor for 2 minutes. Gradually whisk in 1 cup chicken broth and ½ cup heavy cream, stirring constantly until thickened and bubbly. Add shredded chicken, frozen peas, and 1 teaspoon fresh thyme leaves. Season with salt and pepper. Simmer for 3-5 minutes until heated through. Remove from heat and let cool slightly.
- Preheat your oven to 400°F (200°C).
- Roll out the dough: On a lightly floured surface, roll the chilled dough to about ⅛-inch (3 mm) thickness. Using a round cutter slightly larger than your mini pie tins, cut out enough circles to line the bottoms and tops of your pies.
- Assemble the pies: Gently press dough circles into the mini pie tins. Spoon the filling into each crust, leaving a small gap at the top. Cover with another dough circle, pressing edges to seal (use a fork or your fingers). Cut small vents in the top crust to release steam.
- Apply egg wash: Beat 1 egg with 1 tablespoon water and brush the tops of the pies for that golden sheen.
- Bake: Place the mini pies on a baking sheet and bake in the preheated oven for 25-30 minutes, or until the crust is golden and crisp. Watch carefully toward the end to avoid burning.
- Cool slightly: Let the pies rest for 5-10 minutes before serving to allow the filling to set a bit—hot filling can be tricky!
Pro tip: If your crust edges brown too quickly, cover them loosely with foil halfway through baking. Also, rolling the dough between sheets of parchment paper can help prevent sticking and makes transferring the dough a breeze. I like to prepare the filling a little ahead of time so it’s cool when filling the pies—that way, the crust stays flakier and less soggy.
Cooking Tips & Techniques
Making flaky, crispy mini chicken pot pies has its quirks, but a few tricks from my own kitchen failures can save you a lot of trouble.
- Keep everything cold: The secret to flaky crust is cold butter and water. Warm ingredients mean greasy, tough dough. Chill your dough before rolling and handle it minimally.
- Don’t overfill: Too much filling makes the pies spill or soggy. Leave a small border so the crust can seal properly and vent steam.
- Seal edges well: Press edges firmly with your fingers or a fork to avoid filling leaks during baking.
- Vent the top crust: Cut small slits to let steam escape, preventing sogginess and uneven baking.
- Use a combination of butter and shortening: Butter adds flavor; shortening helps with flakiness and crisp texture. Pure butter can sometimes brown too fast.
- Don’t rush the filling: Let it thicken well on the stove to avoid a runny pie. If it’s too thin, your crust won’t stay crispy.
- Watch baking time: Mini pies bake faster than full-sized ones—start checking at 20 minutes to prevent over-browning.
I remember my first batch bursting open because I didn’t vent properly—lesson learned the hard way! Also, I sometimes double the filling recipe to have leftovers for a quick chicken pot pie soup the next day. Multitasking is key: while the filling simmers, I prep the dough, saving precious time.
Variations & Adaptations
One of the best things about these mini chicken pot pies is how flexible they are. Here are some ways I’ve tweaked the recipe to suit different tastes and dietary needs:
- Vegetarian: Swap chicken for diced mushrooms, roasted butternut squash, or chickpeas. Increase herbs like thyme and rosemary for depth.
- Gluten-Free: Use a gluten-free flour blend for the crust—just be sure to chill it well, as gluten-free dough can be more delicate.
- Dairy-Free: Replace butter with coconut oil or vegan margarine, and use coconut or almond milk instead of cream. The flavor shifts slightly but still delicious.
- Seasonal Twist: In fall, add roasted sweet potatoes and sage for a cozy harvest version. Spring calls for fresh peas and asparagus for brightness.
- Cheesy Upgrade: Stir in shredded sharp cheddar or gruyere into the filling for an extra savory punch that’s a crowd favorite.
One time, I swapped the traditional pie crust for puff pastry sheets for a quicker assembly with an even flakier crust. It was a hit during a casual dinner party where I needed to move fast but still impress. For a lighter option, I sometimes make open-faced pot pies, skipping the top crust and broiling a cheese topping instead.
Serving & Storage Suggestions
These mini chicken pot pies are best served warm, straight from the oven when the crust is at its crispiest and the filling is bubbling. They make a perfect handheld comfort food, great for pairing with a crisp green salad or a simple side of roasted vegetables.
If you’re serving them at a gathering, line them up on a rustic wooden board or colorful platter to invite everyone in. A dollop of tangy cranberry sauce or a drizzle of hot honey butter biscuits (if you want a side that’s just as flaky and golden) complements the savory flavors beautifully.
For storage, cool the pies completely, then wrap individually in plastic wrap or store in an airtight container. They keep in the refrigerator for up to 3 days. To reheat, pop them in a 350°F (175°C) oven for 10-15 minutes to restore that crispy crust—microwaving will make them soggy, so avoid if possible. These pies also freeze well; freeze unbaked pies on a tray, then transfer to a freezer bag for up to 2 months. Bake from frozen, adding a few extra minutes to baking time.
Over time, the flavors meld even more, making leftovers surprisingly delicious the next day. Just remember to re-crisp the crust in the oven to keep that signature crunch.
Nutritional Information & Benefits
Each mini chicken pot pie is roughly 250-300 calories, depending on the exact size and ingredients. The recipe provides a good balance of protein from the chicken, fiber and vitamins from the vegetables, and energy from the buttery crust.
Chicken is a lean protein source, supporting muscle repair, while the vegetables add antioxidants and essential nutrients. Using homemade or low-sodium chicken broth helps control sodium intake. For those watching carbs, swapping the crust for a low-carb almond flour version can cut down on carbs significantly.
This recipe is naturally gluten-containing but can be adapted for gluten-free diets. It contains dairy but can be modified for lactose intolerance or dairy-free preferences. It’s a satisfying comfort food that doesn’t rely on heavy sauces or processed ingredients, making it a wholesome choice when you want something indulgent yet homemade.
Conclusion
Crispy mini chicken pot pies with flaky golden crust are the kind of recipe that feels like a little celebration in your mouth every time. They’re approachable, comforting, and adaptable—perfect for those moments when you want something homemade but fuss-free. Whether you’re feeding a crowd or just treating yourself to a cozy night in, these pies deliver that warm, satisfying feeling without a ton of effort.
I love how the crust bakes up crisp while the filling stays creamy and flavorful, making every bite a perfect balance. Plus, they’re endlessly customizable, which keeps me coming back to tweak and try new versions.
If you make these pies, I’d love to hear what variations you try or your favorite sides to serve with them. Sharing recipes and tips is what makes cooking even more fun!
Happy baking and crispy crust loving!
Frequently Asked Questions about Crispy Mini Chicken Pot Pies
- Can I use store-bought pie crust for this recipe?
Yes, store-bought crust works fine if you’re short on time. Just make sure to thaw it according to package instructions and handle gently to keep it flaky. - How do I prevent the crust from getting soggy?
Make sure the filling is thick and not too watery before filling the crust. Venting the top crust and baking immediately after assembling also helps keep it crisp. - Can I prepare these pies ahead of time?
Absolutely. You can assemble them, cover, and refrigerate for up to 24 hours before baking. Just add a few extra minutes to the baking time if baking from cold. - What can I substitute for heavy cream in the filling?
Whole milk or half-and-half can be used for a lighter filling, though it may be a bit less rich. For dairy-free options, use coconut or almond milk with a tablespoon of cornstarch to thicken. - How do I freeze mini chicken pot pies?
Freeze unbaked pies on a baking sheet until solid, then transfer to a freezer-safe bag or container. Bake from frozen at 400°F (200°C), adding 5-10 minutes to the baking time.
For a fun twist on breakfast comfort food, you might enjoy pairing these with the creamy custard toast or wrapping up your meal with a sweet treat like the chocolate covered strawberry scone sandwiches. Both bring that perfect balance of texture and flavor, just like these pies.
Pin This Recipe!
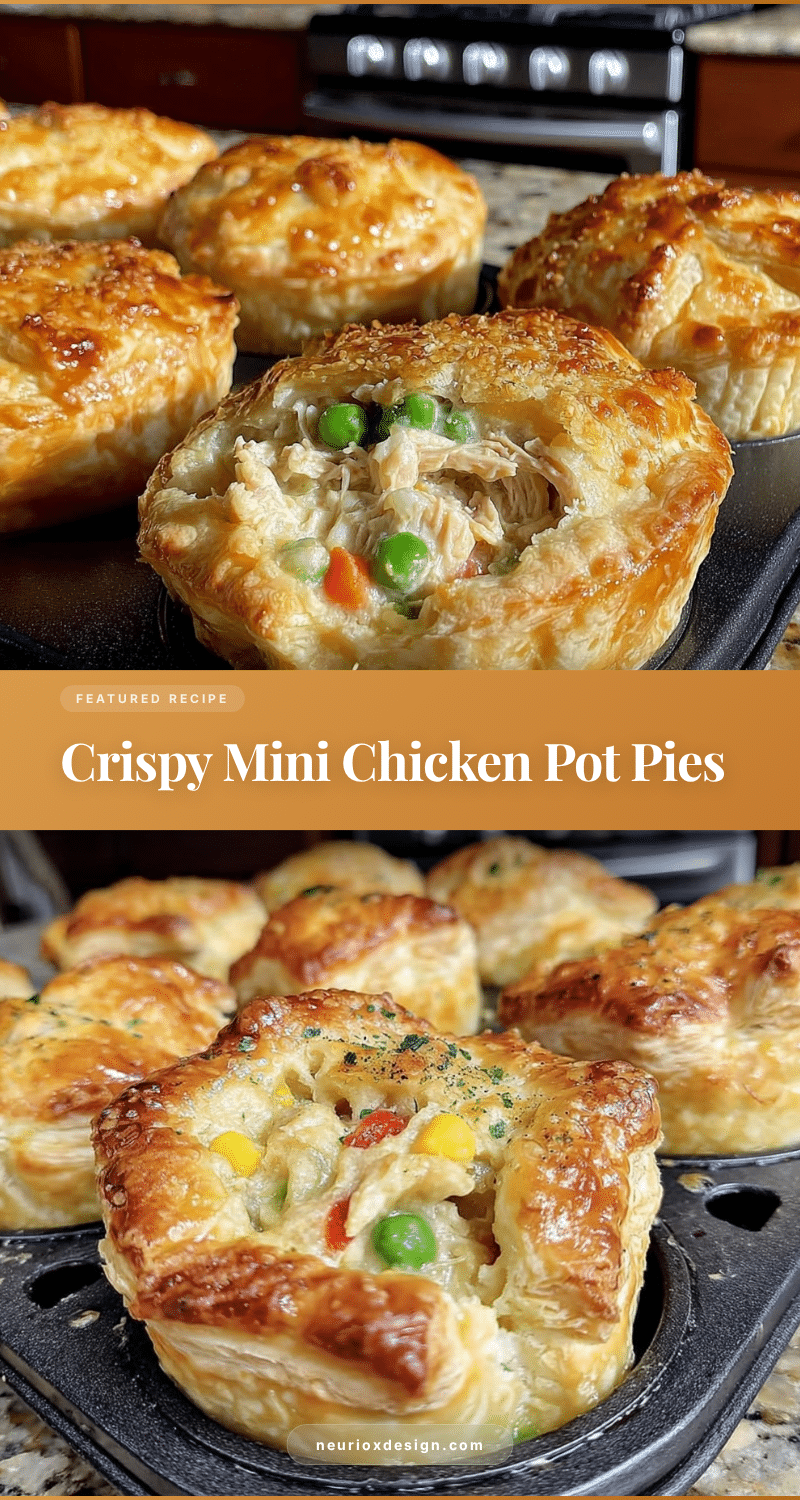

Crispy Mini Chicken Pot Pies
- Total Time: 45 minutes
- Yield: 12 mini pies 1x
Description
These crispy mini chicken pot pies feature a flaky golden crust and a creamy, savory filling, perfect for a comforting and easy homemade meal.
Ingredients
- 2 ½ cups all-purpose flour (300 g)
- ½ cup cold unsalted butter, cubed (113 g)
- ¼ cup cold vegetable shortening (56 g)
- 6–8 tablespoons ice-cold water
- 1 teaspoon salt
- 2 cups cooked chicken breast, shredded or diced (about 300 g)
- ½ cup diced carrots (75 g)
- ½ cup frozen peas (75 g)
- ½ cup diced celery stalks (75 g)
- 1 medium yellow onion, finely chopped
- 2 garlic cloves, minced
- 1 cup chicken broth (240 ml)
- ½ cup heavy cream (120 ml)
- 3 tablespoons all-purpose flour
- 3 tablespoons butter
- 1 teaspoon fresh thyme leaves, finely chopped (or ½ teaspoon dried thyme)
- Salt and pepper to taste
- 1 large egg, beaten
- 1 tablespoon water
Instructions
- Make the crust dough: In a large bowl, whisk together 2 ½ cups flour and 1 teaspoon salt. Add cold cubed butter and shortening. Use a pastry cutter or fingertips to cut fats into flour until mixture resembles coarse crumbs with pea-sized pieces. Slowly add 6 tablespoons ice-cold water, mixing gently until dough just holds together. Form into a disk, wrap in plastic, and chill for at least 30 minutes.
- Prepare the filling: Melt 3 tablespoons butter in a skillet over medium heat. Add diced onion, carrots, and celery; cook for 5-6 minutes until softened. Stir in minced garlic and cook for 1 minute. Sprinkle 3 tablespoons flour over veggies, stirring to coat and cook out raw flavor for 2 minutes. Gradually whisk in 1 cup chicken broth and ½ cup heavy cream, stirring constantly until thickened and bubbly. Add shredded chicken, frozen peas, and thyme leaves. Season with salt and pepper. Simmer for …
- Preheat oven to 400°F (200°C).
- Roll out the dough on a lightly floured surface to about ⅛-inch (3 mm) thickness. Using a round cutter slightly larger than mini pie tins, cut out enough circles for bottoms and tops of pies.
- Assemble pies: Press dough circles into mini pie tins. Spoon filling into each crust, leaving a small gap at the top. Cover with another dough circle, pressing edges to seal. Cut small vents in top crust to release steam.
- Apply egg wash: Beat 1 egg with 1 tablespoon water and brush tops of pies for golden finish.
- Bake pies on a baking sheet for 25-30 minutes or until crust is golden and crisp. Watch carefully to avoid burning.
- Let pies cool for 5-10 minutes before serving to allow filling to set.
Notes
Keep ingredients cold for flaky crust. Do not overfill pies to prevent sogginess. Vent top crust to release steam. Cover crust edges with foil if browning too fast. Let filling cool before assembling to keep crust flaky. Pies can be assembled ahead and refrigerated up to 24 hours before baking. Freeze unbaked pies on a tray, then store in freezer bag for up to 2 months; bake from frozen adding 5-10 minutes.
- Prep Time: 15 minutes
- Cook Time: 30 minutes
- Category: Main Course
- Cuisine: American
Nutrition
- Serving Size: 1 mini pot pie
- Calories: 275
- Sugar: 3
- Sodium: 350
- Fat: 15
- Saturated Fat: 7
- Carbohydrates: 22
- Fiber: 2
- Protein: 14
Keywords: mini chicken pot pies, crispy crust, flaky crust, comfort food, easy chicken pot pie, homemade pot pies, savory pies
