

“You won’t believe where I found this recipe,” my neighbor chuckled the other day as she handed me a crumpled, slightly stained scrap of paper. It was tucked inside a forgotten drawer of her kitchen, scribbled on by her niece after a wild afternoon of baking experiments. Honestly, I wasn’t expecting much—just some typical cookie nonsense. But as soon as I tasted these Crunchy No-Bake Easter Bird Nest Cookies, I was hooked. The moment I bit into that crunchy, sweet, chewy nest, I felt like a kid again, sitting cross-legged on the living room floor, fingers sticky with chocolate.
Maybe you’ve been there too—looking for a festive treat that’s fun to make with kids but doesn’t require hours or complicated tools. This recipe popped up just when I needed a stress-free, playful baking session that also looked adorable on the Easter table. And let me tell you, the best part? No oven involved. The weather was uncooperative that week, and my oven was acting up (go figure), so this no-bake approach was a lifesaver. If you’re like me, juggling everything and still wanting to create something homemade that brings smiles, you’re going to love this.
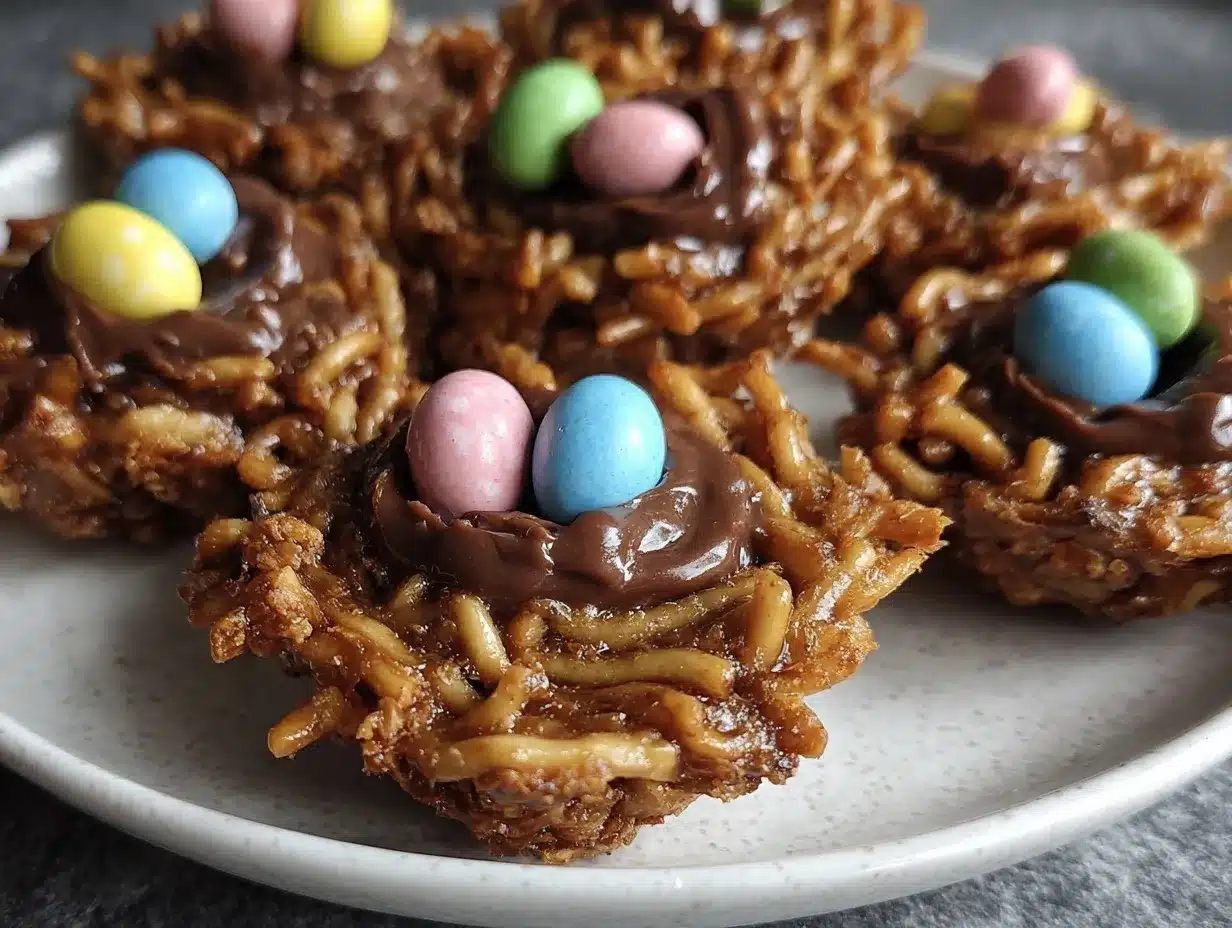
Between the crunchy clusters, the chocolatey coating, and those colorful candy eggs nestled on top, these cookies are a little burst of springtime joy. Plus, they’re sturdy enough for little hands and perfect for sharing (if you don’t eat them all first). I keep making them every year since that day—it’s my go-to Easter tradition now, and I’m pretty sure it might become yours too.
Why You’ll Love This Recipe
There’s something about these Crunchy No-Bake Easter Bird Nest Cookies that feels just right—like a simple recipe perfected through trial and a few happy accidents. Here’s why I think you’ll adore making and munching on them:
- Quick & Easy: Ready in under 30 minutes, no oven fuss needed. Perfect for busy parents or last-minute celebrations.
- Simple Ingredients: Most are pantry staples—think crunchy cereals, chocolate, and marshmallows. No fancy or hard-to-find stuff.
- Perfect for Kids: Great for little helpers. They can shape the nests and decorate with candy eggs, making it a fun family activity.
- Crowd-Pleaser: These cookies disappear faster than you can say “Easter basket,” loved by adults and kids alike.
- Unbelievably Delicious: The crunchy texture combined with melty chocolate and chewy marshmallows hits that comfort-food spot every time.
What sets this recipe apart? I like to melt the chocolate with a splash of cream for a silky coating that clings perfectly to the cereal, creating crunchy clusters that hold their shape well. The addition of a pinch of salt balances the sweetness, making these bird nest cookies taste far from ordinary. Honestly, I’ve tried several recipes before, but this one nails that balance between gooey and crisp, simple and festive. It’s the kind of treat that makes you close your eyes savoring each bite, and it’s just too fun to resist making year after year.
What Ingredients You Will Need
This recipe uses simple, wholesome ingredients to deliver bold flavor and satisfying texture without the fuss. You might already have most of these on hand, which is always a win!
- Crispy Rice Cereal (about 6 cups / 150 grams) – the crunchy base of the nests. I prefer brands like Kellogg’s Rice Krispies for the right texture.
- Mini Marshmallows (1 ½ cups / 90 grams) – these help bind the cereal and add that chewy softness.
- Butter (4 tablespoons / 56 grams), unsalted, softened – adds richness and helps melt the marshmallows smoothly.
- Chocolate Chips (1 cup / 170 grams), semi-sweet or milk chocolate – for a luscious coating that holds the nests together.
- Vanilla Extract (1 teaspoon) – just a splash to brighten the flavor.
- Pinch of Salt – balances sweetness and enhances chocolate depth.
- Mini Candy Eggs (1 cup / about 50 grams) – colorful, edible decorations that mimic bird eggs. You can swap for jelly beans or small chocolate eggs if you prefer.
Substitution tip: If you want a dairy-free or vegan version, swap butter for coconut oil and use dairy-free chocolate chips and marshmallows. I’ve tried this with good results, just keep an eye on melting times as coconut oil behaves differently.
If you want to add a nutty twist, toasted chopped almonds or pecans sprinkled inside the nest add a lovely crunch and flavor depth. Just toss them in with the cereal before mixing.
Equipment Needed
- Large mixing bowl – sturdy and roomy enough to toss everything together comfortably.
- Microwave-safe bowl or double boiler – for melting chocolate and butter safely. I usually use a glass bowl in the microwave in 30-second bursts.
- Spatula or wooden spoon – essential for mixing melted ingredients with the cereal without crushing it.
- Measuring cups and spoons – accurate measurements help get the texture right.
- Baking sheet or large tray – lined with parchment paper for shaping and cooling the nests.
- Small bowl or cup – for shaping the nests (optional). You can also use your hands, but a small bowl helps keep them uniform.
If you don’t have parchment paper, wax paper or a silicone mat works fine. I’ve made these nests on plain trays too, but they stick a little more, which can be frustrating with kids involved.
Preparation Method
- Prepare your workspace: Line a baking sheet with parchment paper for easy cleanup. Gather all your ingredients measured out and ready to go.
- Melt the butter and marshmallows: In a microwave-safe bowl, combine 4 tablespoons (56 g) of unsalted butter and 1 ½ cups (90 g) mini marshmallows. Microwave in 30-second intervals, stirring each time, until smooth and fully melted. This usually takes about 1 to 1 ½ minutes total. (Watch carefully so the marshmallows don’t burn!)
- Add vanilla and salt: Stir in 1 teaspoon vanilla extract and a pinch of salt into the melted mixture. This adds depth and balances the sweetness.
- Mix the cereal: Place 6 cups (150 g) of crispy rice cereal in a large bowl. Pour the melted marshmallow mixture over the cereal. Gently fold with a spatula until every piece is coated evenly. Be careful not to crush the cereal; you want the crunch!
- Melt the chocolate: In a separate microwave-safe bowl, melt 1 cup (170 g) of chocolate chips in 30-second bursts, stirring in between, until smooth. Add a teaspoon of cream or milk if the chocolate feels too thick. This silky chocolate will coat the nests and help them hold their shape.
- Combine chocolate and cereal mixture: Pour the melted chocolate over the marshmallow-coated cereal and gently fold until combined. The chocolate should be just warm enough to coat without melting the marshmallow texture completely.
- Shape the nests: Using a tablespoon or your hands (lightly greased with butter or sprayed with cooking spray), scoop a handful of the mixture and shape it into a small nest on the lined baking sheet. Use your thumb or the back of a spoon to create a small indentation in the center for the candy eggs. Repeat for the remaining mixture. You should get about 12 nests.
- Add candy eggs: Place 3 to 4 mini candy eggs in the center of each nest, pressing slightly so they stick but don’t sink.
- Let them set: Allow the nests to cool and firm up at room temperature for about 30 minutes. If you’re in a hurry, pop the tray in the fridge for 15 minutes.
- Serve and enjoy: Once set, gently peel the nests off the parchment paper and arrange on a festive platter. They’re ready to delight!
Tip: If the mixture feels too sticky or hard to shape, refrigerate it for 10 minutes before forming nests. If too dry, add a little more melted butter or marshmallows next time.
Cooking Tips & Techniques
Making these no-bake bird nest cookies is pretty straightforward, but a few tricks can make your batch flawless every time. Here’s what I’ve learned after a couple of dozen attempts:
- Don’t over-melt marshmallows: Microwave in short bursts and stir often to avoid burning. Burnt marshmallows taste bitter and ruin the texture.
- Use room temperature butter: It melts more evenly with marshmallows and helps create a smooth binding mixture.
- Gentle folding is key: When mixing cereal with melted marshmallow and chocolate, fold carefully to keep the cereal intact and crunchy. Overmixing turns it mushy.
- Shape with lightly greased hands or tools: This keeps the mixture from sticking and lets you make neat nests without frustration.
- Timing matters: If you wait too long to shape the nests, the mixture becomes stiff and hard to mold. Work while it’s still warm and pliable.
- Customize your sweetness: If you prefer less sweet, try half semi-sweet and half dark chocolate chips.
Honestly, the first time I tried rushing the shaping step, I ended up with a gooey mess stuck to my fingers and the counter. Lesson learned—patience makes all the difference. Also, multitask by prepping candy eggs and lining trays while melting your ingredients to speed things up.
Variations & Adaptations
Want to switch things up? These bird nest cookies are pretty forgiving and adapt well to different tastes and dietary needs.
- Nutty nests: Add ½ cup of chopped toasted almonds, walnuts, or pecans for extra crunch and flavor. I once made a batch with toasted coconut flakes too, which was a tropical twist that my family loved.
- Peanut butter version: Stir in ¼ cup creamy peanut butter with the melted butter and marshmallows for a rich, nutty flavor. Use allergy-friendly butter if needed.
- Gluten-free swap: Use gluten-free crispy rice cereal to keep these nests safe for sensitive diets without sacrificing crunch.
- Seasonal flavors: In spring, add a teaspoon of orange zest to the melted mixture for a citrusy note. In fall, cinnamon or pumpkin pie spice works beautifully.
- Chocolate drizzle: Once nests are set, drizzle melted white or dark chocolate over the top for a fancy finish.
One year, I swapped candy eggs for mini marshmallows and pretzel sticks to mimic a twiggy nest, which was a fun, less sweet version that kids loved for snacks.
Serving & Storage Suggestions
These crunchy no-bake Easter bird nest cookies are best served at room temperature to enjoy their full texture and flavor. They make a charming centerpiece on any Easter dessert table or a playful snack for kids after egg hunts.
Pair them with a glass of milk or a mild tea to balance the sweetness. They also complement fruit salads or simple vanilla yogurt for a light brunch spread.
To store, place the nests in an airtight container. They keep well at room temperature for up to 3 days. For longer storage, refrigerate them for up to a week, but bring them back to room temp before serving for the best texture.
If you want to freeze these, wrap them carefully in wax paper and place in a freezer-safe container. Thaw in the fridge overnight, then rest at room temperature for 15 minutes before enjoying. Flavors actually mellow and blend nicely after a day or two, making leftovers even tastier.
Nutritional Information & Benefits
Each crunchy no-bake Easter bird nest cookie contains approximately:
| Nutrition | Per Cookie (1/12 of recipe) |
|---|---|
| Calories | 160 kcal |
| Fat | 8 g |
| Carbohydrates | 22 g |
| Sugars | 14 g |
| Protein | 1 g |
While these are definitely a treat, the recipe benefits from simple ingredients like whole-grain cereal options and real butter. Using dark chocolate chips adds antioxidants, and the cereal provides some fiber. The recipe is naturally gluten-free if you choose gluten-free cereal and vegan if substitutions are made with dairy-free and vegan marshmallows and butter alternatives.
For families mindful of allergens, watch out for marshmallows and candy eggs containing gelatin or dairy. I always recommend reading labels carefully, especially when cooking for kids with allergies.
Conclusion
These Crunchy No-Bake Easter Bird Nest Cookies are more than just a festive treat—they’re a little bundle of joy that brings people together in the kitchen and around the table. They’re simple enough for kids to help with, quick enough for last-minute celebrations, and delicious enough to make you want seconds (or thirds, no judgment here!).
I love how this recipe feels both playful and satisfying, and I hope you’ll find the same joy making it. Feel free to customize the flavors and decorations to make it uniquely yours. When you try it, I’d be thrilled to hear how your nests turned out or any fun twists you added. Don’t be shy—drop a comment or share your photos!
Happy baking, happy nesting, and may your Easter be filled with sweet memories and crunchy delights.
Frequently Asked Questions
- Can I make these bird nest cookies ahead of time?
Yes! They hold up well stored in an airtight container for 3–5 days at room temperature or up to a week in the fridge. - What if I don’t have mini marshmallows?
Regular-sized marshmallows can work if chopped into smaller pieces, but mini marshmallows melt more evenly and bind better. - Can these nests be frozen?
Absolutely! Wrap them individually or in containers and freeze. Thaw overnight in the fridge before serving. - Is there a way to make these less sweet?
Try using dark chocolate chips and reduce candy egg decorations, or swap some marshmallows for unsweetened puffed cereal. - Can I use other cereals instead of crispy rice?
You can experiment with cornflakes or shredded wheat, but the texture and shape might vary. Crispy rice gives the best nest-like crunch.
Pin This Recipe!
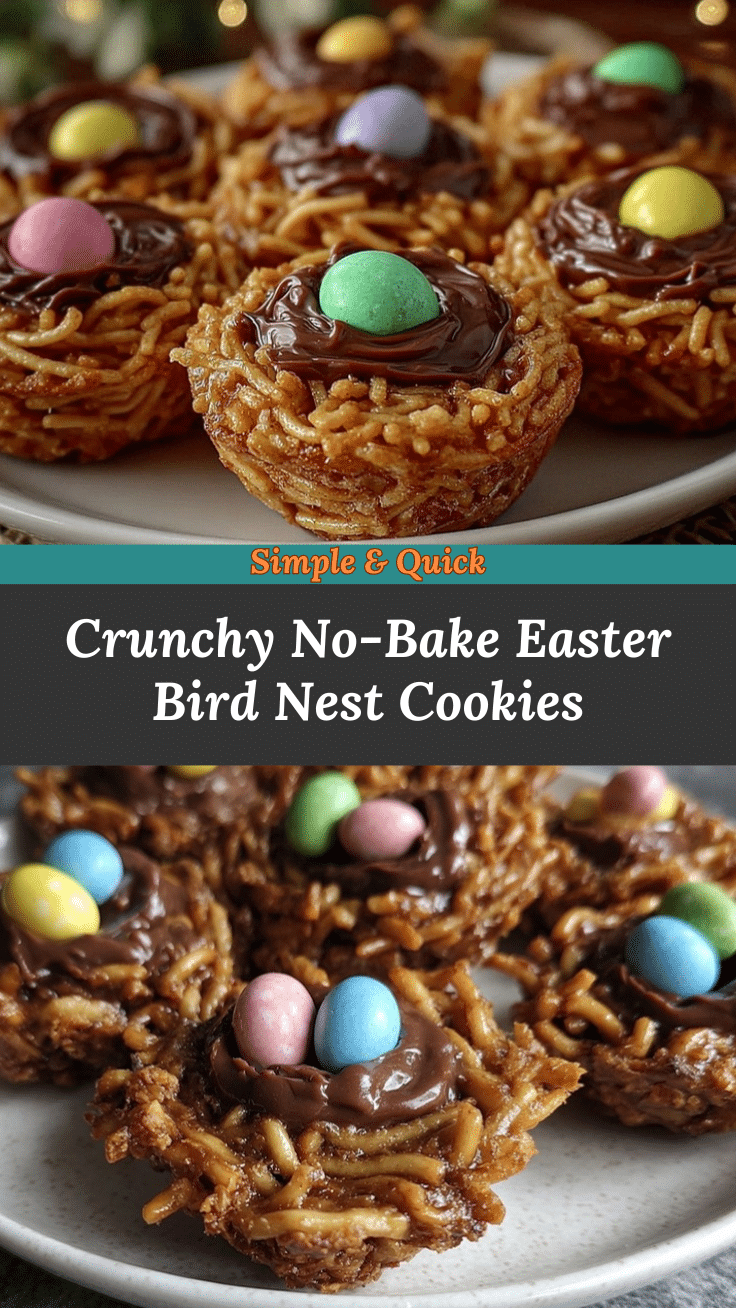

Crunchy No-Bake Easter Bird Nest Cookies
- Total Time: 25 minutes
- Yield: 12 nests 1x
Description
These crunchy, sweet, chewy no-bake bird nest cookies are a fun and easy Easter treat perfect for kids and families. Made with crispy rice cereal, melted marshmallows, and chocolate, they are quick to prepare and require no oven.
Ingredients
- 6 cups (150 grams) crispy rice cereal
- 1 ½ cups (90 grams) mini marshmallows
- 4 tablespoons (56 grams) unsalted butter, softened
- 1 cup (170 grams) semi-sweet or milk chocolate chips
- 1 teaspoon vanilla extract
- Pinch of salt
- 1 cup (about 50 grams) mini candy eggs
Instructions
- Line a baking sheet with parchment paper for easy cleanup and gather all ingredients measured out.
- In a microwave-safe bowl, combine butter and mini marshmallows. Microwave in 30-second intervals, stirring each time, until smooth and fully melted (about 1 to 1 ½ minutes).
- Stir in vanilla extract and a pinch of salt into the melted mixture.
- Place crispy rice cereal in a large bowl. Pour the melted marshmallow mixture over the cereal and gently fold until every piece is coated evenly, being careful not to crush the cereal.
- In a separate microwave-safe bowl, melt chocolate chips in 30-second bursts, stirring in between until smooth. Add a teaspoon of cream or milk if chocolate is too thick.
- Pour melted chocolate over the marshmallow-coated cereal and gently fold until combined.
- Using a tablespoon or lightly greased hands, scoop a handful of the mixture and shape into small nests on the lined baking sheet. Create a small indentation in the center for candy eggs. Repeat to make about 12 nests.
- Place 3 to 4 mini candy eggs in the center of each nest, pressing slightly so they stick but don’t sink.
- Allow nests to cool and firm up at room temperature for about 30 minutes, or refrigerate for 15 minutes if in a hurry.
- Once set, gently peel nests off parchment paper and arrange on a platter to serve.
Notes
If mixture is too sticky to shape, refrigerate for 10 minutes before forming nests. If too dry, add more melted butter or marshmallows next time. Use lightly greased hands or tools to prevent sticking. Melt marshmallows carefully to avoid burning. Gentle folding keeps cereal crunchy.
- Prep Time: 10 minutes
- Cook Time: 15 minutes
- Category: Dessert
- Cuisine: American
Nutrition
- Serving Size: 1 nest
- Calories: 160
- Sugar: 14
- Fat: 8
- Carbohydrates: 22
- Protein: 1
Keywords: no-bake cookies, Easter cookies, bird nest cookies, kids recipe, crunchy cookies, marshmallow cookies, chocolate cookies
