

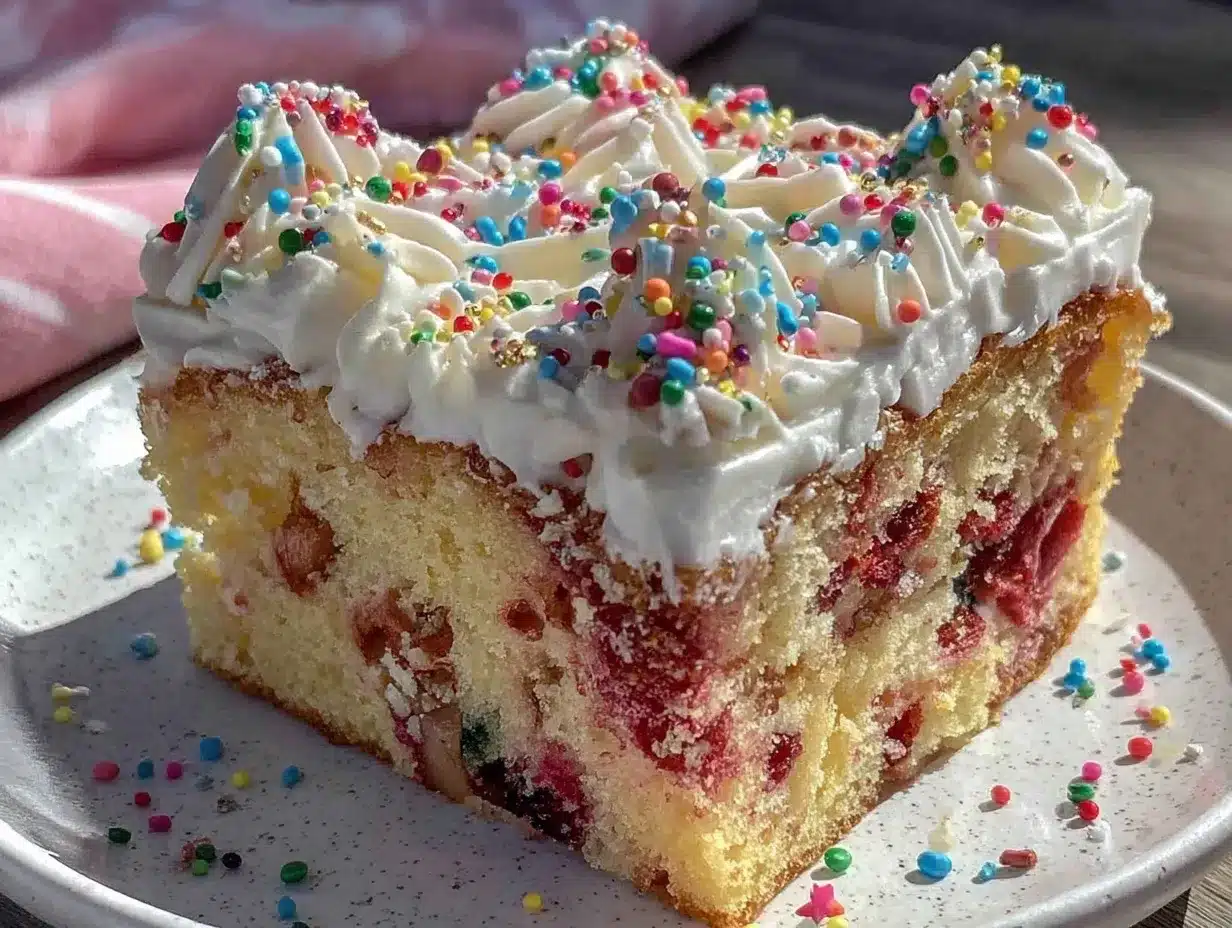
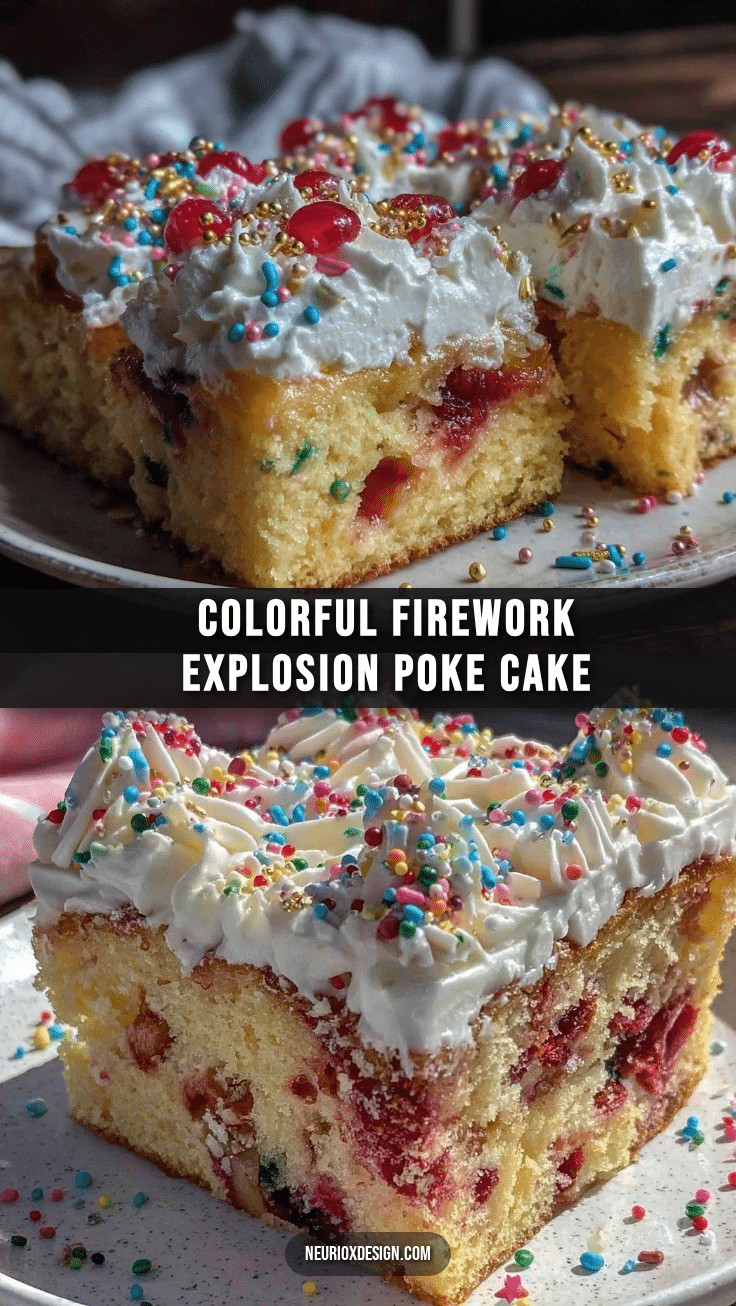
“Boom! Did you see that?” my nephew shouted, eyes wide as the colorful sparks burst across the sky. It wasn’t just the fireworks outside that night that had everyone buzzing — it was the dessert table. I’d thrown together what I now call the Best Firework Explosion Poke Cake for Celebrations kind of on a whim. Honestly, I was aiming for something quick and festive for our July 4th barbecue, but the way the cake looked when sliced — a dazzling burst of red, white, and blue — stole the show.
The idea hit me while I was stirring the cake batter and glancing at the fireworks schedule on my phone. I wanted something that felt like the holiday but didn’t demand hours of decorating or fancy skills. Poke cakes are a bit of a guilty pleasure for me — simple, forgiving, and so fun to customize. This particular recipe became a favorite after a few runs in the kitchen, each time tweaking the colors and flavors to get that perfect pop. It’s become my go-to whenever I want to impress the crowd with minimal fuss and maximum wow.
What’s stuck with me is how this cake manages to feel both nostalgic and exciting. It’s like catching that firework sparkle in dessert form — a moment you want to savor and share. If you’ve ever felt the pressure of making a dessert that fits a celebration yet isn’t stressful, you know exactly what I mean. The Best Firework Explosion Poke Cake for Celebrations delivers that sparkle without the stress. And honestly, every time I see those colorful pockets of creamy filling, I smile a little, remembering how it saved the day and made the holiday extra special.
Why You’ll Love This Recipe
After testing this poke cake recipe several times (and yes, sampling way more than I should admit), I can say it hits all the sweet spots for a festive dessert that’s easy and crowd-pleasing. Here’s why it’s become a staple for my celebrations:
- Quick & Easy: You can have this cake ready in under an hour, perfect when you’re juggling grills, kids, and last-minute decorations.
- Simple Ingredients: No need for a special trip to a fancy market. Most ingredients are pantry staples or basic grocery finds — like boxed cake mix and simple frosting.
- Perfect for July 4th and Beyond: Whether it’s Independence Day, Memorial Day, or any summer party, the red, white, and blue color scheme fits right in.
- Crowd-Pleaser: Kids love the surprise inside, and adults appreciate the creamy, moist texture — it’s a win for all ages.
- Unbelievably Delicious: The secret to this cake’s magic is the way the sweetened condensed milk and pudding mix soak into the cake, creating a luscious, almost custard-like explosion of flavor.
What sets this apart from other poke cake recipes? For one, I blend a bit of vanilla pudding into the filling to amp up the creaminess. Also, the strategic layering of red and blue gelatin juices creates that “explosion” effect when you slice it open — it’s a simple trick but makes a huge difference visually and flavor-wise. This isn’t just another poke cake; it’s a festive centerpiece that’s surprisingly effortless but leaves an impression, which is exactly what you want when the sparklers come out.
What Ingredients You Will Need
This recipe calls for straightforward ingredients, each playing a key role in delivering that signature moist texture and vibrant colors. Most are common staples, so you likely have a good chunk of this in your kitchen already.
- For the Cake:
- 1 box white cake mix (about 15.25 oz / 432 g) – I prefer Betty Crocker for consistent results
- Ingredients called for on the box (usually eggs, oil, and water)
- For the Poke Filling:
- 1 (14 oz / 396 g) can sweetened condensed milk – adds rich sweetness and moisture
- 1 (3.4 oz / 96 g) box instant vanilla pudding mix – helps thicken the filling and add creaminess
- 1 cup cold milk (240 ml) – to mix with the pudding
- For the Gelatin Explosion:
- 1 package red gelatin (e.g., strawberry or cherry) – dissolved in 1 cup boiling water (240 ml)
- 1 package blue gelatin (e.g., blueberry or blue raspberry) – dissolved in 1 cup boiling water (240 ml)
- For the Frosting:
- 2 cups whipped topping (about 480 ml), thawed – I use store-bought for convenience
- Optional: fresh blueberries and sliced strawberries for garnish
For a seasonal twist, you can swap fresh berries instead of gelatin for a more natural flare, but the color punch won’t be quite the same. Also, if you want to make this gluten-free, try a gluten-free white cake mix and double-check your pudding mix for allergens.
Equipment Needed
- 9×13 inch (23×33 cm) baking pan – a glass or metal pan works well; glass helps with even baking
- Mixing bowls – one large for the cake batter, one medium for pudding mixture
- Electric mixer or whisk – to blend the pudding smoothly and whip the topping if making homemade
- Wooden spoon or spatula – for gentle folding and spreading
- Fork or skewer – to poke holes in the cake for the gelatin filling; a chopstick works too
- Measuring cups and spoons – for precise ingredient amounts
If you don’t have an electric mixer, no worries — a sturdy whisk and some elbow grease will do just fine. When poking the cake, I find a large skewer easier for evenly spaced holes that soak up the gelatin perfectly. For budget-friendly options, glass pans are often cheaper and easy to clean compared to non-stick metal pans, though both yield great results.
Preparation Method
- Prepare the Cake Batter: Follow the instructions on your cake mix box, combining the mix, eggs, oil, and water in a large bowl. Beat for about 2 minutes on medium speed until smooth. Pour the batter into your greased 9×13 inch baking pan. Smooth the top with a spatula.
Tip: Don’t overmix; just blend until combined to keep the cake tender. - Bake: Place the pan in a preheated oven at 350°F (175°C) for 30-35 minutes. Check doneness with a toothpick inserted in the center; it should come out clean. Remove the cake and let it cool for about 10 minutes.
Note: Cooling slightly is key so the gelatin doesn’t melt when poured. - Poke the Cake: Using a fork or skewer, poke holes about 1 inch (2.5 cm) apart all over the cake. You want enough holes to let the gelatin seep through but not so many it falls apart.
Pro Tip: Go gently to avoid breaking the cake’s surface excessively. - Prepare Gelatin: Dissolve each gelatin packet separately in 1 cup boiling water, stirring until fully dissolved. Let cool for about 5 minutes but not set.
Tip: The gelatin should be warm but not hot to avoid soaking too quickly and making the cake soggy. - Pour Gelatin: Alternately drizzle red and blue gelatin over the cake holes, filling them evenly. The colors will sink into the cake and create that firework explosion effect inside.
Note: Pour slowly to give the gelatin time to soak in. - Prepare Pudding Filling: In a medium bowl, whisk together the instant vanilla pudding mix and 1 cup cold milk until smooth and thickened, about 2 minutes.
Tip: This adds a creamy layer inside the cake for extra richness. - Spread Filling: Gently spoon the pudding mixture evenly over the gelatin-soaked cake.
Warning: Be careful not to break the cake surface. - Chill: Refrigerate the cake for at least 2 hours or until the gelatin and pudding set completely.
Why: This step is crucial for those signature pockets of color and creaminess. - Top and Serve: Spread whipped topping evenly over the chilled cake. Garnish with fresh blueberries and sliced strawberries for a festive finish.
Personal Tip: I like to add a sprinkle of edible glitter or star-shaped sprinkles for an extra celebratory touch.
Cooking Tips & Techniques
Mastering this poke cake is all about timing and gentle handling. First, don’t rush the cooling after baking — if the cake is too warm, the gelatin will melt and bleed colors, losing that clean firework effect. I’ve learned the hard way that patience here pays off.
When poking the cake, consistency is key. Try to keep holes evenly spaced and about the same depth. Uneven holes can lead to uneven gelatin pockets and a messy slice.
Mixing the pudding properly is another must. Whisk it until thick but not grainy, or the texture can feel off. If you prefer, you can substitute vanilla pudding for a lighter cream cheese filling, but the vanilla pudding is the classic creamy counterpoint to the fruity gelatin.
Multitasking really helps: while the cake bakes, prepare the gelatin and pudding so you’re ready to assemble as soon as the cake cools. If you’re short on time, chilling the cake in the fridge before poking can help firm it up for easier hole-poking.
Finally, don’t skip the garnish! The fresh fruit not only adds visual appeal but balances the sweetness and gives a fresh burst with every bite. I’ve tried this cake without fruit, and it just isn’t the same.
Variations & Adaptations
This poke cake is a versatile canvas for your creativity. Here are a few ideas I’ve played with or recommend:
- Dietary Swap: Use a dairy-free cake mix and coconut milk pudding mix for a vegan-friendly version. Swap whipped topping for coconut whipped cream.
- Seasonal Twist: Swap the red and blue gelatin for green and orange flavors and colors for a Halloween or fall party. You can also use fresh fruit juices and natural colorants for a healthier option.
- Flavor Boost: Add a teaspoon of lemon or almond extract to the cake batter for subtle complexity that pairs beautifully with the fruity gelatin.
- Cooking Method: If you’re making a smaller batch, try baking in cupcake liners and poking each cupcake individually for mini poke cakes perfect for potlucks.
- Personal Favorite: I once layered a thin spread of cream cheese frosting under the whipped topping for an extra tangy finish — it’s a little richer but worth trying if you love cream cheese desserts.
Serving & Storage Suggestions
This poke cake is best served chilled, right out of the fridge, to maintain the integrity of the gelatin pockets. I find slicing it with a sharp serrated knife gives the cleanest cuts, showing off those colorful bursts inside.
Pair this dessert with light beverages like sparkling lemonade or iced tea to complement the sweetness without overpowering. It also sits nicely alongside classic party foods, like the crispy cheeseburger wraps or a fresh Green Goddess Salad, balancing out the meal.
Store leftovers (if there are any!) covered tightly in the refrigerator for up to 3 days. The flavors deepen a bit overnight, and the texture stays pleasantly moist. When reheating, just avoid microwaving as it will melt the gelatin; instead, let slices come to room temperature for about 15 minutes before serving.
Nutritional Information & Benefits
Per serving (based on 12 slices), this poke cake roughly contains:
| Calories | 320 kcal |
|---|---|
| Carbohydrates | 48 g |
| Fat | 10 g |
| Protein | 4 g |
| Sugar | 32 g |
The sweetened condensed milk and pudding add richness but also provide calcium. Using fresh berries as a garnish adds antioxidants and vitamin C. For those watching gluten, swapping to a gluten-free white cake mix keeps this dessert friendly to gluten-sensitive guests. While indulgent, the portion sizes are reasonable for a festive treat that feels special but not overwhelming.
Conclusion
So, if you’re looking for a dessert that brings the firework spirit to the table without turning your kitchen upside down, the Best Firework Explosion Poke Cake for Celebrations is your answer. It’s a recipe that’s easy to make but unforgettable to eat — colorful, creamy, and perfectly festive. The balance of simple ingredients with a clever poke technique means you can relax and enjoy the party, not stress over the dessert.
Feel free to tweak the colors, flavors, or toppings to make it truly yours. I love how this cake brings people together and sparks genuine smiles with every slice. If you try it, I’d love to hear how your celebrations went — every family has its own twist, and that’s what makes sharing recipes so fun!
Here’s to sweet moments and spectacular celebrations ahead.
FAQs About the Best Firework Explosion Poke Cake
Can I make this poke cake ahead of time?
Yes, you can prepare it a day in advance. Just keep it tightly covered in the refrigerator. The flavors meld beautifully overnight, making it even more delicious.
What if I don’t have red or blue gelatin?
You can use any gelatin colors or flavors you like. For a patriotic look, red and blue work best, but green or purple can be fun for other occasions.
Can I use homemade cake instead of boxed mix?
Absolutely! A simple white or yellow homemade cake recipe works well. Just make sure it’s sturdy enough to hold the gelatin filling.
Is there a dairy-free option for this recipe?
Yes, use dairy-free pudding and whipped topping alternatives, and select a dairy-free cake mix. Coconut milk works great for mixing the pudding.
How do I prevent the cake from getting soggy?
Don’t pour the gelatin while the cake is too warm and let the cake chill properly before serving. Also, pouring the gelatin slowly helps it absorb evenly without over-saturating.
Pin This Recipe!

Best Firework Explosion Poke Cake Recipe for Easy 4th of July Celebrations
- Total Time: 2 hours 50 minutes
- Yield: 12 servings 1x
Description
A festive and easy poke cake featuring red and blue gelatin explosions inside a moist white cake, perfect for July 4th and other celebrations. This recipe combines simple ingredients with a creamy pudding filling and whipped topping for a crowd-pleasing dessert.
Ingredients
- 1 box white cake mix (about 15.25 oz / 432 g), e.g., Betty Crocker
- Ingredients called for on the cake mix box (usually eggs, oil, and water)
- 1 (14 oz / 396 g) can sweetened condensed milk
- 1 (3.4 oz / 96 g) box instant vanilla pudding mix
- 1 cup cold milk (240 ml)
- 1 package red gelatin (e.g., strawberry or cherry), dissolved in 1 cup boiling water (240 ml)
- 1 package blue gelatin (e.g., blueberry or blue raspberry), dissolved in 1 cup boiling water (240 ml)
- 2 cups whipped topping (about 480 ml), thawed
- Optional: fresh blueberries and sliced strawberries for garnish
Instructions
- Prepare the cake batter by following the instructions on the cake mix box, combining the mix, eggs, oil, and water in a large bowl. Beat for about 2 minutes on medium speed until smooth. Pour the batter into a greased 9×13 inch baking pan and smooth the top with a spatula.
- Bake the cake in a preheated oven at 350°F (175°C) for 30-35 minutes. Check doneness with a toothpick inserted in the center; it should come out clean. Remove the cake and let it cool for about 10 minutes.
- Using a fork or skewer, poke holes about 1 inch (2.5 cm) apart all over the cake, being careful not to break the surface excessively.
- Dissolve each gelatin packet separately in 1 cup boiling water, stirring until fully dissolved. Let cool for about 5 minutes but not set.
- Alternately drizzle red and blue gelatin over the cake holes, filling them evenly. Pour slowly to allow the gelatin to soak in.
- In a medium bowl, whisk together the instant vanilla pudding mix and 1 cup cold milk until smooth and thickened, about 2 minutes.
- Gently spoon the pudding mixture evenly over the gelatin-soaked cake, being careful not to break the cake surface.
- Refrigerate the cake for at least 2 hours or until the gelatin and pudding set completely.
- Spread whipped topping evenly over the chilled cake. Garnish with fresh blueberries and sliced strawberries if desired.
Notes
Do not pour gelatin while the cake is warm to prevent melting and bleeding colors. Poke holes evenly spaced about 1 inch apart for best results. Chill the cake thoroughly to set gelatin and pudding layers. Garnish with fresh fruit for balance and visual appeal. For gluten-free, use gluten-free cake mix and check pudding mix allergens. For dairy-free, use dairy-free cake mix, pudding, and whipped topping alternatives.
- Prep Time: 15 minutes
- Cook Time: 35 minutes
- Category: Dessert
- Cuisine: American
Nutrition
- Serving Size: 1 slice (1/12 of cak
- Calories: 320
- Sugar: 32
- Fat: 10
- Carbohydrates: 48
- Protein: 4
Keywords: poke cake, 4th of July dessert, patriotic cake, gelatin poke cake, easy celebration dessert, red white and blue cake, summer party dessert
