

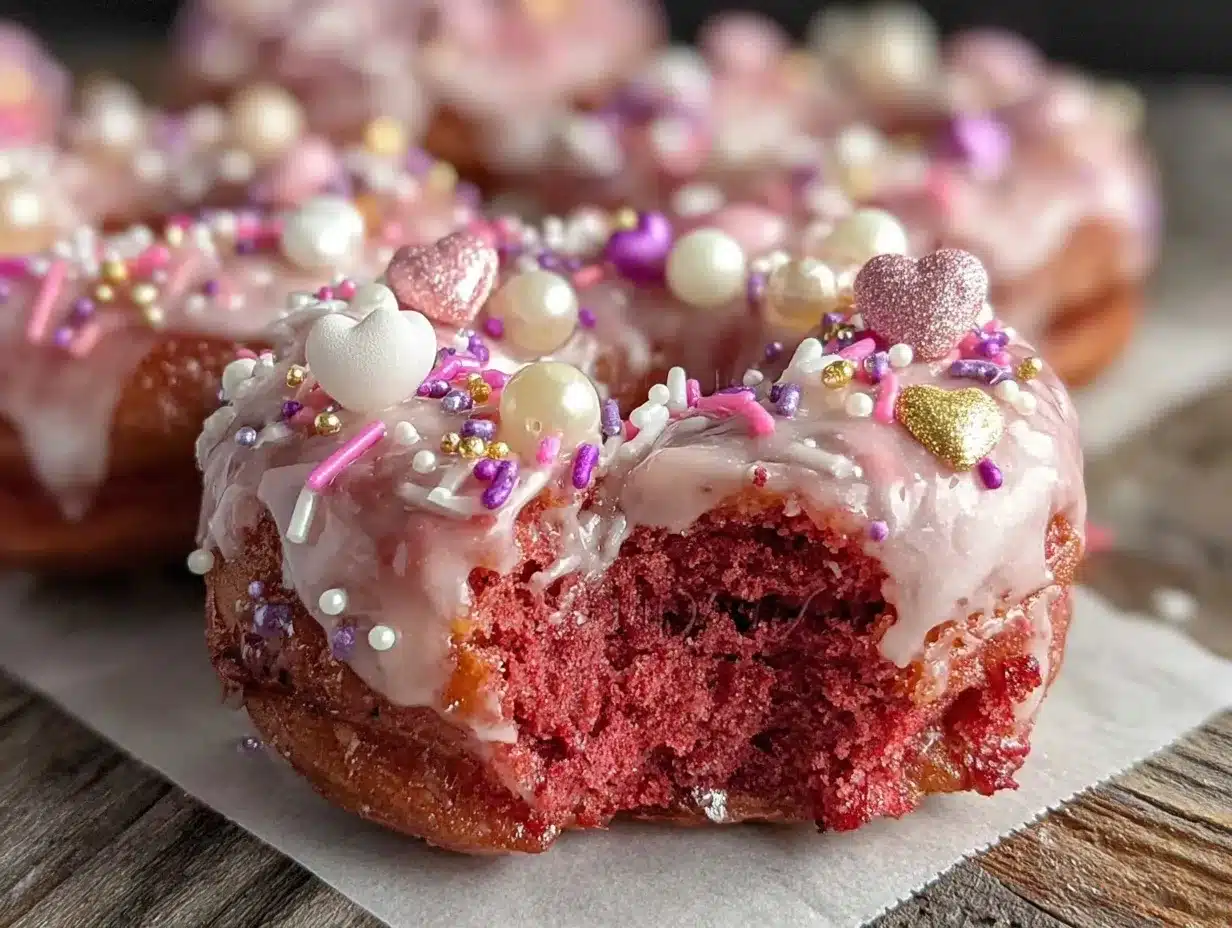
Let me set the scene: the sweet aroma of vanilla and cocoa swirling through my kitchen, the gentle sizzle as freshly baked Pink Velvet Donuts cool on the wire rack, and a cascade of colorful sprinkles glimmering under the afternoon sun. Seriously, the first time I made these tender Galentine’s Pink Velvet Donuts, the whole house smelled like a bakery—warm, inviting, and just a little bit magical. I remember standing there, pink batter splattered on my apron (and a little in my hair), feeling that mix of anticipation and nostalgia you only get with baking something truly special.
It all started one February when my best friends and I wanted a treat for Galentine’s Day—something fun, festive, and, let’s face it, pink. We’d grown up celebrating friendship every year, and food always played a starring role. I was knee-high to a grasshopper when my grandma taught me to bake her classic velvet cake, and I’ve been hooked on that soft crumb ever since. So, I thought, why not give it a modern twist for Galentine’s? The first batch was a revelation—the kind of moment you pause, take a deep breath, and just smile because you know you’re onto something truly special.
Honestly, my family and friends couldn’t stop sneaking donuts off the rack. Even my neighbor popped in (the scent was that irresistible) and asked for the recipe! These donuts are dangerously easy, bursting with pure, nostalgic comfort, and they look absolutely adorable on any Pinterest board. Whether you’re planning a brunch, surprising your kids, or just need a pick-me-up on a rainy afternoon, these Pink Velvet Donuts are the move. I’ve tested them more times than I’d like to admit—in the name of research, of course—and now, they’re a staple for family gatherings, gifting, and, you know, any excuse to eat something sweet. If you’re craving a treat that feels like a warm hug, you’re going to want to bookmark this one!
Why You’ll Love This Recipe
There’s a reason these Pink Velvet Donuts recipe is my go-to for Galentine’s Day celebrations (and honestly, for any day that calls for a little extra sparkle). My years of baking, a few disasters along the way, and plenty of taste-testing have led to this crowd-pleasing treat. They aren’t just pretty; they’re downright irresistible. Let me share why you’ll love them as much as I do:
- Quick & Easy: Ready in under 40 minutes—perfect for spontaneous brunches or last-minute dessert cravings.
- Simple Ingredients: No running around town for specialty items; you already have most ingredients in your pantry.
- Perfect for Galentine’s (and beyond): Bright, cheerful, and fun—ideal for parties, sleepovers, or cozy nights in with your favorite people.
- Crowd-Pleaser: Gets rave reviews from kids, teens, and adults. Honestly, I haven’t met anyone who didn’t reach for seconds.
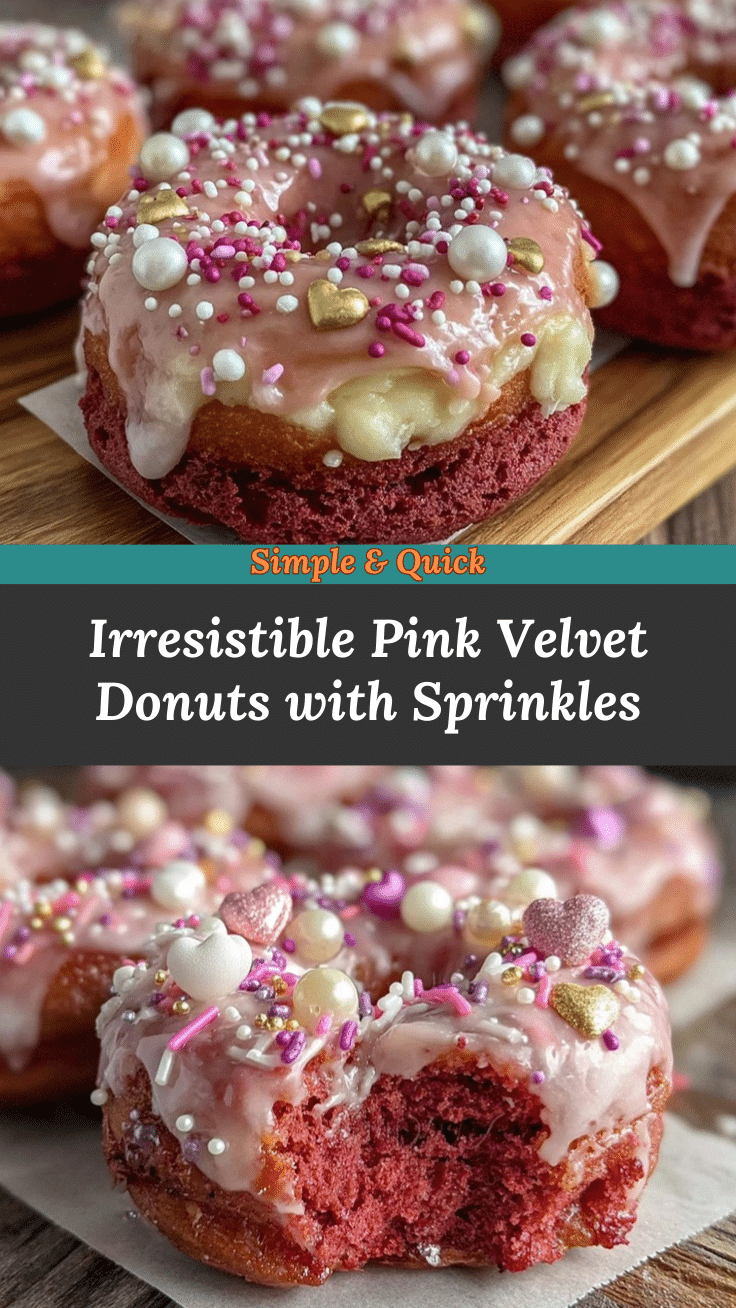
- Unbelievably Delicious: Soft, cakey texture with a velvety crumb, subtle cocoa notes, and a sweet vanilla glaze.
What sets this Pink Velvet Donuts recipe apart? For starters, the technique: mixing the batter just enough (not overdoing it!) ensures maximum tenderness. The addition of buttermilk gives that classic velvet tang, and a hint of cream cheese in the glaze brings the whole thing together. Plus, the pink hue is just plain fun—no food coloring drama, just a few drops for festivity.
These donuts are more than a sweet treat—they’re a celebration of friendship, joy, and the little moments that matter. When you bite into one, it’s comfort food with personality: soft, moist, and totally satisfying. Whether you’re impressing guests or treating yourself, they’re the kind of dessert that makes you close your eyes and savor. You can trust this recipe—it’s been through the ringer, tested at family gatherings, bake sales, and even a brunch where the oven tried to betray me. But hey, it always delivers that soul-soothing satisfaction.
What Ingredients You Will Need
This Pink Velvet Donuts recipe uses everyday ingredients to create a treat that’s both visually stunning and delicious. They’re pantry-friendly, easy to swap, and give you the flexibility to experiment if you’re feeling adventurous. Here’s what you’ll need:
- For the Donut Batter:
- 1 1/4 cups (155g) all-purpose flour (use gluten-free blend if needed)
- 1/4 cup (25g) unsweetened cocoa powder (Dutch-process for deeper flavor)
- 3/4 cup (150g) granulated sugar
- 1/2 tsp baking soda
- 1/2 tsp baking powder
- 1/4 tsp salt
- 1/3 cup (80ml) buttermilk (or milk + 1 tsp lemon juice as a sub)
- 1/4 cup (60g) unsalted butter, melted (or coconut oil for dairy-free)
- 1 large egg, room temperature
- 1 tsp vanilla extract (I love Nielsen-Massey for richness)
- 1 tsp white vinegar (for classic velvet tang)
- Pink gel food coloring (about 3-4 drops, adjust for shade)
- For the Glaze:
- 1 cup (120g) powdered sugar, sifted
- 2 tbsp cream cheese, softened
- 2-3 tbsp milk (dairy or non-dairy)
- 1/2 tsp vanilla extract
- Pink gel food coloring (optional, for extra pop)
- For Decorating:
- Assorted sprinkles (heart-shaped, pastel, or classic rainbow work best)
A few tips: Use high-quality cocoa powder (I swear by Ghirardelli), and make sure your butter is fully melted but not hot. If you want to skip dairy, swap the buttermilk for a vegan-friendly version and the butter for coconut oil. For a deeper pink, add an extra drop or two of food coloring—but don’t go overboard unless you want neon! Sprinkles are a must, but the kind is totally up to you. In summer, swap sprinkles for freeze-dried berries for a fruity twist. If you’re out of cream cheese, full-fat Greek yogurt works in a pinch for the glaze.
Ingredient substitutions are easy: almond flour for gluten-free, coconut sugar for a lower glycemic option, or plant-based milk for dairy-free friends. I’m all about adjusting to what’s in the fridge—no need for perfection. That’s how the best recipes happen.
Equipment Needed
You don’t need a fancy kitchen setup to make these Pink Velvet Donuts—just a few trusty tools and a little patience. Here’s what I use every time:
- Donut pan (non-stick, standard size): For perfectly shaped donuts. If you don’t own one, a muffin tin works—just bake as “donut holes.”
- Mixing bowls: One medium and one small. Glass or stainless steel is easiest to clean.
- Whisk: For combining wet and dry ingredients. A fork works in a pinch (I’ve been there!)
- Rubber spatula: For folding and scraping every bit of batter.
- Piping bag or zip-top bag: Makes filling the donut pan way less messy. Just snip the corner!
- Wire cooling rack: For cooling and glazing. A sheet of parchment underneath saves on cleanup.
- Measuring cups and spoons: Accurate measuring means tender donuts.
Donut pans come in silicone or metal; I’ve tried both, and metal gives a more even bake. If using silicone, set it on a sturdy baking sheet. Cleaning tip: soak in warm soapy water before scrubbing—sprinkles can stick! If you’re on a budget, most items can be found at big-box stores or thrift shops. I started with hand-me-downs, and they worked just fine.
Preparation Method
- Preheat your oven: Set to 350°F (175°C). Grease your donut pan lightly with butter or nonstick spray. This helps the donuts release easily and gives a lovely golden edge.
- Mix dry ingredients: In a medium bowl, whisk together 1 1/4 cups (155g) flour, 1/4 cup (25g) cocoa powder, 3/4 cup (150g) sugar, 1/2 tsp baking soda, 1/2 tsp baking powder, and 1/4 tsp salt. The mixture should look uniform and smell faintly of cocoa.
- Combine wet ingredients: In a separate bowl, whisk 1/3 cup (80ml) buttermilk, 1/4 cup (60g) melted butter, 1 large egg, 1 tsp vanilla, 1 tsp vinegar, and 3-4 drops pink food coloring. The color should be vibrant but not too intense. (If your butter’s hot, let it cool first—learned that the hard way!)
- Blend wet and dry: Pour the wet mixture into the dry ingredients. Gently fold with a spatula until just combined. Don’t overmix—stop as soon as you don’t see flour streaks. The batter will be thick, almost like cake batter.
- Fill the pan: Spoon the batter into a piping bag or zip-top bag. Pipe into the donut molds, filling about 2/3 full. If you overfill, they’ll lose their classic donut shape. (Trust me, I’ve baked a few “donut muffins” by accident!)
- Bake: Place the pan in your preheated oven and bake for 12-15 minutes. Donuts should spring back lightly when touched and a toothpick should come out clean. The tops may crack a bit—that’s okay!
- Cool: Let donuts sit in the pan for 5 minutes, then gently transfer to a wire rack. Cooling fully before glazing is key, or the glaze will melt right off.
- Make the glaze: In a small bowl, whisk 1 cup (120g) powdered sugar, 2 tbsp cream cheese, 2-3 tbsp milk, 1/2 tsp vanilla, and a drop of pink food coloring if desired. Aim for a pourable consistency—add more milk if too thick, more sugar if too runny.
- Glaze and decorate: Dip each cooled donut into the glaze, letting excess drip off. Top immediately with sprinkles so they stick. Set on a rack to set for 10 minutes.
- Serve and enjoy! Donuts are best eaten fresh, but they’ll keep for a couple of days. If storing, let glaze harden before stacking.
Troubleshooting: If donuts stick, run a thin knife around the edges. If the batter seems dry, add a splash of milk. The batter’s color may fade a bit while baking—add a smidge more coloring if you want vivid pink. For efficiency, prep glaze while donuts bake!
Cooking Tips & Techniques
After dozens of batches, I’ve picked up a few tricks for perfect Pink Velvet Donuts. Here’s what I wish I’d known from the start:
- Don’t overmix! Gentle folding keeps the crumb tender. Overworking the batter can make donuts dense.
- Exact measurements matter: Use a kitchen scale if possible. I learned the hard way—too much flour leads to dry donuts.
- Room temperature ingredients: Butter, eggs, and buttermilk blend better and create a smoother batter.
- Piping for neatness: Filling the pan with a bag makes for uniform donuts and less mess. Spooning works, but piping is way easier.
- Cool before glazing: Warm donuts = runny glaze. Patience pays off, even when the temptation is strong!
- Sprinkle timing: Add sprinkles immediately after glazing. If you wait, they won’t stick.
- Multi-tasking: While donuts bake, prep your glaze and set up your sprinkle station. This saves time and keeps things fun.
- Consistency: If your glaze is too thin, add more powdered sugar. Too thick? A little milk does the trick.
Common mistakes: Overfilling the pan (hello, muffin tops!), skipping the cooling step, or using cold butter (leads to lumpy batter). I’ve made all these errors, but practice makes perfect. Don’t stress—these donuts are forgiving, and even “imperfect” ones taste amazing.
Variations & Adaptations
One of my favorite things about this Pink Velvet Donuts recipe is just how flexible it is. Here are a few ways you can switch it up:
- Gluten-Free: Swap the all-purpose flour for a 1:1 gluten-free baking blend. It works like a charm—my cousin with celiac disease can vouch!
- Dairy-Free: Use coconut oil instead of butter, plant-based milk for buttermilk, and vegan cream cheese for the glaze. The flavor stays rich and the color is just as pink.
- Seasonal Flavors: Add a teaspoon of orange zest or a pinch of cinnamon for a wintery twist. In summer, fold in a handful of freeze-dried raspberries.
- Baked Donut Holes: Use a mini muffin tin for bite-sized treats. Kids love these for lunchboxes!
- Chocolate Drizzle: Melt dark chocolate and drizzle over the glaze for a grown-up finish (I tried this at a girls’ night and everyone raved).
- Nut-Free: All ingredients are nut-free as written, but always double-check your sprinkles for hidden allergens.
Personally, I love adding a dash of almond extract for extra depth—it’s a subtle twist that pairs beautifully with the cocoa. Don’t be afraid to experiment. The best version is the one that makes you smile!
Serving & Storage Suggestions
For the prettiest presentation, arrange your Pink Velvet Donuts on a pastel platter or a cake stand. Serve them at room temperature for the softest crumb, or slightly chilled if you prefer a firmer glaze. A mug of hot cocoa or a vanilla latte is the perfect pairing for brunch or an afternoon snack.
If you’re prepping ahead, store donuts in an airtight container at room temp for up to 2 days. For longer storage, pop them in the fridge—just let them come to room temp before serving for best flavor. To freeze, wrap individually in plastic and freeze for up to 1 month. Thaw overnight, then glaze and decorate as usual.
Reheating is easy: 10 seconds in the microwave is all it takes (any longer and the glaze melts off). Flavors develop beautifully over time—the cocoa and vanilla deepen, and the donuts stay moist. Honestly, they’re just as good on day two (if any survive that long).
Nutritional Information & Benefits
Each Pink Velvet Donut contains roughly 190 calories, with 6g fat, 30g carbs, and 3g protein (based on standard ingredients and glaze). They’re lower in saturated fat than fried donuts and offer a modest protein boost from the egg and buttermilk.
Key ingredients like cocoa powder bring antioxidants, while buttermilk adds calcium and probiotics. If you opt for almond flour or plant-based milk, you’ll get an extra hit of healthy fats or vitamin D. Sprinkles are pure joy—no nutritional claim, just happiness!
These donuts are nut-free as written, and easily adaptable for gluten-free or dairy-free diets. Always check your sprinkles for allergens if you’re baking for a crowd. From a wellness perspective, these donuts are about balance—a little indulgence, a lot of fun, and a dash of friendship.
Conclusion
If you’re seeking a dessert that’s festive, flavorful, and easy to make, this Pink Velvet Donuts recipe is truly worth a try. It’s a blend of nostalgia and creativity—classic velvet cake in donut form, decked out for Galentine’s with sprinkles and a glossy glaze.
Don’t be shy about tweaking the recipe to fit your tastes or dietary needs. That’s where the real magic happens! For me, these donuts are more than a treat—they’re a celebration of friendship, laughter, and little moments that stick with you.
I hope you’ll give them a whirl, share your variations, and let me know how they turn out! Leave a comment below with your favorite sprinkle combo, tag your Pinterest boards, or send a photo if you’re feeling proud. Happy baking, friends—may your Galentine’s be as sweet and colorful as these donuts!
Frequently Asked Questions
Can I make Pink Velvet Donuts without a donut pan?
Absolutely! Use a mini muffin tin for “donut holes.” They’ll bake up round and tender—just adjust baking time to 10-12 minutes.
How do I get a vibrant pink color without using too much food coloring?
Gel food coloring is your best bet—a few drops go a long way. Mix the batter well and adjust gradually. Natural beet powder works too (the flavor is mild).
Can I freeze these donuts before glazing?
Yes! Freeze baked, unglazed donuts wrapped individually. Thaw, then glaze and sprinkle before serving for freshest results.
What’s the best way to make the glaze stick?
Make sure donuts are completely cool before glazing, and dip each one generously. Add sprinkles right away so they adhere perfectly.
Are Pink Velvet Donuts suitable for nut allergies?
They’re nut-free as written, but always check your sprinkles and cocoa for cross-contamination if allergies are a concern.
Pin This Recipe!

Pink Velvet Donuts
- Total Time: 40 minutes
- Yield: 10-12 donuts 1x
Description
These Pink Velvet Donuts are soft, cakey, and bursting with vanilla and cocoa flavor, topped with a sweet cream cheese glaze and festive sprinkles. Perfect for Galentine’s Day or any celebration, they’re easy to make and guaranteed to bring smiles.
Ingredients
- 1 1/4 cups all-purpose flour (or gluten-free blend)
- 1/4 cup unsweetened cocoa powder (Dutch-process preferred)
- 3/4 cup granulated sugar
- 1/2 teaspoon baking soda
- 1/2 teaspoon baking powder
- 1/4 teaspoon salt
- 1/3 cup buttermilk (or milk + 1 teaspoon lemon juice)
- 1/4 cup unsalted butter, melted (or coconut oil for dairy-free)
- 1 large egg, room temperature
- 1 teaspoon vanilla extract
- 1 teaspoon white vinegar
- 3–4 drops pink gel food coloring
- 1 cup powdered sugar, sifted
- 2 tablespoons cream cheese, softened
- 2–3 tablespoons milk (dairy or non-dairy)
- 1/2 teaspoon vanilla extract
- Pink gel food coloring (optional, for glaze)
- Assorted sprinkles
Instructions
- Preheat oven to 350°F (175°C). Lightly grease a donut pan with butter or nonstick spray.
- In a medium bowl, whisk together flour, cocoa powder, sugar, baking soda, baking powder, and salt.
- In a separate bowl, whisk buttermilk, melted butter, egg, vanilla extract, white vinegar, and pink food coloring until combined.
- Pour wet ingredients into dry ingredients and gently fold with a spatula until just combined. Do not overmix.
- Transfer batter to a piping bag or zip-top bag. Pipe into donut molds, filling each about 2/3 full.
- Bake for 12-15 minutes, until donuts spring back when touched and a toothpick comes out clean.
- Let donuts cool in the pan for 5 minutes, then transfer to a wire rack to cool completely.
- For the glaze: In a small bowl, whisk powdered sugar, cream cheese, milk, vanilla extract, and a drop of pink food coloring until smooth and pourable.
- Dip cooled donuts into glaze, letting excess drip off. Immediately top with sprinkles.
- Let glaze set for 10 minutes before serving. Enjoy fresh or store in an airtight container.
Notes
Don’t overmix the batter for a tender crumb. Use room temperature ingredients for best results. Add sprinkles immediately after glazing so they stick. For gluten-free or dairy-free, substitute flour and dairy ingredients as needed. Donuts can be made as donut holes in a mini muffin tin. Store in an airtight container for up to 2 days or freeze unglazed donuts for up to 1 month.
- Prep Time: 15 minutes
- Cook Time: 15 minutes
- Category: Dessert
- Cuisine: American
Nutrition
- Serving Size: 1 donut
- Calories: 190
- Sugar: 18
- Sodium: 160
- Fat: 6
- Saturated Fat: 3
- Carbohydrates: 30
- Fiber: 1
- Protein: 3
Keywords: pink velvet donuts, baked donuts, Galentine's Day, sprinkles, cream cheese glaze, easy dessert, nut-free, kid-friendly, party treat
