

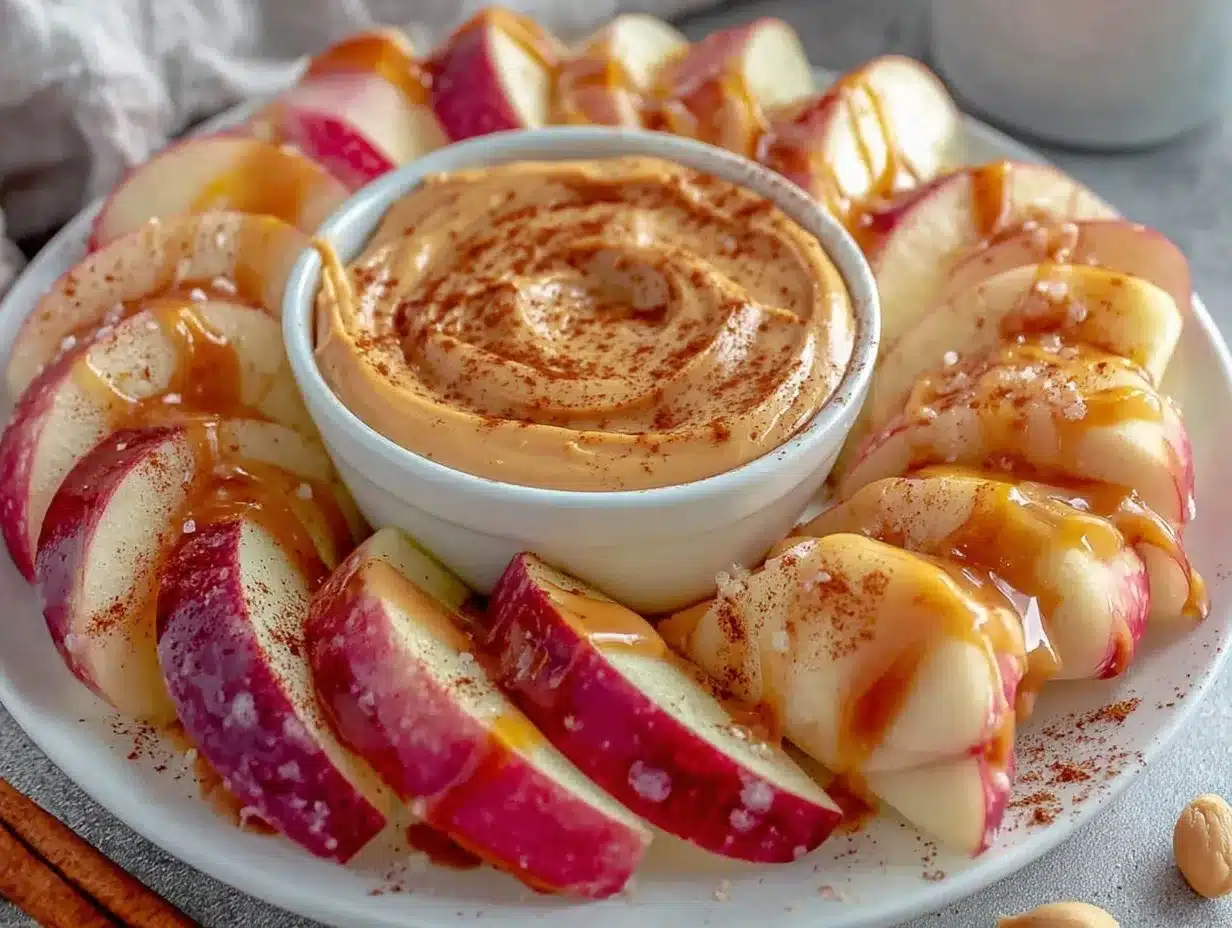
Let me tell you, the first time I sliced into a crisp, juicy apple and dunked it into a velvety peanut butter dip, my whole kitchen filled with that sweet-tart aroma mixed with rich, roasted nuttiness. It’s the kind of scent that makes you stop mid-task, inhale deeply, and just smile—because you know something good is about to happen. The crunch of the apple, the creamy swirl of peanut butter, and that little sprinkle of cinnamon? It’s a symphony of flavors and textures that feels as comforting as a warm hug on a chilly afternoon.
Honestly, my earliest memories of apples involve my grandmother slicing them paper-thin for an afternoon snack when I was knee-high to a grasshopper. She’d add a dollop of peanut butter, and I’d watch those slices disappear, one after the other, until all that was left was a sticky chin and a big grin. Years ago, I tried to recreate that magic for my own kids—hoping for a bite of nostalgia and a snack they’d actually ask for again. Turns out, they couldn’t stop sneaking slices off the plate (and, let’s face it, I didn’t mind joining in!).
This recipe for apple slices with peanut butter dip has turned into a staple for family gatherings, after-school munchies, even birthday party platters. It’s dangerously easy, provides pure, nostalgic comfort, and you know what? It brightens up any Pinterest snack board in a flash. If you’re looking for a snack that gets real reactions—big eyes, sticky fingers, happy sighs—you’re in the right place. I’ve tested and tweaked this combo so many times (in the name of research, of course), and each time, it feels like the kind of treat you wish you’d discovered years ago. Bookmark this one, because you’ll want to make it again and again!
Why You’ll Love This Recipe
When it comes to apple slices with peanut butter dip, there’s something about the simplicity that just works, every single time. I’ve whipped this up for everything from after-school snacks to busy brunches, and I can honestly say—it never fails to impress. Here’s why:
- Quick & Easy: Comes together in under 10 minutes. Perfect for those hectic mornings or last-minute snack attacks (trust me, you’ll be grateful for the speed).
- Simple Ingredients: No fancy grocery trips required. You probably already have apples and peanut butter in your kitchen right now.
- Perfect for Any Occasion: Great for lunchboxes, potlucks, playdates, cozy movie nights, or even as a sweet treat for grown-ups who love a healthy twist.
- Crowd-Pleaser: Kids gobble them up, adults sneak extra slices, and even picky eaters come back for seconds.
- Unbelievably Delicious: The contrast between crisp apple and creamy dip is pure comfort food—without the guilt. Add a sprinkle of cinnamon or a drizzle of honey, and it’s next-level.
What sets this recipe apart? Well, the peanut butter dip isn’t just peanut butter. It’s whipped with a touch of Greek yogurt and a hint of maple syrup, making it luxuriously smooth and just the right amount of sweet. That creamy texture grabs onto every apple slice, so you get flavor in every bite—not just a blob that slides right off.
This snack isn’t just good—it’s the kind that makes you close your eyes and savor that first bite. It’s comfort food reimagined: healthy, fast, but still loaded with soul-soothing satisfaction. Whether you want to impress guests with a pretty platter or just turn a plain snack into something memorable, these apple slices with peanut butter dip do the trick with zero stress. I’ve tweaked the ratios, played with toppings, and tested it on every age group imaginable—so you can trust, it’s truly a winner!
What Ingredients You Will Need
This recipe uses simple, wholesome ingredients to deliver bold flavor and a satisfying crunch. The best part? Most of these are pantry staples and easy to swap if needed. Here’s what you’ll need for apple slices with peanut butter dip:
- Apples: Choose crisp varieties like Honeycrisp, Fuji, Gala, or Granny Smith (for tartness). I love Honeycrisp for their sweet crunch, but any apple works. Go organic if you can—especially if you leave the skin on.
- Peanut Butter: Creamy, natural peanut butter is best. I personally prefer Smucker’s Natural or Trader Joe’s Creamy for a silky texture (avoid brands with added sugar and hydrogenated oils).
- Greek Yogurt: Plain, unsweetened, or vanilla. Adds creaminess and a subtle tang. Use full-fat for richness or non-dairy coconut yogurt for a vegan swap.
- Maple Syrup: Pure maple syrup brings gentle sweetness and depth. You can substitute honey or agave if you prefer.
- Cinnamon: Ground cinnamon for sprinkling and mixing into the dip. It adds warmth and a classic “apple pie” vibe.
- Lemon Juice: Just a splash for tossing the apples, so they stay bright and fresh (no brown slices by snack time).
- Optional Toppings: Mini chocolate chips, chia seeds, pumpkin seeds, shredded coconut, raisins, or even a drizzle of melted dark chocolate for extra flair.
Ingredient Selection Tips:
- For apples: Look for ones without blemishes and with a firm feel. Smaller apples are great for kids’ hands.
- For peanut butter: Stir well before measuring. If using a no-stir peanut butter, check for extra sugar.
- For Greek yogurt: I’ve found FAGE and Chobani work beautifully for texture.
Substitution Guidance:
- Swap peanut butter for almond or sunflower seed butter for nut allergies.
- Use agave syrup if you need a vegan sweetener.
- Try pears, sliced bananas, or celery sticks if apples are out of season.
Honestly, the beauty of this snack is that you can tweak it to match your pantry or your mood. Don’t be afraid to get creative!
Equipment Needed
- Sharp Paring Knife: For slicing apples thinly and evenly. A chef’s knife also works in a pinch.
- Cutting Board: Preferably a sturdy wood or plastic board. If you’re prepping for a crowd, use a large one.
- Mixing Bowl: Medium size for combining the peanut butter dip.
- Whisk or Spoon: Whisk for a fluffier dip, spoon for easy stirring.
- Small Serving Bowls: For the dip and toppings—ramekins or mini bowls look cute for presentation.
- Apple Corer (Optional): Makes prepping apples faster. If you don’t have one, just slice around the core.
Budget-friendly tip: Dollar store knives and bowls work just fine for this recipe—don’t stress about fancy gear! I always hand-wash my knives after slicing fruit to keep them sharper longer. And if you’re prepping for a party, arrange everything on a big platter—makes it look extra special without any extra fuss. If you’ve got kids helping, let them use a plastic knife for safety (they love the independence).
Preparation Method
-
Wash and Prep the Apples:
Give 2-3 medium apples (about 450g) a good rinse under cold water. If you’re leaving the skin on, scrub gently. Dry well. -
Slice the Apples:
Using a sharp knife, cut apples into thin wedges (about 1/2-inch or 1.5cm thick). Remove cores. If you want picture-perfect slices, use an apple corer first.
Time estimate: 3 minutes -
Toss with Lemon Juice:
Place slices in a bowl and drizzle with 1 tablespoon (15ml) fresh lemon juice. Toss gently to coat. This keeps the apples from browning.
Tip: Don’t overdo the lemon or it’ll taste too tart! -
Mix Up the Peanut Butter Dip:
In a medium mixing bowl, combine:- 1/2 cup (120g) creamy peanut butter
- 1/3 cup (80g) plain Greek yogurt
- 2 tablespoons (30ml) pure maple syrup
- 1/2 teaspoon ground cinnamon
Whisk until smooth and creamy. If dip is too thick, add 1-2 teaspoons milk (or non-dairy milk) for a looser consistency.
Time estimate: 2 minutes -
Arrange the Slices:
Fan apple slices on a serving platter (or lunchbox, if packing for school). Place the dip in a small bowl in the center.
Tip: Looks super cute on a round plate for party snacks! -
Add Toppings (Optional):
Sprinkle dip or apple slices with mini chocolate chips, chia seeds, pumpkin seeds, or shredded coconut. My kids love a handful of raisins on top.
Warning: If serving to toddlers, avoid hard toppings like seeds that could be a choking hazard. -
Serve Immediately:
Enjoy right away for best crunch and freshness.
Prep note: If making ahead, cover apples tightly with plastic wrap to prevent browning.
Troubleshooting:
- If apples turn brown, double-check you used enough lemon juice and covered them well.
- If dip separates, whisk in a splash of milk and keep stirring—it’ll come back together.
- If dip is too runny, add a spoonful more peanut butter and mix again.
Personal tip: Prep everything ahead, then assemble just before serving. That way, you get max crunch and flavor (and the dip stays super smooth!).
Cooking Tips & Techniques
Over the years, I’ve picked up a few tricks for making apple slices with peanut butter dip absolutely foolproof. Here’s what really makes a difference:
- Choose Firm Apples: Soft apples get mushy and won’t hold up to dipping. Always go for the crispest variety you can find.
- Stir Peanut Butter Well: Natural peanut butter separates easily. Stir it until completely smooth before mixing with yogurt.
- Mix Dip Gently: Over-whisking can make the dip gummy. Just blend until smooth and creamy—no need to go overboard.
- Keep Apples Fresh: Lemon juice is your best friend here. I’ve skipped it before and, let’s just say, brown apples aren’t Pinterest-worthy.
- Multitasking: Slice apples while the kids set out bowls and sprinkle toppings. Makes snack time feel like a team effort and keeps everyone busy.
- Toppings Last: Don’t add toppings until just before serving, or they’ll get soggy. Learned this after the coconut turned limp at a picnic—never again!
- Consistency Matters: If the dip is too thick for little ones, thin it out with milk or yogurt. If it’s too thin, pop it in the fridge for 10 minutes to firm up.
I’ve definitely had my share of peanut butter dips that were too stiff or apples that went brown way too fast. Through trial and error (and a few snack disasters), I’ve found that prepping everything fresh and keeping things simple almost always leads to success. Don’t be afraid to experiment—snack time shouldn’t be stressful!
Variations & Adaptations
One of the best things about apple slices with peanut butter dip is how easy it is to customize. Here are some variations I’ve tried over the years, and a few fun ideas to make it your own:
- Dairy-Free: Swap Greek yogurt for coconut yogurt or almond yogurt. You still get the creamy texture and tang, without any dairy.
- Nut-Free: Use sunflower seed butter or tahini instead of peanut butter. Works perfectly for nut-allergy households or school-safe snacks.
- Seasonal Twist: Mix pumpkin puree into the dip in the fall, or add a handful of fresh berries in summer for extra color and flavor.
- Flavor Customization: Spice up the dip with a pinch of ground ginger or a drop of vanilla extract. For a chocolatey option, stir in a teaspoon of cocoa powder.
- Cooking Methods: Try grilling apple slices for a caramelized, smoky flavor (just brush with a little oil first). Roasted apples work too—great for winter snacks!
- Personal Favorite: I sometimes add a swirl of honey and a dash of sea salt to the dip—makes it taste like a sweet-and-salty treat that’s totally addictive.
Whether you’re working around allergies, switching up flavors for the seasons, or just making it fun for picky eaters, there’s no wrong way to enjoy this snack. Let your taste buds guide the way!
Serving & Storage Suggestions
Apple slices with peanut butter dip are best served fresh and chilled. Arrange them on a platter with the dip in the center, maybe sprinkle some cinnamon over the apples for extra pop. For kids’ parties, use cupcake liners for individual servings—keeps sticky fingers at bay.
Pair this snack with a cold glass of milk, warm herbal tea, or even a smoothie for a complete mini-meal. If you’re serving adults, a crisp cider or sparkling water makes a nice match.
Storage is easy: Place leftover apple slices in an airtight container lined with a paper towel to absorb moisture. Keep in the fridge up to 24 hours (the lemon helps them stay bright). The dip lasts 2-3 days refrigerated—just stir before serving. For lunchboxes, pack apples and dip separately, and assemble right before eating.
Reheating isn’t necessary, but if you want warm apples, pop them in the microwave for 10 seconds (just don’t microwave the dip!). The flavors actually get richer after a few hours in the fridge—the cinnamon mellows, and the apples soak up extra sweetness. It’s the snack that keeps on giving.
Nutritional Information & Benefits
Each serving (about 1 medium apple with 2 tablespoons dip) provides roughly:
- Calories: 160
- Protein: 5g
- Fat: 6g (mostly healthy fats from peanut butter)
- Fiber: 4g
- Sugar: 15g (mostly natural from apples and maple syrup)
Key health benefits? Apples are high in vitamin C, antioxidants, and fiber, which support immunity and digestion. Peanut butter offers plant-based protein and heart-healthy fats. Greek yogurt adds a calcium boost and probiotics for gut health. This snack is naturally gluten-free, and you can make it vegan or nut-free with simple swaps.
Potential allergens: Peanuts, dairy (if using regular yogurt). Always double-check labels if you’re serving guests. Personally, I love knowing my snack is packed with nutrition but still feels totally indulgent—it’s proof healthy eating doesn’t have to be boring!
Conclusion
If you’re looking for a snack that’s easy, healthy, and guaranteed to make everyone smile, apple slices with peanut butter dip is the answer. It’s simple enough for everyday munching, but special enough to serve at parties. You can customize it a hundred ways, swap in your favorite flavors, and know you’re giving your family something wholesome and delicious.
I love this recipe because it brings people together—kids, grown-ups, even picky eaters. It’s the kind of treat that turns snack time into something memorable. Don’t be afraid to tweak it, add your own twist, or let little hands help out in the kitchen!
Try it out, share your version, and let me know in the comments how you make it your own. Bookmark this for your next busy day, and feel free to share it on Pinterest or with friends who need a healthy snack idea. Here’s to happy snacking and all the sweet moments it brings!
FAQs About Apple Slices with Peanut Butter Dip
Can I use almond butter instead of peanut butter?
Absolutely! Almond butter works perfectly and gives the dip a slightly sweeter, nuttier flavor. Sunflower seed butter is great for nut-free options too.
How do I keep apple slices from turning brown?
Toss them with a little lemon juice right after slicing. Store in an airtight container, and they’ll stay fresh and bright for hours.
Is this snack safe for a school lunch?
If your school allows nuts, it’s perfect. For nut-free schools, use sunflower seed butter or tahini in the dip. Pack apples and dip separately for freshness.
Can I make the dip ahead of time?
Yes! The dip keeps well in the fridge for 2-3 days. Just give it a good stir before serving—sometimes it thickens up a bit after chilling.
What apples are best for this recipe?
Honeycrisp, Fuji, and Gala apples are my favorites for their crunch and sweetness. Granny Smith is great if you prefer a tart flavor. Use whatever you have on hand—most apples work!
Pin This Recipe!
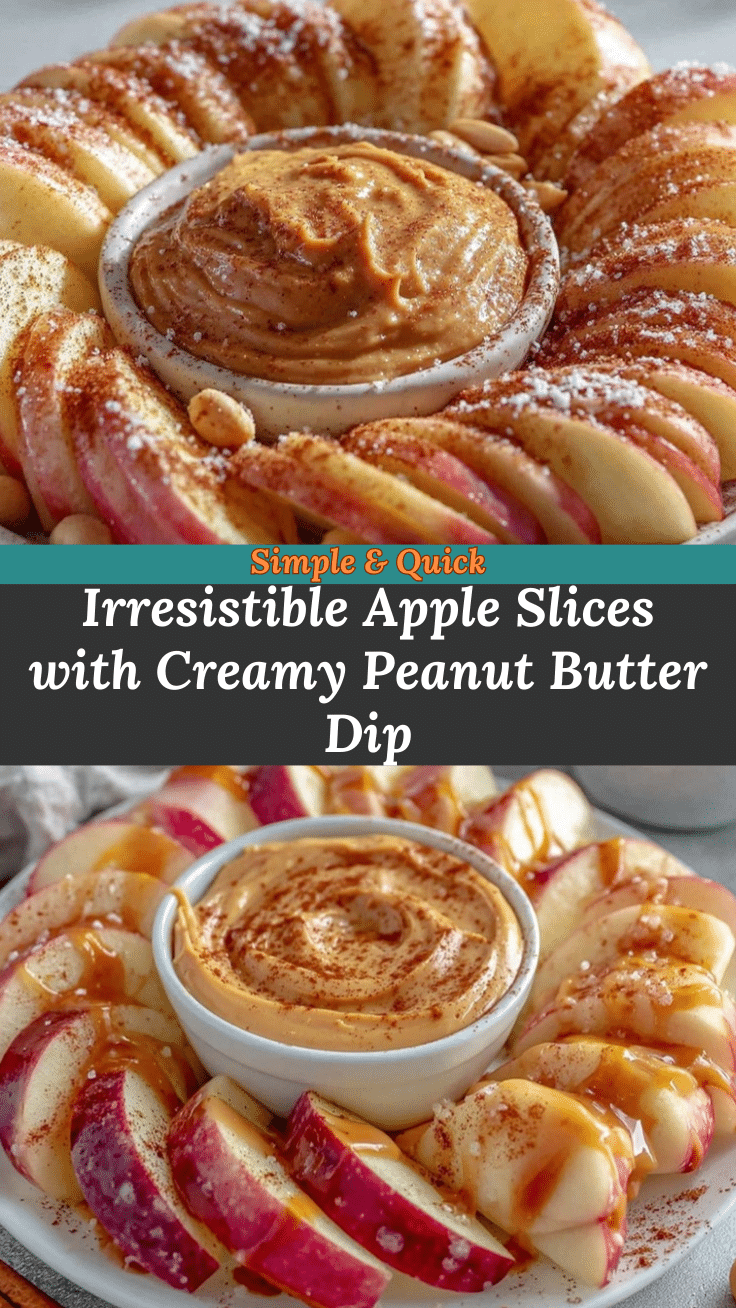

Apple Slices with Peanut Butter Dip Easy Healthy Snack for Kids
- Total Time: 7 minutes
- Yield: 4 servings 1x
Description
Crisp apple slices paired with a creamy, lightly sweetened peanut butter dip make for a quick, healthy, and crowd-pleasing snack. Perfect for kids, parties, or an easy afternoon treat, this recipe is customizable and packed with wholesome ingredients.
Ingredients
- 2–3 medium apples (Honeycrisp, Fuji, Gala, or Granny Smith)
- 1 tablespoon fresh lemon juice
- 1/2 cup creamy natural peanut butter
- 1/3 cup plain Greek yogurt
- 2 tablespoons pure maple syrup
- 1/2 teaspoon ground cinnamon
- 1–2 teaspoons milk or non-dairy milk (optional, for thinning dip)
- Optional toppings: mini chocolate chips, chia seeds, pumpkin seeds, shredded coconut, raisins
Instructions
- Wash and dry the apples thoroughly.
- Slice apples into thin wedges (about 1/2-inch thick), removing cores. Use an apple corer if desired.
- Place apple slices in a bowl and toss gently with lemon juice to prevent browning.
- In a medium mixing bowl, whisk together peanut butter, Greek yogurt, maple syrup, and cinnamon until smooth and creamy. If dip is too thick, add milk or non-dairy milk to reach desired consistency.
- Arrange apple slices on a serving platter and place the dip in a small bowl in the center.
- Sprinkle optional toppings over the dip or apple slices as desired.
- Serve immediately for best crunch and freshness. If making ahead, cover apples tightly with plastic wrap.
Notes
For nut-free or vegan options, substitute peanut butter with sunflower seed butter and Greek yogurt with coconut yogurt. Add toppings just before serving to keep them fresh. If prepping ahead, store apples and dip separately and assemble before eating. Use crisp apples for best texture.
- Prep Time: 7 minutes
- Cook Time: 0 minutes
- Category: Snack
- Cuisine: American
Nutrition
- Serving Size: 1 medium apple with
- Calories: 160
- Sugar: 15
- Sodium: 60
- Fat: 6
- Saturated Fat: 1
- Carbohydrates: 22
- Fiber: 4
- Protein: 5
Keywords: apple slices, peanut butter dip, healthy snack, kids snack, easy snack, gluten-free, party snack, after-school snack
