

Introduction
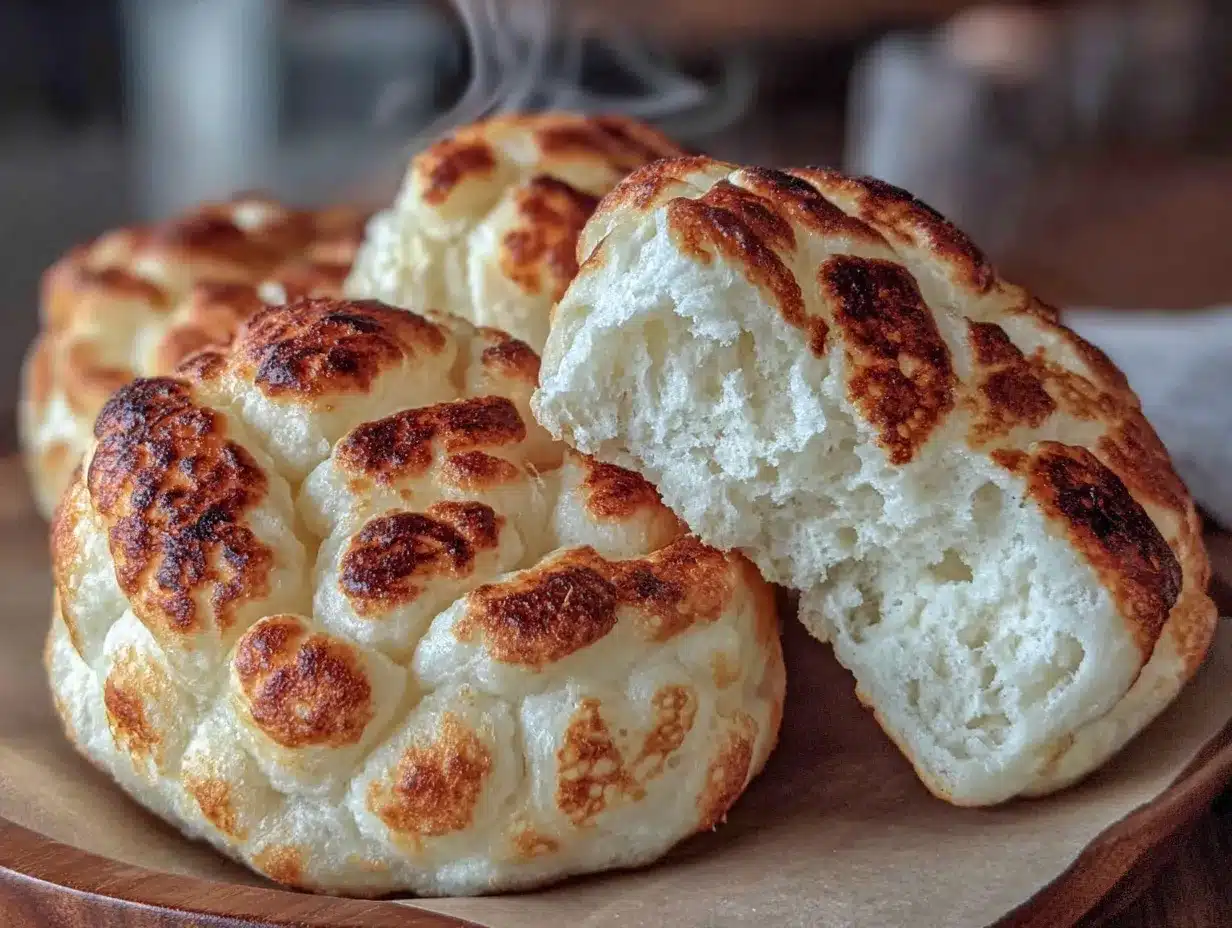
The first time I pulled a tray of cloud bread out of my oven, the kitchen filled with a scent that was equal parts sweet and eggy—like the promise of a fresh start. Watching the pillowy rounds rise and turn golden (almost like little clouds floating on a baking sheet), I could hardly wait for them to cool. I still remember that first bite: light, airy, and almost melting on my tongue. It was the kind of moment where you pause, take a deep breath, and just smile because you know you’re onto something truly special.
Honestly, I stumbled across this cloud bread recipe years ago when I was knee-high to a grasshopper, trying to find a snack that wouldn’t weigh me down but would still satisfy my cravings. What started as a bit of kitchen curiosity quickly became a family favorite. My kids would hover around, hoping to snag a piece before dinner (and, let’s be real, I was guilty of swiping a few myself). My husband declared it “the softest bread I’ve ever tasted”—coming from a man who’s picky about textures, that’s saying something.
There’s something so comforting about knowing that you can whip up a batch of fluffy 3-ingredient cloud bread any time you want—especially for those afternoons when you want a snack that’s light, guilt-free, and, honestly, a little bit magical. This recipe is dangerously easy (just three ingredients!), making it perfect for busy days, weight loss journeys, or when you want to brighten up your Pinterest snack board with something whimsical. I’ve tested this recipe more times than I can count (in the name of research, of course), and it’s become a staple for family gatherings, gifting, and just treating myself on a quiet morning. Cloud bread feels like a warm hug in the form of food, and you’re going to want to bookmark this one.
Why You’ll Love This Cloud Bread Recipe
After years in the kitchen as a food blogger and home cook, I can confidently say this cloud bread recipe checks all the boxes for both taste and ease. With only three simple ingredients, it’s become my go-to whenever I want something satisfying without the heaviness of traditional bread. Here’s why you’ll be hooked after one try:
- Quick & Easy: You can whip up a batch in under 30 minutes—ideal for those spontaneous snack cravings or last-minute guests. (No more anxiously watching the clock!)
- Simple Ingredients: No complicated shopping trips. You likely have eggs, cream cheese, and cream of tartar in your kitchen right now.
- Perfect for Weight Loss: Low in carbs and calories, this recipe fits right into your healthy eating plan without feeling deprived. (Trust me, it’s saved me from reaching for less wholesome snacks more than once.)
- Crowd-Pleaser: Kids love the squishy texture, while adults appreciate the subtle flavor and versatility. Even my “bread is life” friends are always surprised at how satisfying this is.
- Unbelievably Delicious: The texture is so light and airy, you might wonder if you’re eating a savory soufflé or a bread roll. It’s pure, nostalgic comfort—without the guilt.
What sets this cloud bread recipe apart? It all comes down to technique and balance. By carefully separating the eggs and using cream of tartar, you get a structure that holds together but stays soft. Blending the cream cheese until perfectly smooth means no lumps—just silky, fluffy bread that almost floats off the tray.
This isn’t just another “diet bread”—it’s the kind that makes you close your eyes and savor every bite. Whether you’re trying to impress brunch guests (without breaking a sweat) or just want a comforting, healthy snack, this cloud bread delivers. It’s my secret weapon for transforming a simple meal into something memorable—without any stress.
What Ingredients You Will Need
This cloud bread recipe uses simple, wholesome ingredients to deliver a flavor and texture that’s hard to beat. No mystery fillers, no fancy powders—just the good stuff. Here’s what you’ll need to make your own batch of fluffy 3-ingredient cloud bread:
- Large eggs (3, separated) – The real stars here. Eggs give cloud bread its signature rise and structure. I always use the freshest eggs I can find (local if possible), because they whip up fluffiest.
- Cream cheese (3 tablespoons, about 45g, softened) – This adds a gentle tang and creamy richness. Go for full-fat for best flavor, but you can use light cream cheese if you’re watching calories. Make sure it’s at room temperature for easy blending. I sometimes use the Philadelphia brand for a consistent result.
- Cream of tartar (1/4 teaspoon, about 1g) – This humble powder stabilizes the egg whites, so your bread stays cloud-light instead of collapsing. If you don’t have cream of tartar, a few drops of lemon juice will do in a pinch, but the rise won’t be quite as dramatic.
That’s it—just three ingredients! But let’s chat options and troubleshooting, because I’ve been there:
- Eggs: If you only have medium eggs, use four instead of three. For best results, separate while cold but let whites come to room temperature before whipping.
- Cream cheese alternatives: Dairy-free? Swap in plant-based cream cheese. I’ve tried Kite Hill and it works well. Greek yogurt (thick and strained) can work in a pinch, but the bread will be a tad more tangy and less firm.
- Cream of tartar: If you’re out, use 1/2 teaspoon of white vinegar or lemon juice.
Optional adds (not traditional but fun to experiment with):
- Pinch of salt – brings out flavor, especially if you plan to use cloud bread for savory sandwiches.
- Sweetener (like stevia or honey) – for a slightly sweet version (think breakfast treat).
- Herbs or spices (dried oregano, garlic powder, or cinnamon) – to match your favorite flavor vibe.
Honestly, this recipe is so forgiving. Start with the basics, then riff however you like!
Equipment Needed
- Mixing bowls: Two medium-size bowls, one for yolks and one for whites. Glass or metal works best for whipping.
- Electric mixer or stand mixer: A hand mixer is perfect for whipping egg whites to stiff peaks (my trusty handheld has been going strong for years). You can do it by hand with a whisk, but your arm will get a workout!
- Baking sheet: Standard size, lined with parchment paper for easy removal and no sticking. Silicone baking mats are a reusable, eco-friendly option.
- Spatula: For gently folding the yolk mixture into the whites. I like a flexible silicone spatula—it scrapes the bowl clean without popping your lovely meringue bubbles.
- Measuring spoons: Especially for the cream of tartar.
If you don’t own an electric mixer, don’t let it stop you—just use a good old-fashioned wire whisk and a bit of elbow grease. My grandma used to do it that way (and her cloud bread always turned out just fine). As for parchment, I’ve even used lightly greased foil in a pinch. Just be gentle when peeling them off, as cloud bread is delicate.
A quick tip: always wash your mixing bowl and beaters with hot, soapy water and dry well before whipping egg whites. Any leftover grease can keep those peaks from forming!
Preparation Method
- Preheat your oven: Set to 300°F (150°C). Line a baking sheet with parchment paper or a silicone baking mat. This keeps your cloud bread from sticking and makes clean-up a breeze.
- Separate the eggs: Carefully crack 3 large eggs, placing yolks in one bowl and whites in another. (Tip: Separate while eggs are cold for less risk of broken yolks, but let whites come to room temperature—about 10 minutes—for best volume.)
- Prepare the yolk mixture: Add 3 tablespoons (45g) softened cream cheese to the yolks. Beat with a mixer or whisk until smooth, pale, and fully blended—no lumps! If adding any optional sweetener or herbs, mix them in now.
- Whip the egg whites: Add 1/4 teaspoon (1g) cream of tartar to the egg whites. Using clean, dry beaters, beat on high speed until stiff peaks form—about 3-5 minutes. The mixture should look glossy, thick, and hold a peak when you lift the beaters. If you under-whip, the bread will be flat. If over-whipped, the whites get grainy—stop as soon as they look like clouds!
- Fold together: Gently scoop 1/3 of the whipped whites into the yolk mixture to lighten it. Then, add the yolk mixture back into the whites and fold with a spatula, turning the bowl as you go. Don’t stir aggressively—you want to keep as much air as possible! The batter should look even but still fluffy.
- Shape the bread: Spoon the batter onto your lined baking sheet, making 6 even rounds (about 3-4 inches/8-10 cm across). Smooth the tops with the back of a spoon for that classic cloud look. Leave space between each “cloud” so they don’t stick together as they bake.
- Bake: Place in the preheated oven and bake for 20-25 minutes, or until golden brown on top and just set. They will puff up and might crack slightly—totally normal!
- Cool: Remove the tray and let the cloud bread cool on the sheet for 3-5 minutes (they’re fragile when hot). Then, transfer to a wire rack to cool completely. They’ll firm up as they sit.
- Serve or store: Eat warm for ultimate fluffiness, or store for later (see storage tips below).
Troubleshooting: If your cloud bread spreads too much, your whites may not have been whipped enough. If it’s eggy-smelling, try adding a pinch of salt or a splash of vanilla next time. Practice makes perfect—the process is simple, but gentle folding and proper whipping are key!
Personal tip: I like to make a double batch and freeze half. That way, I always have a light, airy snack ready to go!
Cooking Tips & Techniques
If there’s one thing I’ve learned about cloud bread, it’s that little details make a big difference. Here are my best pro tips for the fluffiest results every time:
- Egg whites are everything: Make sure your mixing bowl and beaters are squeaky clean—any grease or yolk will keep the whites from whipping up. I once forgot and ended up with flat, sad “clouds.” Lesson learned.
- Don’t rush the folding: When combining yolk mixture with whipped whites, slow and steady wins the race. Use a “cut, fold, turn” motion with your spatula—this preserves those precious air bubbles.
- Check for stiff peaks: When you lift your beaters out, the peaks should stand tall and not slump over. If in doubt, whip a few seconds more, but don’t go too far—over-whipped whites get chunky and dry.
- Watch your oven: Every oven is a little different. Start checking at 20 minutes—cloud bread should be golden, lightly springy, and just starting to pull away from the parchment.
- Cool before moving: Cloud bread is crazy delicate when hot! Let it cool on the tray before transferring. I’ve lost a few “clouds” to impatience.
- Batch and multitask: Double the recipe for meal prep, or bake while prepping other snacks. These keep well and save you time later.
Remember, every batch gets easier. If your first try isn’t perfect, you’re not alone—I had to tweak my folding technique a few times before I got those picture-perfect clouds. Just keep at it, and enjoy every fluffy, tasty experiment!
Variations & Adaptations
One of the joys of cloud bread is how customizable it is. Here are some fun ways to switch it up:
- Sweet cloud bread: Add 1-2 tablespoons of your favorite sweetener (like stevia, honey, or maple syrup) and a dash of vanilla extract to the yolk mixture. Sprinkle with cinnamon before baking for a breakfast twist.
- Herbed and savory: Mix in dried herbs (rosemary, thyme, or Italian seasoning) and a pinch of garlic powder. Top with sesame or poppy seeds before baking for a faux “bagel” vibe.
- Dairy-free: Substitute plant-based cream cheese (like Kite Hill or Tofutti). I’ve tried both, and the result is just as fluffy—plus, it’s great for those with dairy sensitivities.
- Gluten-free and keto: Cloud bread is naturally gluten-free and low-carb, so it fits into nearly every diet. For extra protein, add a scoop of unflavored whey or pea protein to the yolk mixture.
- Cooking methods: If you want crispier edges, bake at 325°F (163°C) for a little less time. For a softer bread, bake at 275°F (135°C) for 30 minutes.
My personal favorite? A batch with chives mixed into the yolk blend and a sprinkle of flaky salt on top—perfect for sandwiching sliced turkey or smoked salmon!
If you’re baking for allergies, always check your cream cheese label for hidden dairy or nut ingredients. Cloud bread is super forgiving, so feel free to experiment and make it your own.
Serving & Storage Suggestions
Cloud bread is best enjoyed fresh and slightly warm, but it’s also a champ when it comes to meal prep. Here’s how I like to serve and store it:
- Serving ideas: Serve as “bread” for sandwiches, with avocado and tomato, or as a base for mini pizzas (just add sauce and cheese, broil for a minute). For a sweet treat, top with nut butter and berries.
- Temperature: Room temperature or lightly warmed in the microwave (about 10 seconds) works great. Too hot and it gets rubbery, so go easy.
- Presentation: Stack on a pretty plate for brunch, or wrap in parchment for a lunchbox surprise. Cloud bread is eye-catching on any table—those golden tops practically beg for a photo.
- Storage: Store in an airtight container at room temp for 2 days, or in the fridge for up to 5 days. Layer parchment between pieces to prevent sticking.
- Freezing: Freeze between layers of parchment in a zip-top bag. Thaw at room temp or microwave gently (just 10-15 seconds).
- Flavor over time: The flavor deepens a bit after a day, but the texture may get slightly chewier—just toast or warm for best results.
Honestly, I like to keep a stash in the freezer for snack emergencies. It’s one of those recipes that adapts to your routine!
Nutritional Information & Benefits
For those keeping track, here’s the lowdown: each piece of cloud bread (when making 6 rounds) has about 35-40 calories, 2g protein, 2g fat, and less than 1g carbs. That’s pretty fantastic for anyone on a weight loss, keto, or gluten-free journey.
Eggs provide high-quality protein and important nutrients like choline and B vitamins. Cream cheese adds a touch of calcium and healthy fat. There’s no added sugar or flour, so it’s naturally gluten-free and low-carb—great for diabetes-friendly or paleo eating plans.
Potential allergens: contains eggs and dairy (but see substitutions above for dairy-free). As someone who’s always looking for lighter snack options, I love that cloud bread lets me satisfy my cravings without feeling weighed down. It’s truly a “have your cake and eat it too” kind of recipe!
Conclusion
If you’re searching for a snack that’s light, airy, and practically guilt-free, this fluffy 3-ingredient cloud bread is a must-try. It’s simple enough for even the busiest weekday but special enough to wow your family or brunch guests. I love how versatile it is—whether I’m in the mood for something savory or sweet, cloud bread fits the bill.
Don’t be afraid to experiment and find your favorite flavor combos. I hope you’ll fall in love with this recipe as much as I have—there’s just something magical about seeing those little “clouds” puff up in the oven. If you try it, leave a comment below, share your tweaks, or snap a photo for Pinterest! Happy baking, and may every bite bring you a bit of joy and lightness.
Frequently Asked Questions about Cloud Bread
How do I keep my cloud bread from deflating?
Be sure to whip the egg whites to stiff peaks and gently fold them into the yolk mixture. Avoid overmixing, and let the bread cool before moving so it sets properly.
Can I make cloud bread ahead of time?
Yes! Store in an airtight container in the fridge for up to 5 days or freeze for up to a month. Reheat gently in the microwave for best texture.
Is cloud bread good for sandwiches?
Absolutely. It’s sturdy enough for light sandwiches—think turkey, cheese, or avocado—but so light you’ll want to go easy on heavy fillings.
Can I make cloud bread dairy-free?
Yes! Substitute dairy-free cream cheese (like Kite Hill or Tofutti) for traditional cream cheese. The texture stays fluffy and delicious.
Why does my cloud bread taste eggy?
A mild egg flavor is normal, but adding a pinch of salt, a dash of vanilla, or even some herbs can help balance it. Chilling before eating also helps mellow the flavor.
Pin This Recipe!
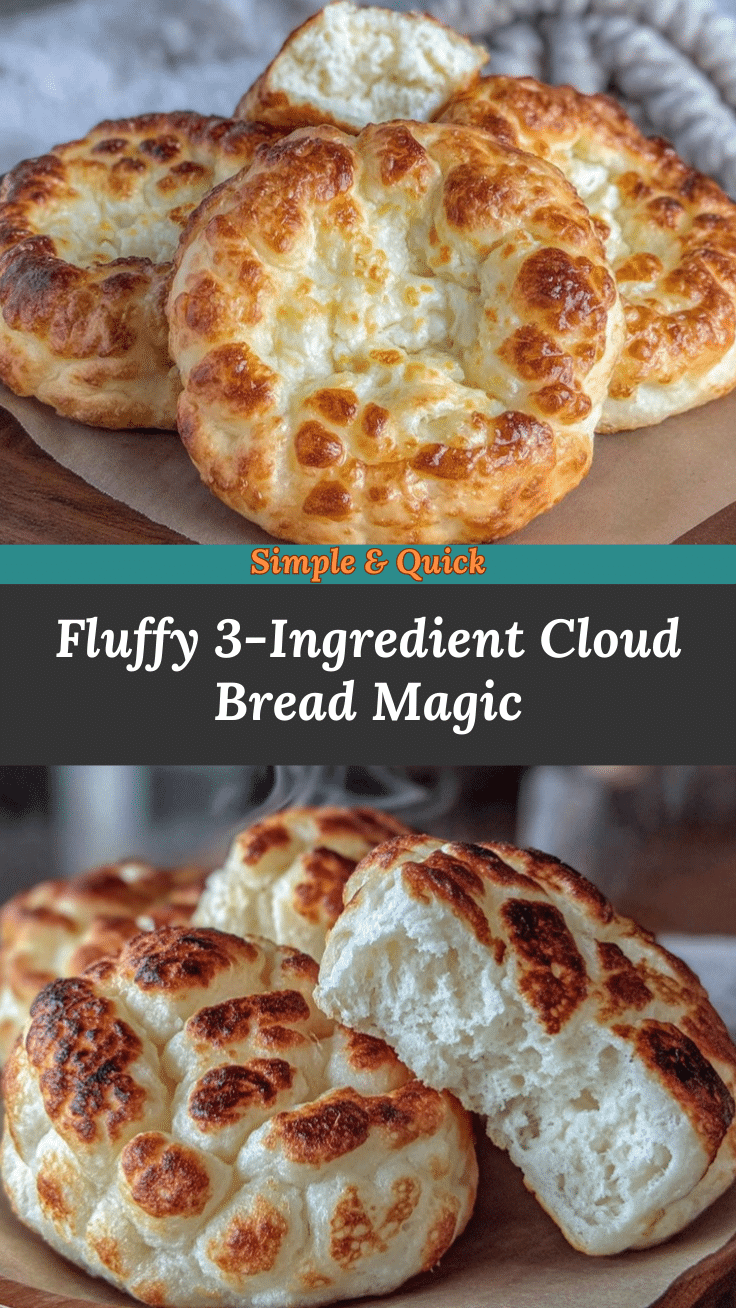

Cloud Bread Recipe: Easy 3-Ingredient Fluffy Snack for Weight Loss
- Total Time: 30-35 minutes
- Yield: 6 pieces 1x
Description
This easy cloud bread recipe uses just three ingredients to create a light, fluffy, and low-carb snack that’s perfect for weight loss or healthy eating. It’s naturally gluten-free, keto-friendly, and comes together in under 30 minutes for a guilt-free treat.
Ingredients
- 3 large eggs, separated
- 3 tablespoons (about 45g) cream cheese, softened
- 1/4 teaspoon cream of tartar
Instructions
- Preheat your oven to 300°F (150°C). Line a baking sheet with parchment paper or a silicone baking mat.
- Carefully separate 3 large eggs, placing yolks in one bowl and whites in another. Let the whites come to room temperature for about 10 minutes.
- Add 3 tablespoons softened cream cheese to the yolks. Beat with a mixer or whisk until smooth and fully blended. Mix in any optional sweetener or herbs if desired.
- Add 1/4 teaspoon cream of tartar to the egg whites. Using clean, dry beaters, beat on high speed until stiff peaks form (about 3-5 minutes).
- Gently scoop 1/3 of the whipped whites into the yolk mixture to lighten it. Then, add the yolk mixture back into the whites and fold with a spatula until just combined and fluffy.
- Spoon the batter onto the lined baking sheet, making 6 even rounds (about 3-4 inches across). Smooth the tops and leave space between each.
- Bake for 20-25 minutes, or until golden brown on top and just set.
- Remove from the oven and let cool on the sheet for 3-5 minutes, then transfer to a wire rack to cool completely.
- Serve warm or store as desired.
Notes
For best results, make sure your mixing bowls and beaters are completely clean and dry before whipping egg whites. Gently fold the mixtures to keep the batter airy. Optional: Add a pinch of salt, sweetener, or herbs for flavor variations. Store in an airtight container at room temperature for 2 days, in the fridge for up to 5 days, or freeze for up to a month.
- Prep Time: 10 minutes
- Cook Time: 20-25 minutes
- Category: Snack
- Cuisine: American
Nutrition
- Serving Size: 1 piece (1/6 of reci
- Calories: 3540
- Sugar: 0.5
- Sodium: 60
- Fat: 2
- Saturated Fat: 1
- Carbohydrates: 1
- Protein: 2
Keywords: cloud bread, low carb bread, keto bread, gluten free snack, weight loss snack, easy bread, 3 ingredient bread, healthy snack, fluffy bread, egg bread
