

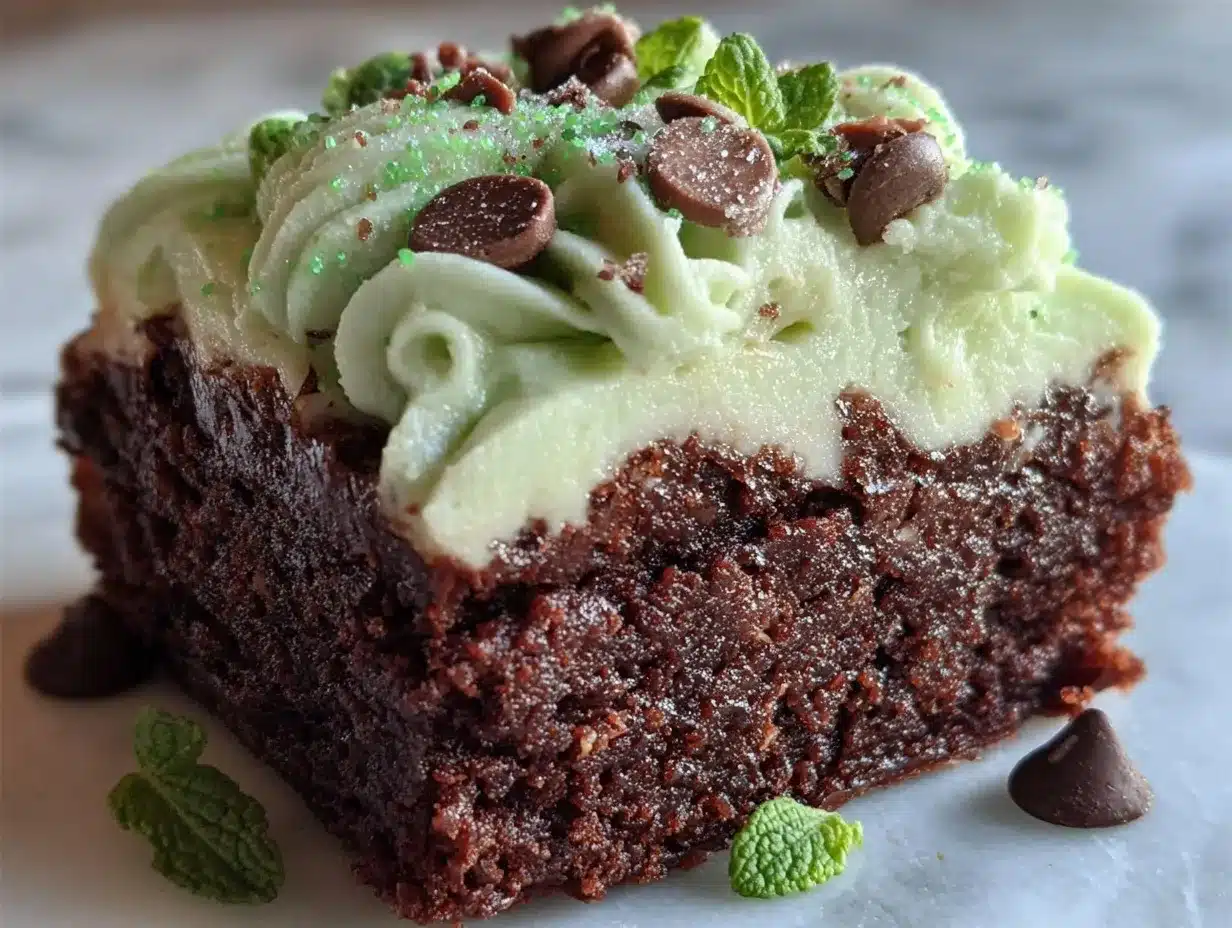
Imagine this: the rich aroma of fudgy chocolate swirling with cool, sweet mint frosting drifting through your kitchen, practically begging you to grab a fork before the brownies have even cooled. That first bite? It’s like biting into a chocolatey cloud, topped with a creamy layer of mint that makes you close your eyes and hum with happiness. Honestly, the green swirl of frosting isn’t just festive—it’s the kind of irresistible treat that makes your kitchen the happiest spot on the block.
The first time I made these St. Patrick’s Mint Frosted Brownie Squares, I was trying to recreate a memory from a childhood bake sale. My grandma used to bring a plate of chocolate-mint treats every March, and the pan would always disappear before you could even blink. I was knee-high to a grasshopper back then, but I still remember the way my cousins and I would race for the corners (frosting piled a little higher there, you know?). When I finally nailed this recipe, it was one of those moments—a deep breath, a goofy smile, and the realization that I’d found something truly special. I can’t help but wish I’d cracked the code years ago.
Let’s face it, these brownies are dangerously easy to make. My family couldn’t stop sneaking them off the cooling rack (I’m pretty sure a few “quality control” pieces vanished before I even got the frosting on). They’re pure, nostalgic comfort with a playful twist—perfect for St. Patrick’s Day parties, birthday potlucks, or just brightening up your Pinterest board with that pop of green. In the name of research (and maybe a little self-indulgence), I’ve tested this recipe more times than I can count. It’s become a staple for family gatherings, gifting, and those cozy nights when you need a little something sweet that feels like a warm hug. Trust me, you’re going to want to bookmark this one.
Why You’ll Love These St. Patrick’s Mint Frosted Brownie Squares
When you want a dessert that everyone raves about, these mint frosted brownie squares are the answer. I’ve made dozens of brownie recipes over the years (some flops, some keepers), and this one checks every box for flavor, texture, and visual wow-factor. Here’s why you’ll find yourself reaching for this recipe again and again:
- Quick & Easy: They come together in less than an hour, so you can whip them up on a busy weeknight or satisfy that last-minute sweet tooth before guests arrive.
- Simple Ingredients: No wild shopping trips or specialty stores required—you probably have everything you need in your pantry right now.
- Perfect for Celebrations: These are my go-to for St. Patrick’s Day, but they’re just as fun for birthdays, bake sales, or “just because” days when you want a treat.
- Crowd-Pleaser: Kids and adults both go wild for that classic chocolate-mint combo, and that eye-catching layer of green frosting never fails to get a “wow!”
- Unbelievably Delicious: The brownies are fudgy (not cakey), the frosting is smooth and creamy, and the hit of mint is perfectly balanced—not toothpastey, just cool and refreshing.
What sets this recipe apart? It’s all about the little things: using melted butter for that dense, chewy crumb; a touch of espresso powder to amplify the chocolate; whipping the mint frosting until it’s cloud-light. I’ve tried everything from boxed mixes to fancy double-boilers, but this method is foolproof. The mint layer is dreamy and soft, but won’t slide off or get greasy—thanks to a trick I picked up from a pastry chef friend (more on that in the tips section!). This recipe isn’t just good—it’s the kind that makes you pause, close your eyes, and savor every bite.
If you want a treat that feels special but doesn’t require fancy skills, this is the one. It’s comfort food, made just a bit more magical. These brownies will make you the hero of any gathering, and you don’t need a culinary degree to pull them off. Bake them for the people you love, or just for yourself on a rainy day—either way, you’ll be hooked after the first bite.
What Ingredients You Will Need
This recipe uses simple, wholesome ingredients to deliver bold flavor and that signature minty swirl—no complicated steps, just pantry staples with a few festive touches. Here’s what you’ll need for your St. Patrick’s Mint Frosted Brownie Squares:
For the Brownie Base
- 1 cup (227 g) unsalted butter, melted and slightly cooled
- 2 cups (400 g) granulated sugar
- 4 large eggs, room temperature
- 1 tablespoon pure vanilla extract (I love Nielsen-Massey for big flavor)
- 1 cup (80 g) unsweetened cocoa powder (Dutch-process or natural both work)
- 1 cup (125 g) all-purpose flour (swap with gluten-free blend if needed)
- 1/2 teaspoon salt
- 1/2 teaspoon instant espresso powder (optional, but deepens the chocolate)
For the Mint Frosting
- 1/2 cup (113 g) unsalted butter, softened
- 2 cups (240 g) powdered sugar, sifted
- 2-3 tablespoons whole milk (or dairy-free alt if needed)
- 1 1/2 teaspoons pure peppermint extract (not spearmint—there’s a difference!)
- Green gel food coloring (a few drops, optional but fun)
- Pinch of salt
For the Chocolate Ganache
- 1 cup (170 g) semisweet chocolate chips or chopped chocolate
- 1/2 cup (120 ml) heavy cream
- 1 tablespoon unsalted butter (for gloss and smoothness)
Ingredient Tips & Substitutions
- Butter: Real butter brings the best flavor, but you can use a vegan alternative for dairy-free brownies.
- Flour: For gluten-free brownies, swap in a 1:1 gluten-free baking flour. I’ve had great results with Bob’s Red Mill.
- Peppermint Extract: Make sure it’s peppermint, not mint or spearmint—those can taste a bit like toothpaste.
- Food Coloring: Gel works best for vivid color, but you can skip it for a natural look.
- Chocolate Chips: Use high-quality chocolate for the ganache—I love Ghirardelli or Guittard.
You can switch things up depending on what you have. I’ve used coconut milk in the frosting for a dairy-free version, and swapped in almond flour for friends who can’t do gluten. These brownies are super forgiving—just keep the ratios about the same and you’ll be golden.
Equipment Needed
You don’t need a fancy kitchen or loads of gadgets for these brownies. Here’s what I use every time (and a few budget swaps if you need them):
- 9×13-inch (23×33 cm) baking pan – Metal pans bake more evenly, but glass works in a pinch; just watch the baking time.
- Parchment paper – Makes removing and cutting the brownies a breeze (no stuck-on bits!).
- Large mixing bowls – One for the brownies, one for the frosting.
- Whisk and sturdy spatula – I use a hand whisk for the brownie batter, and a silicone spatula to scrape every last bit.
- Electric hand mixer or stand mixer – For that fluffy mint frosting. You can use a whisk, but it’s a workout!
- Small saucepan or microwave-safe bowl – For melting the ganache.
- Offset spatula or butter knife – For frosting and swirling the layers nice and smooth.
- Sharp knife – For clean, bakery-style squares. A plastic knife actually works great for cutting sticky brownies!
Don’t have a mixer? No worries—just beat the frosting by hand with a wooden spoon until it’s smooth. For the ganache, I usually use a glass bowl and microwave in 20-second bursts (less mess, fewer dishes). And if you’re like me and always losing your parchment, a little extra buttering of the pan works too—just expect to use a spatula for serving.
How to Make St. Patrick’s Mint Frosted Brownie Squares
- Preheat and Prep: Preheat your oven to 350°F (175°C). Line a 9×13-inch (23×33 cm) baking pan with parchment paper, leaving a bit of overhang for easy lifting. Lightly grease the paper and sides with butter or nonstick spray. This step is crucial—no one likes stuck brownies!
- Make the Brownie Batter: In a large bowl, whisk together 1 cup (227 g) melted butter and 2 cups (400 g) sugar until glossy and combined (about 1 minute). Add 4 large eggs, one at a time, whisking well after each addition. Stir in 1 tablespoon vanilla extract.
- Dry Ingredients: Sift in 1 cup (80 g) cocoa powder, 1 cup (125 g) flour, 1/2 teaspoon salt, and 1/2 teaspoon instant espresso powder (if using). Gently fold everything together with a spatula until just combined. Don’t overmix—just until you can’t see flour streaks.
- Bake: Pour the batter into your prepared pan and smooth the top. Bake for 25-30 minutes, or until a toothpick comes out with moist crumbs (not wet batter). If your oven runs hot, check at 24 minutes. The brownies will set as they cool, so don’t overbake.
- Cool Completely: This is the hardest part! Let brownies cool in the pan on a wire rack for at least 1 hour (or they’ll melt the frosting). If you’re impatient, pop the pan in the fridge for 20 minutes.
- Prepare the Mint Frosting: In a medium bowl, beat 1/2 cup (113 g) butter until creamy. Gradually add 2 cups (240 g) sifted powdered sugar, beating on low speed. Add 2 tablespoons milk, 1 1/2 teaspoons peppermint extract, a pinch of salt, and a few drops of green food coloring. Beat on medium-high until fluffy and spreadable, 2-3 minutes. If it’s too thick, add another tablespoon of milk.
- Frost the Brownies: Spread the mint frosting evenly over the cooled brownies. Use an offset spatula for swoops and swirls. Chill in the fridge for 20 minutes to set the frosting (it’ll make spreading the ganache easier).
- Make the Chocolate Ganache: In a small saucepan or microwave, heat 1/2 cup (120 ml) heavy cream until steaming (not boiling). Pour over 1 cup (170 g) chocolate chips and 1 tablespoon butter in a heatproof bowl. Let sit for 2 minutes, then stir until smooth and glossy. If needed, microwave in 10-second bursts to melt fully.
- Top and Chill: Pour the ganache over the frosted brownies, gently tilting the pan to cover the surface. Chill the pan in the fridge for at least 30 minutes, until set. (Overnight is fine if you want to make ahead!)
- Slice and Serve: Lift the brownies out using the parchment sling. Use a sharp or plastic knife for clean cuts (wipe between slices for bakery-perfect squares). Serve slightly chilled or at room temp—either way, they’re dreamy!
Troubleshooting: If your frosting is too runny, add more powdered sugar. If the ganache is too thick, zap in the microwave for a few seconds or add a splash of cream. Don’t stress if the layers aren’t perfect—they’ll still taste amazing. My secret for neat lines? Chill between each layer and use a hot, dry knife for slicing. You’ve got this!
Cooking Tips & Techniques
- Don’t Overbake: Brownies should be just set in the center. If you wait for a clean toothpick, they’ll end up dry. I always pull them when there are a few moist crumbs—trust me, they firm up as they cool.
- Room Temperature Ingredients: Cold eggs or butter can make the batter seize. I set my eggs out while preheating the oven (or soak them in warm water for a few minutes if I forget).
- Frosting Consistency: If the frosting is stiff, add milk a teaspoon at a time. If it’s too loose, add a bit more powdered sugar. You want it spreadable, not runny.
- Ganache Gloss: For that shiny, bakery-style ganache, always add a touch of butter. I learned this trick after a few sad, dull attempts in the past.
- Cutting Clean Squares: Chill the brownies after ganache sets. Use a hot knife (run under hot water and wipe dry between cuts). This gets you those perfect, Pinterest-worthy squares every time.
- Multitasking: While the brownies bake, prep your frosting. While the frosting sets, make the ganache. This way, you’re never just waiting around.
- Recovery Tip: If your ganache splits (looks oily), stir in a tablespoon of cold milk and whisk like crazy. It usually comes back together!
Don’t stress about perfection—the layers might not be perfectly even, but the taste makes up for it. My first batch? The frosting swirled into the ganache, and they still disappeared before dinner. Experience has taught me that patience (and not skimping on the chilling time) is key. And hey, if you sneak a bite before they’re fully set, I won’t tell.
Variations & Adaptations
One of my favorite things about these St. Patrick’s Mint Frosted Brownie Squares is how easy they are to customize. Here are a few ways to make them your own:
- Gluten-Free: Swap the all-purpose flour for a 1:1 gluten-free baking mix. I’ve had great results with King Arthur and Bob’s Red Mill blends—no one notices the difference.
- Dairy-Free: Use plant-based butter (like Earth Balance) in both the brownies and frosting, and coconut cream for the ganache. Almond milk works in the frosting, too.
- Flavor Twist: Add orange zest to the brownie batter for a chocolate-orange-mint treat, or swap the peppermint extract for almond or coconut extract for something totally different.
- Holiday Swap: For Christmas, tint the frosting pink or red and sprinkle crushed candy canes on top. For Halloween, go with purple or orange frosting and spooky sprinkles.
- Nutty Version: Fold 1/2 cup (60 g) chopped walnuts or pecans into the brownie batter for crunch.
Personal favorite? I once swapped the ganache for a layer of melted white chocolate and added a sprinkle of matcha powder for an earthy green vibe. The possibilities are endless. If you need to avoid eggs, try using a flax egg substitute (1 tablespoon ground flaxseed + 3 tablespoons water per egg)—just know the texture will be a bit fudgier. Allergic to mint? Try vanilla or coconut extract in the frosting for a sweet, mild alternative. These brownies are a blank canvas for your creativity!
Serving & Storage Suggestions
The best way to serve these St. Patrick’s Mint Frosted Brownie Squares is chilled or at cool room temperature (the layers stay neat, and the flavors really pop). Arrange them on a cute platter, scatter with green sprinkles or mini shamrock candies, and watch them disappear. They pair beautifully with a mug of hot cocoa, Irish coffee, or just a tall glass of cold milk.
For storage, pop any leftovers in an airtight container and refrigerate—they’ll stay fresh for up to 5 days (if they last that long!). If you want to freeze them, slice first and layer with parchment in a freezer-safe box. Thaw in the fridge overnight or at room temp for 1-2 hours. To keep the ganache glossy, avoid microwaving—just let the brownies come to temp naturally.
Over time, the mint flavor actually gets a little stronger, which is a delicious bonus. I like to stash a few squares in the back of the fridge “for later”—they’re a perfect pick-me-up with coffee the next morning. If you’re serving for a party, cut the brownies into smaller bite-sized squares for easy snacking. Trust me, everyone will want seconds!
Nutritional Information & Benefits
Each brownie square (based on 24 servings) has approximately 240 calories, 12g fat, 32g carbohydrates, and 2g protein. (These numbers are estimates and can vary based on brands and substitutions.)
The good news: cocoa powder brings a dose of antioxidants, and the recipe is naturally nut-free (unless you add some!). For gluten-free or dairy-free diets, just adjust as noted above. If you’re watching sugar, use a sugar substitute suitable for baking; just know the texture may change a bit. This recipe does contain eggs and dairy, so those with allergies should consult the ingredient list closely.
From a wellness perspective, I see these brownies as a treat—something to savor and share. They bring joy, and to me, that’s part of a balanced life. If you want to lighten things up, use reduced-fat butter or swap half the sugar for a sweetener like Swerve. But honestly, a little dessert happiness goes a long way!
Conclusion
So, why not treat yourself and your loved ones to these St. Patrick’s Mint Frosted Brownie Squares? They’re easy, festive, and absolutely full of that chocolate-mint magic we all crave this time of year. Whether you make them for a big party or a quiet night in, they’re the kind of dessert that sparks joy (and maybe a little friendly competition for the last piece).
Don’t be afraid to make them your own—tweak the flavors, swap the colors, or add your favorite sprinkles. That’s the beauty of baking at home. Personally, I love how these bring back memories of childhood and create new ones every time I share them. If you try this recipe, I’d love to hear how it went—leave a comment, share your photos, or let me know your favorite twist!
Here’s to a dessert that’s as delightful to eat as it is to make. Grab your apron, gather your ingredients, and get ready for a little kitchen magic. Happy baking—and may the luck of the Irish be with you!
Frequently Asked Questions About St. Patrick’s Mint Frosted Brownie Squares
Can I make these brownies ahead of time?
Absolutely! You can bake and frost the brownies a day ahead, then add the ganache just before serving if you want it extra glossy. Store in the fridge until you’re ready to slice and serve.
How do I make these brownies gluten-free?
Just use a 1:1 gluten-free baking flour blend in place of the all-purpose flour. I’ve had great results with both King Arthur and Bob’s Red Mill gluten-free mixes.
What if I don’t have peppermint extract?
You can substitute with vanilla extract for a classic flavor, or try almond or coconut extract for a fun twist. Just know the signature “shamrock” mint vibe will be missing!
Can I freeze these brownies?
Yes! Slice them first, then layer with parchment in a freezer-safe container. They keep well for up to 2 months. Thaw in the fridge overnight or at room temp before serving.
What’s the best way to get clean, bakery-style slices?
Chill the brownies until firm, then use a hot, dry knife (run under hot water and wipe between cuts). This helps you get sharp lines and keeps the layers neat—perfect for showing off that green mint frosting!
Pin This Recipe!
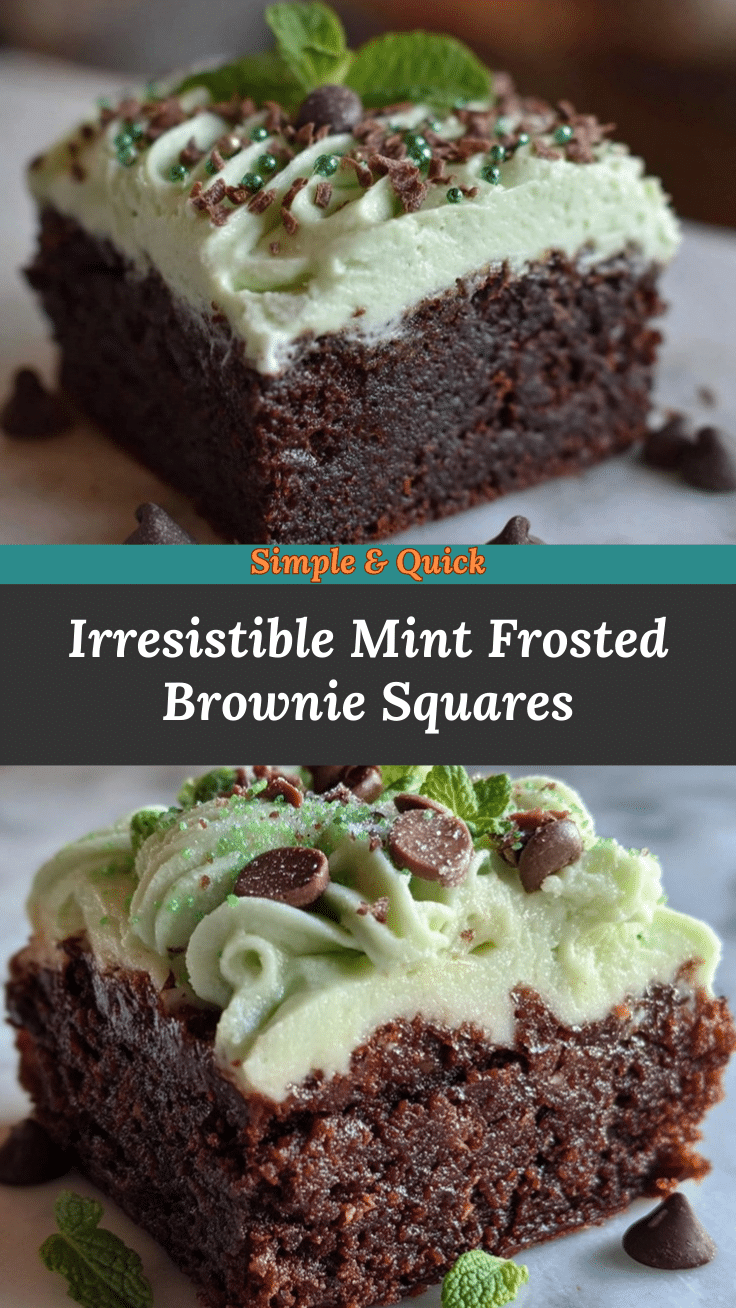

St. Patrick’s Mint Frosted Brownie Squares
- Total Time: 1 hour 20 minutes
- Yield: 24 squares 1x
Description
Fudgy chocolate brownies topped with a creamy, cool mint frosting and a glossy chocolate ganache—these festive squares are easy to make and perfect for St. Patrick’s Day or any celebration. The classic chocolate-mint combo is a guaranteed crowd-pleaser with bakery-style looks and nostalgic flavor.
Ingredients
- 1 cup (227 g) unsalted butter, melted and slightly cooled
- 2 cups (400 g) granulated sugar
- 4 large eggs, room temperature
- 1 tablespoon pure vanilla extract
- 1 cup (80 g) unsweetened cocoa powder (Dutch-process or natural)
- 1 cup (125 g) all-purpose flour
- 1/2 teaspoon salt
- 1/2 teaspoon instant espresso powder (optional)
- 1/2 cup (113 g) unsalted butter, softened
- 2 cups (240 g) powdered sugar, sifted
- 2–3 tablespoons whole milk (or dairy-free alternative)
- 1 1/2 teaspoons pure peppermint extract
- Green gel food coloring (a few drops, optional)
- Pinch of salt
- 1 cup (170 g) semisweet chocolate chips or chopped chocolate
- 1/2 cup (120 ml) heavy cream
- 1 tablespoon unsalted butter
Instructions
- Preheat your oven to 350°F (175°C). Line a 9×13-inch baking pan with parchment paper, leaving overhang for easy lifting. Lightly grease the paper and sides.
- In a large bowl, whisk together melted butter and sugar until glossy and combined (about 1 minute). Add eggs one at a time, whisking well after each. Stir in vanilla extract.
- Sift in cocoa powder, flour, salt, and espresso powder (if using). Gently fold together with a spatula until just combined—do not overmix.
- Pour batter into prepared pan and smooth the top. Bake for 25-30 minutes, or until a toothpick comes out with moist crumbs. Do not overbake.
- Let brownies cool completely in the pan on a wire rack for at least 1 hour (or chill in the fridge for 20 minutes).
- For the frosting: In a medium bowl, beat softened butter until creamy. Gradually add powdered sugar, beating on low. Add 2 tablespoons milk, peppermint extract, a pinch of salt, and green food coloring. Beat on medium-high until fluffy and spreadable, 2-3 minutes. Add more milk if needed.
- Spread mint frosting evenly over cooled brownies. Chill in the fridge for 20 minutes to set.
- For the ganache: Heat heavy cream in a small saucepan or microwave until steaming (not boiling). Pour over chocolate chips and 1 tablespoon butter in a heatproof bowl. Let sit 2 minutes, then stir until smooth and glossy. Microwave in 10-second bursts if needed.
- Pour ganache over frosted brownies, tilting pan to cover. Chill in fridge at least 30 minutes, until set.
- Lift brownies out using parchment. Slice with a sharp or plastic knife, wiping between cuts for clean squares. Serve chilled or at room temperature.
Notes
For best results, chill brownies between each layer for clean lines. Use room temperature ingredients for a smooth batter and frosting. If making gluten-free or dairy-free, substitute as noted. For bakery-style slices, use a hot, dry knife. Brownies can be made ahead and freeze well.
- Prep Time: 20 minutes
- Cook Time: 30 minutes
- Category: Dessert
- Cuisine: American
Nutrition
- Serving Size: 1 square
- Calories: 240
- Sugar: 24
- Sodium: 80
- Fat: 12
- Saturated Fat: 7
- Carbohydrates: 32
- Fiber: 2
- Protein: 2
Keywords: brownies, mint, St. Patrick's Day, chocolate, dessert, ganache, easy brownies, frosted brownies, festive dessert
