
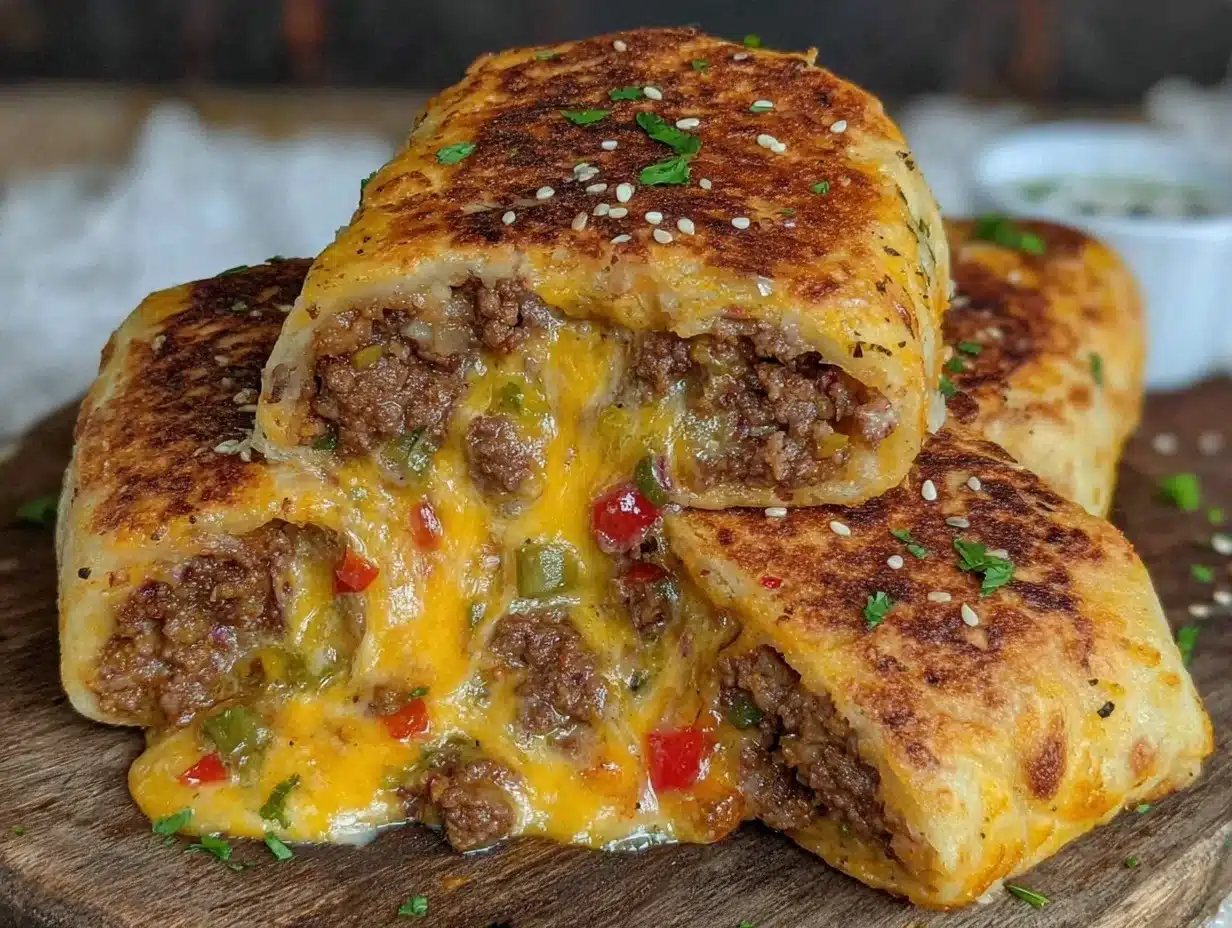
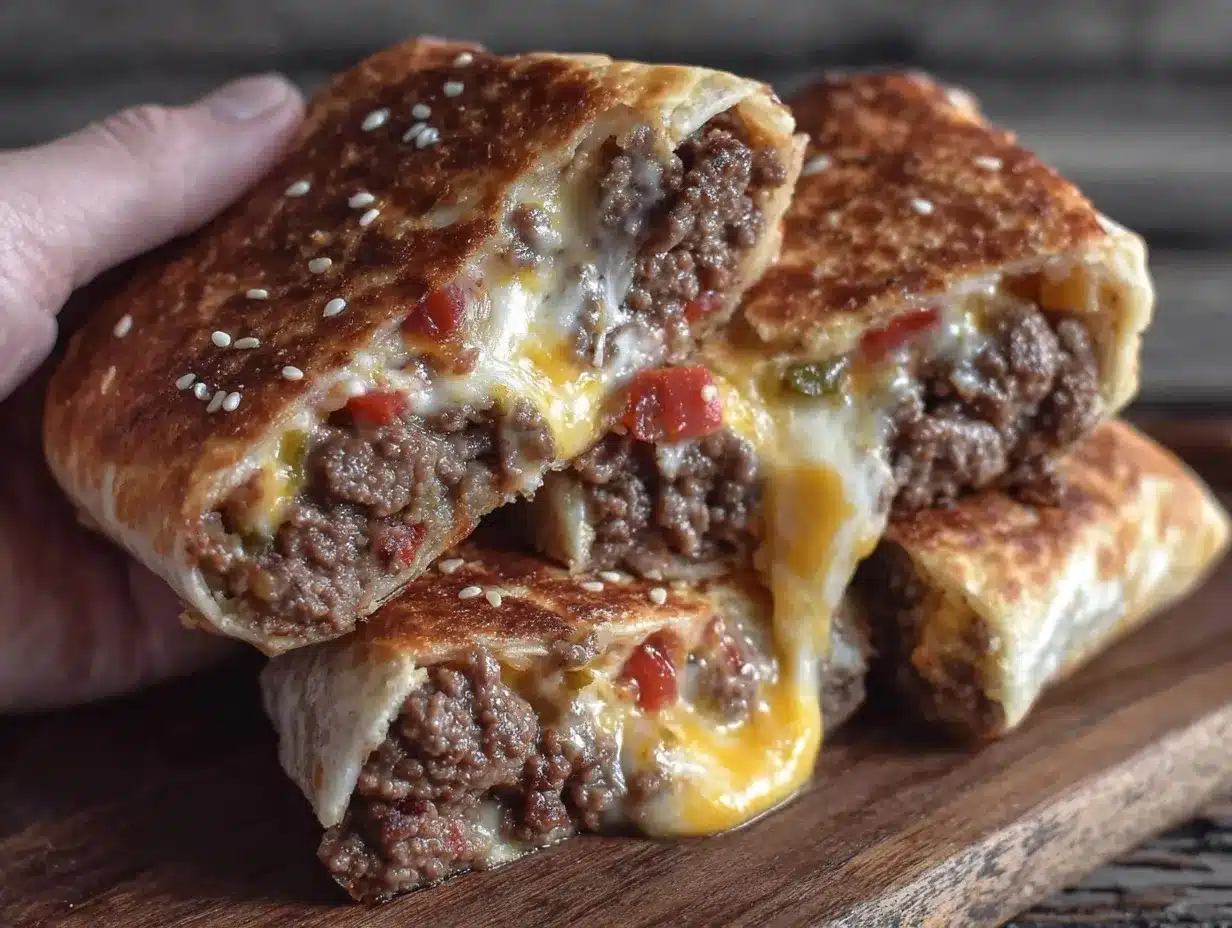
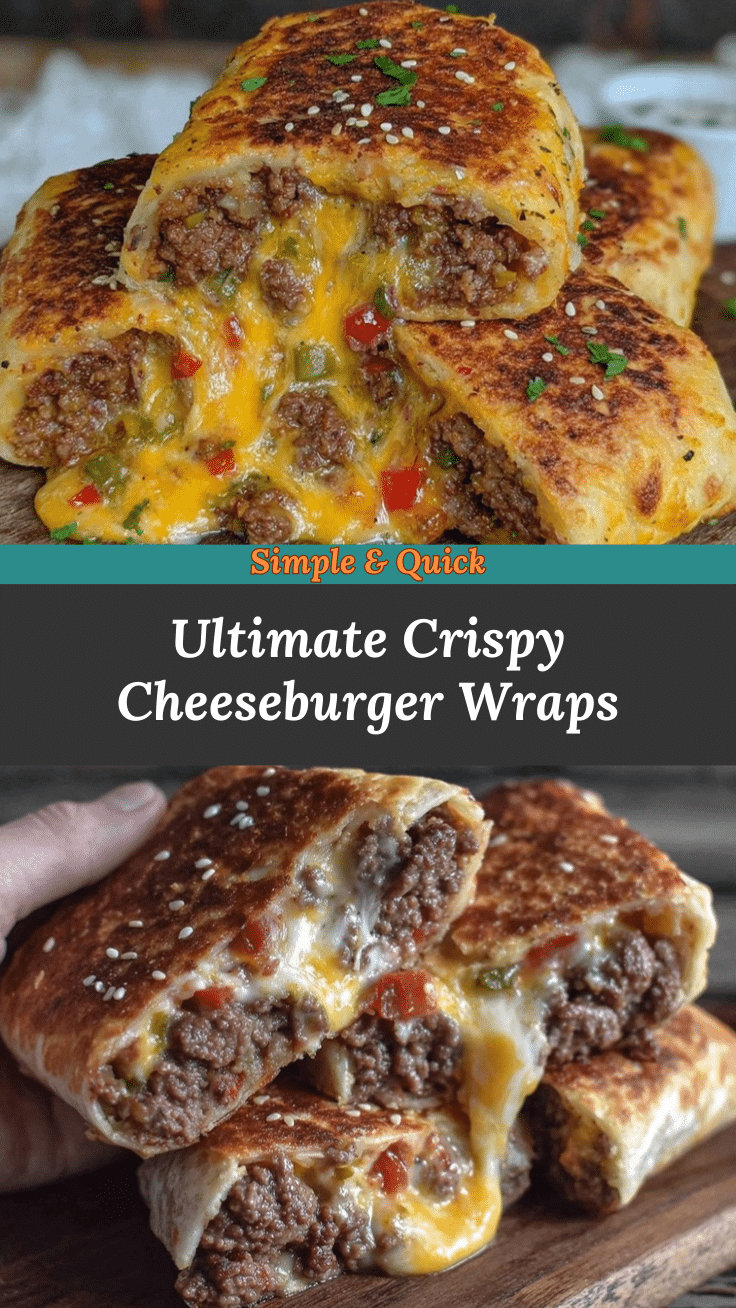
Let me just say, when the sizzling aroma of ground beef, onions, and melting cheddar fills the kitchen, it’s practically impossible to wait for these Crispy Super Bowl Cheeseburger Wraps to cool off. The first time I tried wrapping up all the classic cheeseburger flavors and frying them until golden brown, I knew I’d stumbled on something seriously addictive. Picture biting into a crunchy tortilla, then hitting that juicy, cheesy center—honestly, it’s the kind of snack that makes you pause mid-bite, look around, and just grin because you’ve hit a home run for game day.
Years ago, when I was knee-high to a grasshopper, my grandma used to host Super Bowl parties with giant platters of sliders and homemade potato chips. Those memories stuck with me, and now, every time I make these cheeseburger wraps, I’m channeling that pure, nostalgic comfort. I first whipped up a batch to impress my friends on a rainy Sunday (the kind where you really don’t want to fuss with a grill). I wish I’d discovered this trick years ago—no more running in and out, flipping burgers while missing the big plays!
The real test? My family couldn’t stop sneaking them off the cooling rack. And you know what? I can’t blame them. These wraps are dangerously easy and downright craveable. Whether you’re looking to add some irresistible crunch to your Pinterest feed or serve up the ultimate game day snack, these cheeseburger wraps hit the mark. I’ve made them more times than I can count—in the name of research, of course—and now they’re a staple for family gatherings, last-minute potlucks, and even gifting to hungry neighbors. Trust me, if you love crispy snacks that feel like a warm hug, you’re going to want to bookmark this one.
Why You’ll Love This Recipe
Let’s face it—everyone wants a game day snack that’s quick, easy, and a guaranteed crowd-pleaser. These Crispy Cheeseburger Wraps check all the boxes, and after testing them for countless gatherings, I can say with confidence they’re a winner for both flavor and convenience. Here’s why you’ll fall head over heels for this recipe:
- Quick & Easy: You can whip these up in under 40 minutes, so there’s no stress about missing any of the action. Perfect for busy weeknights or surprise guests.
- Simple Ingredients: No fancy shopping required—most of what you need is probably already in your fridge and pantry.
- Perfect for Game Day: These wraps are made for sharing. They’re easy to pick up and dunk, making them a top choice for Super Bowl parties, movie nights, or any casual get-together.
- Crowd-Pleaser: Kids and adults go wild for these. My picky nephew even asked for seconds (that’s a big deal in our house).
- Unbelievably Delicious: The crispy shell, gooey cheese, and savory beef filling are next-level comfort food. It’s like the best parts of a cheeseburger, minus the mess.
What makes these cheeseburger wraps stand out? For starters, the beef is cooked with onions, garlic, and a splash of Worcestershire sauce for depth of flavor. The wraps themselves get a double-cheese hit—inside and out. Unlike basic cheeseburger pockets, frying (or air-frying!) the wraps makes them shatteringly crisp, just like a good egg roll. I’ve experimented with oven-baking, but nothing beats that crunch.
If you’re like me and want a snack that’s satisfying but not greasy, this recipe nails it. It’s comfort food, but lighter and faster. You get all the classic flavors—savory beef, sharp cheddar, tangy pickles—without the hassle of grilling and assembling burgers. These wraps are perfect for impressing guests without breaking a sweat, or just treating yourself to something special during the big game. Trust me, you’ll want to add these to your party playbook!
What Ingredients You Will Need
This recipe uses simple, wholesome ingredients for bold cheeseburger flavor and a satisfyingly crunchy texture. The best part? No weird stuff—just everyday staples you can grab at any grocery store, and plenty of room for swapping if you want to customize.
- For the filling:
- 1 lb (450g) ground beef (80/20 blend recommended for juiciness)
- 1 small onion, diced (adds sweet-savory depth)
- 2 cloves garlic, minced
- 1 tablespoon Worcestershire sauce (for umami richness)
- 1 teaspoon kosher salt
- 1/2 teaspoon freshly ground black pepper
- 1/2 cup (120g) dill pickles, chopped (or bread & butter pickles for sweeter flavor)
- 1/2 cup (120g) ketchup (classic burger taste)
- 2 tablespoons yellow mustard
- For the wraps:
- 8 large flour tortillas (10-inch/25cm; use whole wheat for extra fiber or gluten-free if needed)
- 2 cups (200g) shredded cheddar cheese (I like Tillamook for extra sharpness, but mild works too)
- 2 tablespoons vegetable oil (for frying; swap in olive oil or use an air fryer for less oil)
- For serving (optional but recommended):
- Extra ketchup and mustard (for dipping)
- Chopped lettuce, tomatoes, or sliced jalapeños
- Hot sauce or ranch dressing
If you want to mix things up, swap ground beef for ground turkey or plant-based meat. You can add bacon bits or sautéed mushrooms for a heartier filling. For cheese, pepper jack or mozzarella add a different kick. In summer, fresh-picked tomatoes make the wraps super juicy. I usually keep a jar of pickled jalapeños handy for spicing things up—just toss a few into the filling. If you’re watching carbs, use low-carb tortillas. There’s plenty of room to riff, so make it your own.
Equipment Needed
You don’t need a chef’s arsenal to pull off these crispy cheeseburger wraps—just a few trusty tools and maybe a backup plan or two.
- Large skillet (nonstick or cast iron; cast iron gives the best browning on the beef)
- Wooden spoon or spatula (for breaking up ground beef and mixing the filling)
- Cutting board and sharp knife (for dicing onions and pickles)
- Mixing bowl (for assembling the filling)
- Measuring spoons and cups (accuracy matters for seasoning!)
- Tongs (helpful for turning wraps while frying)
- Sheet pan or large plate (for cooling finished wraps)
- Paper towels (for draining excess oil—trust me, you’ll want these handy)
If you don’t have a skillet big enough, fry in batches or use an electric griddle. Air fryer fans: these wraps crisp up beautifully at 400°F (200°C) for 7-8 minutes per batch. If you’re on a budget, a basic nonstick pan works just fine. For maintenance, always wipe down your skillet right after cooking to prevent stubborn sticky bits. I’ve learned the hard way—don’t try to fry wraps in a pan that’s too small; they’ll steam instead of crisp.
Preparation Method
- Cook the beef filling: Heat a large skillet over medium-high heat. Add 1 tablespoon vegetable oil, then the diced onion. Sauté for 3 minutes until softened and fragrant. Toss in minced garlic and cook for another 30 seconds (don’t let it burn!). Add 1 lb (450g) ground beef, breaking it up with your spoon. Cook for 5-6 minutes until browned; drain excess fat if needed.
- Season and finish the filling: Stir in 1 tablespoon Worcestershire sauce, 1 teaspoon salt, and 1/2 teaspoon pepper. Add ketchup, mustard, and chopped pickles. Mix well and cook for 2 more minutes until everything is heated through. The mixture should be slightly saucy but not watery—if it looks runny, simmer for 1-2 minutes more.
- Prep the wraps: Lay out 8 tortillas on your work surface. Sprinkle a quarter cup (25g) shredded cheddar cheese in the center of each. Spoon about 1/3 cup (70g) of beef filling on top of the cheese. Top with another heaping tablespoon of cheese (double cheese is key!).
- Wrap it up: Fold up the bottom of the tortilla over the filling, then fold in the sides, and roll up tightly like a burrito. Press gently to seal; if the tortillas seem stiff, microwave them for 10 seconds to soften.
- Fry the wraps: Wipe out the skillet and add remaining oil. Heat over medium. Place 2-3 wraps seam-side down in the pan. Cook for 2-3 minutes until golden and crisp, then flip and cook another 2 minutes. (Watch closely—they go from golden to burnt fast!)
- Air fryer method: Brush wraps lightly with oil and place in air fryer basket. Cook at 400°F (200°C) for 7-8 minutes, flipping halfway. They should be crunchy and golden.
- Drain and cool: Transfer finished wraps to a plate lined with paper towels. Let cool for 3-5 minutes before slicing. The cheese should be gooey but not runny.
- Serve: Slice wraps in half on the diagonal, stack them on a platter, and set out dipping sauces. If you’re going all out, add lettuce, tomatoes, and jalapeños for topping.
Notes: If your filling starts to look dry, add a splash of ketchup or a drizzle of pickle juice. If tortillas crack while rolling, they’re too cold—warm them up first. Don’t overcrowd the skillet; crispiness suffers if the wraps touch. For extra crunch, sprinkle a little cheese in the pan before adding the wraps. The bottom gets a lovely cheesy crust (my secret trick!).
Cooking Tips & Techniques
Making these Crispy Super Bowl Cheeseburger Wraps is straightforward, but a few pro tips (learned the hard way) can make all the difference.
- Don’t overfill: It’s tempting to stuff the wraps, but too much filling can cause leaks and soggy tortillas. Stick to about 1/3 cup filling plus cheese per wrap.
- Preheat your skillet: A hot pan gives you that perfect golden crust. If it’s not hot enough, the wraps will steam and soften instead of crisping.
- Seal the edges: Press the seams firmly after rolling. If you’re worried about the wraps coming apart, brush a little water along the edge before sealing.
- Flip gently: Use tongs for turning to avoid squishing the wraps and spilling the filling.
- Cheese placement: Layering cheese both inside and outside (a sprinkle on the pan!) gives you gooey centers and crispy edges. This is my favorite trick for extra texture.
- Multitasking: While the beef is cooking, prep your tortillas and cheese so you’re ready to assemble. It saves time and keeps things moving.
- Troubleshooting: If your wraps aren’t crisping, check oil temperature or switch to an air fryer. If the filling tastes bland, add a pinch more salt or a splash of Worcestershire.
- Consistency: Use similar-sized tortillas and evenly portion the filling for uniform cooking. If some wraps look pale, just fry a minute longer.
I’ve had a few wraps fall apart because I got impatient rolling them—don’t rush! Take your time and the results will be worth it. If you’ve got leftovers, reheat in the air fryer for the crunchiest texture. Enjoy the process and don’t stress if a wrap cracks; they’ll still taste amazing.
Variations & Adaptations
There’s no rule that says you have to stick to the classic cheeseburger formula—these wraps are perfect for switching up to suit your cravings or dietary needs.
- Low-Carb Version: Swap flour tortillas for low-carb or gluten-free wraps. Use lean ground turkey and reduced-fat cheese to lighten things up.
- Veggie Lover’s Adaptation: Use plant-based ground “beef” (like Beyond or Impossible), skip the Worcestershire (or use vegan), and add sautéed mushrooms, spinach, or sweet bell pepper strips.
- Spicy Kick: Add chopped jalapeños or pepper jack cheese to the filling. A dash of hot sauce in the beef mixture brings serious heat for spice fans.
- Breakfast Wrap: Add scrambled eggs and cooked bacon to the filling for a morning twist—my kids love these on busy weekends!
- Seasonal Swaps: In summer, fresh tomatoes and a handful of chopped herbs (like chives or parsley) brighten things up. In fall, try adding a little smoked paprika or crisp apple slices for a sweet-savory combo.
- Dairy-Free: Use vegan cheese and a plant-based wrap. I’ve tried this with Daiya cheddar-style shreds—melts pretty well and tastes great.
My personal favorite? Adding sautéed mushrooms and a drizzle of barbecue sauce for a smoky, umami-packed wrap. And for parties, I’ll sometimes set up a “build your own” wrap station so everyone can pick their own fillings. Just don’t forget the pickles—they make everything pop!
Serving & Storage Suggestions
These crispy cheeseburger wraps are best served warm, with cheese still gooey and the shell perfectly crunchy. Slice them diagonally for a fun, shareable look—stacked high on a platter, they’re irresistible for guests.
- Serving Temperature: Serve hot right off the pan or air fryer. If you’re prepping ahead, keep them in a low oven (200°F/90°C) to stay warm.
- Presentation: Garnish with chopped parsley or green onions. Set out dipping sauces—ketchup, mustard, ranch, or hot sauce—for extra flavor.
- Pairings: These wraps go great with crispy fries, onion rings, or a simple salad. For drinks, root beer or a cold lager are game day classics.
- Storage: Cool leftovers completely, then store in an airtight container in the fridge for up to 3 days.
- Reheating: For best crunch, reheat in an air fryer or oven at 400°F (200°C) for 5-7 minutes. Microwave works, but you’ll lose some crispiness.
- Flavor Development: The flavors deepen after a day in the fridge—especially the beef and pickle combo. Sometimes I’ll make them ahead just for that!
These wraps freeze well, too. Just wrap tightly in foil and freeze for up to 2 months. Reheat from frozen in the oven for 15 minutes at 400°F (200°C) until piping hot.
Nutritional Information & Benefits
Each crispy cheeseburger wrap comes in around 350-400 calories, depending on your cheese and tortilla choices. You get about 18g protein, 20g carbs, and 22g fat per wrap. They’re surprisingly filling, thanks to the beef and cheese combo.
The main health benefits come from protein-rich ground beef and calcium-packed cheese. If you use whole wheat tortillas, you’ll add fiber. For a lighter version, choose lean turkey or plant-based ground “meat.” Pickles are low-calorie and add a nice probiotic kick, too.
Potential allergens include wheat (tortillas), dairy (cheese), and sometimes soy (plant-based meat). If you’re gluten-free or dairy-free, swap ingredients accordingly. For me, these wraps are a fun way to sneak extra veggies into a meal—just toss in shredded carrots or chopped spinach. Comfort food doesn’t have to mean heavy!
Conclusion
If you’re looking for an easy, crave-worthy Super Bowl snack, these Crispy Cheeseburger Wraps are a must-try. They’re simple to make, packed with classic burger flavor, and always a hit with friends and family. Whether you stick to the basics or riff with your own favorite add-ins, you’ll end up with something special—crunchy, cheesy, and totally irresistible.
Honestly, I love how flexible and forgiving this recipe is. You can switch up the filling, use whatever cheese you like, and even prep them ahead for stress-free hosting. It’s become my go-to for game days, casual dinners, and anytime I want a little nostalgic comfort food.
Give these wraps a shot for your next party and let me know how you make them your own! Drop a comment below, share your favorite variations, or tag your wrap creations on social media. Here’s to sharing good food, big smiles, and fun memories—happy cooking!
FAQs
Can I make these cheeseburger wraps ahead of time?
Absolutely! You can assemble and refrigerate the wraps up to a day ahead. Fry or air fry just before serving for the best crunch.
Can I freeze the wraps?
Yes, they freeze well. Wrap tightly in foil or plastic, then freeze up to 2 months. Reheat straight from frozen in the oven for best results.
What’s the best cheese for these wraps?
Sharp cheddar melts beautifully and packs flavor, but you can use pepper jack, mozzarella, or American. Mix and match to suit your taste!
Can I make these wraps vegetarian?
Definitely. Use plant-based ground “beef” and vegan cheese. Add extra veggies for flavor and nutrition.
How do I keep the wraps from getting soggy?
Make sure the filling isn’t too wet and fry the wraps over medium heat until golden and crisp. Don’t overcrowd the pan, and eat them soon after cooking for maximum crunch!
Pin This Recipe!

Crispy Cheeseburger Wraps
- Total Time: 35 minutes
- Yield: 8 wraps 1x
Description
These Crispy Cheeseburger Wraps pack all the classic burger flavors into a crunchy, cheesy, handheld snack—perfect for Super Bowl parties, game days, or casual gatherings. Quick to make and endlessly customizable, they’re a guaranteed crowd-pleaser with a golden, shatteringly crisp shell and a juicy, savory filling.
Ingredients
- 1 lb ground beef (80/20 blend recommended)
- 1 small onion, diced
- 2 cloves garlic, minced
- 1 tablespoon Worcestershire sauce
- 1 teaspoon kosher salt
- 1/2 teaspoon freshly ground black pepper
- 1/2 cup chopped dill pickles (or bread & butter pickles)
- 1/2 cup ketchup
- 2 tablespoons yellow mustard
- 8 large flour tortillas (10-inch; whole wheat or gluten-free optional)
- 2 cups shredded cheddar cheese
- 2 tablespoons vegetable oil (plus more as needed)
- Extra ketchup and mustard, for serving (optional)
- Chopped lettuce, tomatoes, or sliced jalapeños (optional)
- Hot sauce or ranch dressing (optional)
Instructions
- Heat a large skillet over medium-high heat. Add 1 tablespoon vegetable oil and the diced onion. Sauté for 3 minutes until softened.
- Add minced garlic and cook for 30 seconds. Add ground beef, breaking it up with a spoon. Cook for 5-6 minutes until browned; drain excess fat if needed.
- Stir in Worcestershire sauce, salt, and pepper. Add ketchup, mustard, and chopped pickles. Mix well and cook for 2 more minutes until heated through. Simmer 1-2 minutes more if mixture is watery.
- Lay out 8 tortillas. Sprinkle 1/4 cup shredded cheddar cheese in the center of each. Spoon about 1/3 cup beef filling on top, then add another heaping tablespoon of cheese.
- Fold up the bottom of the tortilla over the filling, fold in the sides, and roll up tightly like a burrito. Microwave tortillas for 10 seconds if stiff.
- Wipe out the skillet and add remaining oil. Heat over medium. Place 2-3 wraps seam-side down in the pan. Cook for 2-3 minutes until golden and crisp, then flip and cook another 2 minutes.
- For air fryer: Brush wraps lightly with oil and place in basket. Cook at 400°F for 7-8 minutes, flipping halfway.
- Transfer finished wraps to a plate lined with paper towels. Let cool for 3-5 minutes before slicing.
- Slice wraps in half on the diagonal, stack on a platter, and serve with dipping sauces and optional toppings.
Notes
Don’t overfill wraps to prevent leaks. Warm tortillas before rolling to avoid cracking. For extra crunch, sprinkle cheese in the pan before adding wraps. Air fryer method yields a lighter result. Use gluten-free tortillas and vegan cheese for dietary adaptations. Leftovers reheat best in the air fryer or oven. Wraps freeze well for up to 2 months.
- Prep Time: 15 minutes
- Cook Time: 20 minutes
- Category: Appetizer
- Cuisine: American
Nutrition
- Serving Size: 1 wrap
- Calories: 375
- Sugar: 4
- Sodium: 900
- Fat: 22
- Saturated Fat: 10
- Carbohydrates: 20
- Fiber: 2
- Protein: 18
Keywords: cheeseburger wraps, Super Bowl snacks, crispy wraps, game day food, party appetizer, easy cheeseburger recipe, skillet wraps, air fryer wraps
