

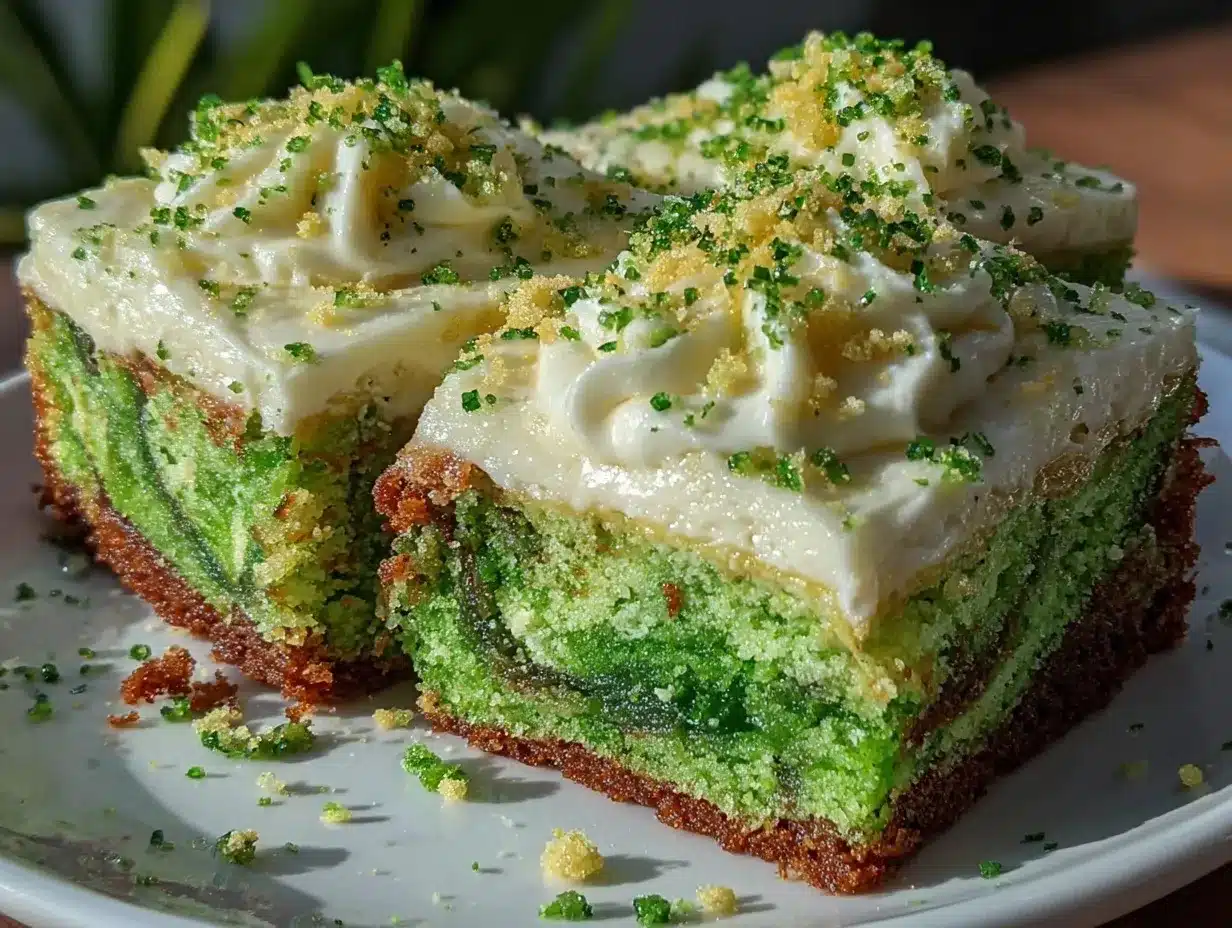
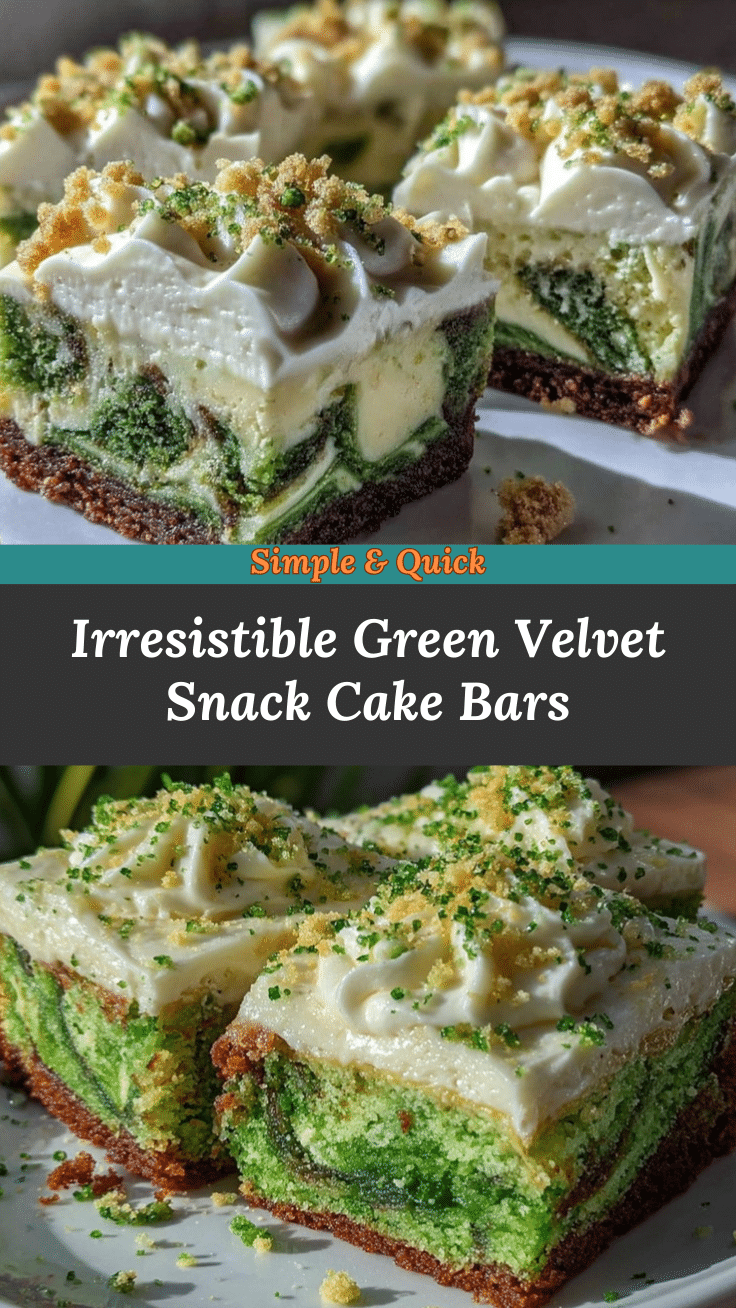
The first thing you’ll notice is the magical, almost glowing green color of these Green Velvet Snack Cake Bars as they emerge from the oven—soft, fluffy, and totally irresistible. There’s a sweet scent that fills the kitchen, something like vanilla and cocoa swirling together, with just a hint of buttermilk tang. I swear, these bars have a way of calling everyone to the kitchen (even the pets seem a bit more interested in snack time). When I sliced into them for the first time—years ago, on a chilly March afternoon—the vibrant color made me grin like a kid at a parade. It was the kind of moment where you pause, take a deep breath, and just smile because you know you’re onto something truly special.
This recipe isn’t just another green dessert—it’s a family tradition in the making. My grandma used to bake up all sorts of snack cakes for St. Patrick’s Day, but I never saw a green velvet version until I tried to recreate a bakery treat I spotted downtown. Honestly, I wish I’d thought of this when I was knee-high to a grasshopper. The first time I made these for my family, my kids couldn’t stop sneaking pieces off the cooling rack (and I can’t really blame them). There’s something about that soft, melt-in-your-mouth crumb that just screams “one more bite!”.
These bars are dangerously easy, perfect for bake sales, school parties, or when you want to brighten up your Pinterest feed with something a little special. They’re festive enough for St. Patrick’s Day but honestly, you’ll want to make them all year round. After several rounds of “research” (which mostly involved taste-testing, if I’m being honest), these Green Velvet Snack Cake Bars have become a staple for family gatherings and gifting. They feel like a warm hug on a plate—trust me, you’re going to want to bookmark this one.
Why You’ll Love This Green Velvet Snack Cake Bars Recipe
Let’s face it, there are plenty of green desserts floating around as March rolls in, but these Green Velvet Snack Cake Bars truly stand out. I’ve tested, tweaked, and taste-tested (with enthusiastic helpers) to make sure every batch comes out fluffy, flavorful, and just the right shade of green. Here’s why you’ll be reaching for this recipe again and again:
- Quick & Easy: This recipe comes together in under 45 minutes, start to finish. Perfect for busy weeknights, last-minute classroom treats, or when you just need a little color in your day.
- Simple Ingredients: No need to hunt for specialty items. Everything you need is probably already in your pantry or fridge (and yes, you can use any brand of green food coloring you like!).
- Perfect for St. Patrick’s Day: These bars are the ideal festive treat for potlucks, parties, or just adding a little cheer to your coffee break.
- Crowd-Pleaser: Kids love the bright color, adults can’t resist the soft, velvety crumb, and everyone will be asking for the recipe.
- Unbelievably Delicious: The blend of cocoa, vanilla, and buttermilk creates a rich taste and fluffy texture—pure comfort food with a twist.
What sets this Green Velvet Snack Cake Bars Recipe apart? It’s the balance of flavors—just enough cocoa for depth, a touch of tang from buttermilk, and that classic velvet crumb that makes each bite tender. I use a special folding technique for the batter that keeps things extra light (no dense or dry bars here). Plus, the color is perfectly vibrant without tasting artificial.
This isn’t just another green cake. It’s the kind of treat that has people closing their eyes after the first bite, savoring that classic velvet texture. It’s comfort food—faster, a little healthier, but with the same homemade, love-filled satisfaction. Whether you’re impressing guests or just making an afternoon snack, these bars keep things low-stress and high-reward. And if you’re anything like me, you’ll be making a double batch because they disappear fast.
What Ingredients You Will Need
This Green Velvet Snack Cake Bars Recipe uses everyday ingredients to create a vibrant, flavorful treat with no fuss. Most are pantry staples, and you can easily swap in alternatives if needed—so you’ll be snacking in no time.
- For the Cake Batter:
- All-purpose flour (2 cups / 250g) – For structure and a soft crumb. I like King Arthur for consistency.
- Granulated sugar (1 cup / 200g) – Sweetens and keeps things moist.
- Unsalted butter, softened (1/2 cup / 113g) – Adds richness and flavor. If you only have salted, just cut back a pinch of the added salt.
- Large eggs, room temperature (2) – For binding and fluffiness.
- Buttermilk, room temperature (1 cup / 240ml) – Key for that velvet texture and subtle tang. Substitute with milk + a tablespoon of lemon juice if needed.
- Unsweetened cocoa powder (2 tablespoons / 12g) – Just enough for depth without overpowering the color. Dutch-process or natural both work.
- Baking powder (1 1/2 teaspoons / 6g) – For lift and tenderness.
- Baking soda (1/2 teaspoon / 2g) – Works with buttermilk for extra fluff.
- Salt (1/2 teaspoon / 3g) – Balances sweetness.
- Pure vanilla extract (1 teaspoon / 5ml) – Adds warmth. I love Nielsen-Massey for flavor.
- Green gel or liquid food coloring (about 1 tablespoon, or to desired shade) – I use AmeriColor Leaf Green. Gel gives a bolder hue, but any will do!
- White vinegar (1 teaspoon / 5ml) – Classic for velvet cakes, helps with tenderness and color vibrancy.
- For the Frosting (Optional but recommended):
- Cream cheese, softened (4 oz / 113g) – For that tangy-sweet richness.
- Unsalted butter, softened (1/4 cup / 57g) – Keeps the frosting creamy.
- Powdered sugar (1 1/2 cups / 180g) – Sweetens and thickens.
- Vanilla extract (1/2 teaspoon / 2.5ml) – Rounds out the flavor.
- Pinch of salt – Optional, but balances sweetness.
- Festive sprinkles or sanding sugar – For that St. Patrick’s Day sparkle!
Ingredient tips: If you want a gluten-free version, swap in your favorite 1:1 baking flour. Dairy-free? Use plant-based butter and non-dairy milk with a splash of vinegar. For a deeper green, add a smidge more food coloring (but not too much or you’ll taste it!). In summer, you can even swirl in a touch of lemon zest for a fresh twist.
Equipment Needed
- 9×13 inch (23x33cm) baking pan – Metal or glass both work. I like to line mine with parchment for easy lifting.
- Mixing bowls – One large for the batter, one medium for dry ingredients.
- Electric mixer or sturdy whisk – A hand mixer makes creaming butter easy, but elbow grease works too.
- Measuring cups and spoons – For accuracy. Weighing ingredients is always a plus, but not essential here.
- Rubber spatula – For scraping every bit of batter (trust me, you won’t want to waste any).
- Wire rack – For cooling the bars evenly without soggy bottoms.
- Offset spatula or butter knife – For spreading frosting smoothly.
If you don’t have a 9×13 pan, two 8×8 pans work in a pinch—just check for doneness a bit earlier. I’ve used both metal and glass pans; metal gives a slightly higher rise, but glass is great for even baking. For cleanup, parchment paper is your best friend (especially if you dread scrubbing stuck-on crumbs). If you’re on a budget, a sturdy whisk and a simple glass casserole dish will do the trick!
Preparation Method
- Prep the Pan and Oven: Preheat your oven to 350°F (175°C). Line a 9×13-inch (23x33cm) baking pan with parchment paper, leaving an overhang for easy removal. Grease the paper and sides lightly with butter or spray. This little step makes bar removal a breeze and keeps your edges neat.
- Mix Dry Ingredients: In a medium bowl, whisk together 2 cups (250g) flour, 2 tablespoons (12g) cocoa powder, 1 1/2 teaspoons (6g) baking powder, 1/2 teaspoon (2g) baking soda, and 1/2 teaspoon (3g) salt. Set aside. This keeps the leaveners evenly distributed.
- Cream Butter and Sugar: In a large bowl, beat 1/2 cup (113g) softened butter and 1 cup (200g) sugar with an electric mixer on medium speed for about 2-3 minutes, until pale and fluffy. If mixing by hand, give it a solid 4-5 minutes for best lift.
- Add Eggs and Vanilla: Beat in the eggs, one at a time, scraping down the bowl between each addition. Mix in 1 teaspoon (5ml) vanilla extract until just combined. Don’t overmix here—you want the batter light.
- Add the Color: Stir in 1 tablespoon (or to desired shade) green food coloring and 1 teaspoon (5ml) vinegar. The batter should be a vibrant, St. Patrick’s Day green at this point. If it looks dull, add a couple more drops of food color.
- Alternate Dry and Wet: With the mixer on low, add the dry ingredients in three batches, alternating with 1 cup (240ml) buttermilk. Start and end with the dry mix. Mix just until combined after each addition; overmixing can make the bars tough.
- Scrape and Fold: Gently fold the batter with a spatula to make sure there are no flour pockets (check the bottom!). The batter will be thick and creamy—almost mousse-like.
- Spread and Bake: Pour the batter into the prepared pan and smooth the top. Bake for 22–26 minutes, or until a toothpick inserted in the center comes out clean or with a few moist crumbs. The cake should spring back lightly when pressed with a fingertip.
- Cool Completely: Let the cake cool in the pan on a wire rack for at least 30 minutes. This helps it firm up and makes slicing easier. (If you’re impatient, pop it in the fridge for 10 minutes.)
- Optional Frosting: For the frosting, beat 4oz (113g) cream cheese and 1/4 cup (57g) butter until smooth. Add 1 1/2 cups (180g) powdered sugar, 1/2 teaspoon (2.5ml) vanilla, and a pinch of salt, then beat until fluffy. Spread evenly over the cooled cake. Top with festive sprinkles if desired.
- Slice and Serve: Use the parchment overhang to lift the cake from the pan. Slice into bars (I usually get 20-24 pieces). Wipe your knife between cuts for clean edges.
Troubleshooting: If your cake seems dry, it may be overbaked—check a few minutes early next time. If the color isn’t as bright, try a gel food coloring. And if your frosting is runny, chill it for 10 minutes before spreading. The batter should feel thick but pourable, and the finished cake should be springy, not dense.
Cooking Tips & Techniques
Baking these Green Velvet Snack Cake Bars has taught me a few things over the years (and yes, I’ve had my share of wonky batches).
- Room Temperature Ingredients: Letting your eggs and buttermilk come to room temp makes a world of difference. The batter blends more evenly, so your cake bakes up fluffy instead of dense.
- Don’t Overmix: Once you add the flour, mix just until you see no more streaks. Overworking the batter can make things tough—nobody wants chewy snack cake bars!
- Color Cues: The green should look bold before baking. If it’s dull, add a couple more drops—baking will lighten it slightly.
- Parchment Lining: Seriously, use parchment paper. It’s a lifesaver for lifting the bars out and keeps the edges from browning too much.
- Frosting Consistency: If your frosting is too soft, pop it in the fridge for a few minutes. Too stiff? A splash of milk does the trick.
- Batch Size: Double the recipe for a party! Use two pans or bake in a sheet pan and adjust the time (start checking at 18 minutes).
- Personal Mishaps: I once forgot the vinegar and wondered why the color was off—don’t skip it! It really makes the green pop and keeps things tender.
Timing is everything—start prepping your frosting while the cake cools, and have your sprinkles ready so they stick before it sets. Remember, every oven is a little different, so keep an eye on the bars during the last few minutes. Trust your senses: fragrant, springy, and just starting to pull from the sides means they’re done!
Variations & Adaptations
One of the best things about this Green Velvet Snack Cake Bars Recipe is how easy it is to adapt for almost any occasion or dietary need. Here are a few of my favorite twists:
- Gluten-Free Version: Substitute your favorite 1:1 gluten-free flour blend for the all-purpose flour. I’ve had great results with Bob’s Red Mill. The texture stays fluffy and delicious.
- Dairy-Free Adaptation: Use plant-based butter and substitute buttermilk with almond or oat milk plus 1 tablespoon of lemon juice. A vegan cream cheese works well for the frosting too.
- Lemon-Lime Twist: Add 1 tablespoon of lemon zest and a few drops of lime extract to the batter for a citrusy variation that’s extra refreshing in spring or summer.
- Chocolate Chip Swirl: Fold 1/2 cup (85g) mini chocolate chips into the batter for a bit of crunch and extra chocolatey goodness.
- Holiday Swaps: Swap the green coloring for red and gold sprinkles for Christmas, or pastel colors for Easter. This base recipe adapts to any festive occasion!
For allergen concerns, this recipe is nut-free as written, but always check your extracts and coloring for cross-contamination if you’re baking for others. I once made a batch with orange zest and it was a huge hit—don’t be afraid to add your own twist! The base is forgiving, so get creative.
Serving & Storage Suggestions
These Green Velvet Snack Cake Bars are perfect served at room temperature, with the frosting just set and the crumb tender. If you’re feeling fancy, add a swirl of whipped cream or a dusting of powdered sugar before serving.
- Presentation: Cut into small squares for a crowd, or larger bars for dessert plates. A sprinkle of gold or shamrock-shaped sprinkles makes them extra Pinterest-worthy.
- Pairings: Serve with Irish coffee, hot cocoa, or a glass of cold milk. They also play nicely alongside fruit platters or salty snacks for a sweet-salty balance.
- Storage: Store bars in an airtight container at room temperature for up to 2 days, or in the fridge for up to 5 days. If you’re stacking, place parchment between layers to prevent sticking.
- Freezing: Unfrosted bars freeze beautifully for up to 2 months. Just wrap tightly in plastic and foil. Thaw at room temp and frost fresh for best results.
- Reheating: For a warm treat, pop a bar in the microwave for 10 seconds—just enough to soften the crumb (but not melt the frosting!).
- Flavor development: The bars actually taste even richer on day two, as the flavors meld—if you can resist eating them all at once!
Nutritional Information & Benefits
Each bar (if cut into 24) has about 160 calories, 6g fat, 24g carbohydrates, and 2g protein. The buttermilk and eggs pack in a bit of protein and calcium, while the cocoa provides a little antioxidant boost. If you go for the dairy-free or gluten-free swaps, you’ll still get that lovely texture without missing out on taste.
These are nut-free as written, but contain dairy, eggs, and gluten (unless you use the substitutions above). I love that they’re made with real, simple ingredients—no weird preservatives or artificial flavors here. When I want to feel a bit better about my sweet tooth, I remind myself that homemade always beats store-bought for freshness and ingredient control. A treat for the soul and the senses!
Conclusion
If you’ve been searching for something festive, fun, and foolproof for St. Patrick’s Day, these Green Velvet Snack Cake Bars are it. They’re the kind of treat that brings everyone to the table, sparks conversation, and disappears before you know it. Whether you stick with the classic version or put your own spin on it, you’re in for pure, nostalgic comfort in every bite.
I love this recipe for its simplicity, adaptability, and that “wow” moment when you slice into the vibrant green crumb. Don’t be afraid to experiment—add your favorite flavor twist, swap the frosting, or make mini bites for a party tray. If you try these bars, I’d love to hear about your results! Leave a comment, share a photo on Pinterest, or tell me your favorite St. Patrick’s Day traditions. Here’s to sweet memories and fluffy green snack bars—may your kitchen be filled with laughter and a little extra luck!
FAQs About Green Velvet Snack Cake Bars
How do I get the green color just right without overdoing the food coloring?
I recommend starting with a little less and adding more as needed—gel food coloring is more concentrated, so you’ll need less than liquid. The batter should look a bit bolder than you want your finished bars, as baking lightens the color slightly.
Can I make these Green Velvet Snack Cake Bars ahead of time?
Absolutely! These bars stay moist for several days. Bake them a day ahead, store (unfrosted) in an airtight container, and frost just before serving for best texture.
What’s the best way to store leftovers?
Keep the bars in an airtight container at room temperature for up to 2 days, or in the fridge for up to 5 days. If stacking, separate layers with parchment so the frosting doesn’t stick.
Can I make these bars gluten-free or dairy-free?
Yes! Use a 1:1 gluten-free baking flour for a gluten-free version, and swap in plant-based butter and milk (with a splash of vinegar) for a dairy-free treat. The results are still soft and delicious.
Do I have to use the frosting?
Nope! The bars are delicious on their own, but the tangy cream cheese frosting adds that classic velvet cake touch. If you prefer, dust the top with powdered sugar or serve plain for a lighter treat.
Pin This Recipe!

Green Velvet Snack Cake Bars
- Total Time: 40 minutes
- Yield: 20-24 bars 1x
Description
These Green Velvet Snack Cake Bars are a festive, soft, and fluffy treat with a vibrant green hue, perfect for St. Patrick’s Day or any occasion. With a tender velvet crumb and optional tangy cream cheese frosting, they’re easy to make and sure to be a crowd-pleaser.
Ingredients
- 2 cups all-purpose flour
- 1 cup granulated sugar
- 1/2 cup unsalted butter, softened
- 2 large eggs, room temperature
- 1 cup buttermilk, room temperature
- 2 tablespoons unsweetened cocoa powder
- 1 1/2 teaspoons baking powder
- 1/2 teaspoon baking soda
- 1/2 teaspoon salt
- 1 teaspoon pure vanilla extract
- 1 tablespoon green gel or liquid food coloring (or to desired shade)
- 1 teaspoon white vinegar
- For the Frosting (Optional):
- 4 oz cream cheese, softened
- 1/4 cup unsalted butter, softened
- 1 1/2 cups powdered sugar
- 1/2 teaspoon vanilla extract
- Pinch of salt
- Festive sprinkles or sanding sugar (optional)
Instructions
- Preheat oven to 350°F (175°C). Line a 9×13-inch baking pan with parchment paper, leaving an overhang for easy removal. Grease the paper and sides lightly.
- In a medium bowl, whisk together flour, cocoa powder, baking powder, baking soda, and salt. Set aside.
- In a large bowl, beat softened butter and sugar with an electric mixer on medium speed for 2-3 minutes until pale and fluffy.
- Beat in eggs, one at a time, scraping down the bowl between each addition. Mix in vanilla extract until just combined.
- Stir in green food coloring and vinegar until the batter is a vibrant green.
- With mixer on low, add dry ingredients in three batches, alternating with buttermilk, starting and ending with dry mix. Mix just until combined.
- Gently fold the batter with a spatula to ensure no flour pockets remain. The batter will be thick and creamy.
- Pour batter into prepared pan and smooth the top. Bake for 22–26 minutes, or until a toothpick inserted in the center comes out clean or with a few moist crumbs.
- Let cake cool in the pan on a wire rack for at least 30 minutes.
- For the frosting (optional): Beat cream cheese and butter until smooth. Add powdered sugar, vanilla, and salt, then beat until fluffy. Spread evenly over cooled cake. Top with sprinkles if desired.
- Use parchment overhang to lift cake from pan. Slice into bars (20-24 pieces). Wipe knife between cuts for clean edges.
Notes
For gluten-free, use a 1:1 gluten-free flour blend. For dairy-free, use plant-based butter and non-dairy milk with a splash of vinegar. Let eggs and buttermilk come to room temperature for best texture. Don’t overmix after adding flour. Use parchment for easy removal. Bars taste even better on day two as flavors meld.
- Prep Time: 15 minutes
- Cook Time: 25 minutes
- Category: Dessert
- Cuisine: American
Nutrition
- Serving Size: 1 bar (if cut into 2
- Calories: 160
- Sugar: 15
- Sodium: 120
- Fat: 6
- Saturated Fat: 3
- Carbohydrates: 24
- Protein: 2
Keywords: green velvet, snack cake, St. Patrick’s Day, easy dessert, cake bars, cream cheese frosting, festive treats, kid-friendly, nut-free, party food
