

Close your eyes for a second and just imagine: the sweet, almost magical scent of vanilla cake swirling through your kitchen, bright splashes of color peeking out from a fluffy spiral, and pure joy radiating from the faces of kids (and let’s be real—grown-ups too) as you slice into a rainbow. That, my friends, is what this Dr. Seuss Jelly Roll Cake recipe is all about. The first time I whipped up this multi-color party dessert, I felt like I’d stepped right into a page of a Dr. Seuss story—zany, bold, and just a little bit mischievous. The batter was so vibrant, I actually paused and laughed at the sight of it—my kitchen looked like a candy-colored tornado had passed through. The kind of moment where you pause, take a deep breath, and just smile because you know you’re onto something truly special.
My connection to this cake goes back to childhood, when I was knee-high to a grasshopper and obsessed with anything Seussical. I remember my grandma’s old-fashioned jelly rolls—always rolled a little crooked, always perfect. Years later, as a mom trying to jazz up a birthday party, I thought, “What if I took grandma’s classic and gave it a wild, Dr. Seuss twist?” I wish I’d stumbled on this idea years ago, honestly—it’s the sort of crowd-pleaser that makes you the instant hero of any get-together. My family couldn’t stop sneaking off slices from the cooling rack, and my daughter declared it “the happiest cake ever.” I can’t blame them—it’s pure, nostalgic comfort wrapped up in a swirl.
You know what else? This Dr. Seuss Jelly Roll Cake is dangerously easy to make, shockingly vibrant for your Pinterest board, and the perfect sweet treat for birthday parties, classroom events, or just brightening up a rainy weekend. I’ve tested the recipe more times than I’d care to admit (in the name of research, of course!), and it’s become a staple for family gatherings and edible gifts. From the first slice, it just feels like a warm, cheerful hug. If you’re looking for a show-stopping dessert that doubles as a conversation piece, you’re going to want to bookmark this one right now.
Why You’ll Love This Dr. Seuss Jelly Roll Cake Recipe
Let’s face it—there are a lot of jelly roll cakes bouncing around Pinterest, but this one? It’s something special. After dozens of trials (and a few hilarious flops where my colors ran wild), I can honestly say this Dr. Seuss Jelly Roll Cake recipe is my go-to for parties. Here’s why it stands out (and why you’ll fall in love with it too):
- Quick & Easy: Comes together in just about an hour, so you don’t have to plan days ahead or stress over complicated techniques.
- Simple Ingredients: Uses basic pantry staples—nothing fancy, nothing you’ll have to hunt for in a specialty aisle. You probably have most of it right now.
- Perfect for Parties: Seriously, this cake is a natural at birthdays, school celebrations, baby showers, and any event where color and fun are a must.
- Crowd-Pleaser: Kids go wild for the rainbow swirl, but adults always sneak seconds too. It’s a conversation starter and a memory-maker in one.
- Unbelievably Delicious: Light, tender sponge cake wrapped around fluffy whipped cream—each bite is a sweet, cloud-like surprise. The flavor is classic vanilla, but the colorful look makes it unforgettable.
So, what makes this recipe different from the rest? For one, you’ll be dividing the batter and tinting it with gel food coloring—think Cat in the Hat hats, Truffula Trees, and a little bit of Whoville magic. The rolling technique is easy enough for beginners (don’t sweat the cracks), but the result looks bakery-worthy. After testing different flour types and mixing methods, I found that sifting the cake flour and whipping the eggs just right gives you a sponge that’s flexible and won’t tear.
This isn’t just another jelly roll—it’s my best version yet. It’s the kind of cake that makes you close your eyes and smile after the first bite, and it brings a dash of Seuss-inspired whimsy to any table. The best part? You get all the wow-factor without the stress. Whether you’re impressing guests or just treating your family, this Dr. Seuss Jelly Roll Cake turns an ordinary day into a celebration. Comfort food, but with a wild, colorful twist—what’s not to love?
What Ingredients You Will Need
This Dr. Seuss Jelly Roll Cake recipe uses simple, wholesome ingredients to deliver bold flavor and that famous party-perfect texture. Most of these are pantry staples, and a few drops of food coloring turn the ordinary into something Seussically extraordinary. Here’s what you’ll need:
- For the Sponge Cake:
- 4 large eggs, room temperature (for extra fluffiness)
- 3/4 cup (150g) granulated sugar
- 1 tablespoon (15ml) whole milk (adds moisture)
- 1 teaspoon pure vanilla extract (I love Nielsen-Massey for deep flavor)
- 1 cup (120g) cake flour, sifted (cake flour keeps it extra light, but all-purpose works in a pinch)
- 1/2 teaspoon baking powder
- 1/4 teaspoon fine sea salt
- For the Colors:
- Assorted gel food coloring (think red, blue, yellow, green, and purple for maximum whimsy—Wilton or AmeriColor gels give the most vibrant hues without thinning the batter)
- For the Filling:
- 1 cup (240ml) heavy whipping cream, chilled
- 2 tablespoons (16g) powdered sugar (for sweetness and stability)
- 1/2 teaspoon pure vanilla extract
- For Rolling and Finishing:
- Powdered sugar (for dusting the towel and finishing the cake—prevents sticking)
- Optional: Sprinkles or edible glitter (for extra Seussical sparkle)
Ingredient Tips:
- Gel food coloring works best—liquids can water down the batter and dull your colors.
- If you’re gluten-free, you can swap the cake flour for a 1:1 gluten-free blend (like King Arthur’s).
- Dairy-free? Use a plant-based whipping cream (like Silk Heavy Whipping Cream) and any neutral non-dairy milk.
- No cake flour? Substitute with all-purpose flour, but remove 2 tablespoons and replace with cornstarch for every cup.
- Want a fruity twist? You can fold in finely chopped strawberries or raspberries with the whipped cream—just blot them dry first.
Honestly, you don’t need anything over-the-top for this Dr. Seuss Jelly Roll Cake recipe—the magic is in the colors and the swirl. Every ingredient plays a part in making this dessert both beautiful and delicious. If you’ve got a few basics and some food coloring, you’re ready to roll (literally)!
Equipment Needed
Here’s what you’ll need to create this whimsical Dr. Seuss Jelly Roll Cake (and a few tips from my kitchen to yours):
- 10×15-inch (25x38cm) jelly roll pan: Essential for the perfect cake thickness. A quarter sheet pan will work if that’s what you’ve got. Just don’t use a regular cookie sheet—it’s too shallow.
- Parchment paper: For easy release and less cake-tastrophe. I always cut mine to fit the bottom of the pan exactly.
- Large mixing bowls: For separating and coloring the batter.
- Electric mixer or stand mixer: Whipping the eggs and cream by hand is possible, but let’s not make this a workout unless we have to.
- Spatulas and whisks: For folding, mixing, and scraping every last bit of batter out (you’ll want every drop for the colors!).
- Gel food coloring: I prefer squeeze bottles for easy control—less mess, more fun.
- Clean kitchen towel: The cake gets rolled in this while warm. Flour sack towels work best (no lint, no drama).
- Sifter or sieve: For that ultra-light sponge texture.
- Measuring cups and spoons: Because a little precision goes a long way.
If you don’t have a jelly roll pan, you can use a rimmed baking sheet that’s close in size—just watch your baking time. And if you’re on a budget, most dollar stores have basic whisks, spatulas, and even kitchen towels that get the job done. My first jelly roll was made with a thrift-store pan and an old dish towel—it still turned out Seussical and fabulous. Just keep your tools clean, and don’t skip the parchment paper (trust me on that one!).
Preparation Method
- Preheat and Prep:
Preheat your oven to 350°F (175°C). Line a 10×15-inch (25x38cm) jelly roll pan with parchment paper, letting some hang over the edges for easy lifting. Lightly grease the paper. Lay out a clean kitchen towel and dust generously with powdered sugar—this is what you’ll roll the cake in later. - Whip the Eggs and Sugar:
In a large mixing bowl, beat 4 eggs on high speed for 5 minutes, until pale and thick (they should look almost tripled in volume). Gradually add 3/4 cup (150g) granulated sugar and keep beating until the ribbon stage—when you lift the beaters, the batter should fall in thick ribbons. This step is the secret to a fluffy, flexible sponge. - Add Wet Ingredients:
Gently mix in 1 tablespoon (15ml) milk and 1 teaspoon vanilla extract. Don’t overmix—you want to keep all that air in the batter. - Sift in Dry Ingredients:
Sift together 1 cup (120g) cake flour, 1/2 teaspoon baking powder, and 1/4 teaspoon salt. Gently fold this mixture into your wet ingredients using a spatula. Stop as soon as it’s combined—overmixing can make the cake tough. - Divide and Color the Batter:
Divide the batter evenly among 4-5 small bowls (one for each color you want). Add a few drops of gel food coloring to each bowl and gently fold until the color is even. Add more as needed for bold, Dr. Seuss-worthy colors. - Layer the Colors:
Drop spoonfuls of colored batter randomly over the pan—no need to be perfect; the more whimsical, the better! Use a toothpick or skewer to swirl the colors gently. Don’t overdo it, or the colors will muddy together. - Bake the Cake:
Bake for 10-12 minutes, or until the cake springs back when touched lightly in the center. Don’t overbake—this sponge dries out quickly. Watch carefully after 9 minutes. - Roll the Cake While Warm:
Immediately lift the cake out by the parchment and flip it onto your prepared towel (powdered sugar side down). Peel off the parchment paper carefully. Starting from the short end, roll the cake and towel together into a tight spiral. Let it cool completely, seam side down. This sets the shape and keeps the cake from cracking. - Make the Whipped Cream Filling:
While the cake cools, beat 1 cup (240ml) heavy cream, 2 tablespoons (16g) powdered sugar, and 1/2 teaspoon vanilla on high until stiff peaks form. Keep it chilled until ready to use. - Unroll and Fill:
Once the cake is completely cool (about 30 minutes), gently unroll it. Spread the whipped cream evenly over the cake, leaving a 1/2-inch (1cm) border so the filling doesn’t spill out when you roll it back up. - Roll and Chill:
Roll the cake back up (without the towel this time), as tightly as you can. Transfer to a serving platter, seam side down. Chill for at least 30 minutes to set the shape and make slicing easier. - Finish and Serve:
Dust with more powdered sugar and, if you like, top with sprinkles or edible glitter. Slice off the ends for a super neat look (chef’s treat!). Serve and watch the smiles appear.
Notes: If your cake cracks a little, don’t panic—just cover with extra whipped cream or sprinkles. The cake must be rolled while warm, or it’ll break. If the colors get muddy, try swirling less next time. I always keep a little extra whipped cream on hand for patching up any “oops” moments. Practice makes perfect (and every test batch is delicious anyway)!
Cooking Tips & Techniques
Here are some tips I’ve picked up after making more than a few Dr. Seuss Jelly Roll Cakes (and learning from my fair share of colorful mishaps):
- Whip the Eggs Long Enough: Five full minutes on high is key. The more air you whip in, the lighter and easier to roll your sponge will be. I once tried to rush this step—let’s just say, the result was less “whimsical swirl” and more “sad pancake.”
- Use Gel Food Coloring: Liquid colors can water down your batter and make the colors less vivid. Gel colors stay bright and bold, even after baking.
- Don’t Overbake: The cake should just spring back in the center. Overbaking leads to dryness and cracks. Set a timer, and check early if your oven runs hot.
- Powdered Sugar is Your Friend: Dust the towel well before rolling. If you skip this, the cake can stick and tear (I learned that lesson the hard way). More is better here!
- Roll While Warm: If you let the cake cool before rolling, it will crack. Work quickly, and don’t stress if it’s not perfect—the filling and decorations cover a multitude of sins.
- Slicing Cleanly: Chill the rolled cake for at least 30 minutes before slicing. Use a serrated knife and wipe it clean between cuts for those picture-perfect spirals.
- Don’t Skimp on the Filling: Spread the whipped cream evenly but leave a border. Too much cream will squish out, too little and you lose that dreamy softness.
- Practice Patience: If your first roll isn’t perfect, remember—every cake is a little different, and the colors always wow in the end. The first time I made this, my swirl was a bit wonky, but the delight on my kid’s face made it all worthwhile!
These tricks help you get consistent results every time. And honestly, a few imperfections just add to the whimsy—Dr. Seuss himself would approve!
Variations & Adaptations
The best part about this Dr. Seuss Jelly Roll Cake recipe? You can switch it up a dozen different ways to fit your party theme, dietary needs, or just your mood. Here are a few of my favorite twists:
- Gluten-Free: Swap the cake flour for a 1:1 gluten-free baking blend (I like King Arthur or Bob’s Red Mill). The cake still comes out soft and flexible—no one will guess!
- Dairy-Free: Use plant-based whipping cream (like Silk or So Delicious), and swap the milk for any dairy-free alternative. The color and swirl stay just as vibrant.
- Seasonal Flavors: For a spring party, add a teaspoon of lemon or orange zest to the batter for a zesty twist. At Christmas, use red, white, and green layers with a dash of peppermint extract in the cream.
- Chocolate Swirl: Divide the batter and add 2 tablespoons of unsweetened cocoa powder to one portion—create chocolate and vanilla spirals for a Cat in the Hat vibe.
- Berry Filling: Fold in finely chopped strawberries, raspberries, or even a swirl of jam into the whipped cream for extra flavor and color.
- Mini Rolls: Bake the batter in two smaller pans for mini jelly rolls—perfect for individual party servings or lunchbox treats.
One of my favorite experiments was a “Grinch” version—just green and red layers, a little peppermint in the filling, and crushed candy canes on top. It was a hit at our holiday party! Don’t be afraid to play with color combinations or add-ins—this cake is meant for fun and creativity.
Serving & Storage Suggestions
This Dr. Seuss Jelly Roll Cake is best served chilled for the cleanest, most dramatic swirl slices. Here’s how to make it shine at your next party:
- Serving: Slice with a sharp, serrated knife for neat spirals. Wipe the blade between cuts for the prettiest presentation. Serve on a white platter to make those colors pop!
- Pairings: This cake pairs perfectly with a glass of milk, lemonade, or hot cocoa. For grown-ups, a cup of coffee or fruity punch is just right.
- Storage: Store leftovers (if you have any!) in an airtight container in the fridge for up to 3 days. The colors stay bright, and the cream stays fluffy.
- Freezing: You can freeze the unfilled cake (rolled in the towel) for up to a month. Thaw, fill, and roll as usual when you’re ready to serve.
- Make-Ahead: I often bake the cake and whip the cream the night before. Just assemble a couple of hours before serving for best freshness.
- Flavor Development: If you let the filled cake chill overnight, the flavors meld and the texture gets even softer—almost like a dreamy, colorful cloud.
This cake is a natural centerpiece for any party table. Scatter a few sprinkles on top, add some whimsical paper flags or Dr. Seuss toppers, and watch your guests snap photos before digging in!
Nutritional Information & Benefits
Here’s an estimate for one slice (based on 12 servings):
- Calories: about 180
- Total Fat: 8g
- Saturated Fat: 5g
- Carbohydrates: 25g
- Sugar: 16g
- Protein: 3g
- Fiber: 0.5g
This Dr. Seuss Jelly Roll Cake is naturally nut-free, and you can make it gluten-free or dairy-free with easy swaps. The eggs add a little protein, and the whipped cream filling can be made lighter with Greek yogurt or coconut cream. Just a heads-up—if you’re sensitive to artificial colors, look for plant-based gel food dyes. I love that you can adjust the recipe to fit your nutritional needs while still serving up pure, happy fun. For me, dessert is about joy and moderation, and this cake delivers both in spades!
Conclusion
If you’re looking for a party dessert that’s as fun to make as it is to eat, this Dr. Seuss Jelly Roll Cake recipe is a must-try. The colors, the swirl, the light-as-air cake—all come together for a sweet treat that’s pure celebration on a plate. Customize the colors, play with the filling, or keep it classic—it’s up to you. What I love most is seeing the faces light up around the table, and knowing I’ve started a new tradition that’s just as exciting for me as it is for the kids.
Go ahead, give it a whirl—then come back and let me know how you made it your own! Leave a comment, share your wildest color combos, or tag me in your Pinterest-worthy creations. This is the kind of recipe that’s meant to be shared, tweaked, and loved for years to come. Wishing you happy baking and even happier memories—may your kitchen always be a little bit Seussical!
Frequently Asked Questions
Can I make the Dr. Seuss Jelly Roll Cake ahead of time?
Yes! You can bake and roll the cake (without filling) a day ahead, then fill and decorate it a few hours before serving. Or assemble completely and chill overnight—the flavors get even better.
What’s the secret to getting bright, bold colors?
Gel food coloring is the key! Use vibrant gel colors and don’t be shy—they bake up brighter than liquid dyes. Swirl gently so the colors stay sharp and don’t blend too much.
My cake cracked when I rolled it—what went wrong?
This usually means the cake cooled too long before rolling. Always roll it up while it’s still warm. If you do get cracks, just cover with more whipped cream or sprinkles—it’ll still taste amazing!
Can I freeze the jelly roll cake?
You can freeze the sponge cake (rolled, without cream) for up to a month. Thaw, fill, and roll it again before serving. I don’t recommend freezing the filled cake as the cream might separate.
What kind of filling can I use instead of whipped cream?
You can use stabilized whipped cream, cream cheese frosting, or even a light mousse. For a fruity version, try spreading a thin layer of jam under the cream. Just avoid anything too wet, as it can make the cake soggy.
Pin This Recipe!

Dr. Seuss Jelly Roll Cake Recipe Easy Multi-Color Party Dessert
- Total Time: 1 hour
- Yield: 12 servings 1x
Description
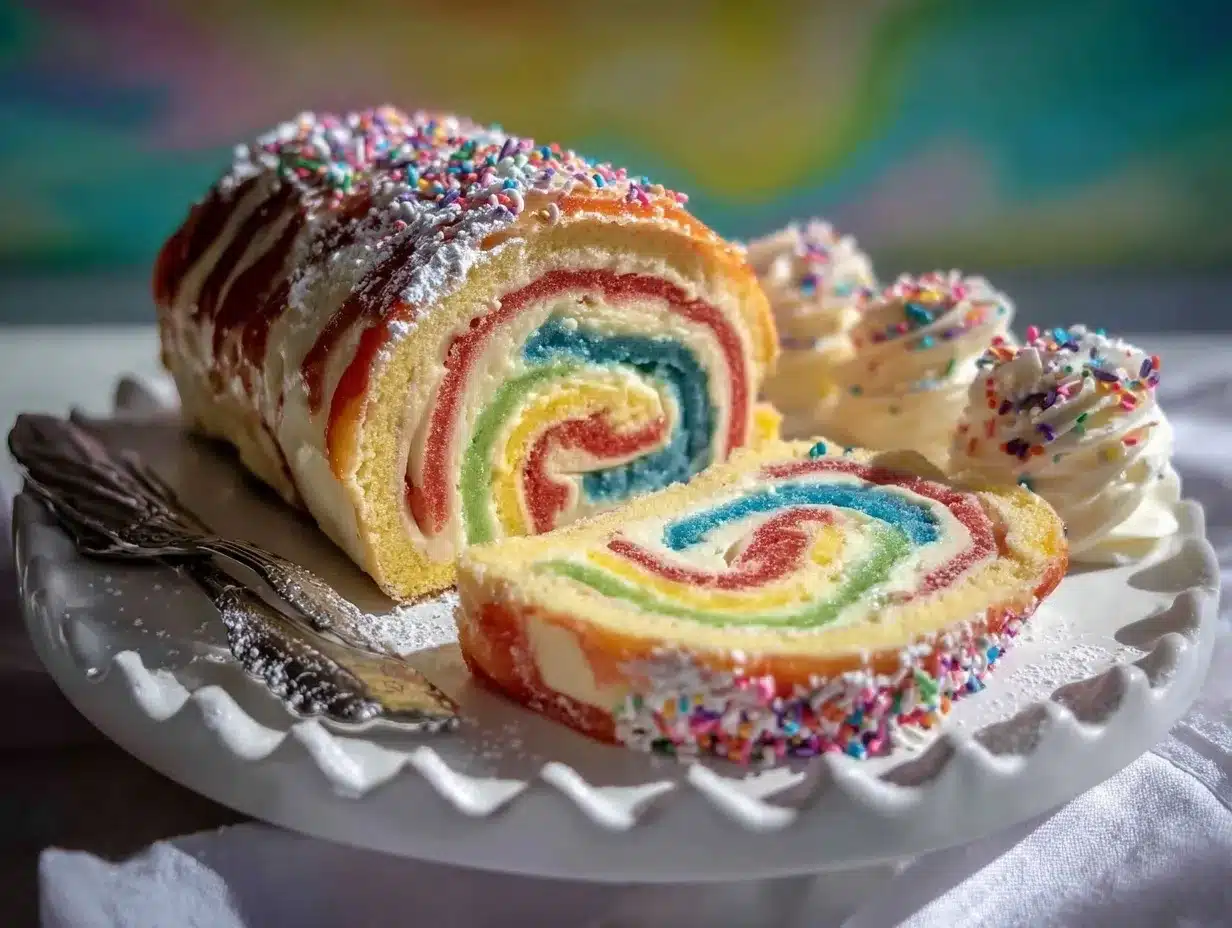
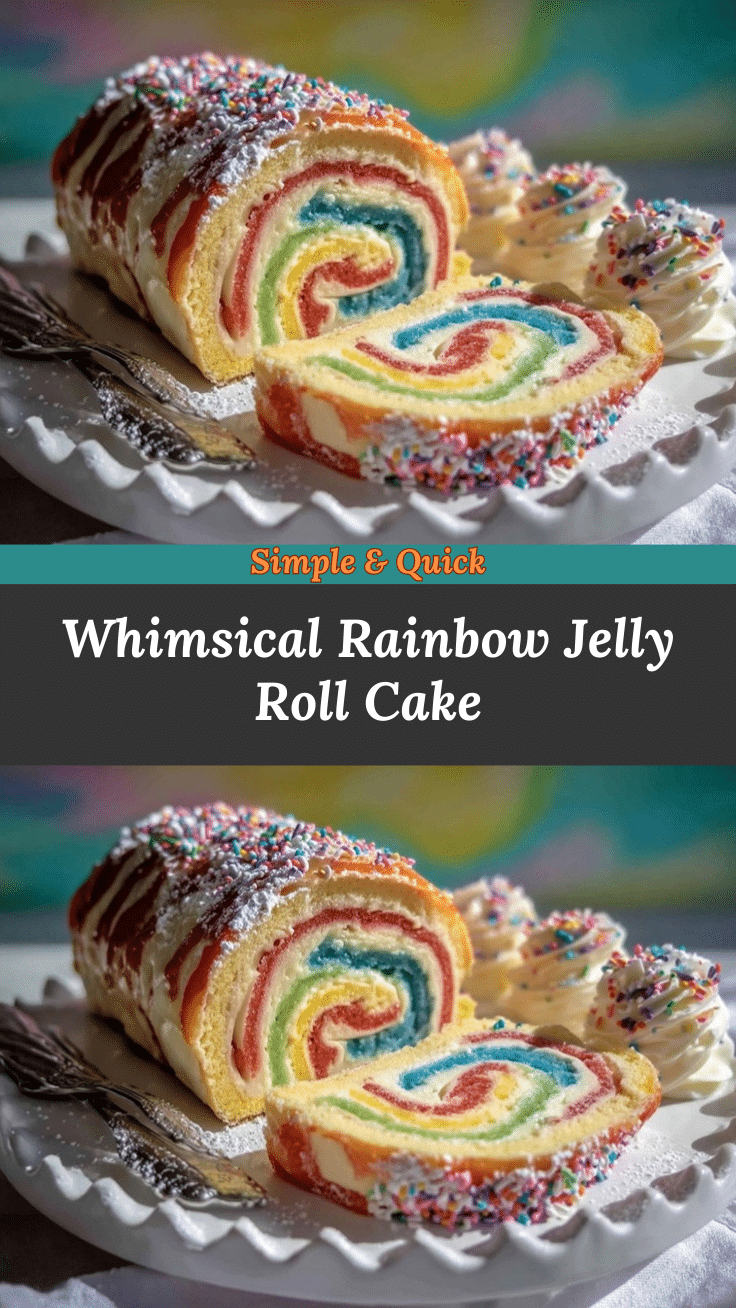
This whimsical Dr. Seuss Jelly Roll Cake features a light vanilla sponge swirled with vibrant colors and filled with fluffy whipped cream. It’s a show-stopping, crowd-pleasing dessert perfect for parties, birthdays, and celebrations.
Ingredients
- 4 large eggs, room temperature
- 3/4 cup granulated sugar
- 1 tablespoon whole milk
- 1 teaspoon pure vanilla extract
- 1 cup cake flour, sifted (or all-purpose flour with 2 tablespoons replaced by cornstarch)
- 1/2 teaspoon baking powder
- 1/4 teaspoon fine sea salt
- Assorted gel food coloring (red, blue, yellow, green, purple, etc.)
- 1 cup heavy whipping cream, chilled
- 2 tablespoons powdered sugar
- 1/2 teaspoon pure vanilla extract
- Powdered sugar (for dusting and finishing)
- Optional: Sprinkles or edible glitter
Instructions
- Preheat oven to 350°F (175°C). Line a 10×15-inch jelly roll pan with parchment paper and lightly grease. Lay out a clean kitchen towel and dust generously with powdered sugar.
- In a large mixing bowl, beat eggs on high speed for 5 minutes until pale and thick. Gradually add granulated sugar and continue beating until the batter falls in thick ribbons.
- Gently mix in milk and vanilla extract. Do not overmix.
- Sift together cake flour, baking powder, and salt. Gently fold into the wet ingredients until just combined.
- Divide the batter evenly among 4-5 bowls. Add a few drops of gel food coloring to each and gently fold until evenly colored.
- Drop spoonfuls of colored batter randomly over the prepared pan. Swirl gently with a toothpick or skewer.
- Bake for 10-12 minutes, until the cake springs back when lightly touched in the center.
- Immediately lift the cake out by the parchment and flip onto the prepared towel (powdered sugar side down). Peel off parchment. Starting from the short end, roll the cake and towel together into a tight spiral. Let cool completely, seam side down.
- While the cake cools, beat heavy cream, powdered sugar, and vanilla on high until stiff peaks form. Keep chilled.
- Once the cake is cool, gently unroll. Spread whipped cream evenly, leaving a 1/2-inch border.
- Roll the cake back up (without the towel), as tightly as possible. Transfer to a serving platter, seam side down. Chill for at least 30 minutes.
- Dust with powdered sugar and decorate with sprinkles or edible glitter if desired. Slice and serve.
Notes
Roll the cake while warm to prevent cracking. Use gel food coloring for vibrant colors. If cracks appear, cover with extra whipped cream or sprinkles. The cake can be made gluten-free or dairy-free with simple swaps. Chill before slicing for neat spirals.
- Prep Time: 25 minutes
- Cook Time: 12 minutes
- Category: Dessert
- Cuisine: American
Nutrition
- Serving Size: 1 slice (1/12 of cak
- Calories: 180
- Sugar: 16
- Sodium: 70
- Fat: 8
- Saturated Fat: 5
- Carbohydrates: 25
- Fiber: 0.5
- Protein: 3
Keywords: jelly roll cake, Dr. Seuss dessert, rainbow cake, party dessert, birthday cake, multi-color cake, easy jelly roll, kids party, whimsical dessert
