

Introduction
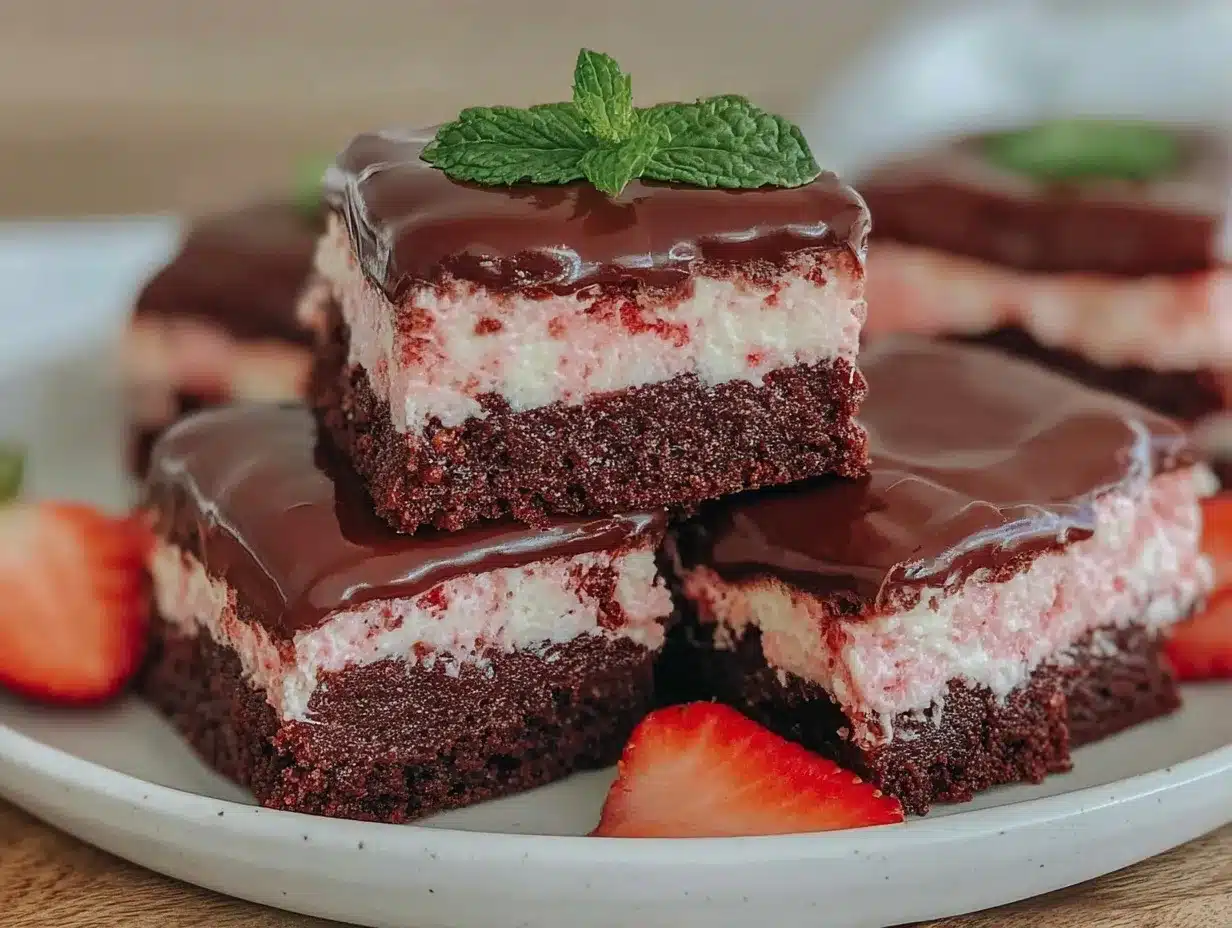
Picture this: the heady scent of melted chocolate swirling with the sweet tang of ripe strawberries, all wrapped up in soft, fudgy sandwich cookies. It’s the kind of aroma that somehow seeps out of the kitchen and pulls everyone in—kids, neighbors, and even the dog with hopeful eyes. The first time I made these Chocolate-Dipped Strawberry Fudge Sandwiches, I was instantly hooked. There’s a certain magic in watching the glossy chocolate coat each sandwich, setting up to a perfect crackle when you bite in. It’s a moment that makes you pause, savor, and realize you’ve just discovered something special.
Growing up, my grandma used to make a strawberry fudge every Valentine’s Day, and it was always a fight to get the last piece. Years later, when I was knee-high to a grasshopper, I tried to recreate that magic. Instead, I stumbled upon a new twist—why not sandwich that berry fudge between two rich, chocolatey cookies and dunk the whole thing in more chocolate? That’s honestly how these came to be. If I’d thought of this years ago, I would’ve been the most popular kid on the block!
Let’s face it, these fudge sandwiches practically disappeared from the cooling rack before they were even dipped. My family couldn’t stop sneaking them (and I can’t really blame them). These are the treats people ask you to bring to every potluck, birthday, or school bake sale. They’re dangerously easy, give pure, nostalgic comfort, and, well, they look downright gorgeous on a Pinterest board.
I’ve tested and tweaked this recipe more times than I can count, all in the name of research, of course. Now, Chocolate-Dipped Strawberry Fudge Sandwiches are a staple for holidays, gifting, or just when you want a sweet treat that feels like a warm hug. Trust me, you’re going to want to bookmark this one.
Why You’ll Love This Chocolate-Dipped Strawberry Fudge Sandwiches Easy Dessert Recipe
If you’re anything like me, you want treats that taste amazing, look impressive, and don’t leave you washing dishes for an hour. These Chocolate-Dipped Strawberry Fudge Sandwiches check all those boxes—and then some. After years of recipe testing and a few chocolate smudges on my favorite apron, here’s why this one stands out:
- Quick & Easy: Comes together in under an hour, so you can whip up a batch even on a busy weeknight or when you get that last-minute “can you bring dessert?” text.
- Simple Ingredients: No need to hunt for hard-to-find stuff. You likely have most of it in your pantry or fridge already.
- Perfect for Any Occasion: These sandwiches are show-stoppers at brunch, ideal for baby showers, and just right for holiday trays or Valentine’s Day surprises.
- Crowd-Pleaser: Kids love the chocolate (of course), adults love the strawberries, and everyone ends up reaching for seconds.
- Unbelievably Delicious: The combination of fudge, strawberry, and crisp chocolate shell is pure comfort food—no weird aftertastes or dry cookies here.
What truly makes this recipe different? It’s the gooey, real strawberry fudge filling (not just jam!) and the way the chocolate cookies stay soft and rich, even after dipping. I use a simple technique blending freeze-dried strawberries into the fudge for a punchy, all-natural flavor. No artificial flavors, just that honest, berry-bright taste.
Honestly, these sandwiches are the kind you close your eyes over after the first bite. They’re a little nostalgic, a little fancy, and a whole lot of fun to make (especially if you have little helpers for the dipping part). Whether you need a “wow” moment for guests or just want to turn a Tuesday into a treat day, you’ll want these in your dessert rotation. I’ve made a lot of cookies in my time, but this one? This is the one people remember.
What Ingredients You Will Need
This easy dessert recipe uses everyday ingredients to create a showstopper treat. Most of these are pantry staples, but I’ll toss in a few tips and trusted brands to help you get the best results. Here’s what you’ll want to gather before you start your Chocolate-Dipped Strawberry Fudge Sandwiches:
-
For the Chocolate Cookies:
- 1 cup (226g) unsalted butter, softened (I like Kerrygold for rich flavor)
- 1 cup (200g) granulated sugar
- 1 large egg, room temperature
- 1 teaspoon pure vanilla extract
- 1 3/4 cups (220g) all-purpose flour (King Arthur is my go-to)
- 1/2 cup (50g) Dutch-process cocoa powder (Ghirardelli or Valrhona for deep flavor)
- 1/2 teaspoon baking powder
- 1/2 teaspoon kosher salt
-
For the Strawberry Fudge Filling:
- 1 cup (170g) white chocolate chips
- 1/2 cup (120ml) sweetened condensed milk
- 1/2 cup (8g) freeze-dried strawberries, finely crushed (Trader Joe’s is great!)
- 1 tablespoon unsalted butter
- 1/2 teaspoon pure vanilla extract
- Pinch of salt
- 2-3 drops natural red gel food color (optional, for extra pinkness)
-
For Dipping & Decorating:
- 8 oz (225g) semisweet chocolate or dark chocolate, chopped (use chips or bars)
- 1 tablespoon coconut oil or shortening (for smoother dipping)
- Extra freeze-dried strawberry powder or sprinkles for garnish (optional)
Ingredient Tips & Substitutions:
- For gluten-free: Swap flour for a 1:1 gluten-free baking blend.
- Dairy-free? Use plant-based butter and dairy-free chocolate chips.
- Can’t find freeze-dried strawberries? Use 2 tablespoons strawberry jam (filling will be softer and sweeter).
- No coconut oil? A splash of vegetable oil works too.
In the summer, swap in freeze-dried raspberries for a tart twist. For a fancier look, roll the edges in mini chocolate chips or colored sugar. The best part? You can tweak these to your heart’s content, and they’re still going to taste amazing.
Equipment Needed
You don’t need a fancy kitchen to whip up these Chocolate-Dipped Strawberry Fudge Sandwiches, but having the right tools makes things smoother (and means less mess!).
- Hand or Stand Mixer: Makes creaming the butter and sugar a breeze. A sturdy wooden spoon works in a pinch, but your arm might not thank you.
- Mixing Bowls: At least two—one for dough, one for fudge.
- Baking Sheets & Parchment Paper: Parchment keeps cookies from sticking and helps with easy cleanup.
- Rolling Pin: For even cookies. If you don’t have one, a wine bottle works (been there, done that).
- Round Cookie Cutter (2-inch/5cm): Or use a glass with a thin rim.
- Small Saucepan: For melting the fudge filling.
- Microwave-Safe Bowl: For melting chocolate (or use a double boiler).
- Wire Rack: For cooling and drying after dipping.
- Spatula & Spoons: For spreading, mixing, and scraping.
If you’re on a budget, skip the stand mixer and use elbow grease. For cookie cutters, improvise with biscuit cutters or even a clean can. I’ve tried them all—what matters is the fun and the fudge, not the fanciness of your tools.
How to Make Chocolate-Dipped Strawberry Fudge Sandwiches
-
Make the Chocolate Cookie Dough:
- Cream 1 cup (226g) softened butter with 1 cup (200g) sugar in a large bowl until light and fluffy—about 2 minutes with a mixer.
- Beat in 1 egg and 1 tsp vanilla extract. The mixture should look pale and creamy.
- In a separate bowl, whisk together 1 3/4 cups (220g) flour, 1/2 cup (50g) cocoa powder, 1/2 tsp baking powder, and 1/2 tsp salt.
- Gradually add dry ingredients to wet, mixing just until combined. Dough will be thick and fudgy—don’t overmix.
- Shape dough into a disk, wrap in plastic, and chill for 20-30 minutes while you prep the filling.
-
Prepare the Strawberry Fudge Filling:
- Place 1 cup (170g) white chocolate chips, 1/2 cup (120ml) sweetened condensed milk, 1/2 cup (8g) finely crushed freeze-dried strawberries, 1 tbsp butter, and a pinch of salt in a small saucepan.
- Heat over low, stirring constantly, until smooth and thickened—about 3-4 minutes. Don’t let it scorch (trust me, burnt white chocolate is a tragedy).
- Remove from heat and stir in 1/2 tsp vanilla and food coloring, if using. Set aside to cool slightly; it should be thick but spreadable.
-
Roll and Cut the Cookies:
- Preheat oven to 350°F (175°C). Line 2 baking sheets with parchment.
- On a lightly floured surface, roll dough to 1/4 inch (6mm) thick. Cut out rounds with a 2-inch (5cm) cutter. Re-roll scraps as needed.
- Place cookies 1 inch apart on sheets. Bake for 8-10 minutes, until edges are firm and centers are just set. They’ll look soft—don’t overbake or they’ll lose their fudgy bite.
- Cool on sheets 5 minutes, then transfer to a wire rack.
-
Assemble the Sandwiches:
- Once cookies are cool, spread 1 generous tablespoon of strawberry fudge on the flat side of half the cookies. Top with remaining cookies, pressing gently to sandwich.
- If fudge is too soft, chill sandwiches 10 minutes before dipping.
-
Dip in Chocolate:
- Melt 8oz (225g) semisweet chocolate and 1 tbsp coconut oil in a microwave-safe bowl in 20-second bursts, stirring until smooth.
- Dip half of each sandwich into chocolate, letting excess drip off. Place on parchment and sprinkle with extra strawberry powder or sprinkles if you want.
- Let stand at room temp or chill 10 minutes to set.
-
Final Touches:
- Cookies are tastiest once the chocolate sets (if you can wait that long). Store any leftovers airtight at room temp up to 2 days, or in the fridge for up to a week.
Troubleshooting:
If your dough feels sticky, chill it longer. If the fudge filling is runny, let it cool until thick. For prettier dipping, use a fork to steady the sandwiches and tap off extra chocolate.
Personal Tip:
I like to make the cookies the day before, then fill and dip the next day for easier assembly. Trust me, your future self will thank you.
Cooking Tips & Techniques
Here’s what I’ve learned (sometimes the hard way) about making Chocolate-Dipped Strawberry Fudge Sandwiches turn out perfectly every time:
- Chill the Dough: Don’t skip this step, even if you’re in a hurry. Chilled dough rolls easier and holds its shape, so you get perfect circles instead of blobs.
- Sift the Cocoa: Lumpy cocoa equals streaky cookies. Sifting before mixing gives you a smoother, fudgier result.
- Don’t Overbake: Cookies should be barely set when you pull them. They’ll firm up as they cool, keeping that soft, brownie-like center.
- Let Fudge Cool: Hot fudge will ooze out. Let it thicken to peanut butter consistency before spreading.
- Use High-Quality Chocolate: Melting chocolate chips with a little coconut oil gives you that bakery-style shine and snap.
- Work in Batches: Fill a few sandwiches at a time, dip, and let set before moving to the next. The fudge can start to set up quickly.
- Clean Up Messes Fast: Chocolate sets quickly—wipe up spills right away or be prepared to scrape later (I’ve learned this the sticky way).
If your cookies spread too much, try chilling before baking. If chocolate seizes, add a dash more coconut oil. And if you’re dipping with kids, set up a “sprinkle station” with parchment underneath—it keeps the chaos contained.
Consistency comes with practice, but honestly, even the messy ones taste amazing. Don’t stress about perfection—these sandwiches are supposed to be fun!
Variations & Adaptations
One of the best things about this easy dessert recipe is how flexible it is. Over the years, I’ve played with flavors and methods, and here’s how you can, too:
- Gluten-Free: Substitute the all-purpose flour with a 1:1 gluten-free baking flour (like Bob’s Red Mill). The texture stays wonderfully fudgy—no one will know the difference.
- Dairy-Free: Use a plant-based butter, dairy-free chocolate chips, and coconut condensed milk (available at most health food stores).
- Seasonal Twist: Swap freeze-dried strawberries for raspberries or blueberries in the filling. In winter, add a dash of peppermint extract for a holiday vibe.
- More Chocolate: Use chocolate fudge filling and dip in white chocolate for a reverse effect (my kids go wild for this).
- Different Shapes: Try heart-shaped or star-shaped cookie cutters for festive occasions or just for fun.
- Nutty Crunch: Roll the edges in finely chopped pistachios or almonds before the chocolate sets for a flavor boost and pretty look.
My favorite riff? I once added a layer of marshmallow fluff on top of the strawberry fudge—messy, but oh so good. Don’t be afraid to experiment. If you’ve got an allergy or a picky eater, there’s a way to make these sandwiches work for everyone.
Serving & Storage Suggestions
Chocolate-Dipped Strawberry Fudge Sandwiches look gorgeous on a platter, especially with a sprinkle of extra strawberry powder or a drizzle of white chocolate. I like to serve them slightly chilled—the fudge firms up, and the chocolate has a perfect snap.
They pair beautifully with a mug of coffee, a glass of cold milk, or a bubbly rosé for grown-up celebrations. These sandwiches make excellent gifts; just wrap them in parchment and tie with a ribbon for a sweet homemade touch.
- Storage: Keep in an airtight container at room temperature for up to 2 days, or refrigerate for up to 1 week. For longer storage, freeze in a single layer, then transfer to a freezer bag. Thaw in the fridge before serving.
- Reheating: No need to reheat, but if you like a softer fudge, let sandwiches sit at room temp 10 minutes before eating.
- Flavor Notes: The berry flavor deepens after a day, so these are perfect for make-ahead parties.
Stack them high on a cake stand or arrange in a cookie tin for a dramatic, Pinterest-worthy presentation. They’re just as tasty as they are pretty.
Nutritional Information & Benefits
Each Chocolate-Dipped Strawberry Fudge Sandwich is around 210 calories, with 3g protein, 28g carbs, and 10g fat. There’s a bit of indulgence, but hey, it’s dessert!
Freeze-dried strawberries pack a punch of vitamin C and antioxidants, while dark chocolate offers a touch of magnesium and heart-healthy flavonoids. For those with dietary restrictions, you can easily make these gluten-free or dairy-free with the swaps above.
Allergens include wheat, dairy, and possibly soy (check your chocolate labels). Personally, I love knowing exactly what’s in my treats—real berries, no weird preservatives, and all the joy of a homemade dessert.
Conclusion
There’s just something about Chocolate-Dipped Strawberry Fudge Sandwiches that makes people smile. Maybe it’s the rich, fudgy cookies, the burst of real strawberry in each bite, or the way the glossy chocolate cracks when you take a bite. I love this recipe because it’s easy enough for a weekday, special enough for a celebration, and customizable to whatever you’ve got in your pantry.
Go ahead and put your own spin on these—change up the flavors, shapes, or dipping chocolate to suit your cravings. I hope these become a staple in your kitchen, just like they are in mine. If you try them, let me know in the comments how they turned out! Snap a photo, share your creation, or tag me if you post on Pinterest. Happy baking, and may your kitchen always smell like strawberries and chocolate!
Frequently Asked Questions
Can I make these sandwiches ahead of time?
Absolutely! They actually taste even better the next day as the flavors meld. Just store them airtight in the fridge or freezer until you’re ready to serve.
What if I can’t find freeze-dried strawberries?
No worries. You can use a couple tablespoons of strawberry jam in the fudge filling, but the consistency will be softer and the flavor a bit sweeter.
Can I use milk chocolate instead of dark chocolate for dipping?
Definitely! Milk, dark, or even white chocolate all work. Use your favorite, or swirl them for a fun effect.
Are these cookies safe for nut allergies?
The basic recipe is nut-free, but always check your chocolate and ingredient labels. If you add nut toppings, be mindful of allergies.
How do I keep my chocolate from getting dull or streaky?
Add a little coconut oil or shortening when melting the chocolate, stir gently, and dip quickly. Let them set at room temperature for the best shine.
Pin This Recipe!
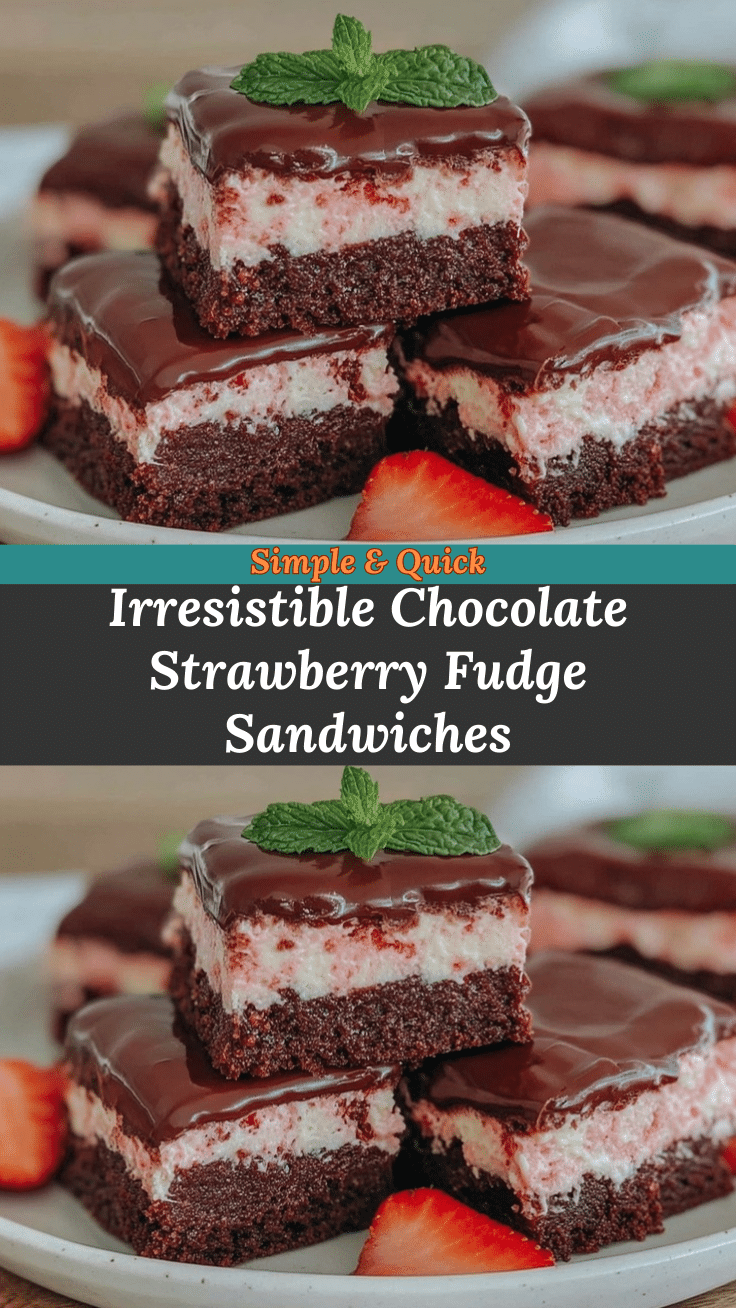

Chocolate-Dipped Strawberry Fudge Sandwiches
- Total Time: 50 minutes
- Yield: 16 sandwiches 1x
Description
Rich, fudgy chocolate sandwich cookies filled with real strawberry fudge and dipped in glossy chocolate. These easy, crowd-pleasing treats are perfect for holidays, gifting, or any time you want a nostalgic, show-stopping dessert.
Ingredients
- 1 cup (226g) unsalted butter, softened
- 1 cup (200g) granulated sugar
- 1 large egg, room temperature
- 1 teaspoon pure vanilla extract
- 1 3/4 cups (220g) all-purpose flour
- 1/2 cup (50g) Dutch-process cocoa powder
- 1/2 teaspoon baking powder
- 1/2 teaspoon kosher salt
- 1 cup (170g) white chocolate chips
- 1/2 cup (120ml) sweetened condensed milk
- 1/2 cup (8g) freeze-dried strawberries, finely crushed
- 1 tablespoon unsalted butter
- 1/2 teaspoon pure vanilla extract
- Pinch of salt
- 2–3 drops natural red gel food color (optional)
- 8 oz (225g) semisweet or dark chocolate, chopped
- 1 tablespoon coconut oil or shortening
- Extra freeze-dried strawberry powder or sprinkles for garnish (optional)
Instructions
- Cream softened butter with sugar in a large bowl until light and fluffy (about 2 minutes with a mixer).
- Beat in egg and vanilla extract until pale and creamy.
- In a separate bowl, whisk together flour, cocoa powder, baking powder, and salt.
- Gradually add dry ingredients to wet, mixing just until combined. Do not overmix.
- Shape dough into a disk, wrap in plastic, and chill for 20-30 minutes.
- For the filling, place white chocolate chips, sweetened condensed milk, crushed freeze-dried strawberries, butter, and a pinch of salt in a small saucepan.
- Heat over low, stirring constantly, until smooth and thickened (about 3-4 minutes).
- Remove from heat, stir in vanilla and food coloring if using. Cool slightly until thick but spreadable.
- Preheat oven to 350°F (175°C). Line baking sheets with parchment.
- On a lightly floured surface, roll dough to 1/4 inch thick. Cut out rounds with a 2-inch cutter.
- Place cookies 1 inch apart on sheets. Bake 8-10 minutes until edges are firm and centers just set.
- Cool on sheets 5 minutes, then transfer to wire rack.
- Spread 1 tablespoon strawberry fudge on the flat side of half the cookies. Top with remaining cookies to sandwich.
- If fudge is soft, chill sandwiches 10 minutes before dipping.
- Melt chocolate and coconut oil in a microwave-safe bowl in 20-second bursts, stirring until smooth.
- Dip half of each sandwich into chocolate, letting excess drip off. Place on parchment and garnish if desired.
- Let stand at room temp or chill 10 minutes to set.
- Store leftovers airtight at room temp up to 2 days, or in the fridge up to a week.
Notes
Chill dough for easier rolling and better shape. Sift cocoa for smooth cookies. Don’t overbake—cookies should be just set. Let fudge cool before spreading. Use high-quality chocolate for dipping. For gluten-free, use a 1:1 baking blend. Dairy-free options available. Store airtight; flavors deepen after a day.
- Prep Time: 25 minutes
- Cook Time: 10 minutes
- Category: Dessert
- Cuisine: American
Nutrition
- Serving Size: 1 sandwich cookie
- Calories: 210
- Sugar: 18
- Sodium: 90
- Fat: 10
- Saturated Fat: 6
- Carbohydrates: 28
- Fiber: 2
- Protein: 3
Keywords: chocolate, strawberry, fudge, sandwich cookies, easy dessert, holiday, Valentine's Day, kid-friendly, potluck, bake sale
