

Introduction
The first time I made this crispy Dutch oven no-knead crusty bread, I honestly thought it was some kind of kitchen magic. I had been juggling a crazy workweek and just wanted a simple loaf of bread—something homemade but without the usual labor and fuss. No kneading? Yeah, I was skeptical. My mind kept circling back to the same doubts: how could bread without that elbow grease turn out crusty and full of flavor? Spoiler alert: it blew every expectation out of the water.
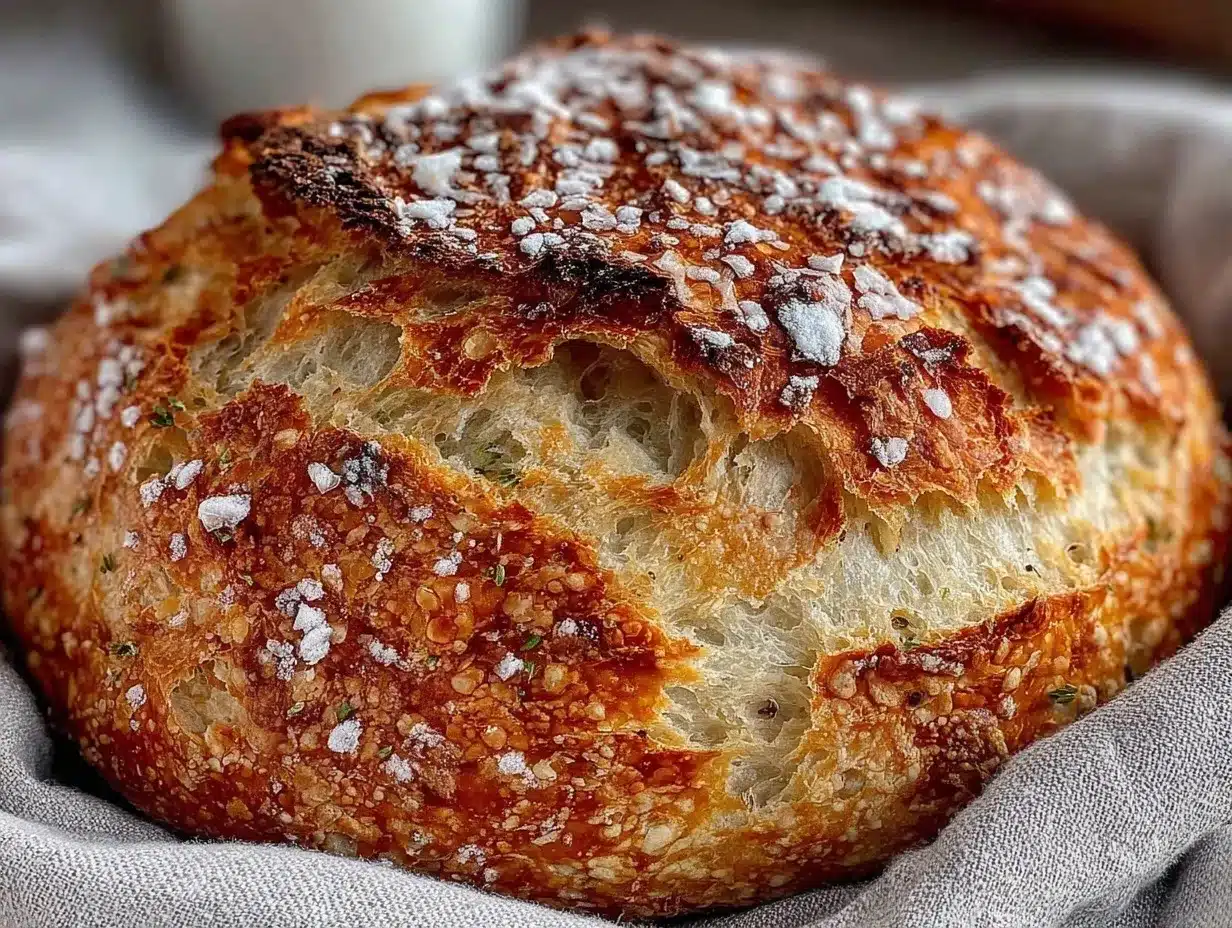
One quiet evening, with nothing but flour, yeast, salt, and water on hand, I tossed the ingredients together, let it sit, and then slid the dough into my trusty Dutch oven. The smell that drifted through the kitchen a few hours later? Pure comfort. The crust crackled the moment I sliced into it, and the interior was soft with those beautiful, irregular holes that make you close your eyes and savor every bite. It reminded me a little of the crusty bread I’d enjoyed during a trip to Europe but without the hassle.
This recipe stuck with me because it fits perfectly into those moments when you want to feel grounded—no fancy equipment, no long prep, just honest bread that makes any meal feel like a little celebration. If you’re like me and appreciate that perfect crust and chewy crumb without the traditional kneading workout, this bread’s got your name on it.
Why You’ll Love This Recipe
After testing and tweaking this recipe more times than I can count, I’ve come to trust it for so many reasons. Here’s why this crispy Dutch oven no-knead crusty bread recipe is a keeper:
- Quick & Easy: The hands-on time is less than 15 minutes, and the rest is just waiting—perfect when life’s busy but you want fresh bread.
- Simple Ingredients: Flour, yeast, salt, and water—no hard-to-find stuff. I usually keep King Arthur flour on hand for the best texture.
- Perfect for Any Occasion: Whether you’re making a cozy dinner or bringing a loaf to a weekend brunch, it’s always a hit.
- Crowd-Pleaser: This bread has gotten countless compliments from family and friends, even those who usually buy store bread.
- Unbelievably Delicious: The crisp crust with a chewy, airy crumb is honestly addictive.
What sets this no-knead bread apart is how the Dutch oven traps steam, giving the crust that crackly exterior you’d expect from a bakery loaf. No tricky techniques, just a simple method that anyone can follow. It’s not just bread—it’s a little slice of homemade happiness that fits into a busy lifestyle without compromise.
What Ingredients You Will Need
This no-knead bread recipe relies on a handful of basic ingredients that work together to create that perfect crust and crumb. You probably have most of these in your pantry already, which makes this recipe even more convenient.
- All-purpose flour (3 cups / 375 grams): I prefer unbleached all-purpose flour for a nice balance of structure and tenderness. You can swap in bread flour for a chewier texture.
- Instant yeast (1/4 teaspoon): This small amount is enough to give your bread a good rise without overwhelming the flavor.
- Salt (1 1/4 teaspoons): Use fine sea salt or kosher salt for even seasoning.
- Lukewarm water (1 1/2 cups / 355 ml): The temperature should be about 100°F (38°C) to activate the yeast gently.
Optional but recommended:
- A little olive oil (1 tablespoon) can be added for subtle richness and crust color.
- Sprinkling of flour or cornmeal for dusting your proofing surface or Dutch oven bottom to prevent sticking.
If you want to experiment, you can substitute all-purpose flour with whole wheat flour for a nuttier flavor, but keep in mind the dough might be denser. For gluten-free options, almond or oat flour blends require recipe tweaks, but I haven’t tried those myself yet.
Equipment Needed
The beauty of this recipe is in its simplicity, but having the right equipment really makes all the difference.
- Dutch oven: A 5-6 quart (4.7-5.7 liter) Dutch oven with a lid is ideal for creating steam and baking the bread evenly. I use a cast-iron one that’s been in my family for years, but any heavy pot with a tight-fitting lid works.
- Mixing bowl: A large bowl for combining ingredients and letting the dough rise.
- Wooden spoon or spatula: For mixing the sticky dough without getting your hands too messy.
- Parchment paper: Helps transfer the dough easily into the hot Dutch oven.
- Kitchen scale (optional): For precise measuring, especially if you want to be consistent every time.
If you don’t have a Dutch oven, you can bake the bread on a baking stone or heavy baking sheet, but the crust won’t be quite as crisp or thick. For budget-friendly options, enamel-coated or ceramic pots work well too, just watch the temperature guidelines to avoid damage.
Preparation Method
- Mix the dough (5 minutes): In your large bowl, combine 3 cups (375 g) of all-purpose flour, 1/4 teaspoon instant yeast, and 1 1/4 teaspoons salt. Stir well to blend dry ingredients. Slowly add 1 1/2 cups (355 ml) lukewarm water and stir with a wooden spoon until a sticky, shaggy dough forms. Don’t worry about kneading—the dough should be loose and a bit messy.
- First rise (12-18 hours): Cover the bowl with plastic wrap or a clean kitchen towel and leave it at room temperature (around 70°F / 21°C). The dough will bubble and expand—this slow fermentation builds flavor and texture. If your kitchen is warm, 12 hours may be enough; cooler temps need closer to 18.
- Preheat the oven and Dutch oven (45 minutes): Place your Dutch oven with the lid inside your oven and preheat to 450°F (232°C). This step is crucial for that crispy crust. Be careful when handling the hot pot later—use oven mitts!
- Shape the dough (10 minutes): Lightly flour a surface and turn out the dough. It will be sticky but manageable. Fold it over itself a few times to create some tension, then shape into a rough ball. Place the dough seam-side down on a piece of parchment paper. Let it rest for 30 minutes while the oven finishes preheating.
- Bake the bread (45 minutes): Carefully lift the dough on the parchment paper and place it into the hot Dutch oven. Cover with the lid and bake for 30 minutes. Then remove the lid and bake for another 15 minutes to develop a deep golden crust. The bread should sound hollow when tapped.
- Cool before slicing (at least 1 hour): Transfer the bread to a wire rack and resist the urge to slice immediately. Cooling helps set the crumb and keeps the crust crisp.
A few quick tips: If the dough feels too sticky during shaping, dust your hands with flour—but lightly, so you don’t dry out the dough. Also, I always double-check my oven temperature with an oven thermometer since accuracy matters here. This recipe pairs beautifully with a simple olive oil dip or a warm bowl of homemade soup.
Cooking Tips & Techniques
Getting that perfect crusty loaf can feel like a small science experiment, but a few tricks go a long way.
- Patience with the rise: The slow fermentation is key. Try not to rush it or use extra yeast to speed things up—that’s how you lose flavor depth.
- Don’t skip preheating the Dutch oven: The hot pot traps steam, which crisps the crust beautifully. I learned this the hard way when I tried baking in a cold pot—the crust was pale and soft.
- Use parchment paper: It makes transferring the dough safe and easy, so you don’t lose the shape or burn your fingers.
- Listen for the hollow sound: When you tap the bottom of the loaf, it should sound hollow—that’s a classic sign the bread is baked through.
- Experiment with hydration: If you want a more open crumb, increase water by 1-2 tablespoons, but handle the dough more carefully as it will be stickier.
Honestly, the first few times I made this, I was worried about underbaking or ruining the crust. But with each loaf, I got a better feel for how the dough should look and sound. It’s one of those recipes where experience really helps, but it’s forgiving enough to encourage you to try again.
Variations & Adaptations
This crispy Dutch oven no-knead bread recipe is a great base, and you can tweak it to suit your tastes or dietary needs.
- Whole wheat variation: Swap half the all-purpose flour for whole wheat flour for a nuttier, denser loaf. You might need slightly more water to keep it moist.
- Herb-infused bread: Add 1-2 tablespoons of fresh chopped rosemary, thyme, or oregano to the dry ingredients for an aromatic twist that pairs well with savory meals.
- Gluten-free option: Try a gluten-free flour blend designed for bread baking. Note that rising times and textures will vary, so keep an eye on the dough.
- Cheese-stuffed loaf: Before shaping, fold in small cubes of sharp cheddar or mozzarella for melty pockets inside the crusty bread.
One variation I love is folding in caramelized onions and cracked black pepper—makes for an irresistible snack or sandwich base. If you’re interested in a breakfast companion, this bread pairs perfectly with my creamy custard toast recipe, which balances the crunch with silky custard goodness.
Serving & Storage Suggestions
This bread shines best fresh and warm, but it also stores well.
- Serving temperature: For crunchiest crust, serve at room temperature or lightly toasted. A smear of butter or a drizzle of olive oil brings out the flavor.
- Complementary dishes: It’s perfect alongside soups, stews, or as a base for sandwiches. I often pair it with roasted tomato soup or a simple salad like the green goddess salad.
- Storage: Wrap the cooled loaf in a clean kitchen towel or paper bag to keep crust crisp for up to two days. For longer storage, slice and freeze in airtight bags.
- Reheating tips: To refresh the crust after freezing, pop slices in a toaster or bake the whole loaf at 375°F (190°C) for 10 minutes.
Over time, as the bread rests, the flavors mellow and the crumb softens—still delicious, just a different experience. I usually slice what I need and toast the rest to keep the texture lively.
Nutritional Information & Benefits
This homemade crusty bread provides a simple, wholesome carbohydrate source without additives or preservatives. Here’s a rough estimate per slice (1/12th of loaf):
| Calories | 150 |
|---|---|
| Carbohydrates | 30g |
| Protein | 5g |
| Fat | 1g |
| Fiber | 1g |
Using unbleached flour keeps the bread closer to its natural state, and the slow fermentation helps with digestibility. For those avoiding gluten, swapping flours is an option but requires adaptation. The simple ingredient list makes it free from common allergens like dairy and nuts.
Personally, I appreciate how this bread fits into a balanced diet—it’s comfort food without the extra junk, and it pairs well with nutrient-rich toppings or sides for a wholesome meal.
Conclusion
This crispy Dutch oven no-knead crusty bread recipe is one of those rare gems that combines ease with amazing results. Whether you’re new to bread baking or just want a no-fuss loaf that tastes like it took hours, this recipe delivers every time.
Feel free to tweak it to your liking—add herbs, cheese, or whole grains to make it your own. Honestly, I love how it feels like a little win every time I pull that golden loaf from the oven.
Give it a try, and if you’ve enjoyed it, I’d love to hear about your variations or moments with this bread. Baking bread at home is such a simple pleasure, and this recipe makes it approachable for everyone.
FAQs
- Can I use active dry yeast instead of instant yeast?
Yes, but you’ll need to proof it first in warm water with a pinch of sugar before adding to the flour. - Why is the dough so sticky?
The high hydration is what creates the open crumb and crusty texture. Use flour sparingly when handling. - Can I make this bread without a Dutch oven?
You can bake on a baking stone or sheet, but the crust won’t be as crispy without steam from the covered pot. - How long can I store the bread?
Store at room temperature for 2 days wrapped in a towel or paper bag. Freeze slices for longer storage. - Can I add seeds or nuts to the recipe?
Absolutely! Fold in your favorite seeds or nuts during shaping for added texture and flavor.
Pin This Recipe!
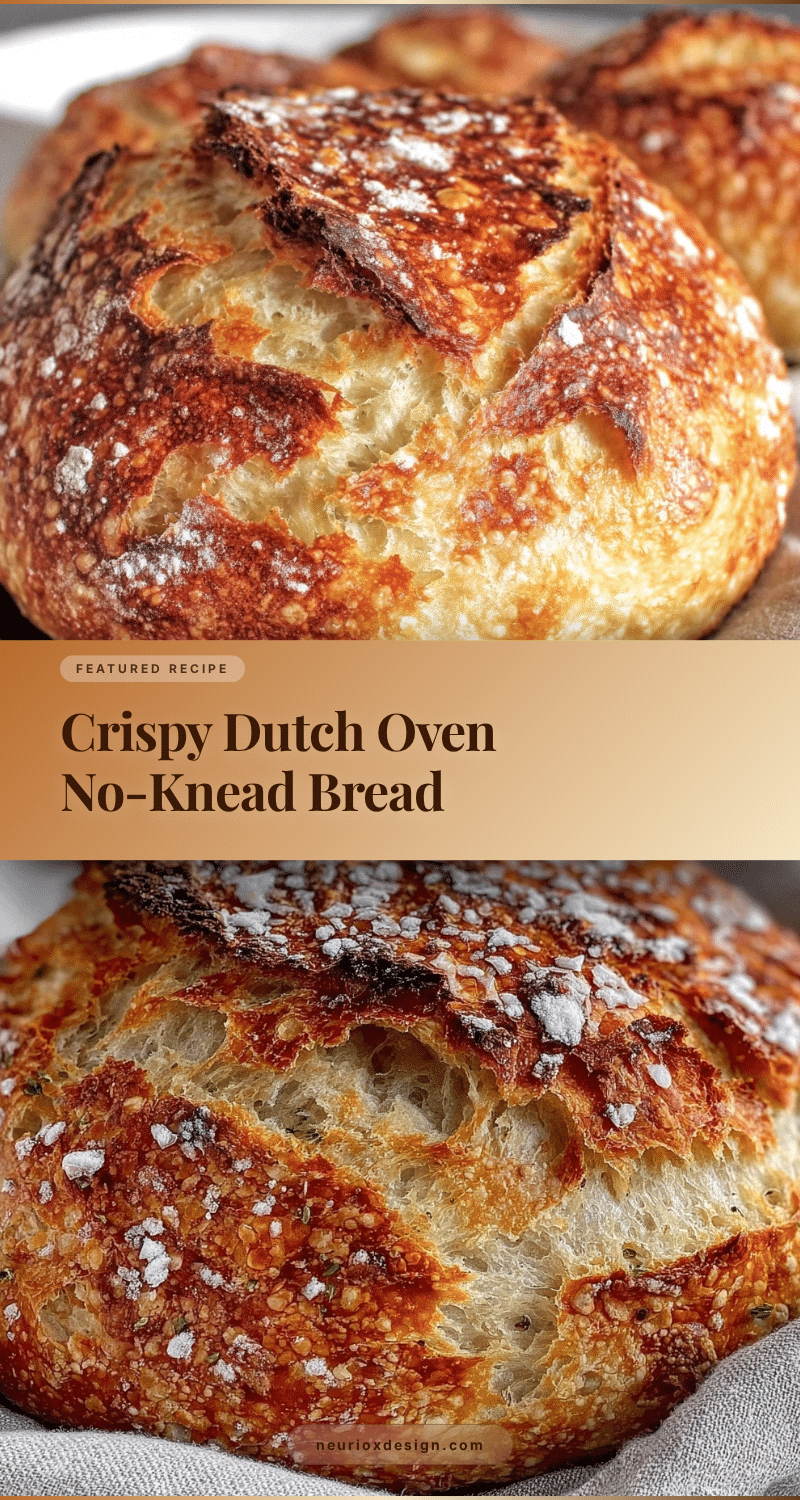

Crispy Dutch Oven No-Knead Bread Recipe Easy Homemade Crusty Loaf
- Total Time: 13 hours
- Yield: 12 servings 1x
Description
A simple no-knead bread recipe baked in a Dutch oven that yields a crusty exterior and soft, airy crumb with minimal hands-on time.
Ingredients
- 3 cups (375 grams) all-purpose flour (unbleached preferred)
- 1/4 teaspoon instant yeast
- 1 1/4 teaspoons salt (fine sea salt or kosher salt)
- 1 1/2 cups (355 ml) lukewarm water (about 100°F / 38°C)
- Optional: 1 tablespoon olive oil
- Optional: Flour or cornmeal for dusting
Instructions
- Mix the dough (5 minutes): In a large bowl, combine flour, yeast, and salt. Slowly add lukewarm water and stir with a wooden spoon until a sticky, shaggy dough forms.
- First rise (12-18 hours): Cover the bowl and leave at room temperature (around 70°F / 21°C) until dough bubbles and expands.
- Preheat the oven and Dutch oven (45 minutes): Place Dutch oven with lid inside oven and preheat to 450°F (232°C).
- Shape the dough (10 minutes): Lightly flour a surface, turn out the dough, fold it over itself a few times, shape into a rough ball, and place seam-side down on parchment paper. Let rest for 30 minutes.
- Bake the bread (45 minutes): Place dough with parchment paper into hot Dutch oven, cover with lid and bake 30 minutes. Remove lid and bake another 15 minutes until deep golden crust forms.
- Cool before slicing (at least 1 hour): Transfer bread to wire rack and let cool completely before slicing.
Notes
Use parchment paper to transfer dough safely. Preheat Dutch oven to trap steam for a crispy crust. Let bread cool at least 1 hour before slicing to set crumb. For a more open crumb, increase water by 1-2 tablespoons but handle dough carefully as it will be stickier. Oven temperature accuracy is important.
- Prep Time: 15 minutes
- Cook Time: 45 minutes
- Category: Bread
- Cuisine: American
Nutrition
- Serving Size: 1 slice (1/12th of l
- Calories: 150
- Fat: 1
- Carbohydrates: 30
- Fiber: 1
- Protein: 5
Keywords: no-knead bread, Dutch oven bread, crusty bread, homemade bread, easy bread recipe, no knead, artisan bread
