
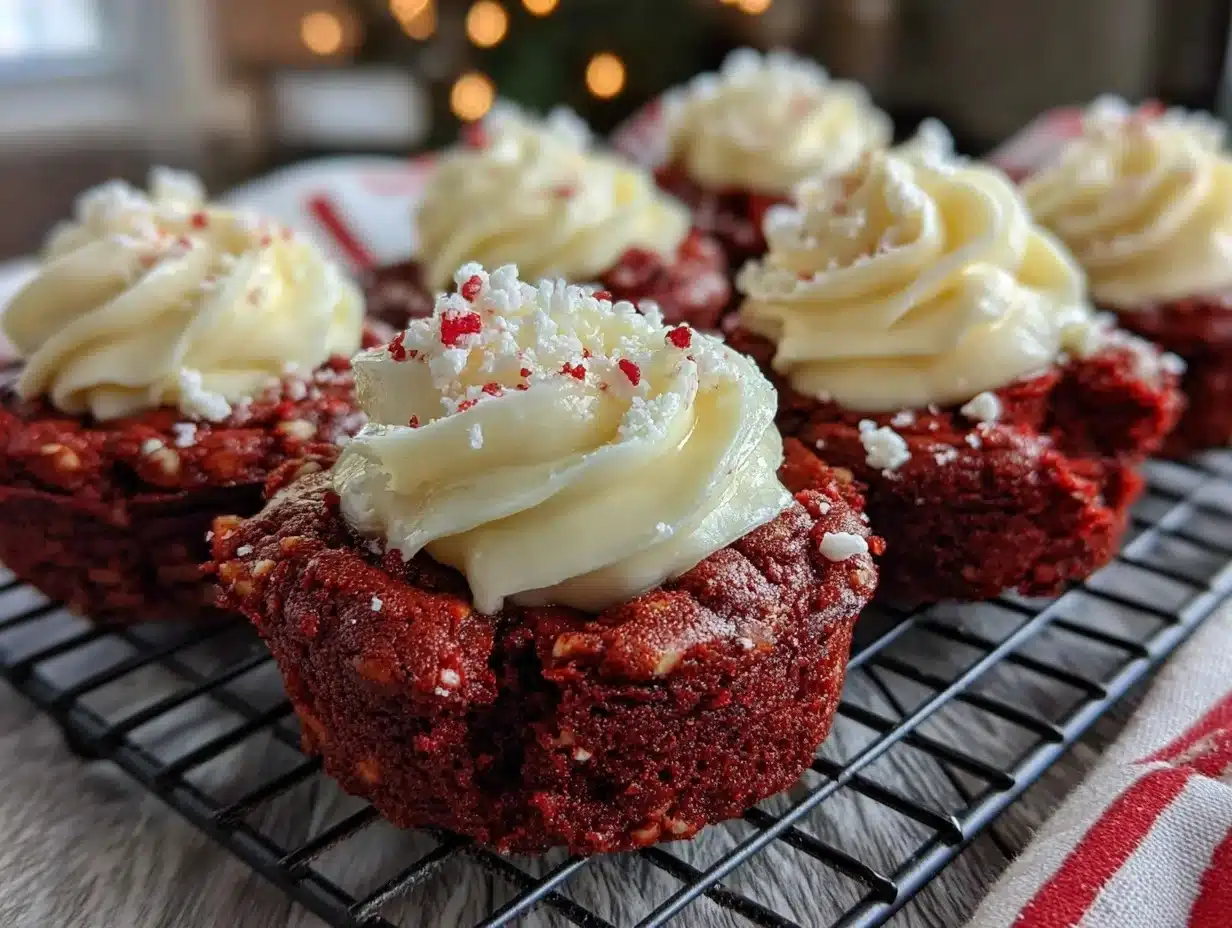
“You’ve got to try these,” my coworker insisted, sliding a small, red velvet cookie cup across the break room table. I eyed it skeptically—red velvet in cookie form, topped with a swirl of creamy frosting? It sounded like a dessert mashup that might not quite hit the mark. But one bite, and honestly, I was hooked.
That moment of surprise wasn’t the first time I’d underestimated a cookie’s potential. Baking is full of those “aha” discoveries, especially when a recipe turns out better than expected. This recipe for irresistible red velvet cookie cups with creamy frosting started as a casual experiment on a hectic afternoon when I wanted something sweet, quick, and a bit fancy without all the fuss. Somehow, the rich cocoa undertone, the tender yet chewy cookie texture, and that luscious cream cheese frosting came together perfectly—almost like a mini cake in a cookie shell.
Since then, I’ve made these cookie cups more times than I can count. They’ve become my go-to when friends drop by unexpectedly or when I need a little pick-me-up after a long day. They’re not just a dessert; they’re a cozy moment wrapped in vibrant red hues and a smooth, tangy frosting. It’s funny how something so simple can feel so special, you know? This recipe stuck with me because it’s proof that sometimes, the best treats come from a little bit of curiosity and a lot of heart.
Why You’ll Love This Recipe
Having tested countless red velvet and cookie recipes, I can confidently say these red velvet cookie cups with creamy frosting have a unique charm that’s hard to beat. Here’s why this recipe quickly became a favorite in my kitchen:
- Quick & Easy: These cookie cups come together in under 30 minutes, perfect for those busy weeknights or last-minute dessert needs.
- Simple Ingredients: With pantry staples like cocoa powder, flour, and cream cheese, no fancy or hard-to-find items are needed.
- Perfect for Entertaining: Whether it’s a holiday gathering, a casual brunch, or a cozy night in, these cookie cups make a charming and impressive treat.
- Crowd-Pleaser: Kids and adults alike can’t get enough of the soft cookie base paired with the creamy, slightly tangy frosting.
- Unbelievably Delicious: The balance between the subtle cocoa flavor, the tender cookie texture, and the smooth cream cheese frosting delivers serious comfort food vibes.
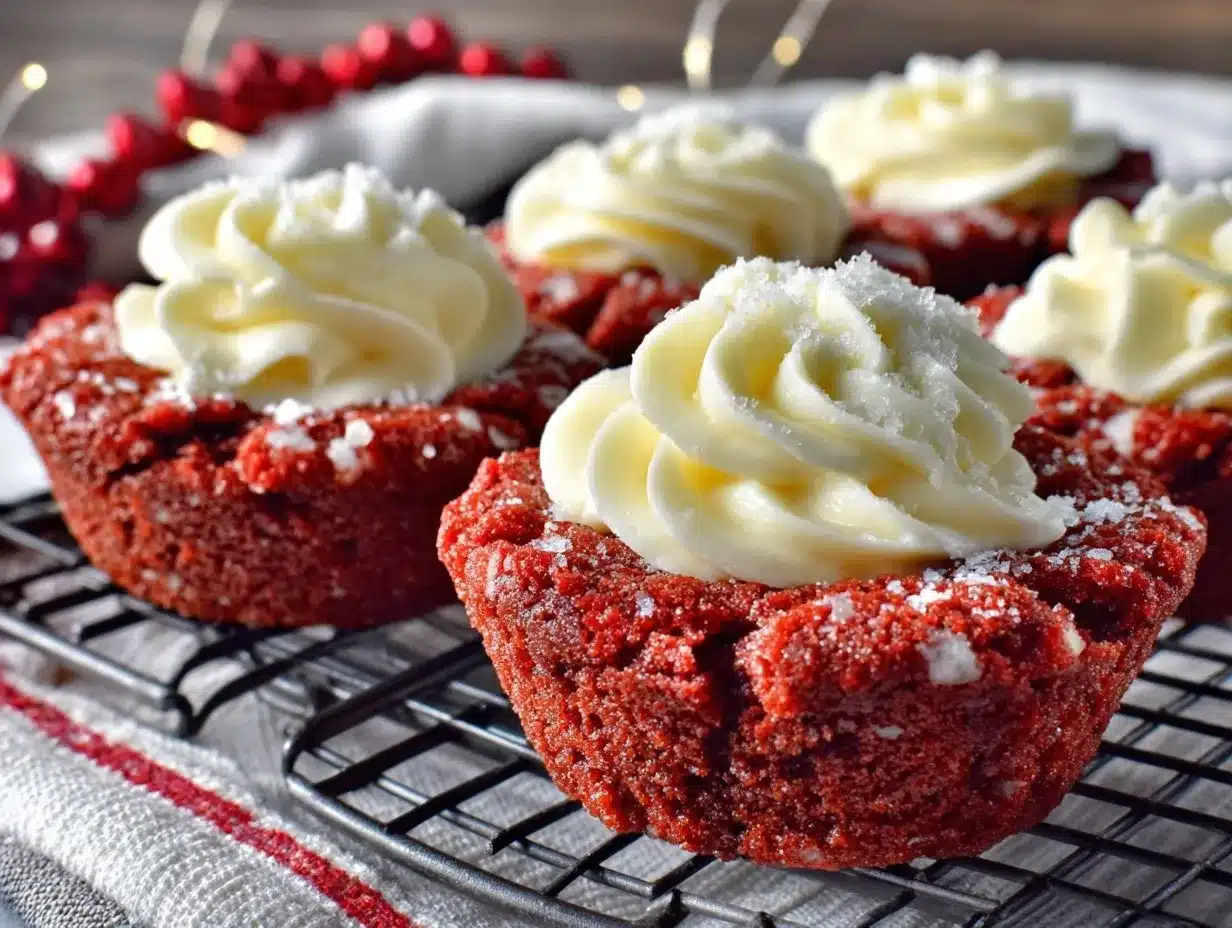
This isn’t just another red velvet cookie recipe. The trick is in shaping the dough into cups before baking, creating a little edible bowl that holds the frosting perfectly. Plus, the frosting itself is blended until silky smooth, not grainy or overly sweet. That little detail makes all the difference and always gets compliments.
Honestly, these cookie cups feel like a small indulgence with a touch of elegance. They’re the kind of dessert that makes you pause and savor the moment, whether you’re sharing them or sneaking one when no one’s looking. If you’ve enjoyed treats like the red velvet chocolate chip mug cake or love creamy, rich desserts, this recipe fits right into that delicious vibe.
What Ingredients You Will Need
This recipe relies on straightforward, wholesome ingredients to create bold flavors and a satisfying texture without any fuss. Most of these items are pantry staples, making this a breeze even on short notice.
- For the Cookie Cups:
- All-purpose flour (2 ½ cups / 315g) – use a reliable brand like King Arthur for best texture
- Cocoa powder (¼ cup / 25g), unsweetened – Dutch-processed cocoa adds richness
- Baking powder (1 tsp) – helps the cookie cups rise slightly
- Salt (½ tsp) – balances the sweetness
- Unsalted butter (1 cup / 225g), softened – room temperature for easy mixing
- Granulated sugar (¾ cup / 150g) – for that perfect sweet crunch
- Brown sugar (½ cup / 110g), packed – adds moisture and depth
- Large eggs (2), room temperature – helps with binding
- Vanilla extract (2 tsp) – enhances the flavor
- Red food coloring (1 tbsp) – classic for that vibrant red velvet look
- For the Creamy Frosting:
- Cream cheese (8 oz / 225g), softened – Philadelphia brand is a trusted favorite
- Unsalted butter (½ cup / 115g), softened – for smoothness and richness
- Powdered sugar (2 cups / 240g), sifted – to keep frosting silky without lumps
- Vanilla extract (1 tsp) – adds a subtle sweet note
- Pinch of salt – balances the sweetness
Substitution tips: If you prefer a dairy-free version, swap the cream cheese and butter for coconut cream and a dairy-free butter alternative. For gluten-free options, almond flour works well, but expect a slightly different texture. In warmer months, if red food coloring feels too artificial, try using beet juice concentrate for natural color and subtle earthiness.
Equipment Needed
- Mixing bowls – at least two, medium and large sizes
- Electric mixer or stand mixer – to cream the butter and sugar smoothly (a hand mixer works fine too)
- Measuring cups and spoons – for precise ingredient amounts
- Spatula – to scrape down the bowl and fold ingredients gently
- Cookie scoop (medium size) – helps portion the dough evenly; a tablespoon works in a pinch
- Muffin tin – standard 12-cup size to shape the cookie cups
- Cooling rack – for letting the cookie cups cool without sogginess
- Spoon or piping bag – to fill the cookie cups with frosting neatly
For budget-friendly options, a simple metal muffin tin and hand mixer are just fine. I found that silicone muffin cups can also work, but they don’t hold the cookie shape as crisply. To keep your muffin tin in good shape, coat it lightly with nonstick spray or line with parchment rounds to prevent sticking—trust me, scraping out these cookie cups is easier when they come out cleanly!
Preparation Method
- Preheat your oven to 350°F (175°C). Lightly grease a 12-cup muffin tin or line with parchment liners to prevent sticking.
- Mix dry ingredients: In a medium bowl, sift together 2 ½ cups all-purpose flour, ¼ cup cocoa powder, 1 tsp baking powder, and ½ tsp salt. Set aside.
- Cream butter and sugars: In a large bowl, using an electric mixer, beat 1 cup softened unsalted butter with ¾ cup granulated sugar and ½ cup packed brown sugar until light and fluffy, about 2-3 minutes. This step is key for a tender cookie texture.
- Add eggs, vanilla, and food coloring: Beat in 2 large eggs one at a time, then stir in 2 tsp vanilla extract and 1 tbsp red food coloring until fully combined. The batter should have a vibrant red hue.
- Combine wet and dry: Gradually add the dry ingredients to the wet mixture, mixing on low speed just until incorporated. Avoid overmixing to keep the cookies tender.
- Shape the cookie cups: Using a cookie scoop or tablespoon, place dollops of dough into each muffin cup—about 2 tablespoons per cup—then press the dough gently up the sides to form a little bowl shape. Don’t worry if it’s uneven; the rustic look adds to the charm.
- Bake: Place the muffin tin in the oven and bake for 12-15 minutes. The cookie cups should look set but still soft to the touch. They’ll firm up more as they cool.
- Cool properly: Remove from oven and let the cookie cups cool in the tin for 10 minutes. Then gently transfer them to a wire rack to cool completely. This prevents sogginess and keeps the edges crisp.
- Prepare the frosting: While cookies cool, beat 8 oz softened cream cheese with ½ cup softened unsalted butter until creamy and smooth. Gradually add 2 cups sifted powdered sugar, 1 tsp vanilla extract, and a pinch of salt. Beat until fluffy and spreadable.
- Fill the cookie cups: Once cookie cups are fully cooled, use a spoon or piping bag to fill each cup with a generous swirl of creamy frosting.
- Serve or chill: These cookie cups can be enjoyed immediately or chilled for a firmer frosting texture. Store leftovers in an airtight container in the fridge.
Tip: If your frosting feels too stiff, add a teaspoon of milk or cream to soften it slightly. Also, if you’re short on time, these cookie cups keep well and taste even better after a day or two as the flavors meld beautifully.
Cooking Tips & Techniques
Getting these red velvet cookie cups just right involves a few tricks I’ve picked up after some trial and error. Here’s what I’ve learned:
- Temperature matters: Make sure your butter and eggs are at room temperature before mixing. It helps the dough come together smoothly and creates that tender crumb we’re after.
- Don’t overmix the dough: Once you add the dry ingredients, mix just until combined. Overmixing activates gluten and can make the cookie cups tough instead of soft.
- Shape the cups carefully: Press the dough up the sides of the muffin cups gently but firmly. If you press too hard or unevenly, the cookie cups might crack or bake unevenly.
- Watch the bake time: The cookie cups should be soft and slightly underbaked when you pull them out—they’ll firm up as they cool. Overbaking can dry them out, so keep an eye starting at 12 minutes.
- Frosting consistency: Cream cheese frosting that’s too cold can be hard to spread. Beat it well and, if needed, add a splash of milk to get that silky texture perfect for piping.
- Chilling the dough: If your kitchen is warm, chilling the dough for 15-20 minutes before shaping helps maintain the shape better while baking.
- Multitasking: While the cookie cups bake, whip up the frosting to save time. This way, you can fill them as soon as they’re cool enough.
One lesson I learned the hard way was trying to frost the cookie cups while they were still warm—messy and the frosting melted too fast. Patience pays off here, and the payoff is worth it!
Variations & Adaptations
Feel like switching things up? These cookie cups are surprisingly versatile. Here are some ideas to customize the recipe:
- Flavor twists: Add a teaspoon of espresso powder to the dough to deepen the cocoa flavor. Or try swapping vanilla extract with almond extract for a nutty note.
- Frosting variations: For a lighter option, replace half the cream cheese with Greek yogurt or mascarpone cheese. Or try a white chocolate ganache filling for a decadent treat.
- Dietary adaptations: Use almond flour instead of all-purpose flour for a gluten-free version, and swap butter with coconut oil for dairy-free. The texture will be slightly different but still delicious.
- Seasonal changes: During fall, sprinkle the frosting with a pinch of cinnamon or pumpkin spice. In summer, top with fresh berries or edible flowers for a fresh finish.
- Chocolate chips: Fold in mini white chocolate chips into the dough for bursts of sweetness that contrast the cocoa flavor.
I once tried a batch with a swirl of homemade raspberry jam under the frosting—it added a lovely tart surprise. If you’re a fan of easy-to-make desserts with a twist, you might also enjoy the mini cheesecake shooting board treats I shared recently; they’re just as fun to make and share.
Serving & Storage Suggestions
These red velvet cookie cups are best enjoyed at room temperature so the frosting is creamy but not too soft. They make a delightful centerpiece on dessert tables or a sweet snack paired with afternoon tea or coffee.
For serving, arrange them on a pretty platter, maybe dusted lightly with cocoa powder or edible glitter for a festive touch. They also pair wonderfully with a glass of cold milk or a warm cup of chai.
Store leftover cookie cups in an airtight container in the refrigerator for up to 4 days. If you want to keep them longer, freeze them without frosting, then thaw and frost just before serving.
To reheat, let refrigerated cookie cups sit at room temperature for 10-15 minutes to soften the frosting. You can also warm them gently in the microwave for 10 seconds, but watch closely to avoid melting.
Flavors tend to deepen after a day or so in the fridge, making them even more irresistible. If you’re planning a brunch spread, these cookie cups would complement a stack of fluffy rainbow pancakes beautifully for a colorful, indulgent treat.
Nutritional Information & Benefits
Each red velvet cookie cup with creamy frosting contains approximately:
| Per Serving (1 cookie cup) | Amount |
|---|---|
| Calories | 220 kcal |
| Fat | 12g |
| Carbohydrates | 26g |
| Protein | 3g |
| Sugars | 18g |
Key ingredients like cocoa powder provide antioxidants, and cream cheese adds calcium and protein. This recipe is not low-carb or sugar-free but offers a balanced indulgence when enjoyed in moderation.
For those with dietary restrictions, the recipe can be adapted to be gluten-free or dairy-free, making it accessible for many. Just be mindful of potential allergens like eggs, dairy, and gluten.
From a wellness perspective, I appreciate that this treat uses real ingredients and avoids overly processed additives. It’s a sweet moment that feels homemade and genuine, which to me is just as important as calories or macros.
Conclusion
These irresistible red velvet cookie cups with creamy frosting are a testament to how simple ingredients and a little creativity can turn an ordinary cookie into something special. I love how they bring a pop of color and a comforting sweetness to any occasion without requiring hours in the kitchen.
Feel free to tweak the frosting, add your favorite mix-ins, or pair them with other treats you love. Baking is about making recipes your own, after all.
If these cookie cups find a spot in your dessert rotation, I’d love to hear how you customize them or the moments you share them in. Don’t hesitate to leave a comment or share your photos—it’s always fun to see these little delights in action.
Here’s to cozy kitchens and sweet surprises, one cookie cup at a time.
FAQs
Can I make the cookie dough ahead of time?
Yes! You can prepare the dough and refrigerate it for up to 24 hours before shaping and baking. This actually helps with flavor development and shape retention.
What if I don’t have a muffin tin?
You can use silicone muffin cups or small ramekins, but the shape might be less defined. Alternatively, bake the cookies flat on a sheet and add frosting on top after cooling.
How do I prevent the cookie cups from sticking to the pan?
Lightly grease your muffin tin or use nonstick spray. You can also line with parchment rounds cut to fit each cup for easier removal.
Can I freeze the cookie cups with frosting?
It’s best to freeze the cookie cups without frosting. Thaw them fully, then pipe on fresh frosting before serving.
What’s the best way to get a bright red color without artificial food coloring?
Natural alternatives like beet juice concentrate or powdered freeze-dried raspberries can add color, though the shade may be less vibrant and slightly alter the flavor.
Pin This Recipe!
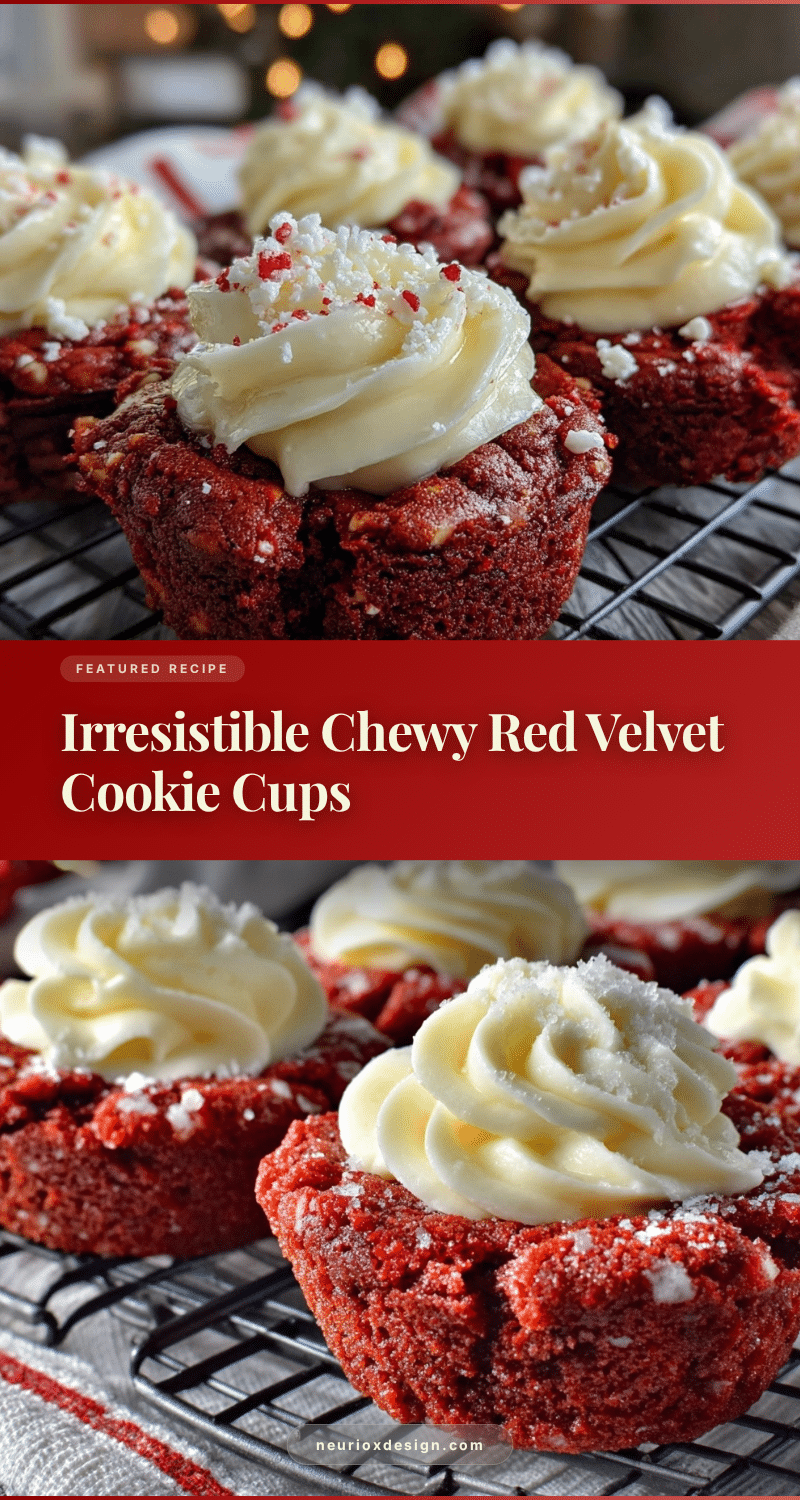

Red Velvet Cookie Cups with Creamy Frosting
- Total Time: 30 minutes
- Yield: 12 servings 1x
Description
These red velvet cookie cups feature a tender, chewy cookie base with a rich cocoa undertone, topped with a luscious cream cheese frosting. Perfect for quick, elegant desserts that delight both kids and adults.
Ingredients
- 2 ½ cups all-purpose flour (315g)
- ¼ cup unsweetened Dutch-processed cocoa powder (25g)
- 1 tsp baking powder
- ½ tsp salt
- 1 cup unsalted butter, softened (225g)
- ¾ cup granulated sugar (150g)
- ½ cup packed brown sugar (110g)
- 2 large eggs, room temperature
- 2 tsp vanilla extract
- 1 tbsp red food coloring
- 8 oz cream cheese, softened (225g)
- ½ cup unsalted butter, softened (115g)
- 2 cups powdered sugar, sifted (240g)
- 1 tsp vanilla extract
- Pinch of salt
Instructions
- Preheat oven to 350°F (175°C). Lightly grease a 12-cup muffin tin or line with parchment liners.
- In a medium bowl, sift together flour, cocoa powder, baking powder, and salt. Set aside.
- In a large bowl, beat softened butter with granulated sugar and brown sugar until light and fluffy, about 2-3 minutes.
- Beat in eggs one at a time, then stir in vanilla extract and red food coloring until fully combined.
- Gradually add dry ingredients to wet mixture, mixing on low speed just until incorporated. Avoid overmixing.
- Using a cookie scoop or tablespoon, place about 2 tablespoons of dough into each muffin cup and press dough gently up the sides to form a bowl shape.
- Bake for 12-15 minutes until cookie cups look set but still soft to the touch. They will firm up as they cool.
- Cool cookie cups in the tin for 10 minutes, then transfer to a wire rack to cool completely.
- While cooling, beat cream cheese with softened butter until smooth. Gradually add powdered sugar, vanilla extract, and salt, beating until fluffy and spreadable.
- Fill cooled cookie cups with frosting using a spoon or piping bag.
- Serve immediately or chill for firmer frosting. Store leftovers in an airtight container in the refrigerator.
Notes
Use room temperature butter and eggs for best texture. Avoid overmixing dough to keep cookies tender. Press dough gently to form cups to prevent cracking. Frost cookie cups only when fully cooled to avoid melting frosting. Add a teaspoon of milk to frosting if too stiff. Dough can be chilled 15-20 minutes before shaping for better hold. Dough can be refrigerated up to 24 hours before baking.
- Prep Time: 15 minutes
- Cook Time: 15 minutes
- Category: Dessert
- Cuisine: American
Nutrition
- Serving Size: 1 cookie cup
- Calories: 220
- Sugar: 18
- Fat: 12
- Carbohydrates: 26
- Protein: 3
Keywords: red velvet, cookie cups, cream cheese frosting, easy dessert, quick baking, homemade cookies, festive treats
