

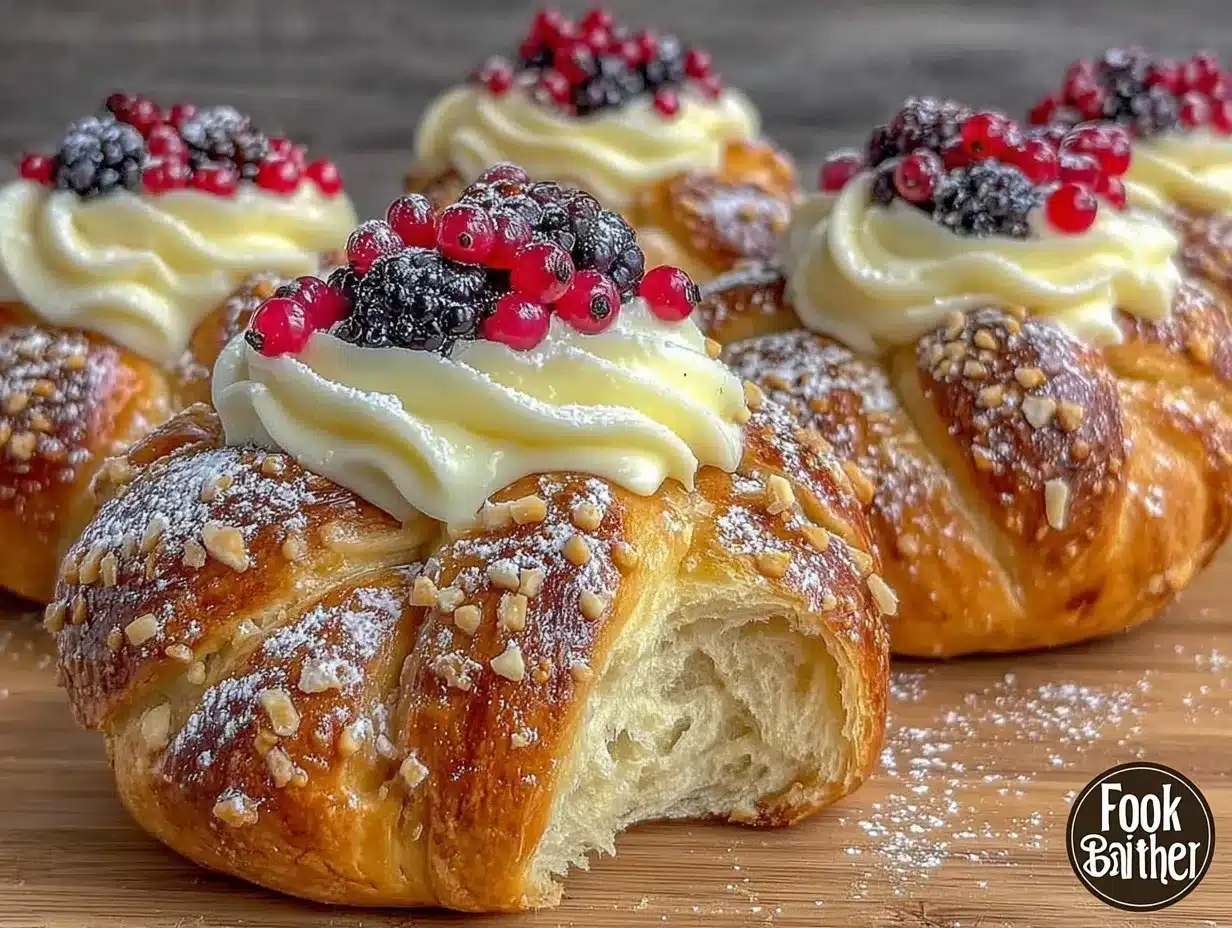
“You’ve got to try these buns,” my neighbor said, sliding a plate across the fence one sunny afternoon. I was skeptical—fluffy Danish carnival buns with creamy vanilla cheesecake filling? It sounded almost too fancy for an ordinary afternoon. But honestly, the moment I bit into that soft, pillowy dough paired with the velvety cheesecake center, I was hooked. I never imagined a simple bun could bring that kind of joy, a little carnival magic right in my kitchen.
There’s something about how the subtle vanilla scent curls through the air while baking, reminding me of fairgrounds and cozy coffee chats. I found myself making these buns more than once in a week, tweaking the filling just slightly each time. It became a quiet ritual after long days—kneading the dough, waiting patiently as it rose, then filling each bun with that luscious cheesecake delight. It’s like a small celebration every time, with crumbs and smiles all around.
What stuck with me wasn’t just the taste but the comfort and warmth these Danish carnival buns bring. They’re soft but not overly sweet, creamy but not heavy, and perfect for when you want to feel a little indulgence without going overboard. I can’t help but think they’d pair wonderfully alongside a cup of something warm, like the creamy custard toast I often make for lazy weekend breakfasts. Somehow, these buns managed to turn a simple moment into something quietly special.
Why You’ll Love This Recipe
After making these fluffy Danish carnival buns several times, I can say they really stand out for a few reasons:
- Quick & Easy: The dough comes together in about 20 minutes, with a couple of rises that let you multitask or relax. Perfect for busy mornings or last-minute treat cravings.
- Simple Ingredients: You probably have everything in your pantry already—flour, yeast, eggs, cream cheese, and vanilla. No special trips needed.
- Perfect for Gatherings: These buns bring a festive touch to brunches, afternoon teas, or even holiday morning spreads.
- Crowd-Pleaser: Kids love the creamy filling, while adults appreciate the light, fluffy texture and subtle sweetness.
- Unbelievably Delicious: The balance between the soft dough and the creamy vanilla cheesecake filling gives a satisfying bite that feels like a treat without being overly rich.
This isn’t just another sweet bun recipe. The secret lies in the perfectly aerated dough and the cheesecake filling that’s whipped just right—not too dense, not too soft. The filling is gently flavored with pure vanilla extract, which makes every bite feel like a little comfort hug. I even swapped the filling once with a berry compote for a fruity twist, but honestly, the classic vanilla cheesecake version remains my go-to.
If you’re looking for a recipe that’s both approachable and feels a bit fancy, this one hits the mark. It’s the kind of treat that makes you want to pause and savor the moment, whether you’re sharing with friends or enjoying a quiet morning alone. Plus, it pairs beautifully with other comforting breakfast ideas like the fluffy single-serve baked oats cake recipe with berries and chocolate chips.
What Ingredients You Will Need
This recipe uses simple, wholesome ingredients to bring out bold flavors and that perfect fluffy texture without fuss. Most of these are pantry staples, and the cheesecake filling is easy to whip up with just a few additions.
- For the Dough:
- All-purpose flour – 3 ½ cups (420 g), sifted for lighter buns
- Active dry yeast – 2 ¼ tsp (one packet)
- Granulated sugar – ½ cup (100 g), adds slight sweetness
- Whole milk – 1 cup (240 ml), warmed to about 110°F (43°C) to activate yeast
- Unsalted butter – 4 tbsp (60 g), softened (I prefer Kerrygold for creaminess)
- Large eggs – 2, room temperature
- Salt – 1 tsp, balances the sweetness
- For the Creamy Vanilla Cheesecake Filling:
- Cream cheese – 8 oz (225 g), softened (Philadelphia brand works well)
- Powdered sugar – ⅓ cup (40 g), for smooth sweetness
- Pure vanilla extract – 1 tsp, the star flavor
- Heavy cream – 2 tbsp (30 ml), to lighten the texture
- For the Topping:
- Egg wash – 1 egg beaten with 1 tbsp water, for golden crust
- Powdered sugar – for dusting after baking (optional)
If you’re avoiding dairy, you can swap cream cheese for a dairy-free alternative and use almond or oat milk warmed for the dough. For a gluten-free option, try a 1:1 gluten-free flour blend (though texture may vary a bit). In summer, I sometimes add fresh berries to the cheesecake filling or serve the buns alongside mini cheesecake shooters for a fun dessert pairing.
Equipment Needed
- Mixing bowls – a large one for the dough and a smaller one for the filling
- Stand mixer with dough hook (optional but helpful) or a sturdy wooden spoon and some muscle
- Measuring cups and spoons – accuracy really helps with yeast dough
- Whisk – for the cheesecake filling and egg wash
- Baking sheet lined with parchment paper or a silicone mat
- Kitchen thermometer (optional) – handy to check milk temperature for yeast activation
- Plastic wrap or clean kitchen towel – to cover dough while rising
I’ve made these buns without a stand mixer plenty of times, just kneading by hand. It takes a little longer, but the dough is forgiving. A silicone baking mat is a nice investment for sticky doughs and easy cleanup. If you don’t have a kitchen thermometer, just make sure the milk feels warm but not hot—like a cozy bath.
Preparation Method
- Activate the Yeast (10 minutes): Warm the milk to about 110°F (43°C). Pour it into a large bowl, sprinkle the yeast and 1 tablespoon of sugar over it, then let it sit until foamy (about 5-10 minutes). If it doesn’t foam, your yeast might be old—start over with fresh yeast.
- Mix the Dough (10 minutes): Add the remaining sugar, softened butter, eggs, and salt to the yeast mixture. Gradually add the sifted flour, mixing with a stand mixer dough hook or wooden spoon until it forms a sticky dough.
- Knead the Dough (8-10 minutes): Turn the dough onto a floured surface and knead until smooth and elastic. It should be slightly tacky but not overly sticky. If sticky, sprinkle with a bit more flour, but don’t overdo it or buns will be dense.
- First Rise (1 to 1.5 hours): Place the dough in a lightly greased bowl, cover with plastic wrap or a kitchen towel, and let it rise in a warm place until doubled in size. This is when the magic happens—if your kitchen is cool, try preheating your oven to 200°F (93°C), then turning it off and placing the dough inside.
- Prepare the Cheesecake Filling (5 minutes): While dough is rising, beat softened cream cheese with powdered sugar, vanilla extract, and heavy cream until smooth and creamy. Refrigerate until ready.
- Shape the Buns (15 minutes): After the dough has doubled, punch it down gently and divide into 12 equal pieces (~70 g/2.5 oz each). Roll each piece into a ball, then flatten slightly. Spoon about 1 tablespoon of cheesecake filling into the center of each, then pinch the edges to seal the filling inside.
- Second Rise (45 minutes): Place the filled buns on a parchment-lined baking sheet, seam side down, leaving space between them. Cover loosely and let rise until puffy.
- Egg Wash and Bake (18-22 minutes): Preheat oven to 350°F (175°C). Brush buns with egg wash for that golden finish. Bake until puffed and lightly browned, about 18-22 minutes. The smell will be irresistible.
- Cool and Serve: Let buns cool on a wire rack for 10 minutes. Dust with powdered sugar if desired before serving warm.
Pro tip: Don’t rush the rises, they’re crucial for that fluffy texture. If your filling leaks, try pinching the dough a bit tighter or chilling the filling for a few extra minutes before stuffing. The buns should smell sweet and smell of vanilla when done.
Cooking Tips & Techniques
A few things I’ve learned through trial and error with these Danish carnival buns:
- Milk Temperature: Too hot and it kills the yeast; too cold and the yeast won’t activate. I usually test with my wrist—warm but not uncomfortable.
- Kneading: Stickiness is normal at first, but the dough should become smooth and elastic. If it’s too sticky, add flour little by little. Over-kneading can make buns tough, so aim for just right.
- Cheesecake Filling: Softened cream cheese is key. If it’s cold, the filling won’t blend well. I sometimes whip the heavy cream separately before folding it in for extra fluffiness.
- Shaping: Seal edges firmly to keep filling inside. A cold filling helps prevent oozing during baking.
- Baking: Oven temps vary, so start checking buns at 18 minutes. They should be golden and spring back lightly when pressed.
I once rushed the second rise and ended up with dense buns—lesson learned! Patience pays off, and multitasking (like prepping the filling during the first rise) makes the process smoother. If you want to get fancy, try brushing the buns with melted butter right after baking for extra shine and richness.
Variations & Adaptations
These buns are quite versatile, and you can switch things up depending on dietary needs or flavor preferences:
- Berry Cheesecake Filling: Stir in 2 tablespoons of berry jam or fresh chopped berries into the cream cheese mixture for a fruity surprise.
- Vegan Version: Use dairy-free cream cheese and plant-based milk. Replace eggs with flax or chia egg (1 tbsp ground seed + 3 tbsp water per egg).
- Spiced Twist: Add a pinch of cinnamon or cardamom to the dough for a warm, aromatic flavor that pairs beautifully with vanilla.
- Gluten-Free: Substitute with a gluten-free flour blend, though dough texture will be different. Adding xanthan gum (if not included in your blend) helps with elasticity.
- Chocolate Drizzle: After baking, drizzle melted dark chocolate over the cooled buns for an extra indulgence.
I once made a batch with a swirl of pistachio paste inside, inspired by the layered desserts I love—kind of like the Dubai chocolate bar with pistachio knafeh. It was a hit, though the classic vanilla cheesecake still wins my heart every time.
Serving & Storage Suggestions
These buns are best served slightly warm, just after baking, when the dough is soft and the filling is creamy. They make a lovely breakfast or afternoon snack paired with coffee or tea. I like to serve them alongside a creamy custard toast for a cozy breakfast spread.
Store leftover buns in an airtight container at room temperature for up to 2 days. For longer storage, refrigerate for up to 5 days or freeze wrapped tightly for 1 month. To reheat, warm buns in a 300°F (150°C) oven for 8-10 minutes or microwave briefly (about 20 seconds) until warmed through. The filling softens and flavors meld beautifully after a day or two, so leftovers can be even better.
Nutritional Information & Benefits
Each fluffy Danish carnival bun with creamy vanilla cheesecake delight roughly contains:
| Calories | 280-320 kcal |
|---|---|
| Fat | 12-15 g |
| Carbohydrates | 34-38 g |
| Protein | 6-7 g |
The cream cheese filling provides calcium and a bit of vitamin A, while the dough’s eggs contribute protein. Using whole milk and real butter adds richness but also essential fats that help with satiety. This recipe isn’t low-calorie but offers a comforting treat with some nutritional perks. If you prefer a lighter version, try swapping heavy cream with coconut cream or using a lower-fat cream cheese.
For those sensitive to gluten or dairy, the recipe can be adapted easily, making it a friendly option for various dietary needs. I often think of these buns as a balance between indulgence and nourishment.
Conclusion
These fluffy Danish carnival buns with creamy vanilla cheesecake delight have become one of those recipes I turn to when I want something special but not complicated. The soft, airy dough combined with the smooth, subtly sweet filling is a little moment of joy that feels both familiar and a touch fancy. Whether you’re making them for a casual brunch, a treat for friends, or a cozy solo snack, they hit the spot.
Feel free to experiment with fillings or spices to make the recipe your own—cooking is all about those personal touches. I love how this recipe quietly brings comfort without fuss, much like the simple pleasure of a chocolate-covered strawberry scone sandwich or a fluffy Dr. Seuss rainbow pancake stack from around the corner in my collection.
Let me know how your carnival buns turn out or share your own twists in the comments. There’s something special about swapping ideas and stories around a shared love of baking. Here’s to soft bites and creamy delights!
Frequently Asked Questions
Can I prepare the dough the night before?
Absolutely! After the first rise, punch down the dough, cover tightly, and refrigerate overnight. Let it come to room temperature before shaping and the second rise.
What if my filling leaks during baking?
Make sure the cream cheese filling is well chilled before stuffing and pinch the dough edges firmly to seal. Avoid overfilling each bun.
Can I use frozen cream cheese for the filling?
It’s best to use softened, fresh cream cheese for smooth texture. Frozen cream cheese tends to become crumbly and harder to mix evenly.
How do I know when the dough has risen enough?
The dough should roughly double in size and feel puffy. A gentle poke should leave an indentation that slowly springs back.
Can I bake these buns in an air fryer?
Yes, but bake in small batches at 320°F (160°C) for about 12-15 minutes. Keep a close eye so they don’t overbrown.
Pin This Recipe!
Fluffy Danish Carnival Buns Recipe Easy Homemade Cheesecake Delight
- Total Time: 2 hours 45 minutes
- Yield: 12 buns 1x
Description
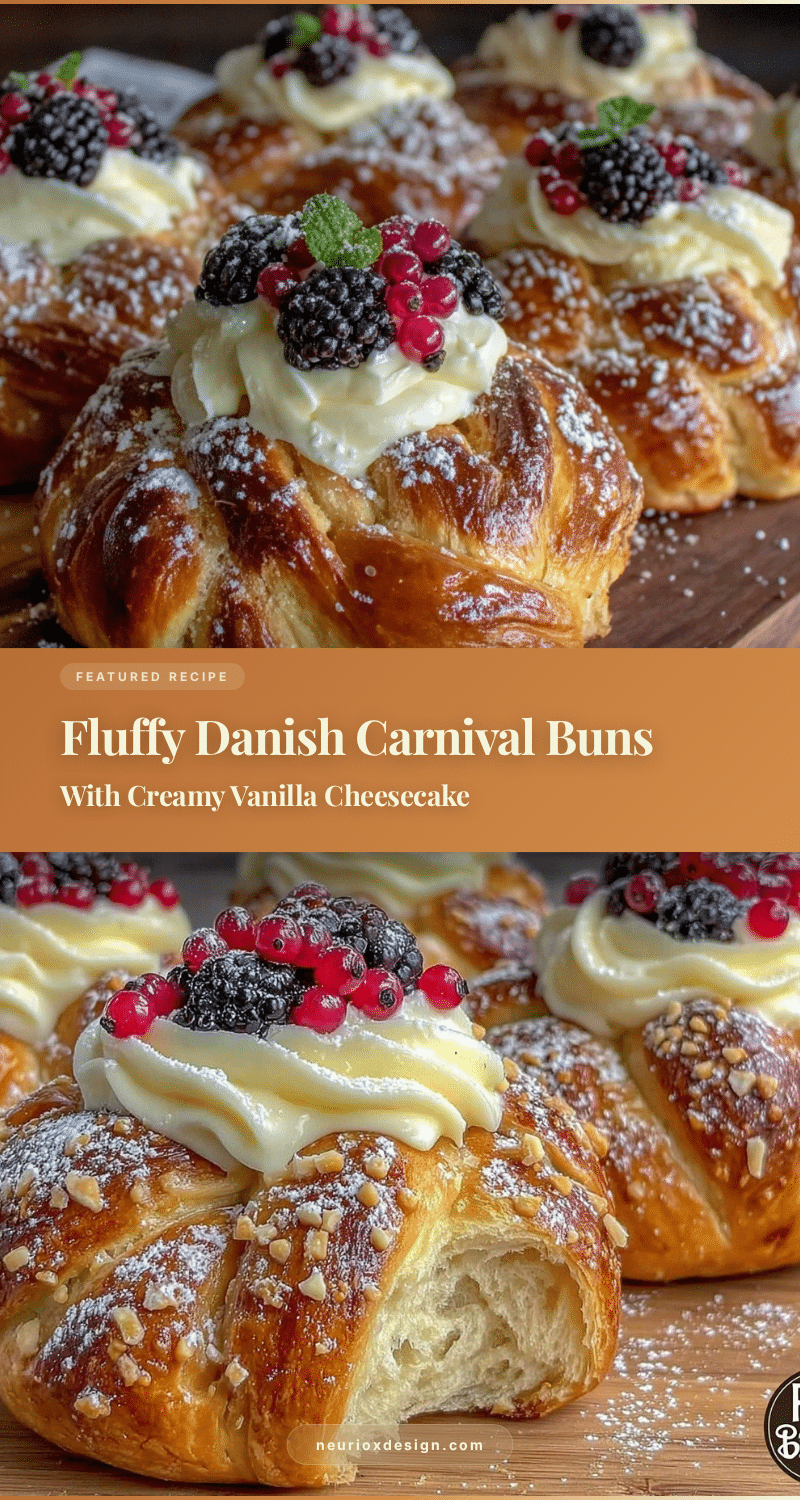
Soft, fluffy Danish carnival buns filled with a creamy vanilla cheesecake filling, perfect for breakfast or a cozy snack. These buns combine light dough with a luscious cheesecake center for a delightful treat.
Ingredients
- 3 ½ cups (420 g) all-purpose flour, sifted
- 2 ¼ tsp active dry yeast (one packet)
- ½ cup (100 g) granulated sugar
- 1 cup (240 ml) whole milk, warmed to about 110°F (43°C)
- 4 tbsp (60 g) unsalted butter, softened
- 2 large eggs, room temperature
- 1 tsp salt
- 8 oz (225 g) cream cheese, softened
- ⅓ cup (40 g) powdered sugar
- 1 tsp pure vanilla extract
- 2 tbsp (30 ml) heavy cream
- 1 egg beaten with 1 tbsp water (egg wash)
- Powdered sugar for dusting (optional)
Instructions
- Warm the milk to about 110°F (43°C). Pour into a large bowl, sprinkle yeast and 1 tablespoon sugar over it, and let sit until foamy (5-10 minutes).
- Add remaining sugar, softened butter, eggs, and salt to the yeast mixture. Gradually add sifted flour, mixing until a sticky dough forms.
- Turn dough onto a floured surface and knead for 8-10 minutes until smooth and elastic, adding flour if too sticky.
- Place dough in a lightly greased bowl, cover, and let rise in a warm place until doubled in size (1 to 1.5 hours).
- While dough rises, beat cream cheese with powdered sugar, vanilla extract, and heavy cream until smooth. Refrigerate until ready.
- Punch down risen dough and divide into 12 equal pieces (~2.5 oz each). Roll each into a ball, flatten slightly, spoon about 1 tablespoon cheesecake filling into center, and pinch edges to seal.
- Place filled buns seam side down on parchment-lined baking sheet, cover loosely, and let rise until puffy (about 45 minutes).
- Preheat oven to 350°F (175°C). Brush buns with egg wash and bake for 18-22 minutes until golden and puffed.
- Cool buns on a wire rack for 10 minutes. Dust with powdered sugar if desired and serve warm.
Notes
Do not rush the dough rises for best fluffiness. Ensure milk is warm but not hot to activate yeast properly. Chill cream cheese filling before stuffing to prevent leaking. If filling leaks, pinch dough edges tighter. For extra shine, brush buns with melted butter after baking. Can refrigerate dough overnight after first rise.
- Prep Time: 20 minutes
- Cook Time: 20 minutes
- Category: Breakfast, Snack, Dessert
- Cuisine: Danish
Nutrition
- Serving Size: 1 bun
- Calories: 300
- Sugar: 10
- Sodium: 200
- Fat: 14
- Saturated Fat: 8
- Carbohydrates: 36
- Fiber: 1
- Protein: 6.5
Keywords: Danish carnival buns, cheesecake buns, vanilla cheesecake filling, fluffy buns, homemade buns, easy bun recipe, breakfast buns, dessert buns
