

“You know that feeling when you’re last-minute hosting a gathering, and the clock’s ticking, but you still want to impress? That was me last Saturday afternoon. The plan was just to chill, but then my buddy called saying he’d swing by with the whole crew in 30 minutes. Honestly, I was halfway through a messy kitchen experiment when I grabbed a bag of sweet Hawaiian rolls from the pantry—the kind you usually save for holidays or lazy weekend breakfasts. That’s when the idea hit: why not turn these fluffy little buns into juicy sliders? No fancy prep, no complicated ingredients, just a quick, tasty fix that everyone loves. I wasn’t expecting much, just something to throw together fast. But, let me tell you, these Easy Juicy No-Fail Hawaiian Roll Sliders turned out to be the star of the night.”
It’s funny how the simplest things can surprise you. I mean, the sliders were gone in minutes—not a crumb left. Maybe you’ve been there too, scrambling to find a snack that feels effortless but tastes like you put in hours. This recipe stuck with me because it’s exactly that kind of magic. Plus, the combination of sweet rolls with savory fillings hits that comfort food sweet spot in a way that’s hard to beat. And hey, if I can make these in 20 minutes flat, imagine what you can do in your kitchen.
Oh, and I should admit—I forgot to set the timer, so I ended up eyeballing the cooking. The buns got a little extra toasty on one side, which honestly made them even better. Perfectly imperfect, just like good food should be.
Why You’ll Love This Recipe
After testing this recipe multiple times—sometimes on hectic weeknights, sometimes for casual get-togethers—I can confidently say it’s a keeper. Here’s why:
- Quick & Easy: Ready in under 20 minutes, making it ideal for last-minute party snacks or busy evenings.
- Simple Ingredients: No need for specialty items; most are pantry staples you already have.
- Perfect for Parties: These sliders are crowd-pleasers, great for game days, potlucks, or casual dinners.
- Crowd-Pleaser: Kids and adults alike rave about the juicy, sweet-savory combo.
- Unbelievably Delicious: The soft Hawaiian rolls paired with flavorful fillings create a mouthwatering bite every time.
What sets this recipe apart is the balance between ease and flavor. The trick? Layering your ingredients just right and warming the sliders so the juices soak into the rolls without making a mess. I also love how versatile it is—you can switch up fillings and sauces without losing that signature juicy goodness. Honestly, it’s the kind of recipe that makes you close your eyes after the first bite and smile, because comfort food doesn’t have to be complicated or time-consuming.
What Ingredients You Will Need
This recipe uses simple, wholesome ingredients to deliver bold flavor and satisfying texture without the fuss. You’ll find most items in your kitchen or local grocery store, so no last-minute runs needed.
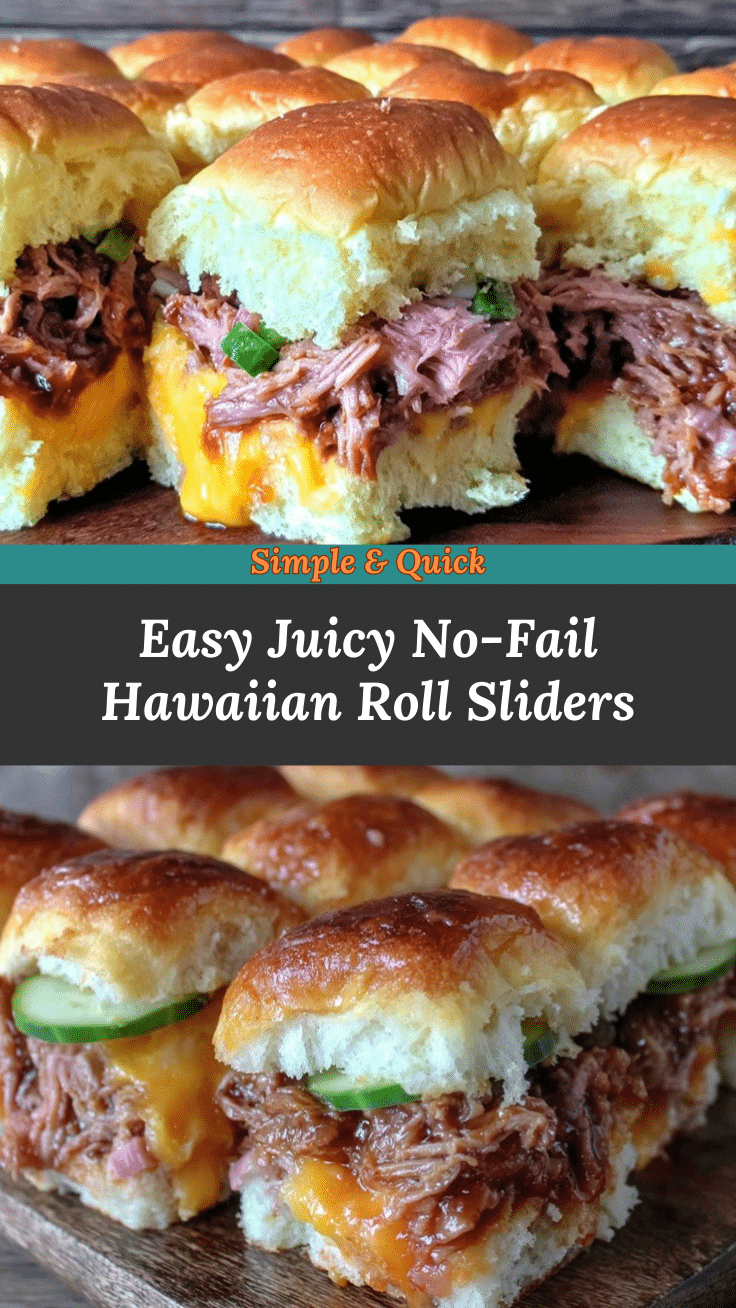
- Hawaiian Rolls: 12 soft, sweet rolls (I prefer King’s Hawaiian for authentic flavor and softness)
- Protein of Choice: 1 lb (450g) ground beef, shredded rotisserie chicken, or sliced deli ham (choose what suits your mood)
- Cheese: 6-8 slices of Swiss, cheddar, or provolone (adds melty richness)
- Butter: 3 tbsp unsalted, melted (for brushing the tops and adding flavor)
- Dijon Mustard: 1 tbsp (adds a subtle tang to balance the sweetness)
- Worcestershire Sauce: 1 tsp (optional, but boosts umami)
- Garlic Powder: ½ tsp (for a gentle savory note)
- Onion Powder: ½ tsp (complements the garlic and deepens flavor)
- Pickles or Lettuce: Optional, for added crunch and freshness
If you want to swap ingredients, almond flour buns or gluten-free rolls work well for dietary needs. For dairy-free, use vegan cheese and a plant-based butter substitute. And if fresh herbs are handy, a sprinkle of chopped parsley on top brightens these sliders nicely.
Equipment Needed
- Baking Dish or Sheet: A 9×13-inch (23×33 cm) pan works perfectly to hold all sliders snugly.
- Mixing Bowl: For combining your meat and seasonings.
- Spatula or Spoon: To spread ingredients evenly.
- Pastry Brush: Handy for brushing melted butter over the rolls (a clean spoon works if you don’t have one).
- Oven or Toaster Oven: For warming and melting cheese.
If you’re short on budget, you can use a disposable aluminum pan instead of a baking dish. I’ve used both and honestly, the sliders taste just as good. Just be careful handling the pan when hot!
Preparation Method

- Preheat your oven to 350°F (175°C). This sets the stage for toasty, melty sliders in about 15 minutes.
- Prepare the rolls: Slice the Hawaiian rolls in half horizontally, keeping them attached if possible to hold the sliders together.
- Make the filling: In a mixing bowl, combine your protein choice with Dijon mustard, Worcestershire sauce, garlic powder, and onion powder. Mix gently until evenly coated.
- Assemble the sliders: Place the bottom half of the rolls in your baking dish. Spread the protein mixture evenly over the bottom buns.
- Add cheese: Layer slices of cheese over the meat. Don’t skimp here—this is where the juicy goodness kicks in.
- Top with the roll tops: Place the top halves of the rolls over the cheese layer.
- Brush with melted butter: Using a pastry brush, coat the tops generously with melted butter. This helps create that golden, flavorful crust.
- Bake: Pop the sliders in the oven for 12-15 minutes, or until the cheese is melted and the tops are lightly browned.
- Optional finishing touches: Add pickles or lettuce between the layers after baking for extra crunch.
- Serve warm: Use a sharp knife to slice between each slider, and serve immediately.
Tip: If your oven tends to run hot, check the sliders at 10 minutes to avoid over-browning. And if you like a touch more caramelization, leave them in for an extra minute or two, but keep a close eye. I once got distracted by a phone call and ended up with slightly charred tops—still tasty, just a bit crunchier than usual!
Cooking Tips & Techniques
Getting these sliders just right is easier than you think, but a few tricks can make a difference:
- Don’t overmix your protein: When combining meat and seasonings, mix gently to keep the texture tender. Overworking can make the filling dense.
- Use room temperature butter: This spreads more evenly and soaks into the rolls nicely, giving that golden finish.
- Cheese choice matters: Swiss and provolone melt beautifully without overpowering the sweet rolls. Sharp cheddar works too if you like a punchier flavor.
- Layer evenly: Even distribution ensures every bite has balance—no one wants a dry slider or a cheese overload.
- Timing is key: Don’t rush the bake; the cheese needs time to melt fully, but don’t wait too long or the buns might dry out.
- Keep slider buns attached: Slicing the rolls as a block and then layering helps keep everything together and makes serving easier.
I once tried adding raw onions to the mixture, and wow, that was a mistake—too strong and threw off the balance. Cook or omit them altogether next time.
Variations & Adaptations
- BBQ Chicken Sliders: Swap the protein for shredded rotisserie chicken tossed in BBQ sauce, and add sliced pickles for tang.
- Veggie Delight: Use grilled mushrooms, roasted peppers, and melted Swiss for a vegetarian option that’s just as juicy.
- Spicy Kick: Mix in some chipotle mayo or hot sauce with the meat for a smoky heat that contrasts beautifully with the sweet rolls.
If you prefer a gluten-free version, grab gluten-free Hawaiian-style buns or make your own low-carb roll alternative. I’ve tried using turkey instead of beef for a leaner option, and it turned out just as satisfying—plus, it’s lighter on the palate.
Serving & Storage Suggestions
These sliders are best enjoyed warm, right out of the oven when the cheese is gooey and the rolls are soft yet toasted. They pair wonderfully with crunchy coleslaw, a simple garden salad, or even sweet potato fries if you’re feeling indulgent. For drinks, think fizzy sodas, light beers, or iced tea.
To store leftovers, cover the sliders tightly with foil or place them in an airtight container. Refrigerate for up to 3 days. When reheating, pop them in a 325°F (160°C) oven for about 10 minutes to warm through and refresh the buns without drying them out. Microwaving works, but the texture can get a bit soggy.
Over time, the flavors meld nicely if you let the sliders sit wrapped for a few hours before serving—great for prepping ahead.
Nutritional Information & Benefits
Each slider provides approximately:
| Calories | Protein | Fat | Carbohydrates |
|---|---|---|---|
| 280 kcal | 15g | 12g | 28g |
Key ingredients like lean ground beef or chicken provide a good dose of protein, while the Hawaiian rolls add a touch of sweetness and energy-boosting carbs. Using real butter and cheese brings in fats that help with satiety. For those watching carbs, swapping rolls for low-carb buns or leafy wraps works well.
Keep in mind the recipe contains dairy and gluten, so adjust accordingly for allergies. From a wellness perspective, these sliders offer a satisfying treat without complicated ingredients or preservatives, so you can enjoy them guilt-free in moderation.
Conclusion
Easy Juicy No-Fail Hawaiian Roll Sliders are proof that quick snacks don’t have to be boring or bland. They come together fast, taste amazing, and bring a relaxed yet special vibe to any gathering. Whether you’re feeding a hungry crowd or just craving something tasty for yourself, this recipe hits the spot every time.
I love these sliders because they remind me that sometimes the simplest ideas turn into favorites. Feel free to make them your own—switch up fillings, add your favorite sauces, or pile on extra cheese. And hey, if you try this recipe, drop a comment to share your twists or tips. Sharing food stories is what makes cooking even more fun!
Here’s to easy, juicy bites that bring people together.
FAQs
Can I make these sliders ahead of time?
Yes! Assemble and refrigerate the sliders up to a day before baking. Just add a few extra minutes to baking time if straight from the fridge.
What’s the best way to reheat leftover sliders?
Warm them in the oven at 325°F (160°C) for about 10 minutes to keep the buns soft and cheese melty.
Can I freeze these sliders?
Absolutely. Wrap tightly and freeze for up to 2 months. Thaw overnight in the fridge before reheating.
What’s a good vegetarian filling alternative?
Grilled or sautéed mushrooms with melted cheese work great, or try a black bean and corn mix for a southwestern twist.
Are Hawaiian rolls necessary, or can I use other buns?
Hawaiian rolls add a signature sweetness and softness, but you can use dinner rolls or slider buns you prefer. Just expect a slightly different flavor profile.
Pin This Recipe!

Easy Juicy Hawaiian Roll Sliders
- Total Time: 25 minutes
- Yield: 12 sliders 1x
Description
Quick and tasty sliders made with sweet Hawaiian rolls and savory fillings, perfect for last-minute party snacks or casual get-togethers.
Ingredients
- 12 soft Hawaiian rolls (King’s Hawaiian preferred)
- 1 lb (450g) ground beef, shredded rotisserie chicken, or sliced deli ham
- 6–8 slices Swiss, cheddar, or provolone cheese
- 3 tbsp unsalted butter, melted
- 1 tbsp Dijon mustard
- 1 tsp Worcestershire sauce (optional)
- ½ tsp garlic powder
- ½ tsp onion powder
- Pickles or lettuce (optional)
Instructions
- Preheat oven to 350°F (175°C).
- Slice Hawaiian rolls in half horizontally, keeping them attached if possible.
- In a mixing bowl, combine protein choice with Dijon mustard, Worcestershire sauce, garlic powder, and onion powder. Mix gently until evenly coated.
- Place bottom half of rolls in a 9×13-inch baking dish.
- Spread protein mixture evenly over bottom buns.
- Layer slices of cheese over the meat.
- Place top halves of rolls over the cheese layer.
- Brush tops generously with melted butter using a pastry brush.
- Bake sliders for 12-15 minutes until cheese is melted and tops are lightly browned.
- Optionally add pickles or lettuce between layers after baking.
- Slice between each slider with a sharp knife and serve warm.
Notes
Do not overmix protein to keep filling tender. Use room temperature butter for even spreading. Check sliders at 10 minutes if oven runs hot to avoid over-browning. Keep rolls attached when slicing for easier assembly and serving. Variations include BBQ chicken, veggie options, and spicy versions.
- Prep Time: 10 minutes
- Cook Time: 15 minutes
- Category: Snack
- Cuisine: American
Nutrition
- Serving Size: 1 slider
- Calories: 280
- Fat: 12
- Carbohydrates: 28
- Protein: 15
Keywords: Hawaiian roll sliders, party snacks, quick sliders, easy sliders, juicy sliders, crowd-pleaser, sweet and savory sliders
