

“I never thought a plumber would be my go-to grilling guru,” I confess, laughing over the memory. It was last summer, and my backyard was filled with the usual weekend chaos—kids running around, the grill sizzling beside an open cooler. My plumber, Mike, was fixing a leaky faucet while sharing his secret for the juiciest, most tender chicken he’d ever cooked. The catch? Just three ingredients and a beer can. Sounds too simple, right? But honestly, that easy 3-ingredient beer can chicken on the grill has since become my lazy weekend hero.
Maybe you’ve been there: craving a smoky, flavorful chicken without the fuss of a dozen spices or complicated marinades. You want that golden, crispy skin and juicy meat but don’t want to spend hours prepping. That’s where this recipe fits in perfectly. I remember the first time I tried it, I forgot to bring out the tongs, ended up juggling the can and the bird, and made a mess. Yet, the results were so delicious that I didn’t even mind the chaos. The simplicity and flavor combo stuck with me—and I have a feeling it will with you too.
Whether you’re a weekend grill master or someone who rarely ventures beyond the stove, this recipe brings the kind of fuss-free, mouthwatering grilled chicken that feels like a backyard party every time. Let me tell you, it’s the kind of dish that has folks asking for your “secret,” even though it’s just beer, chicken, and seasoning.
Why You’ll Love This Recipe
This easy 3-ingredient beer can chicken recipe is honestly a game-changer, and I’m not just saying that because I got it from an unexpected source (hi, Mike). Here’s what makes it stand out:
- Quick & Easy: Ready to grill in under 15 minutes of prep time—perfect for busy days or last-minute plans.
- Simple Ingredients: No need to hunt for exotic spices; just a whole chicken, your favorite beer, and seasoning blend.
- Perfect for Outdoor Gatherings: Whether it’s a casual cookout or a weekend hangout, this recipe steals the show.
- Crowd-Pleaser: Kids and adults alike go wild for the juicy, flavorful meat and crispy skin.
- Unbelievably Delicious: The beer steams the chicken from the inside, making it incredibly moist while the grill adds smoky perfection.
This isn’t just another grilled chicken recipe. The magic lies in the beer can method, which truly locks in moisture and infuses subtle flavor with almost no effort. Plus, the seasoning is balanced just right — not too salty, not bland — making it a dependable, fuss-free winner every time.
Honestly, it’s the kind of recipe that makes you want to close your eyes after the first bite and just savor the moment. And the best part? You don’t need to be a grill pro. I promise, if I can nail it (even after a few messy attempts), so can you.
What Ingredients You Will Need
This recipe calls for just three straightforward ingredients, each playing a key role in crafting that perfect grilled chicken experience. The simplicity is part of the charm, and you probably have these in your kitchen or local store right now.
- Whole Chicken (about 4-5 pounds / 1.8-2.3 kg): Choose a fresh or thawed bird with skin-on and bone-in for best flavor and juiciness.
- Beer (12 oz / 355 ml can): Use your favorite lager or pale ale. I like a crisp, light beer like Pilsner or Bud Light—not too bitter, which keeps the flavor balanced.
- Seasoning Blend (2-3 tablespoons): A simple mix of salt, black pepper, and smoked paprika usually does the trick. I sometimes add garlic powder or onion powder to amp things up. You can use a store-bought BBQ rub or make your own.
Here’s a quick tip: For seasoning, I recommend Morton’s kosher salt for its texture and flavor, and McCormick’s smoked paprika for a subtle smoky touch. If you want to customize, feel free to swap the beer for a non-alcoholic malt beverage or even sparkling water, but I’d say the beer adds a unique depth you don’t want to skip.
In warmer months, I sometimes swap the seasoning blend for a citrus-herb mix (think lemon zest and fresh thyme) for a lighter twist, but the classic version always wins hearts.
Equipment Needed
- Grill: A charcoal or gas grill works fine, but charcoal adds a smoky flavor that’s hard to beat. If you’re using gas, make sure it can maintain indirect heat.
- Beer Can or Holder: A standard 12 oz beer can or a specialized beer can chicken holder. The holder makes it easier to keep the bird stable, but a regular can works just fine.
- Meat Thermometer: Essential for checking doneness. I swear by my instant-read thermometer from ThermoWorks—it’s fast and reliable.
- Tongs and Heat-Resistant Gloves: For safely handling the hot chicken and grill grates.
- Aluminum Foil: Useful for tenting the chicken after grilling to rest and retain juices.
If you don’t have a meat thermometer, no worries—just keep an eye on the chicken’s juices running clear and the skin turning golden brown. But a thermometer makes life easier, trust me! And if you’re on a budget, a simple grill basket or roasting pan can substitute for a holder, just be careful when balancing the bird on the can.
Preparation Method
- Preheat your grill to medium heat (about 375°F / 190°C): Set your grill for indirect cooking—meaning the coals or burners are on one side, and you’ll place the chicken on the other. This keeps the heat even and prevents burning.
- Prepare the chicken: Remove any giblets from the cavity and pat the chicken dry with paper towels. Dry skin crisps up better, you know. Season the chicken liberally all over with your chosen seasoning blend, inside and out, rubbing it in gently.
- Open the beer can: Carefully remove the top (drink half or pour it out—your choice) to leave about 6 oz (180 ml) in the can. This helps create steam during cooking.
- Mount the chicken on the beer can: Lower the chicken cavity onto the beer can so it stands upright. The legs will act as a tripod. If your chicken isn’t steady, use a beer can chicken holder or nestle it in a grill-safe pan.
- Place the chicken on the grill: Over the indirect heat side, set the chicken upright. Close the lid and cook for around 1 hour to 1 hour 15 minutes. Avoid opening the lid too often; the heat needs to stay consistent.
- Check the temperature: After about 50 minutes, start checking the internal temperature by inserting a meat thermometer into the thickest part of the thigh without touching the bone. It should read 165°F (74°C) when done.
- Remove and rest: Carefully take the chicken off the grill (it’ll be hot and a bit wobbly!). Tent it with foil and let it rest for 10-15 minutes. Resting locks in juices and makes carving easier.
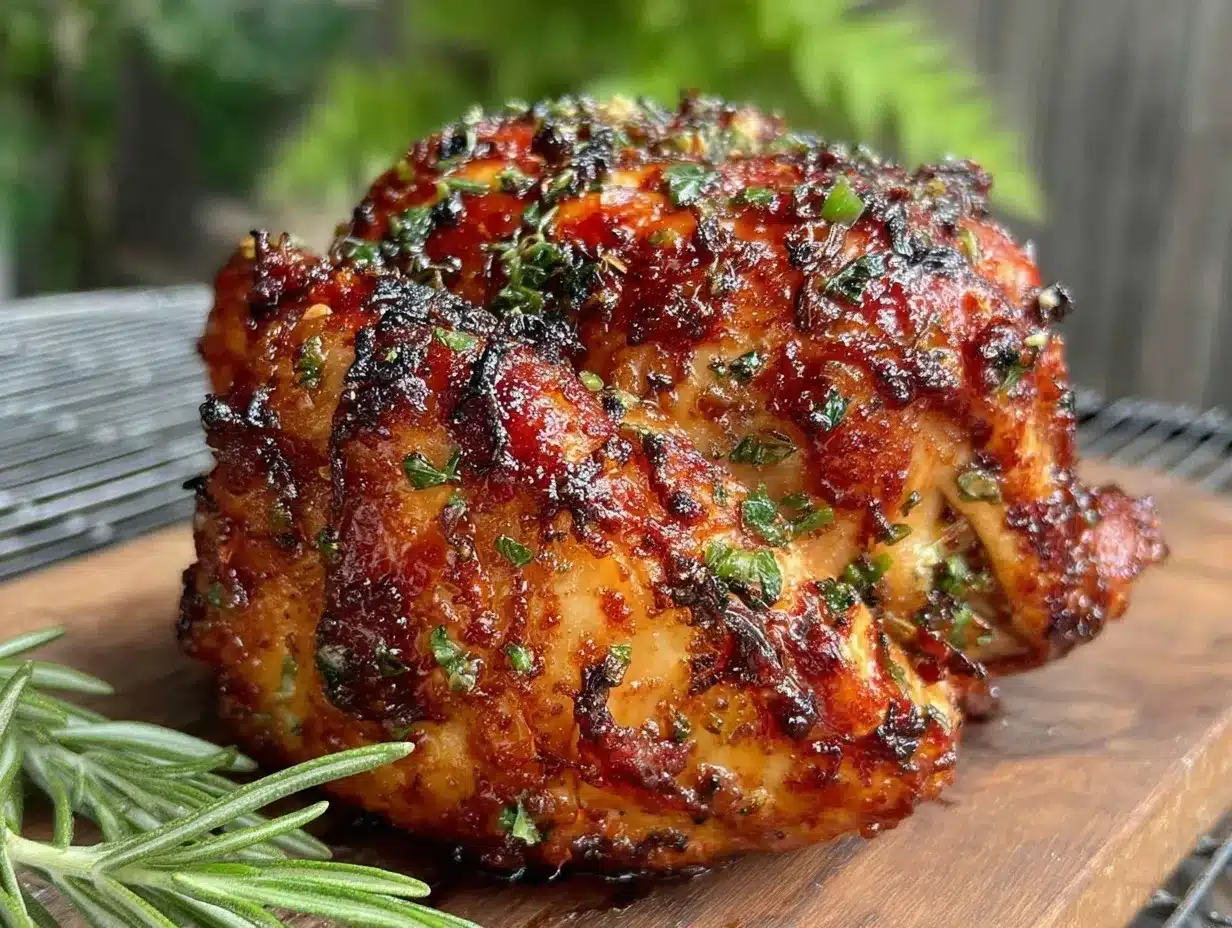
- Carve and serve: Slice the chicken and enjoy! The skin should be crispy, the meat juicy, and the subtle beer aroma lingering in every bite.
Quick heads-up: sometimes the chicken leans a bit or wobbles—don’t sweat it. Just keep it upright as best as you can. Also, if you notice flare-ups, move the chicken slightly away from direct flames to prevent charring.
Cooking Tips & Techniques
Let me share some nuggets of wisdom from my grilling experiments. First, patience is key. The beer can chicken method relies on indirect heat and steam, so rushing or cranking the heat will dry the bird out.
Season generously but don’t overdo salt—it can draw moisture out if left too long before cooking. About 30 minutes of seasoning before grilling is enough; no need for hours of marinating here.
One rookie mistake I made was opening the grill too often, thinking I was checking progress. But every peek lets heat escape and extends cooking time. Trust the process and check temperature only when close to done.
Another tip: if you want extra crispy skin, turn off the lid and move the chicken over direct heat for 2-3 minutes at the end, watching closely to avoid burning. It’s a little trick that makes a big difference.
Lastly, don’t toss out the beer can liquid after cooking—it can be used to make a flavorful pan sauce or marinade base. Just be sure to strain it first.
Variations & Adaptations
- Herb-Infused: Add fresh herbs like rosemary or thyme inside the chicken cavity or mix finely chopped herbs into your seasoning blend for a fragrant twist.
- Spicy Kick: Include cayenne pepper or chili powder in your seasoning for some heat, or brush the skin with a spicy BBQ sauce during the last 10 minutes.
- Gluten-Free: Ensure your seasoning blend is gluten-free (most simple spices are) and use gluten-free beer or substitute with sparkling water for a similar steaming effect.
- Slow Cooker Adaptation: Though the classic is grilled, you can attempt this method in a slow cooker by placing the beer can and chicken upright carefully, but you’ll miss that crispy skin.
Personally, I once tried using a fruity craft beer, and while it added a subtle sweetness, the classic lager or pale ale keeps the flavor balanced and familiar. Feel free to experiment based on your taste and what’s in your fridge!
Serving & Storage Suggestions
This beer can chicken is best served hot off the grill with simple sides like grilled corn, coleslaw, or a fresh green salad. The crispy skin and juicy meat pair beautifully with a cold beer or a refreshing iced tea.
If you have leftovers, wrap them tightly in foil or place in an airtight container. The chicken keeps well in the refrigerator for up to 3 days. When reheating, cover loosely with foil and warm in a 350°F (175°C) oven until heated through to keep the skin from getting rubbery.
For longer storage, you can freeze carved chicken portions for up to 2 months. Thaw overnight in the fridge before reheating gently.
Pro tip: flavors meld beautifully the next day, especially if you’ve packed the chicken with herbs and spices. Sometimes, I’ll serve it cold over a salad for a tasty, no-cook lunch.
Nutritional Information & Benefits
This easy 3-ingredient beer can chicken is a great source of lean protein, essential vitamins, and minerals. One serving (about 3 ounces / 85 grams of cooked chicken) provides approximately:
| Nutrient | Amount |
|---|---|
| Calories | 140-160 kcal |
| Protein | 25-28 g |
| Fat | 4-6 g (mostly from skin) |
| Carbohydrates | 0 g |
The beer adds negligible calories but contributes moisture and subtle flavor. Using skin-on chicken provides more fat, which helps keep it juicy, but you can remove skin after cooking if you prefer a leaner meal.
This recipe fits well into gluten-free and low-carb diets, making it a versatile choice for many eating preferences. Just be mindful of seasoning blends if you have specific allergies or sensitivities.
Conclusion
This easy 3-ingredient beer can chicken recipe proves that sometimes less really is more. It’s fuss-free, packed with flavor, and perfect for any grill lover who wants a reliable, tasty meal without complicated steps. I love how it brings people together—whether it’s a casual family dinner or an impromptu weekend cookout.
Feel free to tweak the seasoning or beer to match your taste buds, but don’t skip the core technique—that upright chicken steaming over beer is what makes this recipe special. I’m excited for you to try it and maybe even share your own tweaks!
Go ahead, give it a shot this weekend. And when you do, I’d love to hear how it turned out—drop a comment, share your photos, or tell me your favorite seasoning combo. Happy grilling!
FAQs
Can I use a different type of beer for this recipe?
Absolutely! Light lagers and pale ales work best for subtle flavor, but you can experiment with darker beers or even non-alcoholic options. Just avoid overly bitter or heavily flavored beers that might overpower the chicken.
How do I know when the chicken is fully cooked?
The safest way is to use a meat thermometer inserted into the thickest part of the thigh, aiming for 165°F (74°C). If you don’t have one, check that the juices run clear and the skin is golden and crisp.
Is it necessary to use a beer can holder?
Not at all. A standard 12 oz beer can works fine, but holders provide stability and make handling easier—especially if you’re new to beer can chicken.
Can I prepare this chicken indoors or in the oven?
You can roast the chicken in the oven upright on a beer can at 375°F (190°C) for about 1 hour 15 minutes, but you’ll miss out on the smoky flavor and crispiness from the grill.
What if I don’t drink beer or want to avoid alcohol?
No problem! You can substitute sparkling water, apple cider, or even broth in the can. The steaming effect is what’s important, so the liquid choice can be flexible.
Pin This Recipe!
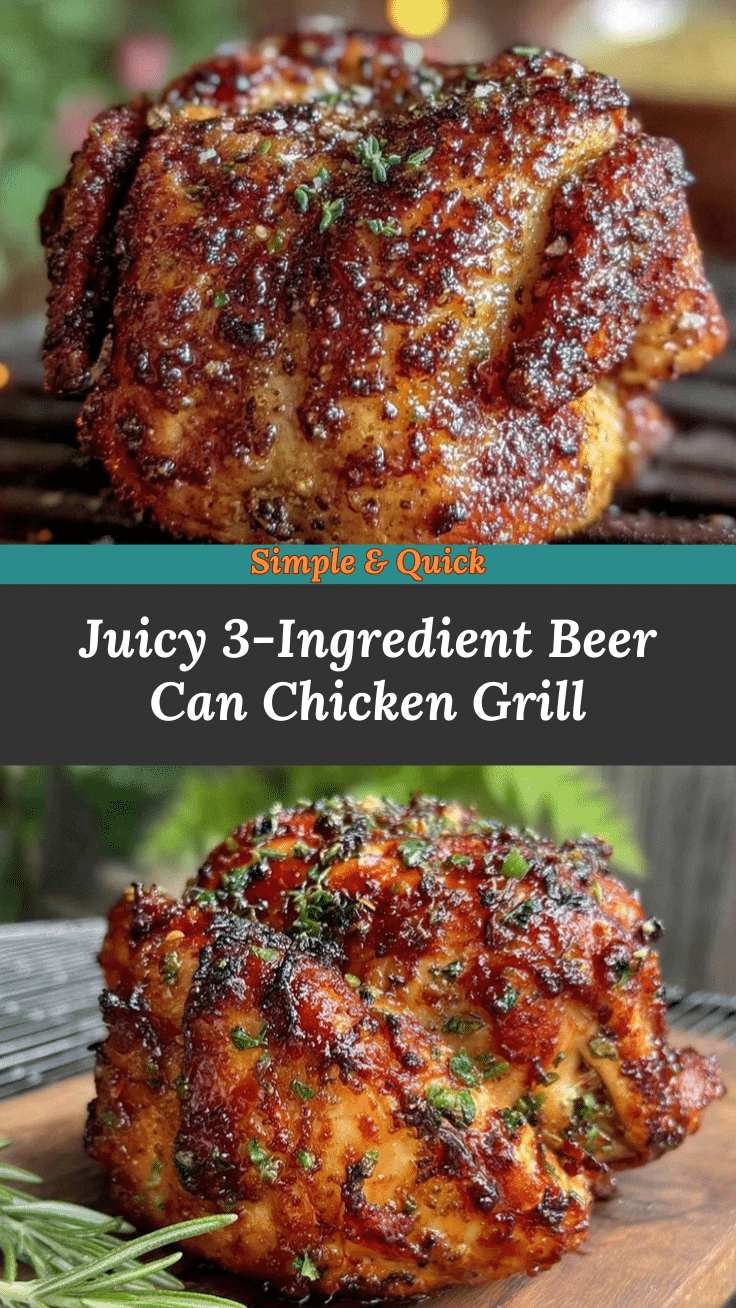

Easy 3-Ingredient Beer Can Chicken Recipe for Perfect Grilled Meals
- Total Time: 1 hour 30 minutes
- Yield: 4-6 servings
Description
A simple and flavorful grilled chicken recipe using just three ingredients: whole chicken, beer, and seasoning blend. Perfect for quick, fuss-free outdoor cooking with juicy meat and crispy skin.
Ingredients
- Whole chicken (about 4-5 pounds / 1.8-2.3 kg), skin-on and bone-in
- Beer (12 oz / 355 ml can), preferably a lager or pale ale like Pilsner or Bud Light
- Seasoning blend (2-3 tablespoons) – salt, black pepper, smoked paprika; optional garlic powder or onion powder
Instructions
- Preheat your grill to medium heat (about 375°F / 190°C) using indirect cooking.
- Remove giblets from the chicken cavity and pat the chicken dry with paper towels.
- Season the chicken liberally all over with the seasoning blend, inside and out.
- Open the beer can and remove about half (leave about 6 oz / 180 ml in the can).
- Mount the chicken cavity onto the beer can so it stands upright, using legs as a tripod.
- Place the chicken upright on the grill over indirect heat, close the lid, and cook for 1 hour to 1 hour 15 minutes.
- After about 50 minutes, check the internal temperature with a meat thermometer in the thickest part of the thigh; it should read 165°F (74°C).
- Carefully remove the chicken from the grill and tent with aluminum foil. Let rest for 10-15 minutes.
- Carve the chicken and serve hot.
Notes
Use indirect heat to avoid burning. Avoid opening the grill lid frequently to maintain temperature. For extra crispy skin, move chicken over direct heat for 2-3 minutes at the end. The beer can liquid can be saved and used for pan sauce after straining. If chicken wobbles, use a holder or nestle in a grill-safe pan. Substitute beer with non-alcoholic malt beverage or sparkling water if desired.
- Prep Time: 15 minutes
- Cook Time: 1 hour 15 minutes
- Category: Main Course
- Cuisine: American
Nutrition
- Serving Size: 3 ounces (85 grams)
- Calories: 140160
- Fat: 46
- Protein: 2528
Keywords: beer can chicken, grilled chicken, easy chicken recipe, 3-ingredient chicken, backyard grilling, simple chicken recipe, beer chicken
