

“You know that moment when you’re rummaging through the kitchen late at night, craving something sweet, but the idea of turning on the oven feels like a chore? Well, that was me last Thursday at 11 PM, standing over a mess of peanut butter jars and chocolate wrappers, convinced I could whip up something delicious without heating up the whole house. Honestly, I wasn’t aiming for perfection—just something quick, satisfying, and mess-free. What came out of that chaotic midnight experiment was these easy no-bake chocolate peanut butter bars, and let me tell you, they stuck around for good reason.
I can’t say I’m usually a no-bake dessert devotee, but this recipe surprised me. It’s like the best kind of kitchen hack—simple, fuss-free, and downright addictive. Plus, the first time I made these, I managed to spill half the peanut butter on the counter (classic me), but the bars still turned out perfectly creamy and rich. If you’ve ever found yourself wanting a treat that doesn’t involve a long bake or complicated steps, I think you’re going to appreciate this one. Maybe you’ve been there—looking for a quick snack that doesn’t compromise on taste or texture. This recipe has become my go-to for exactly that, and I think it might just become yours, too.
So, let me share this little kitchen gem that’s all about combining creamy peanut butter with luscious chocolate, no oven required, and only a handful of ingredients. It’s the kind of recipe that feels like a secret handshake among snack lovers—quick, comforting, and insanely satisfying.
Why You’ll Love This Recipe
Honestly, these easy no-bake chocolate peanut butter bars check all the boxes when it comes to quick treats that hit the spot. After testing countless variations and tweaking ingredient ratios, here’s why I keep coming back to this version:
- Quick & Easy: Ready in under 30 minutes, perfect for those busy afternoons or last-minute dessert emergencies.
- Simple Ingredients: No need for fancy or hard-to-find items; most of these are probably already sitting in your pantry.
- Perfect for Snack Time: Whether it’s a midday pick-me-up or an after-dinner sweet, these bars fit right in.
- Crowd-Pleaser: Kids, adults, coworkers—everyone asks for seconds (and sometimes thirds).
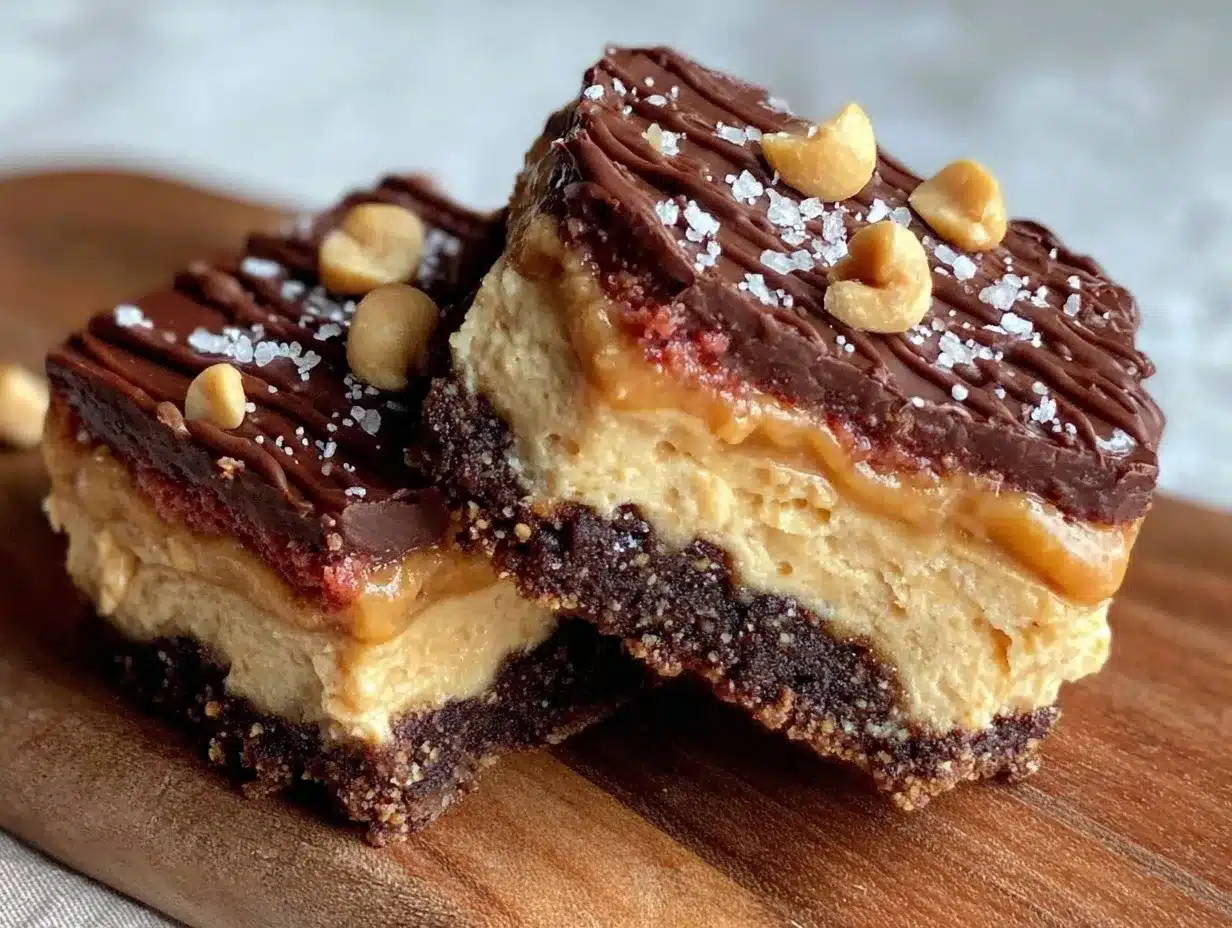
- Unbelievably Delicious: The creamy peanut butter base with a rich chocolate topping creates a dreamy texture and flavor combo.
What sets this recipe apart is the balance. I mean, you don’t want a bar that’s too dry, nor one that’s a total sugar bomb. The peanut butter and chocolate marry perfectly here, with just the right touch of sweetness and saltiness. Plus, I like to blend the peanut butter with a little melted butter and powdered sugar for that smooth, melt-in-your-mouth feel. No crumbly edges or weird textures—just pure, simple goodness.
And here’s the thing: it’s a no-bake recipe that doesn’t taste like a shortcut. Many no-bake treats fall flat, but these bars close your eyes and savor kind of delicious, making them a staple for quick snack cravings or casual get-togethers.
What Ingredients You Will Need
This recipe uses simple, wholesome ingredients to deliver bold flavor and satisfying texture without the fuss. Most items are pantry staples, so you can pull this together in a flash. Here’s what you’ll need:
- Peanut Butter: 1 cup smooth peanut butter (I prefer Jif for its creamy consistency, but natural peanut butter works too—just make sure to stir it well beforehand)
- Unsalted Butter: 1/2 cup (113g), melted (adds richness and helps bind)
- Powdered Sugar: 2 cups (240g) (for that sweet, silky base without graininess)
- Graham Cracker Crumbs: 1 1/2 cups (150g) (gives a subtle crunch and structure; you can substitute with crushed digestive biscuits if you like)
- Semisweet Chocolate Chips: 1 1/2 cups (270g) (I usually grab Ghirardelli for the deep chocolate flavor)
- Heavy Cream: 2 tablespoons (30ml) (to make the chocolate topping glossy and smooth)
- Vanilla Extract: 1 teaspoon (optional, but adds a lovely depth)
- Sea Salt: A pinch sprinkled on top (optional, but trust me, it brings out the flavors beautifully)
Feel free to swap out the peanut butter for almond or cashew butter if you want a twist, or choose dairy-free butter and coconut cream for a vegan-friendly option. I find that the powdered sugar is key to getting that bar-like firmness without baking—so don’t skip it or substitute with granulated sugar, or you might end up with a gritty texture.
Equipment Needed
- Mixing Bowls: One medium and one large bowl for combining ingredients.
- 9×9-inch (23×23 cm) Baking Pan: For shaping the bars. You can also use an 8×8-inch pan if that’s what you have—just expect thicker bars.
- Spatula or Spoon: For mixing and spreading the layers evenly.
- Microwave-Safe Bowl or Double Boiler: To melt the chocolate without burning it. I’ve tried both methods; the microwave is faster, but the double boiler gives you better control.
- Parchment Paper: For lining the pan—trust me, this makes clean-up and bar removal a breeze.
If you don’t have a baking pan exactly that size, improvise with similar-sized containers, but keep in mind thickness and setting times may vary. Also, a food processor isn’t necessary for this recipe, which is great for keeping things simple.
Preparation Method
- Line your baking pan: Use parchment paper to cover the bottom and sides, leaving some overhang to lift the bars out easily later. This saves so much hassle!
- Make the peanut butter base: In a large bowl, combine 1 cup smooth peanut butter, 1/2 cup melted unsalted butter, and 2 cups powdered sugar. Stir together until fully blended and smooth. This should take about 3–5 minutes by hand. The mixture will be thick but creamy, almost like dough.
- Add the graham cracker crumbs: Slowly fold in 1 1/2 cups graham cracker crumbs. The crumbs absorb the moisture and help firm up the base. You want a consistency that holds together when pressed but isn’t dry or crumbly. If it feels too loose, add a bit more crumbs.
- Press the base into the pan: Transfer the peanut butter mixture to your prepared pan. Using a spatula or clean hands, press it down firmly and evenly into a solid layer. This step is key for bars that don’t fall apart later. Set aside.
- Prepare the chocolate topping: In a microwave-safe bowl, add 1 1/2 cups semisweet chocolate chips and 2 tablespoons heavy cream. Microwave in 20-second bursts, stirring in between, until smooth and glossy. This usually takes about 1–1.5 minutes total. Alternatively, melt the chocolate with the cream in a double boiler over simmering water. Stir in 1 teaspoon vanilla extract once melted.
- Pour the chocolate layer: Immediately pour the melted chocolate over the peanut butter base. Use a spatula to spread it evenly. Don’t wait too long, or the chocolate might start to set.
- Add a pinch of sea salt: If you like, sprinkle a tiny bit of flaky sea salt on top to balance the sweetness and add a gourmet touch.
- Chill to set: Place the pan in the refrigerator for at least 2 hours, or until the bars are firm to the touch. If you’re impatient like me, a quick 1-hour freeze works too, but don’t forget to thaw slightly before slicing.
- Slice and serve: Use the parchment paper edges to lift the bars out. Cut into squares or rectangles using a sharp knife (warm the knife under hot water for cleaner cuts). Serve chilled or at room temperature.
Little heads-up: If the peanut butter is too cold or thick, it can make mixing tougher—warming it slightly helps. Also, don’t rush the chilling step; letting the bars set fully is what gives them that perfect bite.
Cooking Tips & Techniques
One trick I learned the hard way is to make sure the peanut butter is at room temperature before mixing. Cold peanut butter can cause the base to clump or resist blending smoothly. Just a quick stir or 15-second zap in the microwave usually does the trick.
When melting chocolate, patience is key. Overheating can cause it to seize and become grainy. If that happens, adding a little cream or a splash of vegetable oil can help smooth it out. Also, stirring frequently during melting ensures even heat distribution.
Pressing the peanut butter base firmly into the pan is more than just for looks. It helps the bars hold together when cut and eaten. I like to press with the back of a spoon or use a piece of parchment paper to flatten it evenly without sticking to my hands.
Timing wise, try not to let the chocolate sit too long before spreading; it starts to harden quickly, and you want a smooth top layer. If it does start to set, gently warm it again to soften.
Lastly, when slicing, wipe your knife clean between cuts to avoid messy edges. A warmed blade works wonders for clean, pretty bars.
Variations & Adaptations
- Vegan Version: Swap butter for coconut oil, use dairy-free chocolate chips, and substitute heavy cream with coconut cream. The texture will be just as creamy and delightful.
- Crunchy Twist: Add chopped roasted peanuts or pretzel pieces to the peanut butter base for extra texture and a salty crunch.
- Chocolate Swap: Use dark chocolate chips or milk chocolate depending on your sweetness preference. White chocolate can work too for a sweeter, creamier bar.
- Nut-Free Option: Replace peanut butter with sunflower seed butter or soy nut butter to accommodate allergies.
- Seasonal Flavor: Stir in a teaspoon of pumpkin pie spice or cinnamon for a cozy autumn vibe, or add a pinch of cayenne for a spicy kick.
I once tried mixing in mini chocolate chips into the peanut butter base for double chocolate goodness. It was a hit with my family and made the bars feel extra indulgent.
Serving & Storage Suggestions
The bars are best served chilled or at room temperature, depending on your preference. I love them straight from the fridge when the chocolate topping has that satisfying snap. For presentation, cut them into bite-size squares and arrange on a simple plate or parchment-lined tray—perfect for casual snacking or parties.
Pair these bars with a cold glass of milk, a cup of coffee, or even a scoop of vanilla ice cream for an extra treat. They also travel well, making them great for packed lunches or picnics.
To store, keep them in an airtight container in the refrigerator for up to a week. If you want to stash some away longer, freeze individual pieces wrapped tightly in plastic wrap and foil; they’ll keep for up to 3 months. Thaw in the fridge overnight before enjoying.
Over time, the flavors meld even more, so leftovers taste just as good, if not better, the next day. Just make sure the bars don’t sit out too long in warm weather, or the chocolate might get melty.
Nutritional Information & Benefits
Each bar (assuming 16 servings) roughly contains:
| Nutrient | Amount per Serving |
|---|---|
| Calories | 200 |
| Fat | 14g |
| Carbohydrates | 17g |
| Protein | 5g |
| Sugar | 12g |
Thanks to peanut butter, these bars provide a decent amount of protein and healthy fats, which help keep you fuller longer compared to typical sugary snacks. The graham crackers add a touch of fiber and texture. Be mindful of portion sizes if you’re watching calories or sugar intake, but honestly, these bars make a better treat option than many store-bought sweets.
For those with dietary needs, the recipe is easily adaptable to gluten-free and vegan diets with simple swaps, making it accessible for many.
Conclusion
So, if you’re hunting for a quick, no-fuss snack that tastes like it took way longer to make, these easy no-bake chocolate peanut butter bars are your new best friend. They’re creamy, chocolatey, and just the right amount of sweet—plus, they come together in a snap with ingredients you probably already have. I love how simple and forgiving this recipe is, meaning even on a hectic day or when the kitchen feels like a disaster zone, you can still treat yourself.
Go ahead and give these bars a try, tweak them to your taste, and share them with friends who appreciate a good homemade snack. And hey, if you end up with a peanut butter spill or two (I won’t tell), just call it part of the fun. Don’t forget to leave a comment and tell me how you made them your own—I’m always curious about your kitchen adventures!
Here’s to quick snacks that taste like a little moment of joy.
FAQs
Can I use crunchy peanut butter instead of smooth?
Yes, you can! Crunchy peanut butter will add some texture to the base, which some people really enjoy. Just be sure to press the mixture firmly in the pan to help it hold together.
How long do these bars last in the fridge?
Stored in an airtight container, they stay fresh for up to one week. If you want to keep them longer, freezing is a great option.
Can I make these bars ahead of time for a party?
Absolutely! They’re perfect for making a day or two in advance. Just keep them refrigerated until serving.
Is it possible to make these gluten-free?
Yes, simply substitute the graham cracker crumbs with gluten-free crackers or gluten-free cookie crumbs. The texture will remain delicious.
What’s the best way to cut the bars without them crumbling?
Use a sharp knife, warmed under hot water and wiped dry before slicing. Cutting when the bars are well chilled helps achieve clean edges too.
Pin This Recipe!
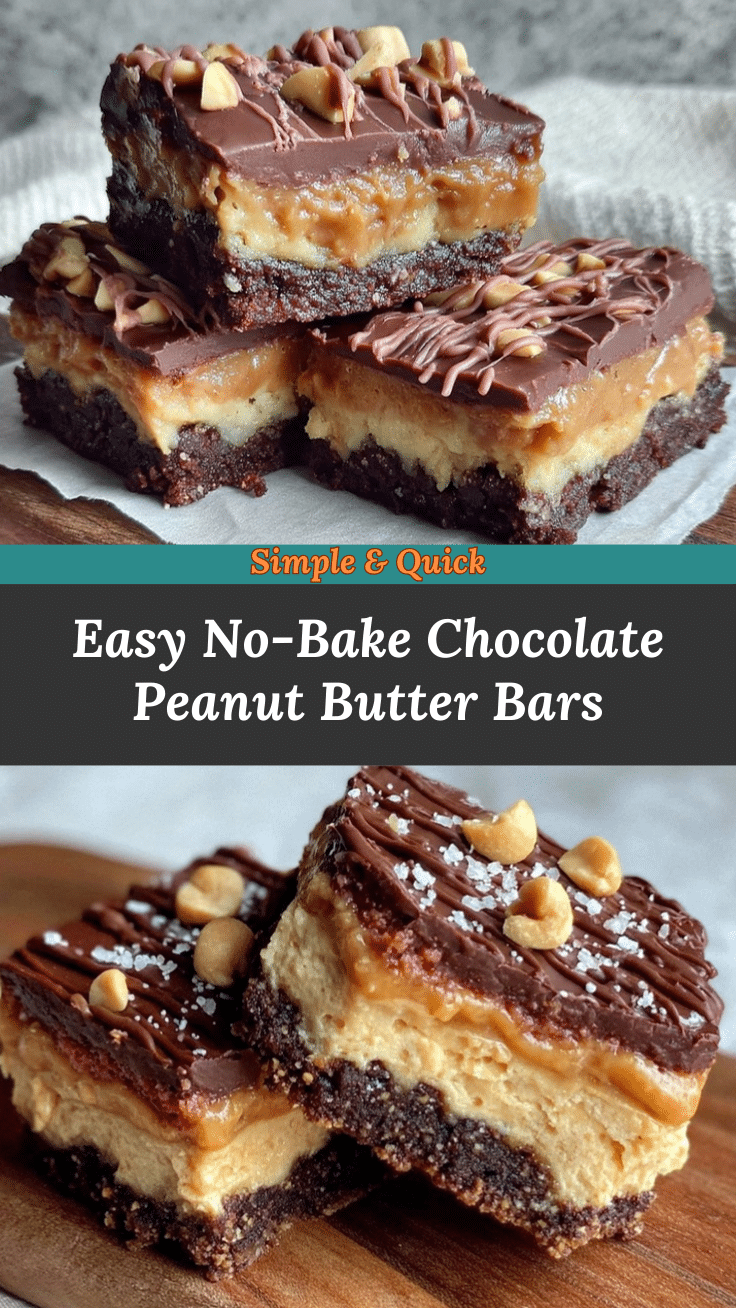

Easy No-Bake Chocolate Peanut Butter Bars
- Total Time: 2 hours 15 minutes
- Yield: 16 servings 1x
Description
A quick and satisfying no-bake treat combining creamy peanut butter with rich chocolate, perfect for snacks or casual get-togethers.
Ingredients
- 1 cup smooth peanut butter
- 1/2 cup (113g) unsalted butter, melted
- 2 cups (240g) powdered sugar
- 1 1/2 cups (150g) graham cracker crumbs
- 1 1/2 cups (270g) semisweet chocolate chips
- 2 tablespoons (30ml) heavy cream
- 1 teaspoon vanilla extract (optional)
- Pinch of sea salt (optional)
Instructions
- Line a 9×9-inch baking pan with parchment paper, leaving some overhang for easy removal.
- In a large bowl, combine peanut butter, melted unsalted butter, and powdered sugar. Stir until smooth and creamy, about 3–5 minutes.
- Fold in graham cracker crumbs until the mixture holds together but is not dry or crumbly.
- Press the peanut butter mixture firmly and evenly into the prepared pan.
- In a microwave-safe bowl, melt semisweet chocolate chips with heavy cream in 20-second bursts, stirring between each, until smooth and glossy. Alternatively, melt using a double boiler.
- Stir in vanilla extract once the chocolate is melted.
- Pour the melted chocolate over the peanut butter base and spread evenly with a spatula.
- Sprinkle a pinch of sea salt on top if desired.
- Refrigerate for at least 2 hours until firm. Alternatively, freeze for 1 hour and thaw slightly before slicing.
- Use parchment paper edges to lift bars from the pan and cut into squares or rectangles with a sharp, warmed knife.
- Serve chilled or at room temperature.
Notes
Ensure peanut butter is at room temperature for easier mixing. Press the base firmly to help bars hold together. Melt chocolate gently to avoid seizing. Use a warmed knife for clean cuts. Chill bars fully for best texture.
- Prep Time: 10 minutes
- Cook Time: 5 minutes
- Category: Dessert
- Cuisine: American
Nutrition
- Serving Size: 1 bar (assuming 16 b
- Calories: 200
- Sugar: 12
- Fat: 14
- Carbohydrates: 17
- Protein: 5
Keywords: no-bake, chocolate peanut butter bars, quick snacks, easy dessert, no oven, peanut butter bars
