
Last spring, I was standing in my kitchen, surrounded by mismatched utensil holders and cluttered drawers, feeling frustrated with the lack of organization. The decor just wasn’t working. That’s when I stumbled upon a statistic: the average person spends up to 60 hours a year searching for items in their kitchen. I laughed, but it hit home. I realized my countertop needed a modern Scandinavian touch—something both practical and beautiful. So, I dove into the world of Scandinavian decor, focusing on sleek yet functional utensil storage. The transformation was immediate. My kitchen felt airy, organized, and inviting. Every morning, my coffee routine became a joy instead of a scavenger hunt. I’ll never forget the satisfaction of seeing everything in its place. If you’re looking for a way to refresh your kitchen, Scandinavian utensil storage ideas can truly change your daily routine and your home’s atmosphere. Let’s unravel the secret to a countertop that’s both stunning and organized.
Style Overview & Inspiration: What Makes Scandinavian Kitchen Decor So Appealing?
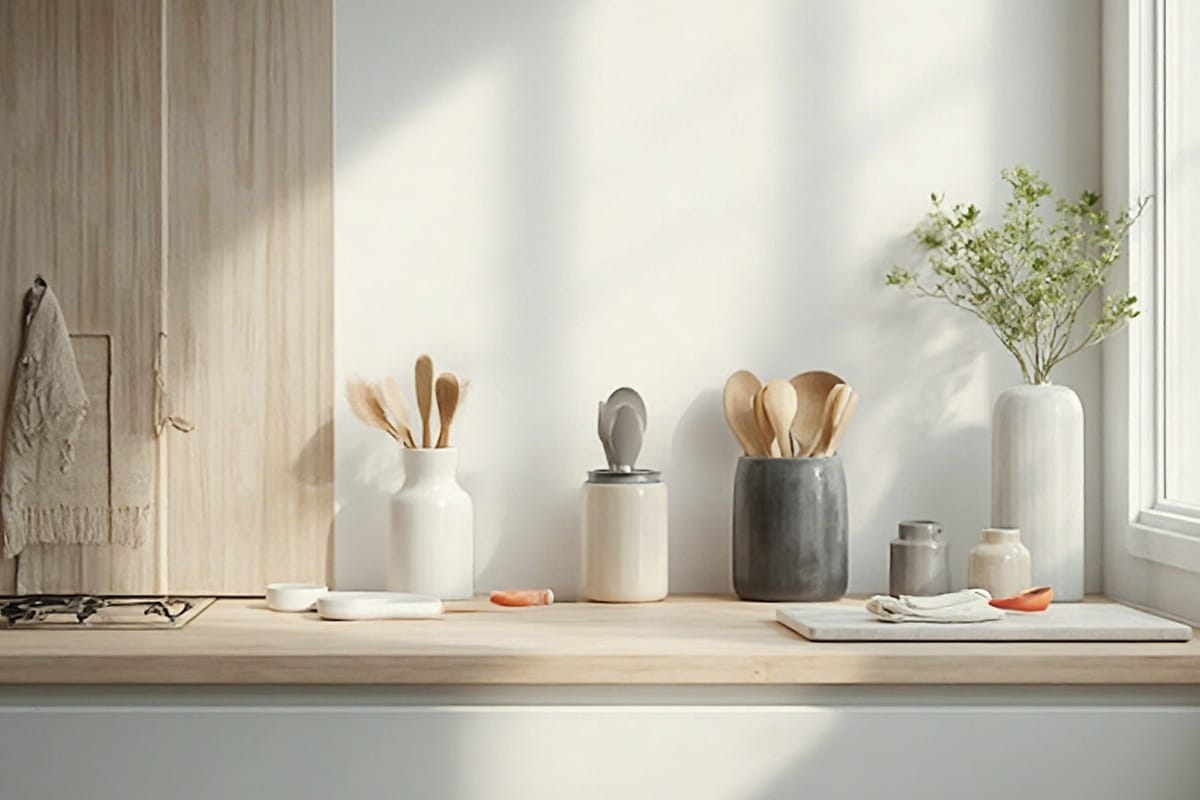
Modern Scandinavian kitchen decor is all about simplicity, functionality, and subtle elegance. Picture pale wood finishes, crisp white ceramics, and matte black accents. The style is rooted in Nordic traditions where long winters inspired bright, clutter-free interiors. This decor embodies a sense of calm and order—everything is intentional and nothing feels overcrowded.
The mood a Scandinavian kitchen creates is unmistakable: light, airy, and serene. It’s the kind of space where you actually want to spend time, whether you’re prepping a meal or sharing coffee with friends. The origins trace back to the mid-20th century, when designers like Alvar Aalto and Arne Jacobsen started favoring natural materials and clean lines. Their influence is still everywhere; think of celebrity kitchens like Gwyneth Paltrow’s, with its soft oak cabinetry and streamlined utensil storage.
Today, Scandinavian decor is a favorite among Instagram home accounts and design magazines, and it’s easy to see why. The focus on well-crafted storage solutions means even the most basic utensil holder can become a sculptural focal point. Current trends lean toward open shelving, minimalist caddies, and floating rails—each one as beautiful as it is useful.
Design Planning & Vision: How Do You Create a Modern Scandinavian Utensil Storage System?
Before you run out and buy new storage, take a moment to assess your space. Measure your countertop width and depth. Some of my best storage solutions came from understanding where I had unused corners or awkward gaps. Start by clearing everything off your counters and taking stock of what you really use every day.
Next, define your design goals. Are you craving a clutter-free look? Do you want easy access to your go-to utensils? Maybe you’re after a soft, cohesive color palette. Write down your non-negotiables. For me, it was keeping my wooden spoons within arm’s reach but off the cutting board area.
There are several approaches to achieving the Scandinavian look. One is the “open-air” method: wall-mounted rails or shelves that make your utensils part of the decor. Another is concealed storage, like drawer inserts or lidded canisters. A third option is hybrid—using a couple of sleek holders for everyday items and tucking the rest away.
Creating a mood board can help bring your vision together. I like to use Pinterest or a simple corkboard with magazine clippings. Collect images of kitchens with white ceramic jars, natural wood trays, and matte black hooks. Notice the repeated colors—often white (#FFFFFF), soft gray (#D3D3D3), and pale oak (#F3E9D2).
As you decide on your approach, think about scale. I once made the mistake of buying a giant utensil crock that dwarfed my small countertop. Now, I always check dimensions twice and sketch a quick layout. Use sticky notes to mark out where each storage piece will go. It’s a small step, but it prevents so much frustration.
Materials & Shopping Guide: What Do You Need for Scandinavian Utensil Storage?

To give your countertop authentic Scandinavian flair, gather these decor essentials:
- White or soft gray ceramic utensil crocks (diameter 5-6 inches)
- Bamboo or light oak trays (approx. 12×6 inches)
- Matte black metal rails and matching S-hooks
- Glass jars with wooden lids (for smaller tools)
- Woven baskets or seagrass bins
- Magnetic knife strips in wood or black
- Minimalist drawer organizers (expandable, 10-20 inches wide)
High-end shops like Muuto and Ferm Living offer beautiful options, but you can also find budget-friendly alternatives at IKEA, Target, or secondhand stores. I’ve scored vintage ceramics for under $10 at flea markets. Shop seasonally—late summer and post-holiday sales often have the best deals. For a DIY twist, repurpose old vases or mason jars with a quick coat of matte spray paint.
Step-by-Step Decorating Process: How Do You Organize and Style Your Countertop?

- Declutter and Deep Clean (30-40 minutes): Remove everything from your countertop. Wipe down surfaces with a gentle cleaner. Let yourself be ruthless—if you haven’t used a spatula in six months, consider donating it.
- Sort and Group Utensils (20 minutes): Lay out all your tools and group them by type (spoons, spatulas, whisks). Decide which ones need to be within reach and which can be stored away.
- Choose Your Storage Solutions (15 minutes): Based on your space and utensil count, select the right combination of crocks, trays, and rails. For small kitchens, I love using a rail above the stove (about 18 inches long) and a single ceramic crock next to the sink.
- Map Out Placement (10 minutes): Arrange your storage items on the counter without utensils. Check for balance—avoid crowding one corner. Make sure nothing blocks your prep area.
- Install Wall-Mounted Pieces (20-30 minutes): If you’re adding a rail or magnetic strip, measure twice and use a level. I once installed a rail 2 inches too high and had to redo it—lesson learned! Keep the rail about 16 inches above the counter for easy access.
- Fill and Style (15 minutes): Place utensils in their new homes. Mix wood, metal, and silicone for texture. Try arranging by height or color—tall spoons in the back, smaller whisks in the front.
- Add Decorative Touches (10 minutes): Tuck a small potted herb or a candle on the tray for warmth. I like to add a linen tea towel with a subtle pattern for softness.
- Troubleshooting and Adjusting (as needed): Live with your setup for a few days. If something feels off, don’t hesitate to swap items or move storage. Sometimes, less really is more.
- Before/After Reflection: Take a snapshot of your kitchen before and after. Seeing the transformation side-by-side is surprisingly satisfying—and it’s a great motivator to keep things organized.
Efficiency tip: Batch similar tasks together. For example, deep clean one day and install storage the next. When I tried to do it all at once, I got overwhelmed and missed details.
Styling Tips & Design Techniques: How Can You Make Your Storage Look Magazine-Worthy?

Professional designers know that little details make a big difference. Start by anchoring your storage with a beautiful tray—it unifies jars and crocks and keeps the decor from feeling scattered. I once skipped the tray and my setup looked random, not intentional.
Layering is key. Combine a matte ceramic crock with a wooden tray and a small glass jar. Play with odd numbers—three items grouped together are more pleasing than two or four. Keep the tallest item in the back, and vary textures for depth.
Scale and proportion matter. In a small kitchen, choose a 5-inch wide crock instead of an 8-inch one. Tall ceilings? Go for a 24-inch rail instead of a 12-inch. My early mistake was using oversized storage, which made my galley kitchen feel tight.
Don’t overcrowd. Leave at least 8 inches of counter space clear for prep work. And remember, negative space is part of Scandinavian design. Add a pop of greenery with a tiny potted plant, but avoid too many accessories.
For a true magazine-worthy look, wipe down surfaces regularly and rotate utensils seasonally—wooden spoons in winter, stainless in summer. Swap out tea towels for a quick refresh. These small swaps keep your decor feeling fresh and intentional.
Color & Texture Combinations: What Palettes and Materials Work Best?
The classic Scandinavian palette is neutral and calming. Start with crisp whites (#FFFFFF), soft grays (#ECECEC), and pale woods like birch or oak (#F3E9D2). Accents in matte black (#232323) or brushed brass add a modern edge.
For texture, mix smooth ceramics with unfinished wood and the occasional touch of leather or linen. A bamboo tray under a white crock creates instant warmth. Glass jars with wooden lids add a soft contrast and keep small tools tidy.
Seasonal color swaps are easy. In spring, add a light blue linen towel (#C7DDEE) for a hint of color. In fall, a muted terracotta (#E27D60) works beautifully with neutral decor. My personal favorite is a white crock on a natural wood tray, paired with a black rail and a sage green towel (#A8BBA1)—it’s fresh and timeless.
Accent colors should be used sparingly—one or two is plenty. Place them in high-traffic areas like next to the sink or the stove for maximum visual impact.
Common Design Mistakes to Avoid: What Should You Watch Out For?
One of the biggest mistakes is overcrowding the countertop. Too many storage pieces make the decor feel cluttered instead of calm. Stick to the essentials and rotate out seasonal items.
Scale is another pitfall. Oversized crocks or trays can overwhelm a small space, while tiny organizers get lost on a big island. Always measure before you buy.
Lighting is easy to overlook. A dark corner can make even the best decor feel depressing. Add an under-cabinet light or a small lamp if your kitchen needs a boost.
Don’t block workflow. Keep storage away from prep areas and leave clear paths for cooking. I once placed a large crock right where I chop vegetables, and it drove me crazy until I moved it.
Finally, remember that perfection isn’t the goal. A few visible utensils or a slightly crooked rail add character—it’s your kitchen, not a showroom.
Budget-Friendly Alternatives: How Can You Achieve the Look for Less?
You don’t need to spend a fortune for beautiful Scandinavian storage. Try these budget-friendly decor hacks:
- Repurpose old mason jars or thrifted vases as utensil crocks—just spray them with matte paint for a modern finish.
- Use a bamboo cutting board as a tray, or pick up a set of wooden trays from a dollar store.
- Look for wall rails at IKEA or even hardware stores; you can spray-paint metal ones black to match the Scandinavian vibe.
- Upcycle baskets or bins for drawer storage—just line them with fabric scraps for a custom look.
- Balance splurges (like a designer crock) with save items (like DIY trays or secondhand finds).
My favorite success story: I found a $3 ceramic vase at Goodwill, painted it white, and it’s now my go-to utensil crock. The whole countertop refresh cost under $25.
Conclusion: Why Scandinavian Utensil Storage Makes Kitchens Beautiful
Modern Scandinavian utensil storage brings calm, order, and understated beauty to your kitchen. By focusing on simple, functional decor, you create a space that works for you every day. Even small changes—like swapping out a crock or adding a tray—can spark big improvements in how your kitchen looks and feels.
Start small. Try a new rail or a thrifted jar, and see how it changes your routine. Every design transformation begins with a single step. I’ve watched my own kitchen go from chaos to calm, and I know yours can too.
Ready to take the leap? Pick one idea from this guide and give your countertop a fresh, Scandinavian-inspired look. Your future self will thank you every time you step into your beautiful, organized kitchen.
Frequently Asked Questions: Scandinavian Kitchen Utensil Storage
What materials are best for modern Scandinavian utensil holders?
Stick to natural materials like ceramic, light-colored wood, and matte metal. These fit the Scandinavian decor style and are easy to keep clean.
How do I keep my countertop from looking cluttered?
Limit storage to one or two crocks and a tray. Store less-used utensils in drawers. Leave plenty of open space for a tidy, calming look.
What’s the right height for wall-mounted utensil rails?
Install rails about 16 inches above the countertop. This keeps utensils within easy reach but out of the way of prep work.
Can I use Scandinavian decor in a small kitchen?
Absolutely. Choose compact storage solutions and stick to light colors. A single white crock and a bamboo tray can make even a tiny space feel bigger and brighter.
Are there seasonal ways to refresh my utensil storage?
Swap out tea towels and add a small accent color—like a blue towel in spring or a terracotta one in fall. Rotate your utensils to match the season for a subtle refresh.
