

Introduction
Let me tell you—there’s something downright magical about the smell of creamy vanilla and buttery graham crackers floating through your kitchen on a chilly February afternoon. The first time I assembled a Mini Cheesecake Shooting Board for Galentine’s Day, I was hit with a wave of pure nostalgia (like I was knee-high to a grasshopper, licking the beaters after my grandma’s legendary cheesecake). It’s the kind of moment you pause, take a deep breath, and just smile because you know you’re onto something truly special. The colors, the whimsy, the tiny cheesecakes, all stacked and ready for sharing—they’re almost too cute to eat. Almost!
I remember stumbling upon this idea on a rainy weekend when my best friends were coming over for a little Galentine’s celebration. Honestly, Pinterest inspiration struck, and I thought, “Why not make a dessert board, but with mini cheesecakes?” It’s dangerously easy, heaps of fun, and gives you that pure, nostalgic comfort (but with a modern twist). My family couldn’t stop sneaking cheesecakes off the board before the party even started—and I can’t blame them. The tiny size is just perfect for nibbling, and the colorful toppings make every bite a surprise.
This recipe has become a staple for our get-togethers, gift exchanges, and even a few late-night movie marathons. It’s the sort of treat you wish you’d discovered years ago—especially when you see the smiles and hear the laughter as everyone picks their favorite flavor. Honestly, if you want your Galentine’s Day to feel like a warm hug (with a little extra sparkle), you’re going to want to bookmark this one. I’ve tested and tweaked it more times than I’ll admit, all in the name of research, of course!
Why You’ll Love This Recipe
Let me just say, these Mini Cheesecake Shooting Board ideas aren’t just adorable—they’re a breeze to make and guaranteed to wow your friends. Over the years, I’ve whipped up countless dessert boards, and this one always gets top marks. Here’s why you’re going to fall in love with this recipe:
- Quick & Easy: Comes together in under 45 minutes (including chilling time). Perfect for last-minute Galentine’s Day plans or spontaneous celebrations.
- Simple Ingredients: No fancy grocery trips—most of these goodies are probably already waiting in your pantry or fridge. You know, the usual suspects like cream cheese, eggs, and graham crackers.
- Perfect for Celebrations: Ideal for brunch, potlucks, or cozy Galentine’s Day gatherings. Plus, it’s a showstopper for your Instagram and Pinterest boards.
- Crowd-Pleaser: Adults and kids both go wild for these bite-sized treats. They’re easy to grab, easy to eat, and absolutely delicious.
- Unbelievably Delicious: The texture is creamy, the crust is buttery, and the toppings add a fun pop of flavor. It’s comfort food with a festive twist!
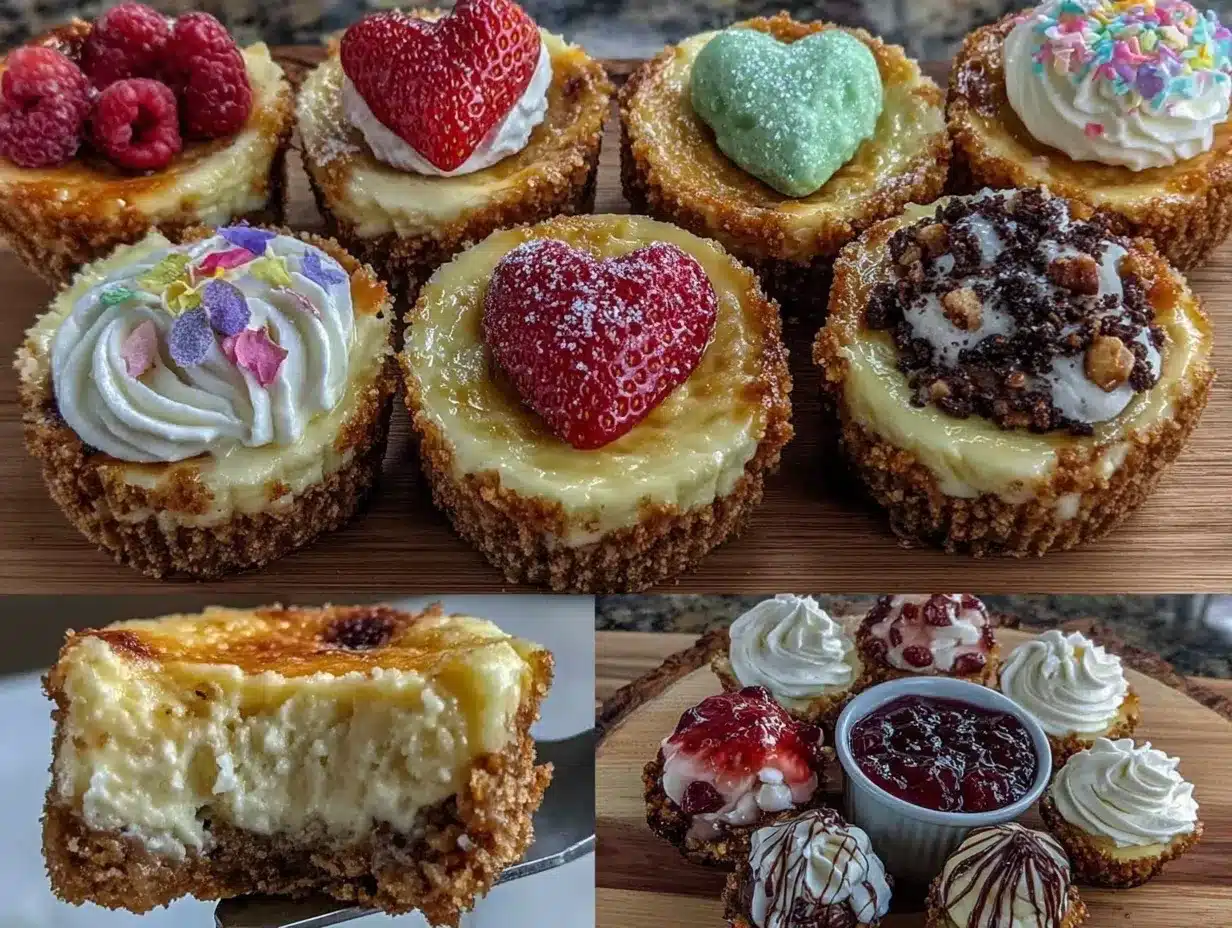
Now, what makes my version stand out? I use a blend of full-fat cream cheese and a touch of Greek yogurt for extra smoothness (trust me, you’ll notice the difference). Each mini cheesecake is baked in a muffin tin, so you get perfect portion control and zero fuss with slicing. You can mix and match toppings—think chocolate drizzle, fresh berries, caramel, or even sprinkles for that party vibe.
Honestly, this recipe isn’t just another cheesecake—it’s the kind that makes you close your eyes after the first bite. It’s comfort food reimagined for your favorite people, without the mess or the stress. Whether you’re impressing friends or just brightening up your own day, these Mini Cheesecake Shooting Board ideas always deliver. You’ll be making memories with every sweet, creamy bite!
What Ingredients You Will Need
This recipe uses simple, wholesome ingredients to deliver bold flavor and satisfying texture without the fuss. Most of these are pantry staples, and a few can be swapped based on what you have on hand or your favorite flavors.
- For the Mini Cheesecake Base:
- 1 cup (100g) graham cracker crumbs (use gluten-free if needed)
- 3 tbsp (40g) unsalted butter, melted
- 2 tbsp (25g) granulated sugar (adds a touch of sweetness and crunch)
- For the Cheesecake Filling:
- 12 oz (340g) cream cheese, softened (I like Philadelphia for the smoothest texture)
- 1/4 cup (60g) Greek yogurt (adds tang and creaminess—use dairy-free if preferred)
- 1/2 cup (100g) granulated sugar
- 1 large egg, room temperature
- 1 tsp pure vanilla extract (or vanilla bean paste for extra flavor)
- Pinch of salt
- For Toppings and Garnishes:
- Fresh berries (strawberries, raspberries, blueberries—all work beautifully)
- Mini chocolate chips or shavings (adds a fun crunch)
- Caramel sauce or chocolate syrup (drizzle for sweetness)
- Whipped cream or whipped coconut cream (for extra flair)
- Sprinkles, edible glitter, or freeze-dried fruit (perfect for a Pinterest-worthy finish!)
- Crushed nuts (optional—almonds, pecans, or pistachios)
If you’re feeling adventurous, swap the graham cracker crust for chocolate cookie crumbs or vanilla wafers. You can use low-fat cream cheese for a lighter version, but honestly, full-fat gives you the best texture. For a vegan option, use dairy-free cream cheese and coconut yogurt. In summer, swap in fresh peaches or mango slices for the topping. I recommend using firm, small-curd cottage cheese if you want a twist on classic creaminess, but Greek yogurt works just as well. Don’t be afraid to mix and match—these mini cheesecakes are built for creativity!
Equipment Needed
You don’t need much to whip up these Mini Cheesecake Shooting Board ideas, which is a blessing for anyone with a small kitchen. Here’s what you’ll want:
- Muffin tin (12-count standard size works best)
- Paper or silicone cupcake liners (for easy removal and less mess—trust me, cleaning a muffin tin isn’t fun!)
- Mixing bowls (one large for the filling, one small for the crust)
- Hand mixer or stand mixer (a whisk works in a pinch, but electric makes things smoother)
- Rubber spatula (helps scrape down the bowl for zero waste)
- Measuring cups and spoons (accuracy is key for mini cheesecakes)
- Cooling rack (helps prevent soggy bottoms)
- Serving board or platter (I love using a wooden board for a rustic, Pinterest-ready look)
If you don’t have a muffin tin, use mini silicone molds or even sturdy paper cups. For mixing, you can use a sturdy whisk if you’re patient (I’ve done this more than once when my mixer was on the fritz). Budget-friendly tools work just fine—no need for anything fancy. For maintenance, make sure to dry your muffin tin thoroughly after washing to keep it rust-free. I’ve tried every type of liner over the years, and honestly, silicone is my favorite for easy release and minimal waste.
Preparation Method
- Preheat your oven: Set your oven to 325°F (160°C). Line a 12-count muffin tin with cupcake liners. This helps with easy removal and keeps cleanup a breeze.
- Make the crust: In a small bowl, mix 1 cup (100g) graham cracker crumbs, 3 tbsp (40g) melted butter, and 2 tbsp (25g) granulated sugar until the mixture resembles wet sand. Spoon about 1 tablespoon of the mixture into each liner and press down firmly with the back of a spoon or your fingers. The crust should be compact and even—don’t rush this part!
- Bake the crust: Pop the muffin tin in the oven for 5 minutes. This sets the crust and makes it nice and crunchy. Remove and let cool slightly.
- Prepare the filling: In a large bowl, beat 12 oz (340g) softened cream cheese with a hand mixer until smooth (about 1 minute). Add 1/2 cup (100g) granulated sugar, 1/4 cup (60g) Greek yogurt, and a pinch of salt. Mix until creamy. Add 1 large egg and 1 tsp vanilla extract, mixing just until combined (overmixing can cause cracks, so go easy).
- Fill the liners: Spoon the cream cheese filling evenly over the baked crusts—about 2 tablespoons per cup. Smooth the tops with a spatula. The filling should come up about 3/4 of the way (it’ll puff slightly in the oven).
- Bake: Bake for 15-18 minutes, until the edges are set and the centers are a bit jiggly (like set Jell-O). If they start to brown, they’re probably done! Let’s face it, overbaking can make them dry, so keep an eye out.
- Cool: Remove from the oven and let them cool in the pan for 10 minutes. Then transfer to a cooling rack. They’ll firm up as they cool—don’t worry if they look a little soft.
- Chill: Place the cooled cheesecakes (in their liners) in the fridge for at least 2 hours. Overnight is even better for a firmer texture. If you’re in a rush, pop them in the freezer for 30 minutes (it works in a pinch).
- Decorate & assemble: Once chilled, top each mini cheesecake with your favorite garnishes: fresh berries, chocolate chips, caramel drizzle, whipped cream, sprinkles, or whatever suits your board. Arrange them on a serving board, mixing in extra toppings and fun treats like cookies or fruit slices for a festive touch.
- Serve & enjoy: Let everyone pick their favorites! These cheesecakes hold up well at room temperature for about 2 hours. If you’re prepping ahead, add whipped cream and softer toppings right before serving.
Preparation Notes: If your cheesecakes crack, don’t stress—toppings cover a multitude of sins. If the crust sticks to the liners, try chilling a bit longer. For a smoother filling, always use room temperature cream cheese (I learned this the hard way after a few lumpy batches). Efficiency tip: Make the crust while the oven preheats, and prep toppings while cheesecakes chill.
Cooking Tips & Techniques
I’ve picked up a few tricks over the years for making the perfect Mini Cheesecake Shooting Board. Let me share what really works (and a couple of things I learned the hard way):
- Room temperature ingredients: Always use softened cream cheese and room temp eggs—this keeps your filling lump-free and makes mixing much easier.
- Don’t overmix: Overmixing introduces air, which can lead to cracks. Mix just until smooth, then stop. I used to go wild with the mixer, but trust me, less is more here.
- Check for doneness: The edges should be set, but the center should jiggle slightly when you shake the pan. If you bake until completely solid, your cheesecakes will be dry. I’ve made this mistake and ended up with a batch that tasted more like cheesecake-flavored bricks!
- Chill thoroughly: Mini cheesecakes need time in the fridge to firm up and develop flavor. If you’re in a hurry, the freezer can help, but overnight chilling is best for texture.
- Multi-tasking: While the cheesecakes bake and cool, prep all your toppings and garnishes. Wash and slice fruit, whip cream, and set up your serving board. It saves you time and lets you get creative with the presentation.
- Consistency matters: Use a cookie scoop for even portions—it makes every mini cheesecake the same size, which looks great on your shooting board.
- Cover up imperfections: If a cheesecake cracks or sags in the middle, pile on whipped cream or fresh berries. No one will know, and honestly, it just adds to the charm.
I’ve burned a few crusts by not watching the oven, so keep an eye out (set a timer!). If you want a softer crust, skip the pre-bake step. And if you want ultra-smooth filling, blend everything except the egg in a food processor before mixing in the egg gently. These little tweaks make all the difference in your final board.
Variations & Adaptations
One of the best things about a Mini Cheesecake Shooting Board for Galentine’s Day is how easy it is to customize. Here are some of my favorite ways to switch things up:
- Dietary variations: Use gluten-free graham crackers for the crust, and swap in dairy-free cream cheese and coconut yogurt for a vegan-friendly option. I’ve made these for friends with allergies, and they turn out just as creamy and delicious.
- Seasonal flavors: In spring, top with lemon curd and edible flowers. For fall, add a dash of pumpkin puree and cinnamon to the filling and garnish with candied pecans. Winter boards look gorgeous with pomegranate seeds and white chocolate.
- Flavor twists: Mix cocoa powder into the filling for chocolate mini cheesecakes, or swirl in raspberry jam before baking for a fruity surprise. Peanut butter lovers? Add a spoonful of peanut butter to the batter and top with chocolate chips.
- Cooking methods: If you prefer no-bake cheesecakes, skip the egg and use whipped cream to lighten the filling. Chill until set—no oven required!
- Allergen substitutions: For nut allergies, leave out nut toppings and use seed-based crusts (sunflower seed butter works surprisingly well!). For egg-free, try using a flax egg or commercial egg replacer.
Personally, my favorite variation is swapping in chocolate cookie crumbs for the crust and topping with espresso whipped cream—makes a grown-up board that my friends always rave about. Don’t be afraid to experiment and make the board your own!
Serving & Storage Suggestions
Mini Cheesecake Shooting Boards are best served chilled or at cool room temperature—just enough so the filling stays creamy but the crust has a little crunch. For presentation, arrange the cheesecakes in rows or circles on a wooden board, sprinkling extra toppings, berries, and edible flowers in between. Add some festive napkins or heart-shaped picks for a true Galentine’s Day vibe.
Pair with sparkling rosé, fruity punch, or a hot cup of coffee to round out the celebration. If you want to go all out, add chocolate-dipped strawberries or sugar cookies to your board for extra variety.
To store, cover leftover cheesecakes tightly and keep in the fridge for up to 4 days. They freeze well, too—just wrap individually and thaw in the fridge overnight. When reheating, let them sit at room temperature for 15-20 minutes, or pop in the microwave for 10 seconds if you like them a tad warmer. Flavors actually deepen after a day, so sometimes day-old cheesecakes are even better!
Nutritional Information & Benefits
Each mini cheesecake (with basic crust and filling) has about 120-150 calories, 8g fat, 12g carbs, and 3g protein. Using Greek yogurt adds a bit of extra protein and calcium. If you opt for fruit toppings, you’ll sneak in extra vitamins and antioxidants. Gluten-free and dairy-free versions are easy to make and suit most dietary needs.
Potential allergens include dairy, eggs, and wheat (but substitutions listed above mean almost everyone can join in the fun). From a wellness perspective, portion-controlled desserts like these make it easier to enjoy a sweet treat without going overboard—something I appreciate after years of “just one more slice.”
Conclusion
I can honestly say this Mini Cheesecake Shooting Board is a recipe you’ll want to keep handy for every celebration—not just Galentine’s Day! It’s easy, flexible, and guaranteed to bring smiles (and maybe a few giggles) to your table. The best part is how customizable it is: switch up toppings, flavors, or crusts to suit your taste or dietary needs. That means no two boards ever look the same!
It’s become a go-to for my family and friends, and I love how everyone gets to pick their own favorite. If you’re searching for a dessert that’s fun, impressive, and totally doable, give this recipe a try. Leave a comment below with your favorite flavor combo, share your own variations, or tag me if you post your board on Pinterest or Instagram!
Wishing you a sweet, laughter-filled Galentine’s Day—may your dessert board be as joyful as your celebrations!
FAQs
Can I make Mini Cheesecake Shooting Boards ahead of time?
Absolutely! You can bake and chill the cheesecakes up to 2 days ahead. Add toppings just before serving for the freshest look.
What if I don’t have a muffin tin?
No worries—use mini silicone molds or sturdy paper cups. Just make sure they’re the right size for easy portioning.
Can I freeze mini cheesecakes?
Yes! Wrap them individually and freeze for up to 2 months. Thaw overnight in the fridge before arranging on your board.
How do I prevent cracks in my cheesecakes?
Don’t overmix the batter. Be sure ingredients are at room temperature, and avoid overbaking. But honestly—toppings cover most imperfections!
Are there nut-free options?
Definitely! Skip nut toppings and use seed-based crusts or standard graham crackers. The recipe is easy to adapt for allergies.
Print
Mini Cheesecake Shooting Board Ideas – Perfect Galentine’s Day Dessert
- Total Time: 2 hours 40 minutes
- Yield: 12 mini cheesecakes 1x
Description
These adorable mini cheesecakes are baked in a muffin tin for perfect portion control and easy sharing. Creamy, customizable, and topped with your favorite garnishes, they’re the ultimate crowd-pleaser for Galentine’s Day or any celebration.
Ingredients
- 1 cup graham cracker crumbs (use gluten-free if needed)
- 3 tbsp unsalted butter, melted
- 2 tbsp granulated sugar
- 12 oz cream cheese, softened
- 1/4 cup Greek yogurt
- 1/2 cup granulated sugar
- 1 large egg, room temperature
- 1 tsp pure vanilla extract
- Pinch of salt
- Fresh berries (strawberries, raspberries, blueberries)
- Mini chocolate chips or shavings
- Caramel sauce or chocolate syrup
- Whipped cream or whipped coconut cream
- Sprinkles, edible glitter, or freeze-dried fruit
- Crushed nuts (optional—almonds, pecans, or pistachios)
Instructions
- Preheat your oven to 325°F (160°C). Line a 12-count muffin tin with cupcake liners.
- In a small bowl, mix graham cracker crumbs, melted butter, and 2 tbsp granulated sugar until the mixture resembles wet sand. Spoon about 1 tablespoon of the mixture into each liner and press down firmly.
- Bake the crust for 5 minutes. Remove and let cool slightly.
- In a large bowl, beat softened cream cheese until smooth. Add 1/2 cup granulated sugar, Greek yogurt, and a pinch of salt. Mix until creamy.
- Add the egg and vanilla extract, mixing just until combined.
- Spoon the cream cheese filling evenly over the baked crusts—about 2 tablespoons per cup. Smooth the tops.
- Bake for 15-18 minutes, until the edges are set and the centers are slightly jiggly.
- Remove from the oven and let cool in the pan for 10 minutes, then transfer to a cooling rack.
- Chill the cheesecakes in the fridge for at least 2 hours (or overnight for best texture).
- Once chilled, top each mini cheesecake with your favorite garnishes: berries, chocolate chips, caramel drizzle, whipped cream, sprinkles, or nuts.
- Arrange on a serving board and enjoy!
Notes
For best results, use room temperature cream cheese and eggs. Don’t overmix the filling to avoid cracks. Toppings can cover imperfections. Cheesecakes can be made ahead and freeze well. For gluten-free or dairy-free, substitute as needed. Chill thoroughly for best texture.
- Prep Time: 15 minutes
- Cook Time: 20 minutes
- Category: Dessert
- Cuisine: American
Nutrition
- Serving Size: 1 mini cheesecake
- Calories: 135
- Sugar: 8
- Sodium: 90
- Fat: 8
- Saturated Fat: 5
- Carbohydrates: 12
- Protein: 3
Keywords: mini cheesecake, Galentine's Day, dessert board, cheesecake bites, party dessert, easy cheesecake, muffin tin cheesecake, customizable dessert
