
Introduction
Let me tell you, the scent of fresh strawberries mingling with whipped cream in the fridge is enough to make anyone’s mouth water. The first time I made this creamy strawberry icebox cake, it was a sunny afternoon, and the kitchen was filled with anticipation—and a little impatience (because waiting for it to chill felt like forever). I was instantly hooked the moment I took that first spoonful—the kind of moment where you pause, take a deep breath, and just smile because you know you’re onto something truly special.
Years ago, when I was knee-high to a grasshopper, my grandma used to whip up all sorts of no-fuss desserts, but this icebox cake was nowhere to be found in her repertoire. Stumbling upon this recipe during a lazy weekend was like finding a hidden gem, and honestly, I wish I’d discovered it way earlier. My family couldn’t stop sneaking slices off the cooling rack (and I can’t really blame them). This creamy strawberry icebox cake is dangerously easy yet packed with pure, nostalgic comfort.
Perfect for potlucks, summer barbecues, or just a sweet treat for your kids after school, this no-bake dessert brightens up any occasion. I’ve tested this recipe multiple times in the name of research, of course, and it’s become a staple for family gatherings, gifting, and those moments when you just need a little slice of happiness. Trust me, you’re going to want to bookmark this one.
Why You’ll Love This Recipe
Honestly, this creamy strawberry icebox cake is a keeper for so many reasons. Having been tested in my kitchen over countless weekends and family get-togethers, it’s not just a recipe—it’s a reliable crowd-pleaser. Here’s why you’ll want to make it your go-to dessert:
- Quick & Easy: Comes together in under 20 minutes, making it perfect for busy weeknights or last-minute cravings.
- Simple Ingredients: No fancy grocery trips needed; you likely already have everything in your pantry and fridge.
- Perfect for Summer: Refreshing and cool, ideal for those hot afternoons or casual picnics.
- Crowd-Pleaser: Always gets rave reviews from kids and adults alike—sweet, creamy, and light.
- Unbelievably Delicious: The combo of fresh strawberries and creamy layers is just next-level comfort food.
What makes this strawberry icebox cake different? Well, the secret lies in the whipped cream that’s folded just right to keep the texture ultra-smooth and airy. Plus, layering is key—it lets the delicate ladyfingers soak in just enough cream without getting mushy. It’s comfort food with a fresh twist, healthier and lighter but still soul-soothing. Perfect for impressing guests without any stress, or turning a simple dessert into something memorable.
What Ingredients You Will Need
This creamy strawberry icebox cake uses simple, wholesome ingredients to deliver bold flavor and a satisfying texture without the fuss. Most of these are pantry staples or easy to find fresh at your local market.
- Fresh Strawberries (about 2 cups sliced) – ripe and juicy for natural sweetness.
- Heavy Whipping Cream (2 cups) – the base for that luscious creamy layer.
- Powdered Sugar (1/2 cup) – to sweeten the whipped cream without graininess.
- Vanilla Extract (1 teaspoon) – adds warmth and depth to the cream.
- Ladyfingers (about 24 pieces) – the classic crisp cookie that softens perfectly in the fridge.
- Cream Cheese (optional, 4 oz softened) – for a slight tang and extra creaminess if you prefer.
- Fresh Lemon Juice (1 tablespoon) – brightens up the strawberries and balances sweetness.
- Strawberry Jam or Preserves (2 tablespoons, optional) – for an extra burst of strawberry flavor between layers.
I usually grab fresh strawberries from local farmers’ markets when in season, but frozen berries work in a pinch if you thaw them gently. For the ladyfingers, I recommend using a brand like Savoiardi—they hold up well without getting soggy too fast. If you want a dairy-free option, swap the heavy cream for coconut cream and use dairy-free cookies, though the texture will shift a bit.
Equipment Needed
- Mixing Bowls: A large bowl for whipping cream and another for folding ingredients.
- Electric Mixer: Handheld or stand mixer to whip up the cream easily and get that perfect fluffy texture.
- Spatula: For gentle folding to keep the cream airy.
- 9×9-inch Square Baking Dish or Glass Pan: For layering the cake—glass works great to show off the pretty layers.
- Knife and Cutting Board: To slice the strawberries nicely.
- Refrigerator: The icebox cake needs several hours to chill and set properly.
If you don’t have an electric mixer, a sturdy whisk and some elbow grease will do, but it’ll take longer to get that fluffy whipped cream. For budget-friendly options, any standard mixing bowl and spatula set works fine—no need to splurge on specialty tools for this one.
Preparation Method
- Prep the Strawberries (10 minutes): Rinse and slice about 2 cups of fresh strawberries. Toss them gently with 1 tablespoon of fresh lemon juice and, if you like, 2 tablespoons of strawberry jam to boost that fruity flavor. Set aside to macerate while you prepare the cream.
- Whip the Cream (5-7 minutes): In a large mixing bowl, pour 2 cups of cold heavy whipping cream. Add 1/2 cup powdered sugar and 1 teaspoon vanilla extract. Using an electric mixer on medium-high speed, whip until soft peaks form—you’ll know it’s ready when the cream holds a gentle peak but still looks smooth and airy. Be careful not to overwhip or you’ll end up with butter!
- Optional Cream Cheese Step: If you want that tangy twist, beat 4 oz softened cream cheese in a separate bowl until smooth. Gently fold the whipped cream into the cream cheese until fully combined. This step adds richness and a velvety texture.
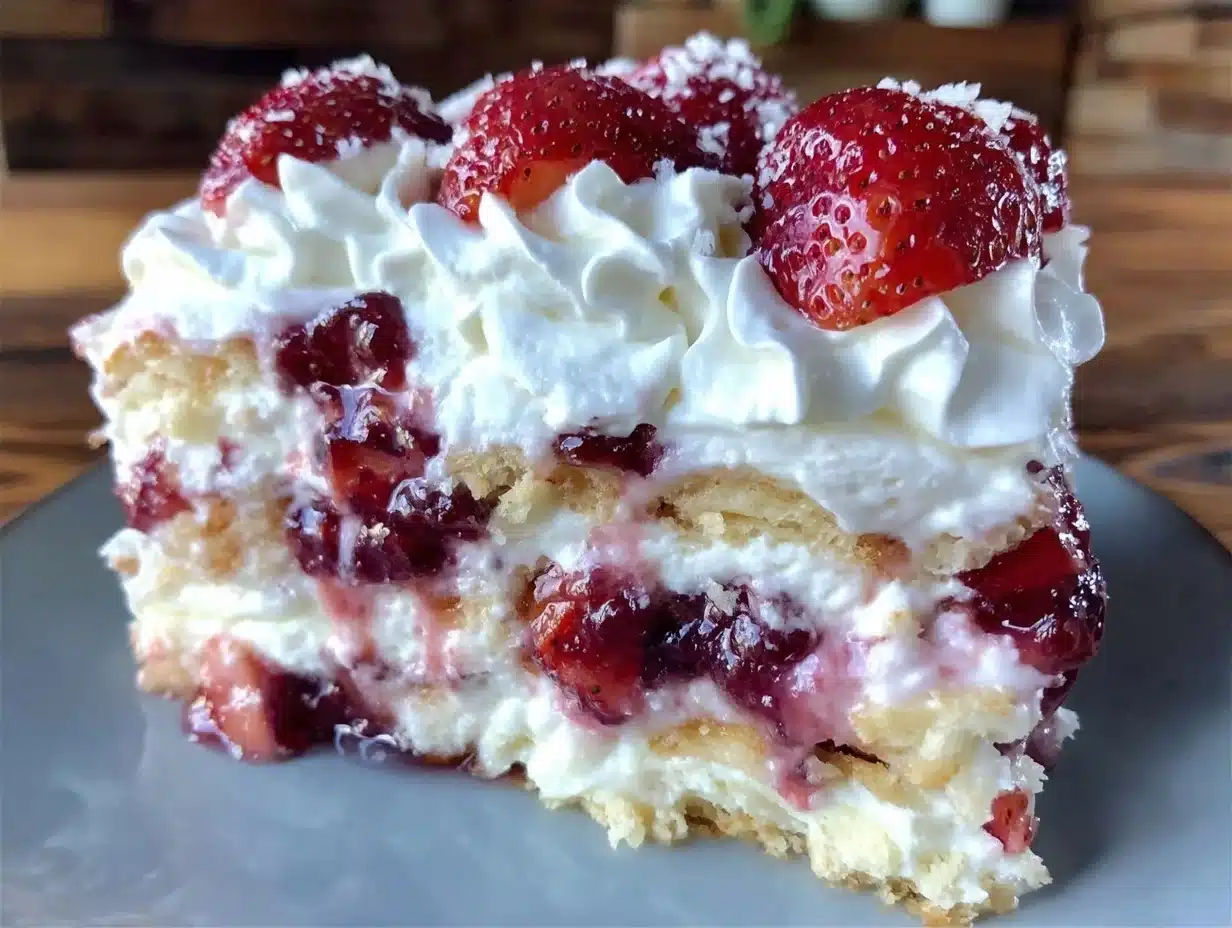
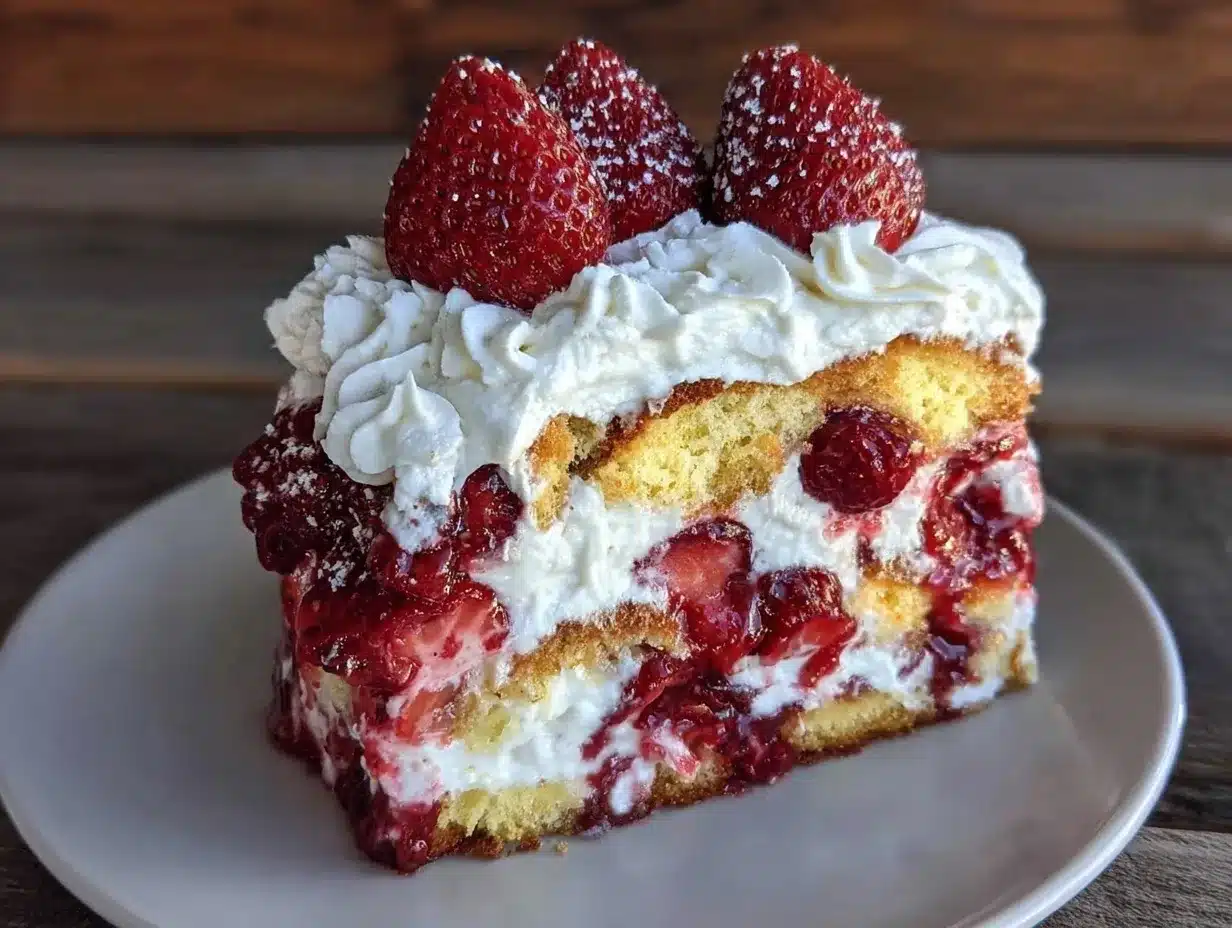
- Assemble the Layers (10 minutes): In your 9×9-inch glass dish, spread a thin layer of the whipped cream mixture on the bottom. Arrange a single layer of ladyfingers over the cream, fitting them snugly without overlapping too much. Spoon half of the macerated strawberries evenly over the ladyfingers, then spread a generous layer of whipped cream on top. Repeat with another layer of ladyfingers, the remaining strawberries, and finish with a final layer of whipped cream.
- Chill (4 hours or overnight): Cover the dish tightly with plastic wrap and refrigerate. This chilling step is crucial—it softens the ladyfingers as they soak up all the creamy, strawberry goodness, melding flavors beautifully.
- Serve: Before serving, you can garnish with extra sliced strawberries or a light dusting of powdered sugar for that picture-perfect finish. Slice into squares and enjoy the creamy, fruity layers that melt in your mouth.
Pro tip: If the ladyfingers seem too hard or dry, give them a quick dip in cold milk before layering—but be cautious not to soak them too long or they’ll get mushy. Also, the key to the perfect creamy strawberry icebox cake is patience—letting it chill long enough ensures the best texture and flavor.
Cooking Tips & Techniques
Whipping cream can be tricky if you’re not used to it. Here’s what I’ve learned the hard way:
- Keep everything cold: Chill your mixing bowl and beaters in the fridge for 10 minutes before whipping. Cold cream whips faster and holds better.
- Don’t rush the chilling: I’ve tried cutting corners, but the best results come after at least 4 hours in the fridge. The flavors marry and the texture becomes dreamily smooth.
- Folding technique matters: When combining whipped cream with cream cheese or strawberries, fold gently with a spatula to keep the airiness. Stirring vigorously will deflate your cream, leading to a dense dessert.
- Ladyfinger layering: Place the cookies snugly but not overlapping too much, so each bite has that perfect balance of crunch and creaminess.
- Freshness is key: Use fresh, ripe strawberries for the best flavor. Overripe or watery berries can make the dessert soggy.
Honestly, I used to mess up the whipping stage all the time until I learned to watch the cream closely and stop at soft peaks. Multitasking is doable here—slice strawberries while your cream chills, and prep your tools in advance. Keeping a checklist helps me avoid missing steps, especially when making this for guests.
Variations & Adaptations
One of the best things about this creamy strawberry icebox cake is how flexible it can be. Here are some ways to make it your own:
- Dietary swaps: Use coconut cream whipped with a bit of maple syrup for a dairy-free version. Gluten-free ladyfingers or thin almond flour cookies work well too.
- Seasonal fruit swaps: In autumn or winter, swap strawberries for fresh raspberries, blueberries, or even sliced peaches. Each gives a lovely twist without losing that creamy magic.
- Flavor boosts: Add a touch of almond extract or lemon zest to the whipped cream for a subtle flavor lift. A drizzle of balsamic glaze on the strawberries can also add a gourmet touch.
- Different textures: Try sprinkling chopped toasted nuts like pistachios or almonds between layers for a satisfying crunch.
- Personal spin: I once added a layer of crushed graham crackers for a bit of a cheesecake vibe—totally delicious and a fun surprise for guests.
Serving & Storage Suggestions
This creamy strawberry icebox cake is best served chilled, straight from the fridge, to keep those layers firm and flavors fresh. I like to slice it into neat squares and serve on pretty dessert plates with a sprig of mint or a few extra strawberry slices on top. It pairs beautifully with a cup of good coffee or a light, fruity rosé if you’re celebrating.
Leftovers (if there are any!) can be stored in an airtight container in the fridge for up to 3 days. The flavors actually deepen overnight, making it even better the next day. If you want to keep it longer, you can freeze individual portions wrapped tightly in plastic wrap and foil for up to a month—just thaw in the fridge overnight before serving.
When reheating, honestly, this dessert isn’t meant to be warmed up—it’s all about that cool, creamy texture that makes your taste buds sing.
Nutritional Information & Benefits
Per serving, this creamy strawberry icebox cake offers a moderate calorie count, mostly from the cream and ladyfingers, balanced by the fresh fruit’s vitamins and fiber. Strawberries bring a boost of vitamin C and antioxidants, which are great for immunity and skin health.
The heavy cream adds rich fat that helps with satiety, while optional cream cheese offers a bit of protein and calcium. If you swap in dairy-free options, the nutritional profile shifts slightly but still keeps it a wholesome treat.
This dessert is gluten-containing by default due to ladyfingers, so swapping to gluten-free cookies will make it suitable for gluten-sensitive folks. It’s not low in sugar, so those watching intake should enjoy smaller portions or tweak sweetness levels.
Conclusion
In the end, this creamy strawberry icebox cake is a no-fuss, sweet delight that’s easy to make and hard to forget. It’s the kind of dessert you’ll want to customize based on your mood, the season, or what’s in your pantry. Personally, I love how it brings together simple ingredients into something that feels both indulgent and fresh.
Give it a try—you might just find yourself reaching for this recipe again and again. And hey, I’d love to hear how you put your own spin on it! Leave a comment, share your tips, or let me know if you tried the dairy-free or gluten-free versions. Here’s to sweet moments and creamy bites!
FAQs
Can I make this creamy strawberry icebox cake ahead of time?
Absolutely! It actually tastes better after chilling for at least 4 hours or overnight, making it perfect for prepping in advance.
What can I substitute for ladyfingers?
You can use gluten-free cookies, graham crackers, or even thin sponge cake layers if you prefer a different texture.
How long does this dessert keep in the fridge?
Stored properly in an airtight container, it stays fresh for up to 3 days—flavors deepen nicely over time.
Can I freeze the icebox cake?
Yes, freeze individual portions wrapped tightly, and thaw overnight in the fridge before serving. The texture remains quite good!
Is there a dairy-free version of this recipe?
Yes! Use coconut cream whipped with a bit of sweetener and dairy-free cookies to make a delicious dairy-free alternative.
Pin This Recipe!
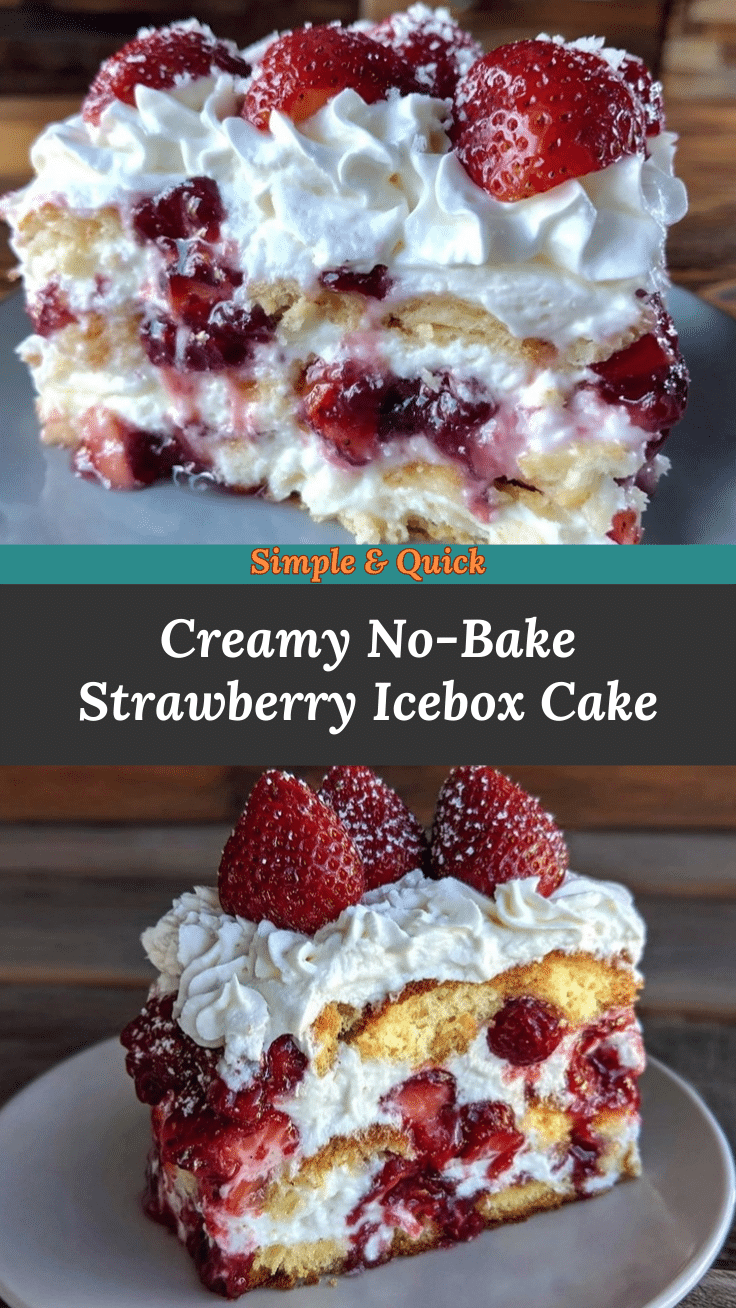

Creamy Strawberry Icebox Cake
- Total Time: 4 hours 20 minutes
- Yield: 9 servings 1x
Description
A no-bake, creamy strawberry icebox cake that layers fresh strawberries, whipped cream, and ladyfingers for a refreshing and easy dessert perfect for summer and gatherings.
Ingredients
- 2 cups fresh strawberries, sliced
- 2 cups heavy whipping cream
- 1/2 cup powdered sugar
- 1 teaspoon vanilla extract
- about 24 ladyfingers
- 4 oz cream cheese, softened (optional)
- 1 tablespoon fresh lemon juice
- 2 tablespoons strawberry jam or preserves (optional)
Instructions
- Rinse and slice about 2 cups of fresh strawberries. Toss them gently with 1 tablespoon of fresh lemon juice and, if desired, 2 tablespoons of strawberry jam. Set aside to macerate.
- In a large mixing bowl, pour 2 cups of cold heavy whipping cream. Add 1/2 cup powdered sugar and 1 teaspoon vanilla extract. Using an electric mixer on medium-high speed, whip until soft peaks form.
- If using cream cheese, beat 4 oz softened cream cheese in a separate bowl until smooth. Gently fold the whipped cream into the cream cheese until fully combined.
- In a 9×9-inch glass dish, spread a thin layer of the whipped cream mixture on the bottom. Arrange a single layer of ladyfingers over the cream, fitting them snugly without overlapping too much.
- Spoon half of the macerated strawberries evenly over the ladyfingers, then spread a generous layer of whipped cream on top.
- Repeat with another layer of ladyfingers, the remaining strawberries, and finish with a final layer of whipped cream.
- Cover the dish tightly with plastic wrap and refrigerate for at least 4 hours or overnight to chill and set.
- Before serving, garnish with extra sliced strawberries or a light dusting of powdered sugar. Slice into squares and serve.
Notes
Keep everything cold for best whipping results. Chill the cake for at least 4 hours or overnight for optimal texture. If ladyfingers are too hard, dip briefly in cold milk before layering but avoid soaking. Fold whipped cream gently to keep it airy. Fresh, ripe strawberries are best to avoid sogginess. Dairy-free and gluten-free substitutions are possible.
- Prep Time: 20 minutes
- Cook Time: 0 minutes
- Category: Dessert
- Cuisine: American
Nutrition
- Serving Size: 1 square (approx. 1/
- Calories: 320
- Sugar: 18
- Sodium: 150
- Fat: 22
- Saturated Fat: 14
- Carbohydrates: 26
- Fiber: 2
- Protein: 4
Keywords: strawberry icebox cake, no-bake dessert, creamy strawberry cake, summer dessert, easy dessert, whipped cream dessert, ladyfingers dessert
