

Let me set the scene. The aroma of sizzling garlic and butter wafted through my kitchen, mingling with the sharp tang of melted mozzarella and Parmesan. It’s that unmistakable smell—garlicky, cheesy, slightly herby—that somehow manages to pull everyone away from their screens and into the kitchen. The first time I pulled a tray of these Crispy Cheesy Garlic Bread Pizza Sticks from the oven, I didn’t even make it to the table. My kids pounced, dipping, munching, laughing (and, honestly, fighting over the last stick). It was the kind of moment where you pause, take a deep breath, and just smile because you know you’re onto something truly special.
When I was knee-high to a grasshopper, my grandma used to bake the best garlic bread—golden, crispy, and always dripping with butter. Years later, craving that same comfort (but with an extra cheesy twist), I tried to recreate her magic. Instead, I stumbled onto something even better: pizza sticks. I wish I’d discovered this shortcut years ago. These aren’t just garlic bread, and they aren’t just pizza. They’re the perfect mashup, loaded with gooey cheese, a whisper of Italian herbs, and a crunchy crust that snaps with each bite.
Honestly, these pizza sticks are dangerously easy. Perfect for potlucks, sleepovers, game days, or when you just want to brighten up your Pinterest board with something that looks as good as it tastes. My family couldn’t stop sneaking them off the cooling rack (and I can’t really blame them). After testing these at least five times in the name of research (of course), they’ve become a staple for family gatherings and gifting. They feel like a warm hug with every bite—if you’re a fan of garlic bread, cheese, and pizza, you’re going to want to bookmark this one.
Why You’ll Love These Crispy Cheesy Garlic Bread Pizza Sticks
I’ve baked, broiled, and taste-tested these pizza sticks more times than I care to admit (all in the pursuit of snack perfection!). Here’s why you’ll find yourself making them again and again:
- Quick & Easy: Ready in under 30 minutes—no dough rising or complicated steps. You can whip them up for a last-minute craving or a busy weeknight treat.
- Simple Ingredients: Everything in this recipe is probably already in your pantry or fridge. No need for a grocery run unless you’re low on cheese!
- Perfect for Any Occasion: These sticks are a hit at parties, potlucks, or cozy movie nights. I’ve even served them for brunch alongside eggs and fruit.
- Crowd-Pleaser: Kids, teens, adults—everyone grabs seconds. They’re great for picky eaters who love pizza but want something snackable.
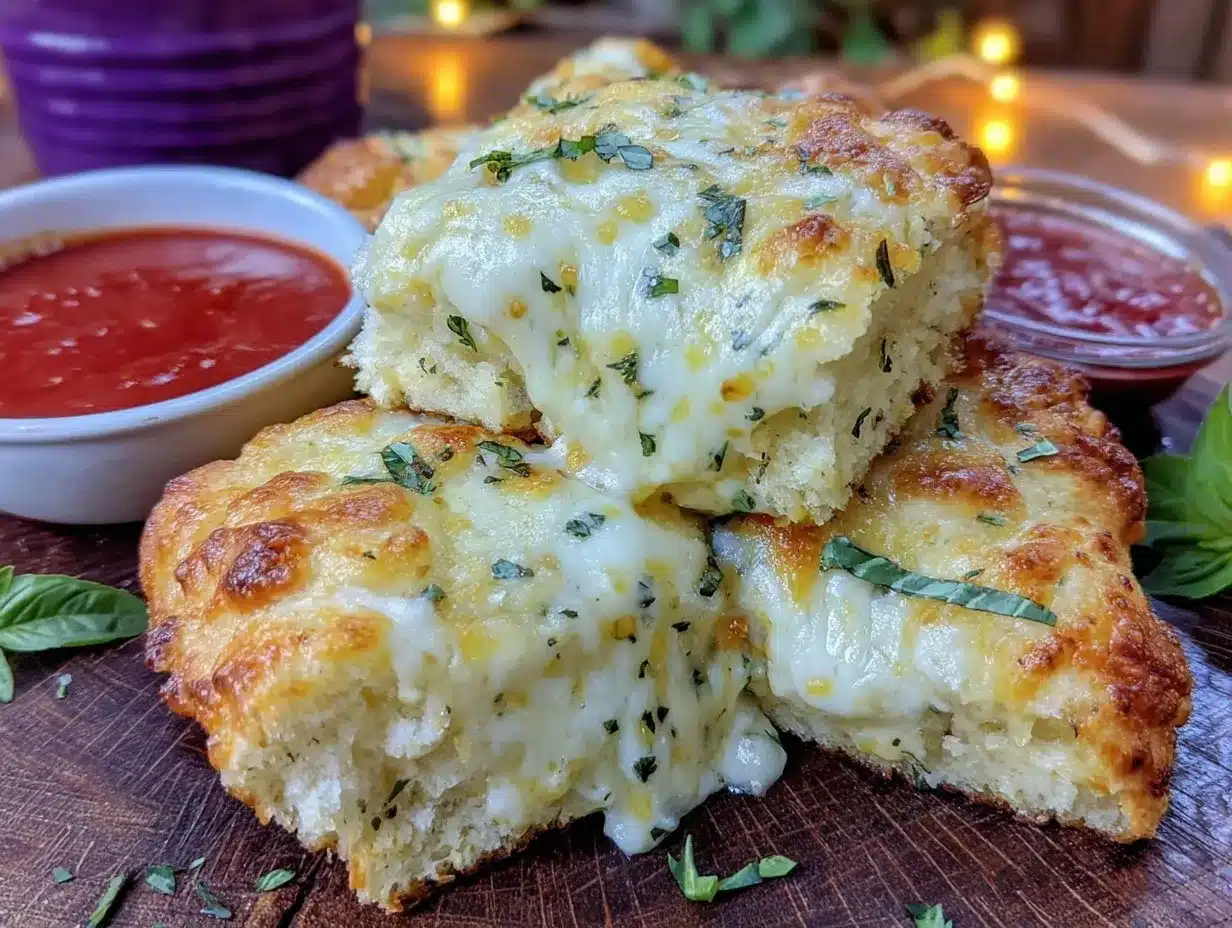
- Unbelievably Delicious: The balance of crispy edges, gooey cheese, and punchy garlic is pure comfort food. You know that feeling when you close your eyes after the first bite? That’s this recipe.
Here’s what sets these pizza sticks apart:
- Double Layer of Cheese: Not just mozzarella—Parmesan adds saltiness and depth, so each bite pops.
- Buttery Garlic Sauce: Instead of just brushing with butter, I mix in fresh garlic and a sprinkle of Italian seasoning for a punch that you’ll taste in every little nook.
- Pizza Twist: A hint of pepperoni or your favorite toppings tucked inside makes these more than just breadsticks—they’re mini pizzas with crunch.
It’s comfort food reimagined—faster, a little lighter, and just as soul-soothing. When I serve these, my guests always ask for the recipe (and sometimes a to-go bag). Whether you’re impressing your friends or just making a simple snack memorable, these pizza sticks deliver every time.
What Ingredients You Will Need
This recipe uses simple, wholesome ingredients to deliver bold flavor and satisfying texture without the fuss. Most are pantry staples, and you’ve got plenty of room for swaps if you like. Here’s what you’ll need for your Crispy Cheesy Garlic Bread Pizza Sticks and that dreamy marinara dip:
- For the garlic bread pizza sticks:
- 1 large baguette or Italian loaf (about 12 oz/340g, preferably day-old for crispier sticks)
- 4 tbsp unsalted butter, melted (56g; adds richness)
- 3 cloves garlic, finely minced (fresh is best for maximum flavor)
- 1 tsp dried Italian seasoning (or use a mix of oregano, basil, thyme)
- 1½ cups shredded mozzarella cheese (170g; I like the low-moisture kind for better melt)
- ½ cup grated Parmesan cheese (50g; use the real stuff for best flavor)
- ½ cup sliced pepperoni or cooked sausage (optional, but adds a pizza vibe)
- ¼ tsp crushed red pepper flakes (optional; for a bit of heat)
- 1 tbsp chopped fresh parsley (for garnish and a pop of color)
- For the Marinara Dip:
- 1 cup prepared marinara sauce (240ml; use your favorite jarred or homemade)
- 1 tbsp olive oil (for extra richness in the dip)
- ½ tsp garlic powder (to boost flavor if your sauce is bland)
- Pinch of salt and black pepper (to taste)
- 1 tbsp chopped basil or parsley (for freshness)
Ingredient Tips & Swaps:
- For gluten-free: Swap the bread for a GF baguette (I like Schär brand).
- For dairy-free: Use plant-based butter and cheese (Violife mozzarella shreds melt well).
- Want more veggies? Add chopped bell pepper or mushrooms over the cheese before baking.
- No marinade on hand? Mix tomato paste with a splash of water, herbs, and a pinch of sugar.
- For spicier sticks, add more red pepper flakes or a dash of hot sauce to the butter mix.
Feel free to get creative—these ingredients are forgiving, and you can tweak the amounts to suit your taste. I’ve tried dozens of cheese combos, but mozzarella and Parmesan are the dream team for texture and flavor.
Equipment Needed
You don’t need much to whip up these crispy cheesy garlic bread pizza sticks, which is part of the charm! Here’s what I use (and a few alternatives):
- Baking sheet (standard size; rimmed helps contain the cheese)
- Wire cooling rack (optional, but helps keep the sticks crispy underneath)
- Small saucepan (for melting butter and making garlic sauce)
- Sharp bread knife (for slicing the loaf into sticks—serrated works best)
- Pastry brush (makes buttering easy, but a spoon works too)
- Cheese grater (if you’re shredding your own cheese)
- Mixing bowl (for tossing toppings or mixing the garlic butter)
- Oven mitts (because, let’s face it, cheese burns are no fun)
If you don’t have a wire rack, just bake directly on the sheet—flip halfway for even crispiness. I’ve tried silicone mats, but the bread gets crispier right on plain parchment. For budget-friendly options, Aldi’s baking sheets are sturdy and affordable, and my $5 grater is still going strong after years. Give your tools a quick wash with hot, soapy water right after use to keep that cheesy residue from sticking.
Preparation Method
-
Preheat Your Oven:
Set your oven to 400°F (200°C). Line a baking sheet with parchment paper or foil for easy cleanup. -
Slice the Bread:
Using a sharp serrated knife, cut your baguette or Italian loaf into sticks about 1 inch wide (2.5 cm). I usually get 12-16 sticks from a standard loaf. If the bread is a bit stale, that’s perfect—it crisps up better. -
Mix Garlic Butter:
In a small saucepan, melt 4 tbsp (56g) butter over low heat. Add minced garlic and Italian seasoning. Stir for about 1 minute until fragrant (don’t let the garlic brown—it can taste bitter). Remove from heat. -
Brush Bread Sticks:
Lay the bread sticks on your baking sheet. Brush each stick generously with the garlic butter, making sure to get the sides and edges for maximum flavor. Sprinkle a pinch of red pepper flakes if you like heat. -
Add Cheese and Toppings:
Sprinkle mozzarella and Parmesan evenly over each stick. Press lightly so it sticks to the butter. If using pepperoni or sausage, tuck a few slices on top. Add diced veggies if you want (try to keep toppings thin so the cheese crisps up). -
Bake:
Slide the baking sheet into the oven and bake for 10-14 minutes, or until the cheese is bubbling and golden, and the bread edges are crisp (keep an eye after 10 minutes—cheese can burn quickly). -
Cool Slightly:
Remove from oven and let the sticks cool on a wire rack for 3-5 minutes. This helps them firm up and stay crispy. If you don’t have a rack, just leave them on the tray. -
Make Marinara Dip:
Warm 1 cup (240ml) marinara sauce in a saucepan over medium-low heat. Stir in olive oil, garlic powder, salt, pepper, and chopped herbs. Simmer for 2-3 minutes until hot and fragrant. Taste and adjust seasoning. -
Serve:
Arrange pizza sticks on a plate or board. Sprinkle with fresh parsley. Serve warm with a bowl of marinara dip.
Troubleshooting: If your cheese slides off, press it onto the buttered bread before baking. If sticks aren’t crispy enough, bake a few extra minutes, but watch closely. I’ve learned to rotate the tray halfway through for even browning. For ultra-crunchy sticks, broil for 1-2 minutes at the end, but don’t walk away!
Prep Notes: Don’t overload with toppings—they weigh down the bread and make it soggy. If you want extra crispiness, toast the bread sticks for 3 minutes before adding butter and cheese.
Cooking Tips & Techniques
After plenty of trial and error (and a few burnt cheese disasters), here’s how to get consistently awesome Crispy Cheesy Garlic Bread Pizza Sticks every time:
- Use Day-Old Bread: Slightly stale bread holds up better and gets crispier. Fresh bread works, but it’s a little softer inside.
- Don’t Skimp on Butter: The more buttery coverage, the tastier and crunchier your sticks. Use a pastry brush for even coverage.
- Layer Cheese Smartly: Mozzarella for gooey melt, Parmesan for salty crunch. A little pressing helps the cheese stick as it melts.
- Watch the Bake Time: Cheese burns fast—set a timer and peek after 10 minutes. Every oven is a little quirky, so adjust if yours runs hot.
- Rotate the Pan: For even browning, spin your baking sheet halfway through. I learned this the hard way after a batch of half-burnt sticks!
- Don’t Overload Toppings: Too many toppings can make the bread soggy. Stick to a light sprinkle for best results.
- Multi-task for Speed: While the bread bakes, warm your marinara and chop parsley. Makes serving seamless.
- Cool Before Cutting: If you’re slicing after baking, let the sticks cool a few minutes. This helps the cheese set and keeps everything neat.
My biggest mistake? Not lining the pan (cheese sticks like crazy!). Parchment is your friend. And if you want extra crunch, broil for 1 minute at the end—but don’t wander off! I learned the hard way that cheese can go from golden to charred in seconds.
Consistency comes from measuring cheese and butter, watching your timer, and not overloading. These pizza sticks may look simple, but those little techniques make them next-level good every time.
Variations & Adaptations
One of the best things about Crispy Cheesy Garlic Bread Pizza Sticks is how customizable they are. Here are some of my favorite ways to shake things up:
- Gluten-Free Version: Use a gluten-free baguette or flatbread. I’ve made these with Schär GF bread, and they turn out just as crispy (just keep an eye—they bake a little faster).
- Vegetarian Twist: Skip the pepperoni and add sliced mushrooms, bell peppers, or even olives. For a Mediterranean feel, sprinkle feta and fresh basil on top.
- Low-Carb Option: Swap bread for thick slices of zucchini or eggplant. Brush with garlic butter, top with cheese, and bake until golden. You get the same cheesy crunch without the carbs!
- Spicy Kick: Add sliced jalapeños or a dash of hot sauce to the butter mix for heat lovers.
- Different Cooking Methods: Try air frying for extra crispiness—400°F (200°C) for 7-9 minutes. Or grill your sticks for a smoky flavor (just wrap in foil to keep the cheese contained).
- Personal Touch: I once made these with sun-dried tomatoes and goat cheese for a party—huge hit! Don’t be afraid to experiment with your favorite pizza flavors.
- Allergen Substitutions: Dairy-free cheese and butter work surprisingly well. For nut allergies, skip pesto or nutty toppings.
Honestly, these pizza sticks are a blank canvas—let your cravings guide you. Mix and match cheeses, breads, and dips as you please. The recipe is forgiving, and there’s plenty of room to make it truly your own.
Serving & Storage Suggestions
Serving: These pizza sticks are best served warm, right out of the oven. Arrange them on a platter, sprinkle with parsley, and place a bowl of marinara dip in the center for easy dunking. I love pairing them with a crisp salad or a bowl of tomato soup for a cozy meal. For parties, stack them in a basket lined with parchment—everyone grabs and dips!
Storage: If you have leftovers (rare in my house!), let the sticks cool completely. Store in an airtight container in the fridge for up to 3 days. They can also be frozen, separated by parchment, for up to a month.
Reheating: To recapture the crispiness, reheat in a 375°F (190°C) oven for 6-8 minutes, or pop in the air fryer for 3-4 minutes. Microwave works in a pinch, but the bread softens—so oven is best if you like crunch. Flavors deepen overnight, and the garlic gets even more fragrant, so leftovers are still tasty!
Nutritional Information & Benefits
Each serving (about 2 sticks with dip) contains roughly:
- Calories: 220
- Protein: 9g
- Fat: 12g
- Carbs: 17g
- Sodium: 380mg
Key ingredients like garlic and parsley offer antioxidants and anti-inflammatory benefits. Mozzarella provides calcium and protein, while the use of olive oil in the dip adds healthy fats. You can make these sticks gluten-free or dairy-free with simple swaps.
Potential allergens include wheat (bread), dairy (cheese, butter), and possibly meat (pepperoni/sausage). Always check labels if serving to guests with food sensitivities. Personally, I love that you can balance comfort and nutrition—these sticks satisfy cheesy cravings without going overboard.
Conclusion
If you’re craving something crispy, cheesy, and seriously snackable, you can’t go wrong with Crispy Cheesy Garlic Bread Pizza Sticks and easy marinara dip. They’re the kind of recipe that becomes a family favorite—quick to make, fun to customize, and always a crowd-pleaser.
Feel free to swap toppings, change up the bread, or add your favorite flavors. That’s the beauty of this recipe—it bends to your tastes and pantry. Personally, I love them for lazy weekends, game nights, and when I need a little cheesy comfort.
Give these pizza sticks a try and let me know how you make them your own! Leave a comment with your favorite twists or share your photos—I’d love to see your creations. Here’s to more moments of cheesy, garlicky joy (and maybe a little less fighting over the last piece!).
FAQs
Can I make these pizza sticks ahead of time?
Yes! You can assemble them and refrigerate for up to 12 hours. Bake right before serving for maximum crispiness.
What bread works best for this recipe?
Baguette or Italian loaf is ideal. Day-old bread is best for crunch, but fresh works in a pinch.
Can I freeze leftover pizza sticks?
Absolutely. Cool them completely, freeze in a single layer, and reheat in the oven for best texture.
What cheese melts best for pizza sticks?
Low-moisture mozzarella is my favorite, but you can use cheddar or a blend for different flavors.
How do I make these pizza sticks gluten-free?
Just swap in your favorite gluten-free baguette or bread. All other ingredients are naturally gluten-free or have easy subs.
Pin This Recipe!
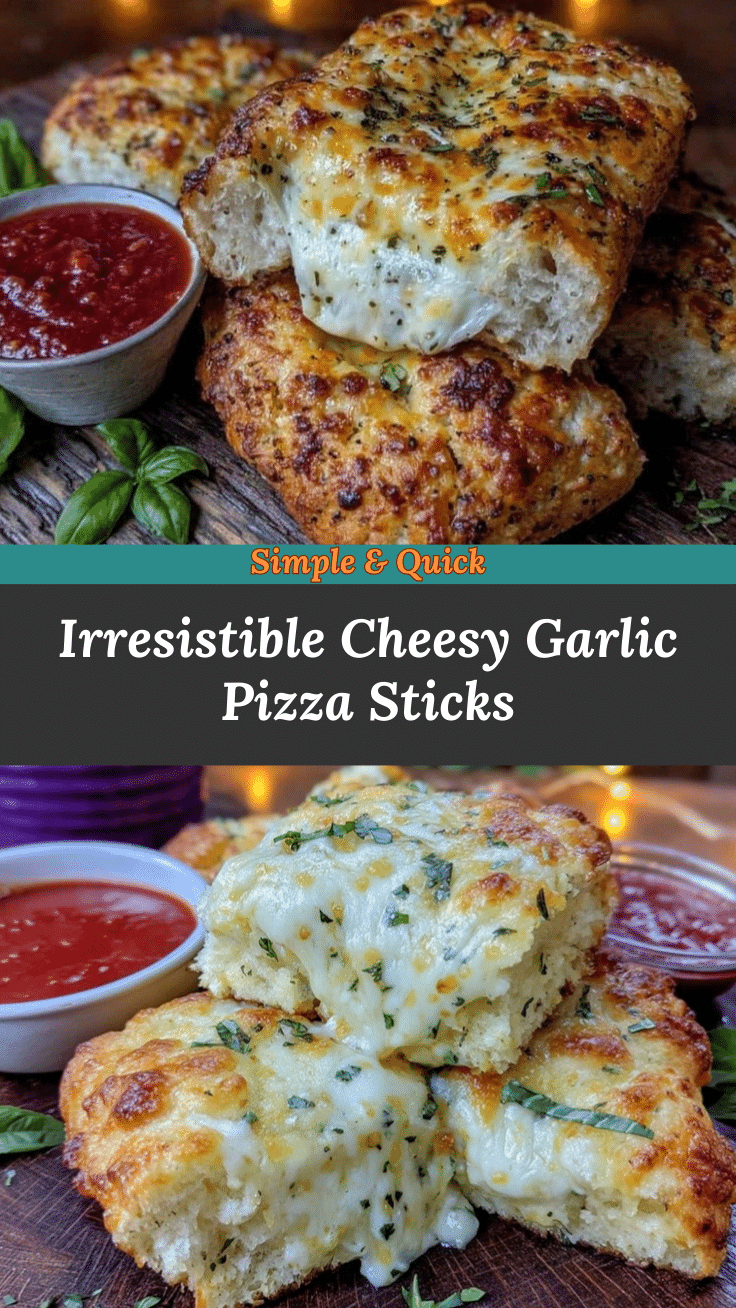

Crispy Cheesy Garlic Bread Pizza Sticks with Easy Marinara Dip
- Total Time: 24 minutes
- Yield: 12-16 sticks (about 6-8 servings) 1x
Description
These crispy cheesy garlic bread pizza sticks are a mashup of classic garlic bread and pizza, loaded with gooey mozzarella and Parmesan, herby garlic butter, and a crunchy crust. Perfect for parties, snacks, or family gatherings, they come with a simple marinara dip for dunking.
Ingredients
- 1 large baguette or Italian loaf (about 12 oz, preferably day-old)
- 4 tbsp unsalted butter, melted
- 3 cloves garlic, finely minced
- 1 tsp dried Italian seasoning (or mix of oregano, basil, thyme)
- 1 1/2 cups shredded mozzarella cheese (low-moisture preferred)
- 1/2 cup grated Parmesan cheese
- 1/2 cup sliced pepperoni or cooked sausage (optional)
- 1/4 tsp crushed red pepper flakes (optional)
- 1 tbsp chopped fresh parsley (for garnish)
- 1 cup prepared marinara sauce
- 1 tbsp olive oil
- 1/2 tsp garlic powder
- Pinch of salt and black pepper (to taste)
- 1 tbsp chopped basil or parsley (for dip)
Instructions
- Preheat oven to 400°F (200°C). Line a baking sheet with parchment paper or foil.
- Slice baguette or Italian loaf into sticks about 1 inch wide (12-16 sticks per loaf).
- In a small saucepan, melt butter over low heat. Add minced garlic and Italian seasoning; stir for 1 minute until fragrant. Remove from heat.
- Lay bread sticks on baking sheet. Brush each stick generously with garlic butter, including sides and edges. Sprinkle with red pepper flakes if desired.
- Sprinkle mozzarella and Parmesan evenly over each stick. Press lightly so cheese adheres. Add pepperoni or sausage and any desired veggies.
- Bake for 10-14 minutes, until cheese is bubbling and golden and bread edges are crisp. Rotate pan halfway through for even browning.
- Remove from oven and let sticks cool on a wire rack for 3-5 minutes.
- For marinara dip: Warm marinara sauce in a saucepan over medium-low heat. Stir in olive oil, garlic powder, salt, pepper, and chopped herbs. Simmer for 2-3 minutes.
- Arrange pizza sticks on a platter, sprinkle with fresh parsley, and serve warm with marinara dip.
Notes
Use day-old bread for extra crispiness. Don’t overload with toppings to avoid soggy sticks. For gluten-free, use a GF baguette. For dairy-free, use plant-based butter and cheese. Rotate the pan halfway through baking for even browning. Broil for 1-2 minutes at the end for ultra-crunchy sticks, but watch closely. Sticks can be assembled ahead and baked just before serving.
- Prep Time: 10 minutes
- Cook Time: 14 minutes
- Category: Appetizer
- Cuisine: American, Italian-inspired
Nutrition
- Serving Size: 2 sticks with dip
- Calories: 220
- Sugar: 2
- Sodium: 380
- Fat: 12
- Saturated Fat: 6
- Carbohydrates: 17
- Fiber: 1
- Protein: 9
Keywords: garlic bread, pizza sticks, cheesy breadsticks, party snack, marinara dip, easy appetizer, kid-friendly, game day, comfort food
