

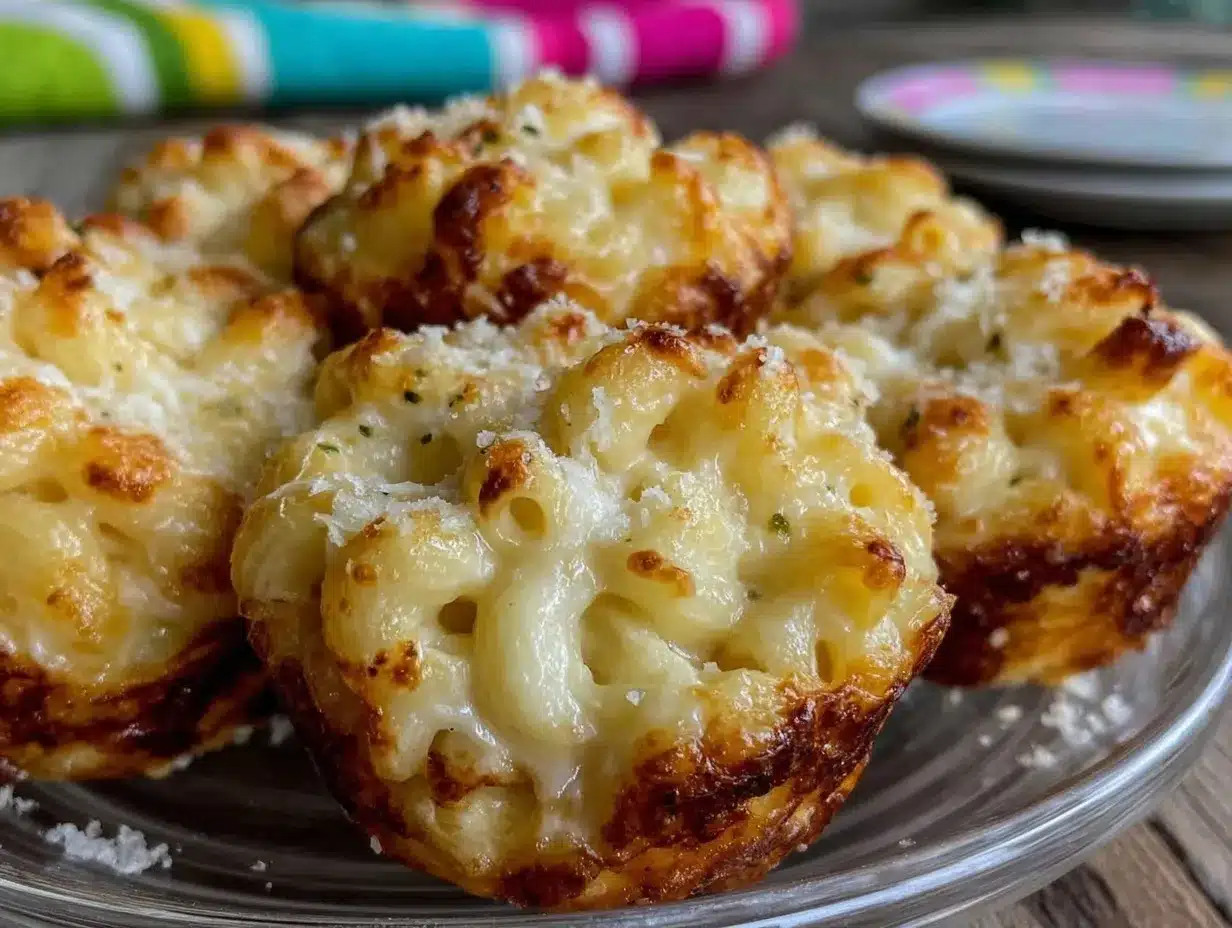
Let me set the scene—imagine the irresistible aroma of bubbling cheddar and buttery pasta wafting through your kitchen, all tucked into golden, hand-held cups. The first time I pulled these Crispy Mac and Cheese Cups from the oven, that crunchy top and creamy center just called out to be tasted. I was instantly hooked, and, honestly, so was my entire crew. These little bites are the kind of snack that makes you pause, grin, and think, “Why didn’t I stumble across this years ago?”
Back when I was knee-high to a grasshopper, my grandma always made huge pans of mac and cheese for Sunday dinners. But the edges—oh, those crispy corners—were the best part. Fast forward to a rainy Saturday, trying to satisfy a houseful of hungry kids and needing something easy for their tiny hands. That’s when the idea for these mac and cheese cups hit me—portable, crunchy, creamy, and basically happiness in a muffin tin. And let’s face it, when you’ve got little ones sneaking snacks from the cooling rack, you know you’re onto a winner.
This recipe quickly became a staple for birthday parties, playdates, and, yes, even those late-night Netflix marathons. My friends started requesting the recipe for school lunches and potlucks. It’s dangerously easy (I’ve tested it at least six times, in the name of research, of course), but the comfort and nostalgia packed into every bite? Pure magic. Whether you’re looking to brighten up your Pinterest snack board, need a quick lunchbox filler, or just want something that feels like a warm hug, these crispy mac and cheese cups check every box. Trust me, you’re going to want to bookmark this one.
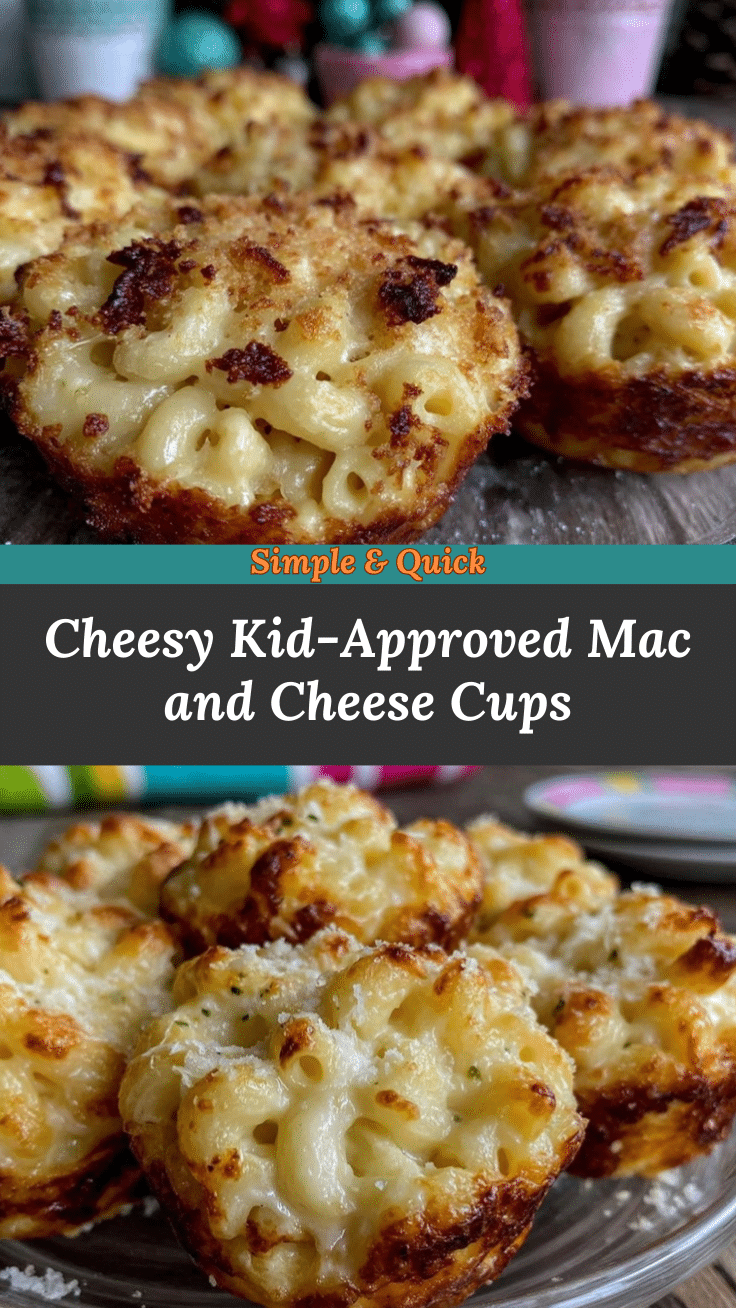
Why You’ll Love These Crispy Mac and Cheese Cups
- Quick & Easy: These crispy mac and cheese cups come together in under 40 minutes. Seriously, perfect for busy afternoons or last-minute snack attacks.
- Simple Ingredients: No fancy grocery trips required. Everything you need is probably already in your pantry or fridge.
- Perfect for Any Occasion: They’re a hit for birthday parties, after-school snacks, potlucks, or cozy family movie nights.
- Crowd-Pleaser: Kids go wild for these, and adults secretly do too. You’ll watch them disappear faster than you can say “cheese!”
- Unbelievably Delicious: That crispy, cheesy top layer combined with creamy, tender pasta is the ultimate comfort food in bite-sized form.
What makes these mac and cheese cups different from the rest? Well, I use a combo of sharp cheddar and a little Parmesan for maximum flavor and crunch on top. Mixing in a pinch of smoked paprika gives them a subtle warmth, while a touch of Greek yogurt adds creaminess without heaviness. Baking in a muffin tin gives every serving the coveted crispy edges (no more fighting over the corners!).
Honestly, this isn’t just another mac and cheese recipe—it’s my tried-and-true, kid-approved, snack-friendly version that delivers comfort faster than you’d expect. When you bite into one, it’s the kind of food that makes you close your eyes and savor. It’s perfect when you want to impress guests without stress, or simply turn an ordinary snack into a memorable treat. If you love mac and cheese but crave something a little less messy and a lot more fun, these cups are about to be your new favorite.
What Ingredients You Will Need
This recipe uses simple, everyday ingredients to create crispy, creamy mac and cheese cups that are both satisfying and kid-approved. Most of these are pantry staples, and there’s plenty of room for easy swaps.
- For the mac and cheese base:
- 1½ cups (180 g) elbow macaroni (small pasta works best for bite-sized cups)
- 2 tablespoons (28 g) unsalted butter, melted (adds richness and helps bind)
- 1 cup (240 ml) whole milk (or use 2% for a lighter version)
- 1/2 cup (120 g) plain Greek yogurt (thickens and adds tang—substitute sour cream if needed)
- 1 large egg (room temperature—helps set the cups)
- For the cheese:
- 1½ cups (170 g) sharp cheddar cheese, shredded (the sharper, the better for flavor)
- 1/4 cup (25 g) Parmesan cheese, grated (for extra crispiness on top)
- Seasonings:
- 1/2 teaspoon salt
- 1/4 teaspoon black pepper
- 1/4 teaspoon smoked paprika (optional, but highly recommended)
- 1/4 teaspoon garlic powder (for a flavor boost—skip if your kids aren’t fans)
- For topping (optional):
- 1/2 cup (60 g) panko breadcrumbs (adds extra crunch)
- 1 tablespoon (14 g) melted butter (mix with breadcrumbs for golden tops)
Ingredient Notes & Substitutions: If you need gluten-free, swap in your favorite GF pasta and breadcrumbs. For dairy-free, use plant-based milk and cheese alternatives—I’ve tried Daiya cheddar, and it works pretty well! You can use any shape of pasta, but elbows or small shells hold together best. If you’re out of Greek yogurt, plain regular yogurt or a bit more milk and cheese will do in a pinch. For extra protein, toss in diced cooked chicken or turkey. And if you want to sneak in some veggies, finely chopped broccoli or spinach blends right in (my picky eaters never notice!).
I usually go for Cabot or Tillamook cheddar—trustworthy brands with great melt. Parmesan from the wedge is always better than pre-grated (less clumping!). If it’s summer, swap in a sprinkle of fresh chopped chives on top for a little color. Honestly, the ingredients are flexible, so use what you have and don’t sweat the small stuff.
Equipment Needed
You don’t need anything fancy to whip up these crispy mac and cheese cups. Here’s what I use (and how I keep it simple):
- Muffin tin (12-cup standard size): This is essential for forming perfect snack-sized portions. I’ve used both non-stick and silicone trays—both work, but silicone pops them out easier.
- Medium saucepan: For boiling the pasta. If you’ve got a heavy-bottomed pan, even better—less chance of sticking.
- Mixing bowls (2): One for the pasta, one for the cheese sauce. I use glass bowls for easy cleanup.
- Whisk and spoon: To stir everything together. A small whisk helps blend the egg and yogurt smoothly.
- Measuring cups and spoons: Accuracy matters for binding and texture, especially with the cheese and milk.
- Spray oil or butter: To grease the muffin tin (trust me, don’t skip this step—you want those cups to pop right out).
I’ve tried paper liners, but the cups stick to them, so skip those. For maintenance, scrub muffin tins with a soft brush—don’t let cheese dry out on the pan. If you’re on a budget, basic metal tins work just fine. If you’ve got kids helping, let them mix the cheese—just be ready for a little mess!
Preparation Method
- Preheat & Prep: Preheat your oven to 375°F (190°C). Lightly grease a 12-cup muffin tin with spray oil or melted butter. Set aside.
- Cook the Pasta: Bring a medium saucepan of salted water to a boil. Add 1½ cups (180 g) elbow macaroni and cook just until al dente (about 6–7 minutes). Drain well and let cool for a minute. (Tip: Don’t overcook—soft pasta gets mushy in the cups!)
- Make the Cheese Sauce: In a mixing bowl, whisk together 1 cup (240 ml) whole milk, 1/2 cup (120 g) plain Greek yogurt, and 1 large egg until smooth. Stir in 2 tablespoons (28 g) melted butter. Add 1½ cups (170 g) shredded cheddar and 1/4 cup (25 g) grated Parmesan. Sprinkle in 1/2 teaspoon salt, 1/4 teaspoon black pepper, 1/4 teaspoon smoked paprika, and 1/4 teaspoon garlic powder. Mix until well combined.
- Combine Pasta and Cheese: Fold the drained pasta into the cheese mixture. Stir gently until each piece is coated. (If your mix looks a little dry, add a splash more milk.)
- Fill the Muffin Tin: Spoon the pasta mixture evenly into the prepared muffin cups. Fill each to the top and press down lightly so the cups hold their shape. (Warning: Don’t pack too tightly or they’ll be dense.)
- Add the Crunchy Topping: In a small bowl, toss 1/2 cup (60 g) panko breadcrumbs with 1 tablespoon (14 g) melted butter. Sprinkle a little over each cup for an extra crispy finish.
- Bake: Place the muffin tin in the oven and bake for 18–22 minutes, until tops are golden brown and edges are sizzling. (Sensory cue: You’ll smell the cheese getting toasty—best kitchen perfume ever.)
- Cool & Remove: Let the cups cool in the tin for 5–10 minutes. Run a small knife around the edges to loosen, then gently lift out. (If any stick, let them cool a bit longer or use a silicone spatula.)
- Serve: Serve warm for the best texture—crispy on the outside, creamy inside. Perfect for little hands or as a side for dinner.
Preparation Notes: If your kids love extra cheese, add a sprinkle before baking. For fewer crumbs on the floor, let cups cool completely before serving. If the mixture seems runny, double-check your pasta is well drained. I’ve learned the hard way—too much moisture means soggy bottoms! For efficiency, cook the pasta while you prep the cheese sauce. If you’re making a double batch, rotate pans halfway through baking for even browning.
Cooking Tips & Techniques
I’ve made these crispy mac and cheese cups more times than I can count (and, yes, burned a batch or two along the way!). Here’s how to nail them every time:
- Don’t Overcook the Pasta: Al dente is key. Too soft and the cups fall apart. I always set a timer and taste a noodle a minute early.
- Muffin Tin Greasing: Spray oil gets into all the corners. Butter adds flavor but can pool at the bottom—use a pastry brush for even coverage.
- Mix Cheese Evenly: If you dump all your cheese in at once, it might clump. I add half, stir, then add the rest. This gives a smooth, creamy mix.
- Crispy Topping: Panko is best for crunch. Regular breadcrumbs work but aren’t as light. If you skip the butter, the topping won’t brown as nicely.
- Let Them Cool: Patience pays off. If you try to pop the cups out too soon, they’ll crumble. Five minutes is usually enough, but ten is safer if you want perfect shapes.
- Multitasking: While the pasta boils, prep your cheese sauce. Get kids grating cheese or measuring spices—it keeps everyone busy and speeds things up.
I’ve learned to avoid using paper liners (they stick to the pasta like glue). If your cups fall apart, try adding another egg next time for extra binding. For extra flavor, sometimes I add a pinch of mustard powder—learned that trick from a chef friend. And, hey, don’t worry if your first batch isn’t picture-perfect. The taste wins every time!
How do I keep mac and cheese cups from sticking to the pan?
Grease your muffin tin really well with spray oil or butter. Silicone pans also help (they’re a lifesaver for sticky recipes). Let cups cool before removing, and run a knife along the edges for stubborn ones.
Variations & Adaptations
There’s no one-size-fits-all when it comes to mac and cheese cups—here are a few ways to make them your own:
- Gluten-Free: Use gluten-free pasta and breadcrumbs. I’ve tried Barilla GF elbows and Schär panko—both work great!
- Dairy-Free: Swap in almond or oat milk, vegan cheese shreds, and plant-based yogurt. Earth Balance butter melts nicely for the topping.
- Veggie Boost: Mix in finely chopped broccoli, spinach, or carrots right before baking. My kids never notice, and you can sneak in an extra serving of veggies.
- Flavor Twist: Add a dash of hot sauce or a sprinkle of crumbled bacon for grown-up versions. Smoked gouda or Monterey Jack are fun cheese swaps.
- Different Cooking Methods: These bake best in the oven, but I’ve crisped leftovers in the air fryer for 2–3 minutes—super crunchy!
- Allergen Substitutions: Egg allergies? Use a flaxseed “egg” (1 tbsp ground flax + 2.5 tbsp water, let sit 5 minutes). Works in a pinch, though the texture is a bit softer.
One of my favorite personal twists is stirring in a spoonful of sriracha before baking—just for the adults, though! Don’t be afraid to experiment; the basic recipe is forgiving, and every family has their own favorite combo.
What cheeses can I use for mac and cheese cups?
Sharp cheddar is classic, but you can mix in Monterey Jack, mozzarella, or pepper jack for different flavors. Just avoid cheeses that don’t melt well (like feta or paneer).
Serving & Storage Suggestions
These crispy mac and cheese cups are best served warm, fresh from the oven. I love piling them onto a platter sprinkled with fresh chives or parsley for extra color. They make a super cute centerpiece for birthday parties or game nights.
If you’re serving for lunch, pair with sliced apples, carrot sticks, or tomato soup. For dinner, they’re a great side with grilled chicken or a green salad. They go well with lemonade or iced tea—my kids think it’s a treat!
To store, cool completely and place in an airtight container. Refrigerate for up to 4 days (they actually get a bit firmer and even crispier after sitting overnight). For longer storage, freeze in a zip-top bag for up to 2 months. To reheat, pop them in a 350°F (175°C) oven for 8–10 minutes or use the air fryer for ultra-crispiness. If microwaving, cover with a damp paper towel to keep from drying out (but let’s face it, the oven is best for crunch!).
Flavors deepen after a day or two, so leftovers are never a disappointment. I almost always stash a few for those unexpected snack attacks.
Can I freeze mac and cheese cups?
Absolutely! Let cups cool, then freeze on a tray until solid. Store in a freezer bag. Reheat in the oven for best results—no thawing needed!
Nutritional Information & Benefits
Each serving (1 cup) is about 130 calories, with 6g protein, 8g fat, and 11g carbs. The Greek yogurt adds calcium and protein, while using whole milk keeps things rich yet balanced. Swap in whole wheat pasta for extra fiber, or add veggies for a vitamin boost.
This recipe is kid-friendly, but with easy swaps, you can make it gluten-free or dairy-free. Beware of allergens: contains wheat, dairy, and egg. For my family, these cups feel like a smarter way to enjoy comfort food—portion-controlled, less greasy, and packed with protein if you use Greek yogurt and real cheese.
I’ve found that making snacks like this helps my kids eat more mindfully, and it’s easy to sneak in healthy stuff. Plus, you control the salt and fat, which is always a win!
Conclusion
These crispy mac and cheese cups are hands-down the best kid-friendly snack idea. They’re portable, easy to make, and deliver that perfect combo of crunchy and creamy—just what snack dreams are made of. Whether you’re cooking for a crowd or just want to liven up lunchboxes, this recipe is worth trying (and tweaking to fit your family’s favorites).
I love how versatile and foolproof this recipe is. It’s become a go-to in my kitchen, and I hope it brings as much joy to your table as it does to mine. If you give it a try, I’d love to hear how you customize it—leave a comment below with your twists, tag me on Pinterest, or share your best mac and cheese cup stories!
So go ahead, gather your ingredients, and bake up a batch. Here’s to crispy, cheesy happiness—one cup at a time!
Frequently Asked Questions
Can I make these mac and cheese cups ahead of time?
Yes! Bake, cool, and refrigerate. Reheat in the oven for best results. They keep well for up to 4 days.
Are mac and cheese cups good for school lunches?
Definitely. They fit perfectly in lunchboxes, are easy for kids to handle, and taste great at room temperature.
What pasta shapes work best?
Elbow macaroni is the classic choice, but small shells or ditalini work too. Just avoid big shapes—they don’t hold together well.
Can I add vegetables to the cups?
Absolutely! Finely chopped broccoli, spinach, or carrots blend right in. Just make sure veggies are cooked or very small.
How do I make these cups extra crispy?
Use panko breadcrumbs mixed with melted butter for the topping, and bake until golden brown. An extra minute under the broiler adds crunch!
Pin This Recipe!

Crispy Mac and Cheese Cups
- Total Time: 37 minutes
- Yield: 12 cups 1x
Description
These kid-friendly mac and cheese cups are creamy inside, crispy on top, and perfectly portable for snacks, parties, or lunchboxes. Made in a muffin tin, they deliver classic comfort food flavor in bite-sized form.
Ingredients
- 1 1/2 cups elbow macaroni (about 6 oz)
- 2 tablespoons unsalted butter, melted
- 1 cup whole milk
- 1/2 cup plain Greek yogurt
- 1 large egg
- 1 1/2 cups sharp cheddar cheese, shredded
- 1/4 cup Parmesan cheese, grated
- 1/2 teaspoon salt
- 1/4 teaspoon black pepper
- 1/4 teaspoon smoked paprika (optional)
- 1/4 teaspoon garlic powder
- 1/2 cup panko breadcrumbs (optional, for topping)
- 1 tablespoon melted butter (for topping)
Instructions
- Preheat oven to 375°F (190°C). Lightly grease a 12-cup muffin tin with spray oil or melted butter.
- Bring a medium saucepan of salted water to a boil. Add elbow macaroni and cook until al dente, about 6–7 minutes. Drain well and let cool for a minute.
- In a mixing bowl, whisk together milk, Greek yogurt, and egg until smooth. Stir in melted butter, shredded cheddar, Parmesan, salt, pepper, smoked paprika, and garlic powder. Mix until well combined.
- Fold the drained pasta into the cheese mixture, stirring gently until evenly coated.
- Spoon the pasta mixture evenly into the prepared muffin cups, filling each to the top and pressing down lightly.
- In a small bowl, toss panko breadcrumbs with melted butter. Sprinkle over each cup for a crispy topping.
- Bake for 18–22 minutes, until tops are golden brown and edges are sizzling.
- Let cups cool in the tin for 5–10 minutes. Run a small knife around the edges to loosen, then gently lift out.
- Serve warm for best texture—crispy outside, creamy inside.
Notes
For gluten-free, use GF pasta and breadcrumbs. For dairy-free, swap in plant-based milk, cheese, and yogurt. Add finely chopped veggies for extra nutrition. Let cups cool before removing for best shape. Avoid paper liners—they stick. For extra crispiness, broil for 1 minute after baking.
- Prep Time: 15 minutes
- Cook Time: 22 minutes
- Category: Snack
- Cuisine: American
Nutrition
- Serving Size: 1 cup
- Calories: 130
- Sugar: 2
- Sodium: 220
- Fat: 8
- Saturated Fat: 4
- Carbohydrates: 11
- Fiber: 1
- Protein: 6
Keywords: mac and cheese cups, kid-friendly snack, muffin tin mac and cheese, party snack, portable mac and cheese, crispy mac and cheese, easy mac and cheese, lunchbox recipe
