

“I wasn’t expecting a baking lesson when I stopped by my neighbor’s on a quiet Saturday afternoon,” I recall, wiping flour off my hands and watching her effortlessly roll out dough that smelled like sweet vanilla and fresh butter. She had this little kit on the counter—a royal icing kit with pastel colors and delicate piping tips—that looked intimidating at first. Honestly, I thought decorating cookies was a task only meant for pros. But as she handed me a flower-shaped cookie and told me, “Just have fun with it,” something clicked.
That day, I discovered just how approachable spring flower cookies can be, especially with a beginner-friendly royal icing kit by your side. Maybe you’ve been there—eyeing those beautifully decorated cookies online, feeling like you’d need a pastry degree to even start. Let me tell you, this recipe breaks all those walls down. The dough is simple, forgiving, and the royal icing kit makes decorating as much about creativity as it is about technique.
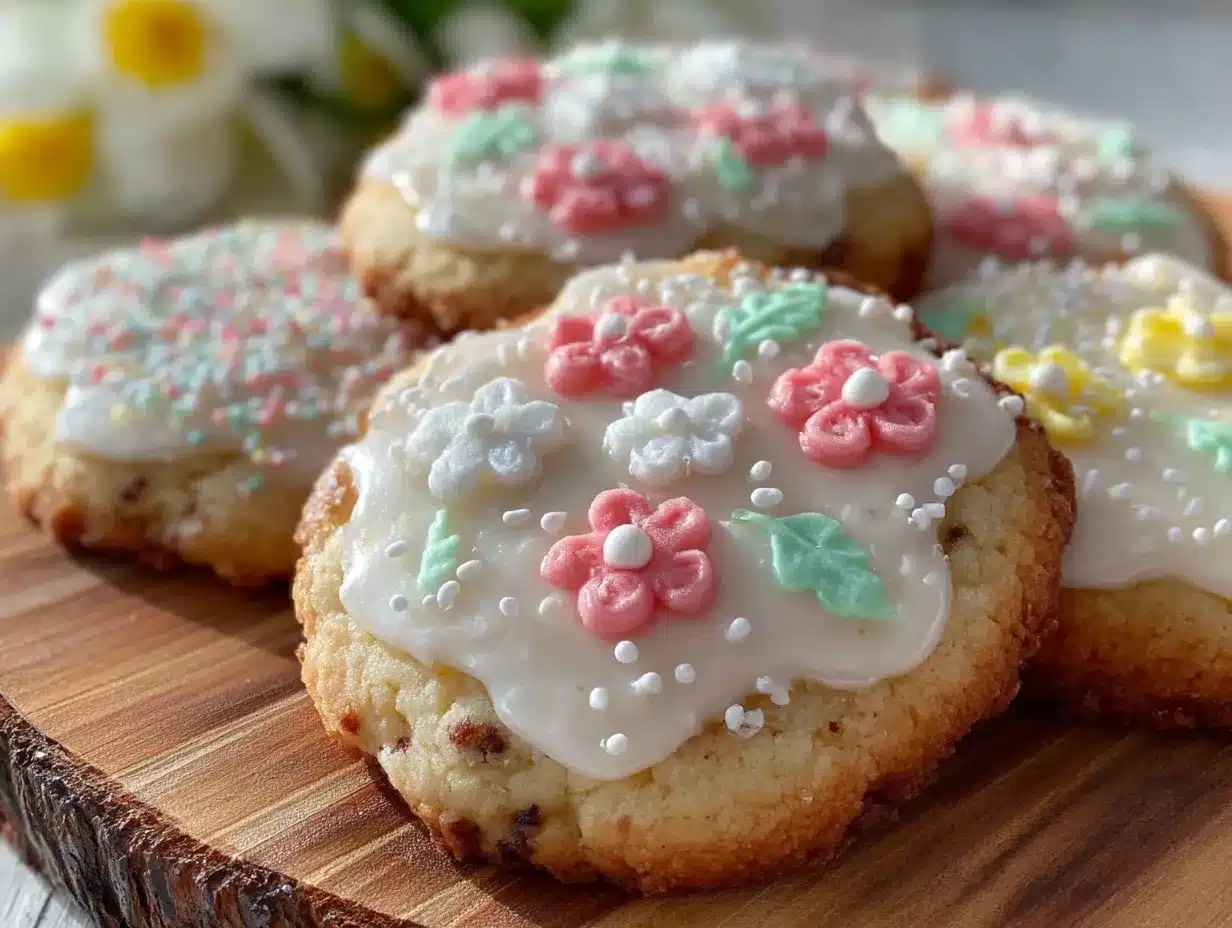
Sure, I made a mess (there was a rogue blob of pink icing on the floor), but that’s part of the charm. The warmth of the kitchen, the soft colors of the icing, and the playful shapes somehow made the whole process feel like a cozy spring afternoon. This recipe stuck with me because it’s not just a cookie; it’s a little project that brightens your day, even if you’re a total beginner. So if you’re looking to try your hand at cookie decorating without stress, these easy beginner spring flower cookies with royal icing kit are exactly what you need.
Why You’ll Love This Recipe
When I first tried making these spring flower cookies using a royal icing kit, I honestly didn’t expect much beyond a fun afternoon in the kitchen. But this recipe quickly turned into a favorite for so many reasons:
- Quick & Easy: The dough comes together in under 20 minutes, and the decorating kit simplifies icing without fuss—perfect for a busy afternoon or last-minute gift idea.
- Simple Ingredients: No fancy or hard-to-find items here. You probably have most ingredients in your pantry, and the royal icing kit provides the perfect color and consistency without extra effort.
- Perfect for Spring Celebrations: Whether it’s a casual brunch, a kids’ party, or just a sunny day treat, the floral designs add a cheerful vibe that’s hard to beat.
- Crowd-Pleaser: Kids love them, adults admire the pretty icing, and everyone enjoys the buttery, tender bite.
- Unbelievably Delicious: The balance of sweet royal icing and a soft but sturdy cookie base creates a texture that’s both comforting and delightful.
What sets this recipe apart is how it makes decorating approachable. The royal icing kit includes step-by-step instructions and just the right colors to coax out your inner artist—no stress, no mess (well, minimal!). The dough is sturdy enough to hold detailed shapes, yet tender enough to melt in your mouth. Honestly, this isn’t just another cookie recipe—it’s the one that makes you want to get out your piping bags again and again.
What Ingredients You Will Need
This recipe uses simple, wholesome ingredients to deliver bold flavor and satisfying texture without the fuss. Plus, the royal icing kit takes the guesswork out of decorating, making it perfect for beginners.
- For the Cookie Dough:
- 2 ½ cups (312g) all-purpose flour, sifted
- 1 cup (227g) unsalted butter, softened (I prefer Kerrygold for its creamy flavor)
- ¾ cup (150g) granulated sugar
- 1 large egg, room temperature
- 1 tsp pure vanilla extract (adds warmth and aroma)
- ½ tsp almond extract (optional but recommended for subtle depth)
- ½ tsp baking powder
- ¼ tsp salt
- For Decorating:
- 1 royal icing kit (includes pre-mixed royal icing in pastel spring colors and piping bags with tips)
- Optional: edible glitter or sugar pearls for extra flair
Ingredient tips: Use unsalted butter so you can control the saltiness, and make sure your egg is at room temperature for better mixing. The almond extract is my secret weapon here—it complements floral designs perfectly. If you want to make this gluten-free, swap the all-purpose flour with a 1:1 gluten-free baking blend; just note the texture might vary slightly.
Equipment Needed
Getting the right tools makes this recipe a breeze, but honestly, you don’t need a fancy setup. Here’s what worked well for me:
- Mixing bowl and electric mixer (hand or stand mixer both work fine)
- Rolling pin (a silicone one helps prevent sticking)
- Spring flower-shaped cookie cutters (sizes between 2 to 3 inches are perfect for decorating)
- Baking sheets lined with parchment paper or silicone mats
- Cooling rack (to let the cookies rest before icing)
- Royal icing kit with piping bags and assorted tips (usually includes round and star tips)
- Small spatula or butter knife (for smoothing icing if needed)
If you don’t have a rolling pin, a clean wine bottle works in a pinch—I’ve been there! The royal icing kit I used came with disposable piping bags, which made cleanup less of a chore. For maintenance, if you plan to reuse piping tips, soak them in warm soapy water right after use to prevent clogging. Budget-friendly tip: check your local craft store for cookie cutter sets, they often come in floral themes perfect for spring.
Preparation Method
- Make the Dough (15 minutes): In a large mixing bowl, beat the softened butter and granulated sugar with an electric mixer until light and fluffy (about 3-4 minutes). Add the egg, vanilla, and almond extract; mix until combined. In a separate bowl, whisk together the flour, baking powder, and salt. Gradually add the dry ingredients to the wet mixture, mixing on low speed until just combined. The dough should hold together without being sticky.
- Chill the Dough (at least 1 hour): Wrap the dough in plastic wrap and refrigerate. This step is crucial—chilling helps the dough firm up, making it easier to roll and cut without losing shape.
- Preheat the Oven & Prepare Baking Sheets (10 minutes): Preheat your oven to 350°F (175°C). Line baking sheets with parchment paper or silicone mats.
- Roll and Cut the Cookies (15 minutes): Lightly flour your work surface and rolling pin. Roll out the chilled dough to about ¼ inch (6 mm) thickness. Use your spring flower cookie cutters to cut out shapes, pressing firmly for clean edges. Transfer cookies carefully to baking sheets, spacing about 1 inch (2.5 cm) apart. If the dough softens too much while working, pop it back in the fridge for 10 minutes.
- Bake the Cookies (10-12 minutes): Bake until the edges just start to turn golden—don’t overbake or they’ll lose their tender crumb. They’ll be soft but will firm up as they cool. Remove from oven and let cool on the baking sheets for 5 minutes, then transfer to a wire rack to cool completely.
- Prepare the Royal Icing (while cookies cool): Follow the instructions on your royal icing kit. Usually, you just need to knead the packets and fill the piping bags. If the icing seems too thick for your liking, add a drop of water and mix gently; too thin will run off the cookies, so adjust carefully.
- Decorate Your Cookies (30-45 minutes): Start with outlining the petals using the round tip. Then fill in with the icing in your preferred colors. Use the star tip for accents or dots in the center of flowers. Don’t worry about perfection—each cookie will have its own charm. Let the icing set completely at room temperature, which can take 1-2 hours depending on humidity.
Pro tip: If you want to speed up drying, place the decorated cookies in front of a small fan or in a cool, dry spot. And remember, if you get interrupted mid-piping (happened to me when the phone rang!), just keep calm and keep decorating once you’re back.
Cooking Tips & Techniques
When making these spring flower cookies, a few tricks can really help you nail the process and keep things fun:
- Don’t overmix the dough: Too much mixing can develop gluten, making cookies tough. Mix until ingredients just come together.
- Chill the dough well: This prevents spreading in the oven and keeps those flower shapes sharp.
- Use parchment paper or silicone mats: This avoids sticking and makes cleanup easier. I learned this the hard way when one batch stuck and broke halfway off the tray!
- Practice piping on parchment first: Before decorating your cookies, test the royal icing flow to get comfortable with pressure and speed.
- Keep a damp cloth nearby: Wipe your piping tips occasionally to prevent clogging, especially when switching colors.
- Work in a cool environment: Warm rooms can cause icing to melt or become runny, so if your kitchen is hot, a little AC or fan can help.
- Patience is key: Allow each layer of icing to dry before adding details on top to avoid colors bleeding.
Variations & Adaptations
Want to make these spring flower cookies your own? Here are some ways to mix things up:
- Flavor Variations: Add lemon zest or a splash of orange extract to the dough for a citrusy twist.
- Dietary Substitutions: Swap butter for coconut oil to make a dairy-free version; use gluten-free flour blends to accommodate gluten sensitivities.
- Seasonal Themes: While spring flowers are classic, you can easily adapt the shapes and colors for other seasons—think autumn leaves or winter snowflakes.
- Alternative Decorating: Use colored sanding sugar or edible markers if royal icing feels intimidating.
- Personal Twist: I once added crushed freeze-dried strawberries to the icing for a natural pink tint and subtle flavor boost—it was a hit!
Serving & Storage Suggestions
These cookies are best enjoyed at room temperature when the icing has set perfectly crisp. Serve them on a pretty plate or wrap as thoughtful gifts for friends and family. Pairing them with a cup of herbal tea or a light lemonade complements the delicate sweetness beautifully.
For storage, place cookies in an airtight container layered with parchment paper to prevent sticking. They keep well at room temperature for up to 4 days. If you want to store longer, freeze them un-iced or fully decorated (wrapped tightly) for up to 2 months. When ready to enjoy, thaw at room temperature—avoid microwaving to keep icing texture intact.
Over time, the flavors meld a bit more, making the cookies taste even better the next day. Just don’t be surprised if they disappear quickly once friends spot them!
Nutritional Information & Benefits
Each spring flower cookie (approximately 2.5 inches in diameter) contains roughly:
| Nutrient | Amount per Cookie |
|---|---|
| Calories | 120-140 kcal |
| Fat | 7g (mostly from butter) |
| Carbohydrates | 15g |
| Sugar | 8g |
| Protein | 1.5g |
The use of real butter provides a rich source of fat-soluble vitamins like A and E, and the almond extract adds a touch of nutty aroma without allergens if you have tree nut sensitivities. However, this recipe does include gluten and eggs, so it’s not suitable for those with those allergies unless adapted.
From a wellness perspective, these cookies serve as a sweet treat to enjoy mindfully. Baking at home lets you control ingredients and avoid preservatives found in store-bought options. Plus, the joy of decorating can be a relaxing, creative outlet—good for mental health!
Conclusion
These easy beginner spring flower cookies with royal icing kit are more than just a recipe—they’re a little celebration of creativity and simple pleasures. Whether you’re new to baking or just looking for a fun project, this recipe offers a sweet, approachable way to make charming treats without stress.
Feel free to customize the flavors, colors, and shapes to suit your style. I love these cookies because they bring a bit of springtime joy indoors and remind me that baking doesn’t have to be complicated to be special. Give it a try, and don’t be shy about sharing your decorating adventures—I’d love to hear how your cookies turned out!
Happy baking, and may your kitchen be filled with flour, laughter, and beautiful blooms!
FAQs
Can I make the cookie dough ahead of time?
Yes! You can prepare the dough up to 3 days in advance and keep it wrapped in the fridge. Just let it rest at room temperature for 10 minutes before rolling out.
What if I don’t have a royal icing kit?
You can make your own royal icing using powdered sugar, meringue powder, and water. However, the kits simplify coloring and consistency, which is great for beginners.
How do I fix runny royal icing?
Add a little more powdered sugar to thicken it, mixing slowly until you reach the desired consistency. Be careful not to add too much water.
Can I store decorated cookies in the fridge?
It’s best to store them at room temperature because refrigeration can cause the icing to sweat or soften.
What’s the best way to transport decorated cookies?
Use a sturdy container with layers separated by parchment paper. Keep the container flat and avoid stacking too many cookies to prevent smudging.
Pin This Recipe!
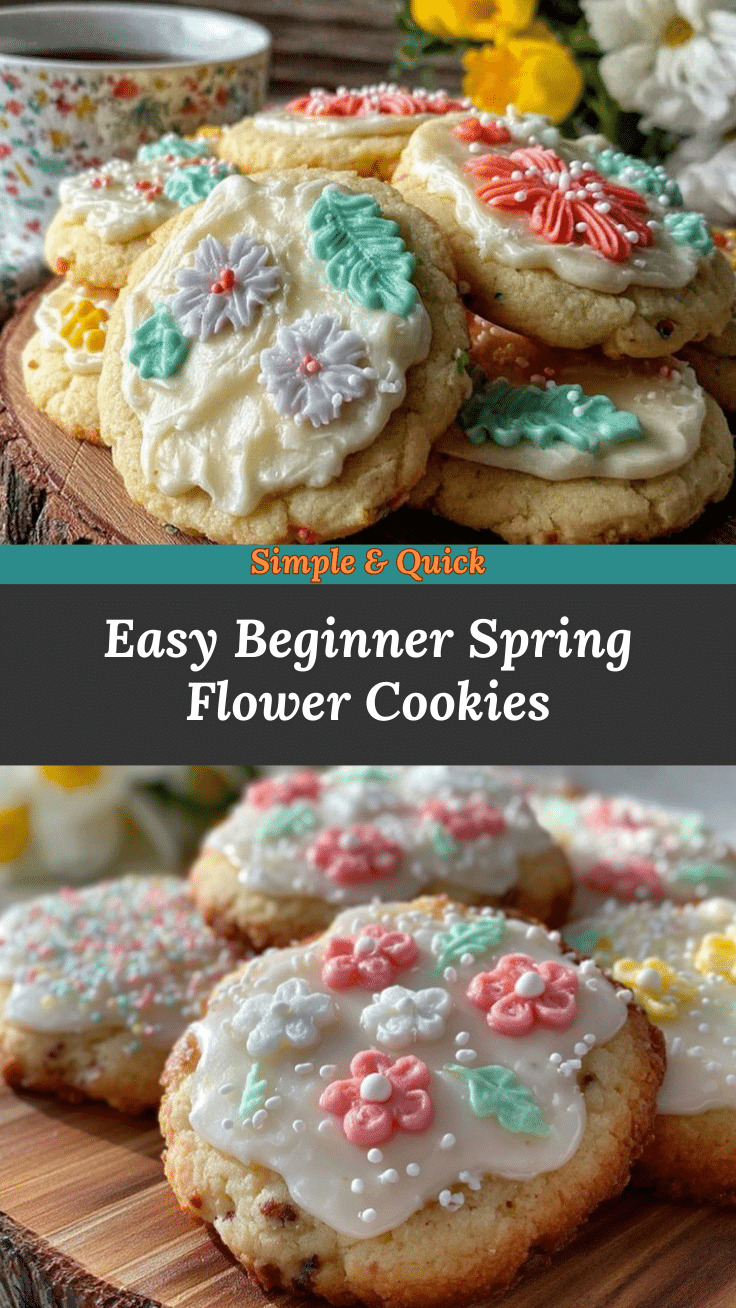

Easy Beginner Spring Flower Cookies Recipe with Royal Icing Kit Tutorial
- Total Time: 1 hour 55 minutes to 2 hours 12 minutes
- Yield: About 24 cookies 1x
Description
A simple and approachable recipe for spring flower-shaped cookies decorated with a beginner-friendly royal icing kit. Perfect for a fun baking project that yields tender, buttery cookies with beautiful pastel icing.
Ingredients
- 2 ½ cups (312g) all-purpose flour, sifted
- 1 cup (227g) unsalted butter, softened
- ¾ cup (150g) granulated sugar
- 1 large egg, room temperature
- 1 tsp pure vanilla extract
- ½ tsp almond extract (optional)
- ½ tsp baking powder
- ¼ tsp salt
- 1 royal icing kit (includes pre-mixed royal icing in pastel spring colors and piping bags with tips)
- Optional: edible glitter or sugar pearls for extra flair
Instructions
- Make the Dough (15 minutes): In a large mixing bowl, beat the softened butter and granulated sugar with an electric mixer until light and fluffy (about 3-4 minutes). Add the egg, vanilla, and almond extract; mix until combined. In a separate bowl, whisk together the flour, baking powder, and salt. Gradually add the dry ingredients to the wet mixture, mixing on low speed until just combined. The dough should hold together without being sticky.
- Chill the Dough (at least 1 hour): Wrap the dough in plastic wrap and refrigerate. This step is crucial—chilling helps the dough firm up, making it easier to roll and cut without losing shape.
- Preheat the Oven & Prepare Baking Sheets (10 minutes): Preheat your oven to 350°F (175°C). Line baking sheets with parchment paper or silicone mats.
- Roll and Cut the Cookies (15 minutes): Lightly flour your work surface and rolling pin. Roll out the chilled dough to about ¼ inch (6 mm) thickness. Use your spring flower cookie cutters to cut out shapes, pressing firmly for clean edges. Transfer cookies carefully to baking sheets, spacing about 1 inch (2.5 cm) apart. If the dough softens too much while working, pop it back in the fridge for 10 minutes.
- Bake the Cookies (10-12 minutes): Bake until the edges just start to turn golden—don’t overbake or they’ll lose their tender crumb. They’ll be soft but will firm up as they cool. Remove from oven and let cool on the baking sheets for 5 minutes, then transfer to a wire rack to cool completely.
- Prepare the Royal Icing (while cookies cool): Follow the instructions on your royal icing kit. Usually, you just need to knead the packets and fill the piping bags. If the icing seems too thick for your liking, add a drop of water and mix gently; too thin will run off the cookies, so adjust carefully.
- Decorate Your Cookies (30-45 minutes): Start with outlining the petals using the round tip. Then fill in with the icing in your preferred colors. Use the star tip for accents or dots in the center of flowers. Don’t worry about perfection—each cookie will have its own charm. Let the icing set completely at room temperature, which can take 1-2 hours depending on humidity.
Notes
Use unsalted butter for better salt control. Chill dough well to prevent spreading and maintain shape. Practice piping on parchment paper before decorating cookies. Keep piping tips clean and work in a cool environment to avoid runny icing. Allow icing to dry completely between layers to prevent bleeding. Dough can be made up to 3 days ahead and refrigerated. Store decorated cookies at room temperature for best texture.
- Prep Time: 15 minutes
- Cook Time: 10-12 minutes
- Category: Dessert
- Cuisine: American
Nutrition
- Serving Size: 1 cookie (approximat
- Calories: 130
- Sugar: 8
- Sodium: 70
- Fat: 7
- Saturated Fat: 4.5
- Carbohydrates: 15
- Fiber: 0.5
- Protein: 1.5
Keywords: spring flower cookies, royal icing, beginner cookie recipe, decorated cookies, easy cookie recipe, spring baking, cookie decorating kit
