
“Are you sure this is going to look like a turtle?” I muttered under my breath, clutching a handful of yarn and a crochet hook that felt way too big for my tiny hands. Honestly, I wasn’t expecting much the first time I tried making this easy free crochet turtle amigurumi pattern for beginners. I’d seen those adorable little creatures online, all cute and squishy, and figured, why not give it a go? I was skeptical — turtles seemed complicated with all that shell detail. But as I hooked and looped, something clicked. The stitches came together, and before I knew it, this little turtle started to take shape. That moment, when the head popped onto the shell and suddenly it looked like an actual living creature, was oddly satisfying. I remember sitting back, tired but grinning, realizing that not only was this beginner-friendly, but it was also kind of addictive.
Since that accidental win, I’ve made these turtles so many times I’ve lost count — gifts for friends, cozy desk buddies, and even a few for myself when I needed a calm project to reset after a chaotic day. It’s funny how something so simple can bring such a sense of accomplishment and joy. Plus, the pattern is forgiving enough that even those who say, “I’m not really a crafter,” can finish with a cute little turtle in hand. This easy free crochet turtle amigurumi pattern for beginners stuck with me because it’s approachable, fun, and honestly, it just makes you smile when you see it sitting there, all stitched up and proud.
So if you ever thought amigurumi was too tricky or that turtles were too detailed, this pattern might just change your mind. Let’s jump into how to make your own little turtle friend — perfect for gifting or just brightening up your space.
Why You’ll Love This Recipe
After countless attempts and tweaks, this easy free crochet turtle amigurumi pattern for beginners really stands out because it balances simplicity with charm. Here’s why it’s become a favorite go-to:
- Quick & Easy: You can finish your turtle in under 2 hours, which is perfect when you want a satisfying project that doesn’t drag on forever.
- Simple Ingredients: The pattern uses basic yarn and a crochet hook—no fancy or expensive supplies needed. I usually go with Lion Brand’s worsted weight yarn for the best texture.
- Perfect for Gifts: Whether it’s a birthday, baby shower, or just a little surprise for a friend, this turtle fits every occasion with its warm, handmade vibe.
- Crowd-Pleaser: Kids adore these turtles, and adults appreciate the charm and effort behind them. I’ve lost count of how many times someone’s asked me for the pattern after seeing mine.
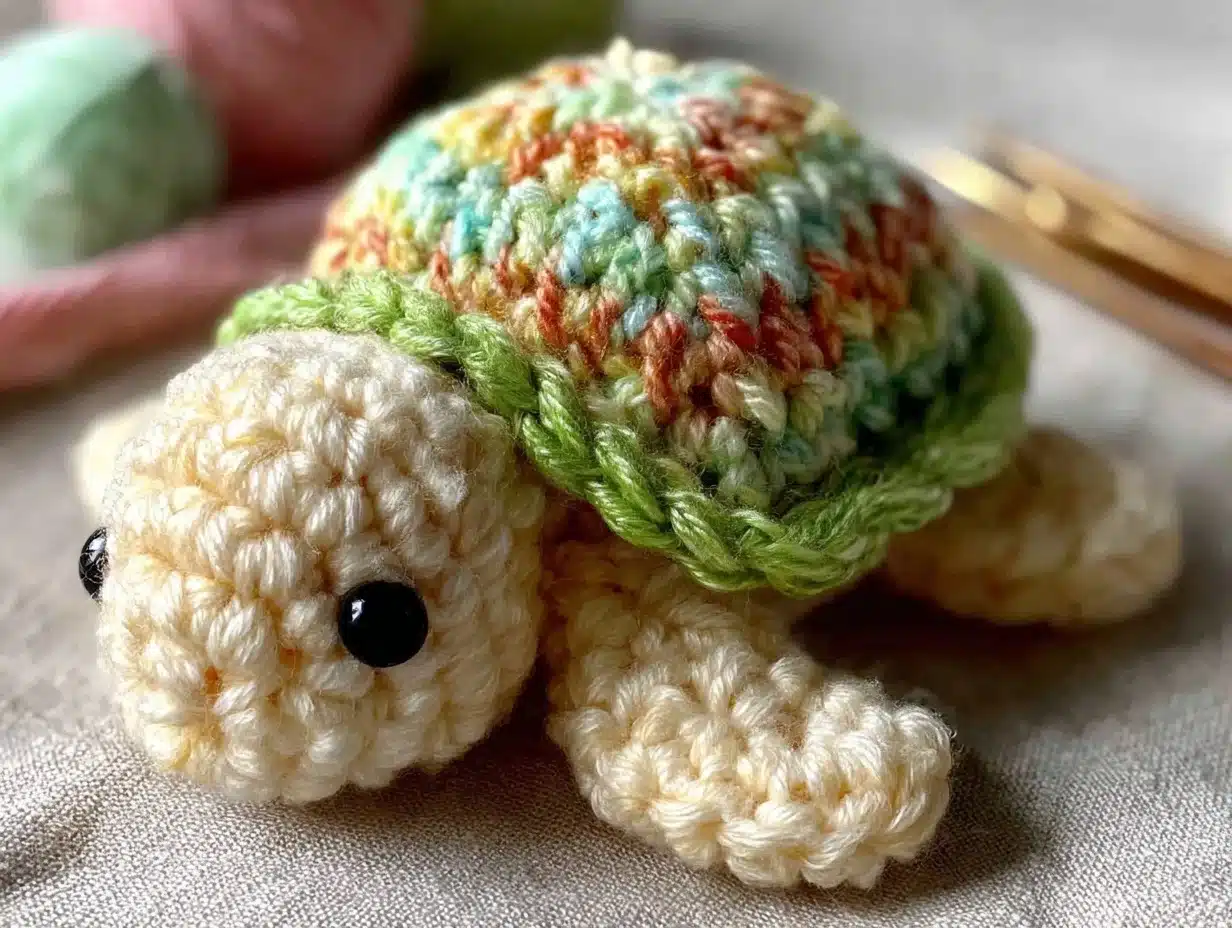
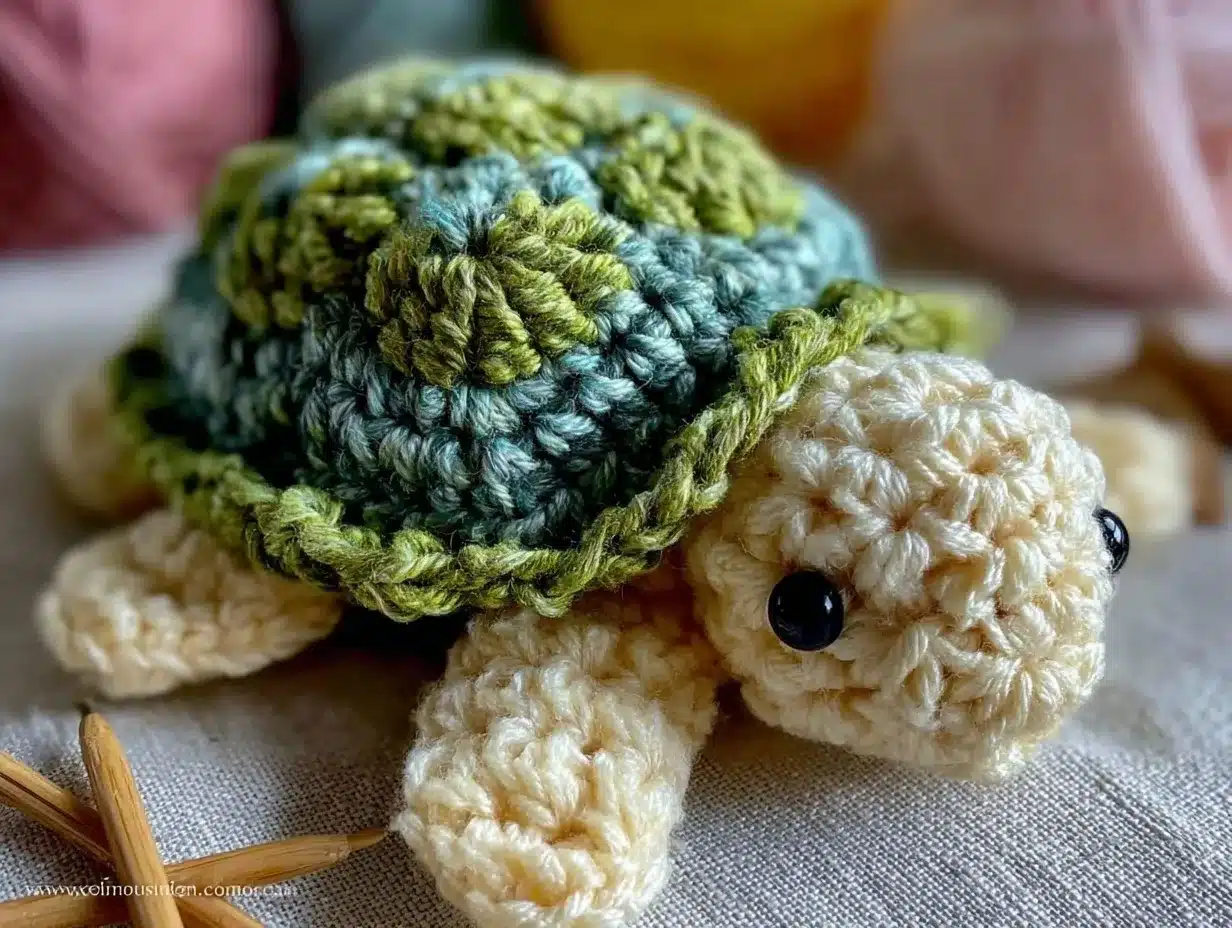
- Unbelievably Cute: The combination of the shell’s rounded shape and the tiny eyes creates an irresistible look that makes you want to squish it (gently!).
What makes this pattern really different is the way it breaks down complex turtle shapes into manageable steps, perfect for beginners. You don’t have to worry about complicated stitches or counting too many rounds, and the instructions gently guide you through shaping the shell, head, and legs. Plus, I’ve added tips along the way to help with tension and finishing so your turtle looks neat and professional. Honestly, it’s a pattern that builds your confidence stitch by stitch.
It’s more than just a crochet tutorial—it’s a little project that brings a sense of calm and accomplishment, much like the satisfying feeling of prepping a cozy meal like the creamy cottage cheese ice cream I make when I want something chilled and comforting. This turtle is that kind of comfort, but in yarn form.
What Ingredients You Will Need
This easy free crochet turtle amigurumi pattern for beginners uses simple, easy-to-find materials that keep the process straightforward and fun. You won’t need anything fancy, just trusty staples that you can find at most craft stores or online. Here’s what you’ll want to gather before starting:
- Worsted Weight Yarn (Medium 4): Approx. 50g each in two colors — one for the shell (I love a soft green or teal) and one for the body (a lighter green or beige works well). I recommend brands like Lion Brand or Red Heart for their durability and softness.
- Size G (4.0 mm) Crochet Hook: This hook size works best with worsted weight yarn and helps achieve the right tightness for stuffing.
- Polyester Fiberfill Stuffing: You’ll need enough to stuff the head, body, and legs firmly but not overstuffed. I usually grab a small bag from my local craft store.
- Tapestry Needle: For sewing pieces together and weaving in ends. A blunt needle about 6 inches long is ideal.
- Safety Eyes (optional): Size 9mm or 12mm work well for giving your turtle a cute, polished look. If you prefer, black embroidery floss can be used to stitch eyes instead.
- Stitch Marker: Very helpful to mark rounds and keep track of your stitches—especially if you’re new at amigurumi.
- Scissors: Sharp enough to cut yarn cleanly without fraying.
Optional but nice to have:
- Fabric Glue: For securing safety eyes or small pieces if you want extra stability.
- Embroidery Floss: For adding little details like a smile or shell accents.
Substitution tips: If you’re looking for a vegan or allergy-friendly option, swap polyester stuffing for a plant-based fiberfill, and choose acrylic yarn instead of wool. For those who want a softer feel, cotton yarn can be used but may affect the firmness of the final turtle.
Equipment Needed
Besides the yarn and materials, having the right tools makes a big difference when making this easy free crochet turtle amigurumi pattern for beginners.
- Crochet Hook Size G (4.0 mm): This is the ideal size for worsted weight yarn to achieve the right stitch tension. I’ve tried smaller hooks, but the stitches get too tight and the turtle ends up stiff, while larger hooks make it too loose.
- Tapestry Needle: Essential for sewing all the parts together. I prefer the ones with big eyes so threading yarn is easier.
- Stitch Markers: Beginner-friendly lifesavers to mark the beginning of rounds. Some folks use scrap yarn instead, but clips work best.
- Scissors: A small pair dedicated to yarn cutting makes things cleaner.
If you don’t have a tapestry needle, a large sewing needle with a blunt tip can work in a pinch. For stitch markers, any small clip or even a safety pin can substitute. I recommend investing in decent quality crochet hooks; a smooth aluminum hook speeds up your progress and reduces hand strain, especially if you plan to make more amigurumi (like the fun animals in the fluffy Dr. Seuss rainbow pancake stacks tutorial).
Preparation Method
- Start with the Shell: Using your darker yarn, create a magic ring and crochet 6 single crochets (sc) into it. Pull tight to close the ring. (Approx. 5 minutes)
Tip: Make sure to pull the ring tight so there’s no hole in the center. This is the base for a sturdy shell. - Increase Rounds: Work 2 sc in each stitch around (12 stitches total). Next round, alternate 1 sc and 2 sc in one stitch (18 stitches). Continue increasing evenly until you reach about 36 stitches around. This forms the rounded turtle shell. (Approx. 10-15 minutes)
Note: Use a stitch marker to keep track of rounds. The shell should start to look domed but not flat. - Work Even Rounds: Crochet several rounds with 1 sc in each stitch (no increases) to build the shell height. Usually 5-6 rounds work well. (Approx. 10 minutes)
- Start Decreasing: Begin to decrease by skipping stitches evenly to close the shell. Stuff lightly with fiberfill before fully closing. (Approx. 5-7 minutes)
Tip: Stuff gradually to avoid lumps and keep the shape smooth. - Make the Head: With the lighter yarn, create a magic ring, crochet 6 sc, then increase to 12 stitches in the next round. Work even rounds to shape the head, then start decreasing and stuff before closing. (Approx. 15 minutes)
Note: Attach safety eyes before closing the head if you’re using them. - Legs and Tail: Crochet small oval shapes for legs using 6-8 stitches per side, work a few rounds, stuff lightly, and close. The tail is a tiny cone shape worked in fewer stitches. (Approx. 15 minutes for all legs and tail)
- Assembly: Sew the head, legs, and tail onto the shell using the tapestry needle. Take your time to position them evenly. Weave in all loose ends. (Approx. 15-20 minutes)
Tip: Use pins to hold pieces in place before sewing to avoid shifting.
Overall, the whole project usually takes about 1.5 to 2 hours. I find it’s best to work in a quiet spot with good lighting so you can spot any missed stitches early. If you find your stitches are too loose, try a smaller hook or tighter tension next time. Conversely, if it’s hard to push your hook through, loosen your grip slightly.
Cooking Tips & Techniques
Okay, so this isn’t cooking, but crocheting this easy free crochet turtle amigurumi pattern for beginners has its own set of tricks and lessons. Here are some helpful tips I’ve picked up along the way:
- Keep Your Tension Consistent: Beginners often struggle with varying stitch tightness. Try practicing a few stitches on scrap yarn to find a comfortable tension before starting the turtle.
- Use Stitch Markers Religiously: They’re a lifesaver when counting rounds and help you avoid accidentally adding or skipping stitches.
- Stuff Firmly but Not Too Much: Overstuffing stretches the stitches and can distort the shape. Understuffing makes the turtle floppy. Find a happy medium by adding stuffing gradually.
- Take Breaks: Crocheting small parts repeatedly can strain your hands. I usually do the shell first, then rest before moving to the head and legs.
- Don’t Rush Assembly: Sewing parts on evenly makes all the difference between a neat turtle and a lopsided one. Pin and adjust before committing.
On my first try, I made the mistake of skipping the stitch marker step and ended up with an oddly shaped shell. Lesson learned! Also, if you’re new to magic rings, they’re worth mastering early because they make your amigurumi look so much cleaner at the start.
Lastly, multi-tasking while watching a favorite show or listening to a podcast turns this project into a relaxing ritual. Similar to making a batch of creamy baked feta pasta, it’s a chance to slow down and enjoy the process without pressure.
Variations & Adaptations
This easy free crochet turtle amigurumi pattern is a fantastic base to customize and make your own. Here are some ideas to mix things up:
- Color Variations: Use variegated yarn or bright colors for a playful turtle. I once made a rainbow turtle for a friend that was an instant hit.
- Size Adjustments: Swap to a smaller hook and lighter yarn to create mini turtles perfect for keychains or ornaments.
- Textured Shell: Add bobble stitches or surface crochet to the shell for a 3D effect and tactile interest.
- Stuffing Variations: For a softer turtle, use cotton yarn and a looser tension. For a sturdier toy, stick to acrylic yarn and firm stuffing.
- Seasonal Themes: Give your turtle a little scarf in winter or a flower crown in spring for a festive touch.
For those with allergies or vegan preferences, swapping to plant-based stuffing and acrylic yarn keeps things safe and eco-friendly. I’ve also tried embroidering little freckles on the shell for a quirky twist that friends loved. If you want to get creative with eyes, try French knots or tiny buttons instead of safety eyes.
Serving & Storage Suggestions
While you can’t exactly “serve” this crochet turtle, how you present and care for your finished amigurumi absolutely matters. Here’s what I recommend:
- Display Ideas: These turtles look adorable perched on shelves, desks, or nursery corners. Group several sizes for a charming turtle family.
- Gift Packaging: Wrap your turtle in tissue paper inside a small gift box or a drawstring bag for a polished look. Add a handwritten tag with care instructions.
- Storage: Keep your turtle out of direct sunlight to prevent fading. Store in a sealed container or zip bag if not displayed to protect from dust.
- Cleaning: Spot clean with a damp cloth. If really dirty, hand wash gently and reshape while damp. Avoid machine washing to keep the stuffing intact.
- Flavors of Yarn: Okay, not flavors, but the feel of your turtle will soften slightly over time with gentle handling, making it even more cuddly.
Storing your turtle properly is key if you want it to last as a keepsake or heirloom gift. Just like how you wouldn’t want to ruin a delicate treat such as those mini cheesecake desserts, your crochet turtle appreciates a little TLC.
Nutritional Information & Benefits
Well, it’s safe to say this crochet turtle doesn’t provide calories, but it does offer mental nourishment and creative benefits!
- Stress Relief: Crocheting this turtle helps reduce anxiety and promotes mindfulness through repetitive, focused motions.
- Fine Motor Skills: Working on small stitches improves hand-eye coordination and dexterity.
- Creative Expression: Choosing colors, customizing shapes, and adding details encourages artistic development.
- Gift-Giving Joy: Handmade gifts like this turtle foster connection and thoughtfulness.
From a wellness perspective, crafting projects like this are little pockets of joy that balance the busyness of life—kind of like how enjoying a wholesome green goddess salad recharges your body. Plus, this pattern is naturally allergy-friendly and gluten-free, so no worries there.
Conclusion
This easy free crochet turtle amigurumi pattern for beginners is truly a gem for anyone wanting a fun, manageable project that results in a charming, handmade treasure. It’s approachable enough for first-timers and satisfying enough to keep you coming back. I love how it’s a little creative escape that fits neatly into a busy day yet leaves you with something to hold onto—literally and figuratively.
Feel free to tweak colors, sizes, or details to fit your style or gifting needs. Whether it’s your first amigurumi or your fiftieth, this turtle brings a quiet kind of happiness that’s hard to beat. So grab your hook, yarn, and let those loops come to life. And hey, if you enjoy little rewarding projects, you might also like the chocolate-covered strawberry scone sandwiches recipe I’ve shared—it’s another simple delight worth trying.
Happy crocheting!
FAQs
What skill level is this crochet turtle pattern suitable for?
This pattern is designed specifically for beginners, using basic stitches like single crochet and simple increases/decreases. If you can make a magic ring and do single crochets, you’re all set.
Can I use different yarn types for this pattern?
Absolutely! Worsted weight acrylic yarn is recommended for durability and ease, but cotton or bamboo yarns can give a softer feel. Just remember to adjust your hook size accordingly.
How do I make the safety eyes stay secure?
Safety eyes come with washers that snap on tightly behind the fabric. If you want extra security, you can add a tiny dab of fabric glue or sew around the base carefully.
Is it possible to make this turtle without a magic ring?
Yes, you can start with a chain circle instead, but magic rings create a tighter, neater center that’s preferred for amigurumi.
How do I clean and care for my finished crochet turtle?
Spot clean with a damp cloth for small stains. If needed, hand wash gently in cool water and reshape while drying. Avoid machine washing to keep the stuffing intact and the shape neat.
Pin This Recipe!
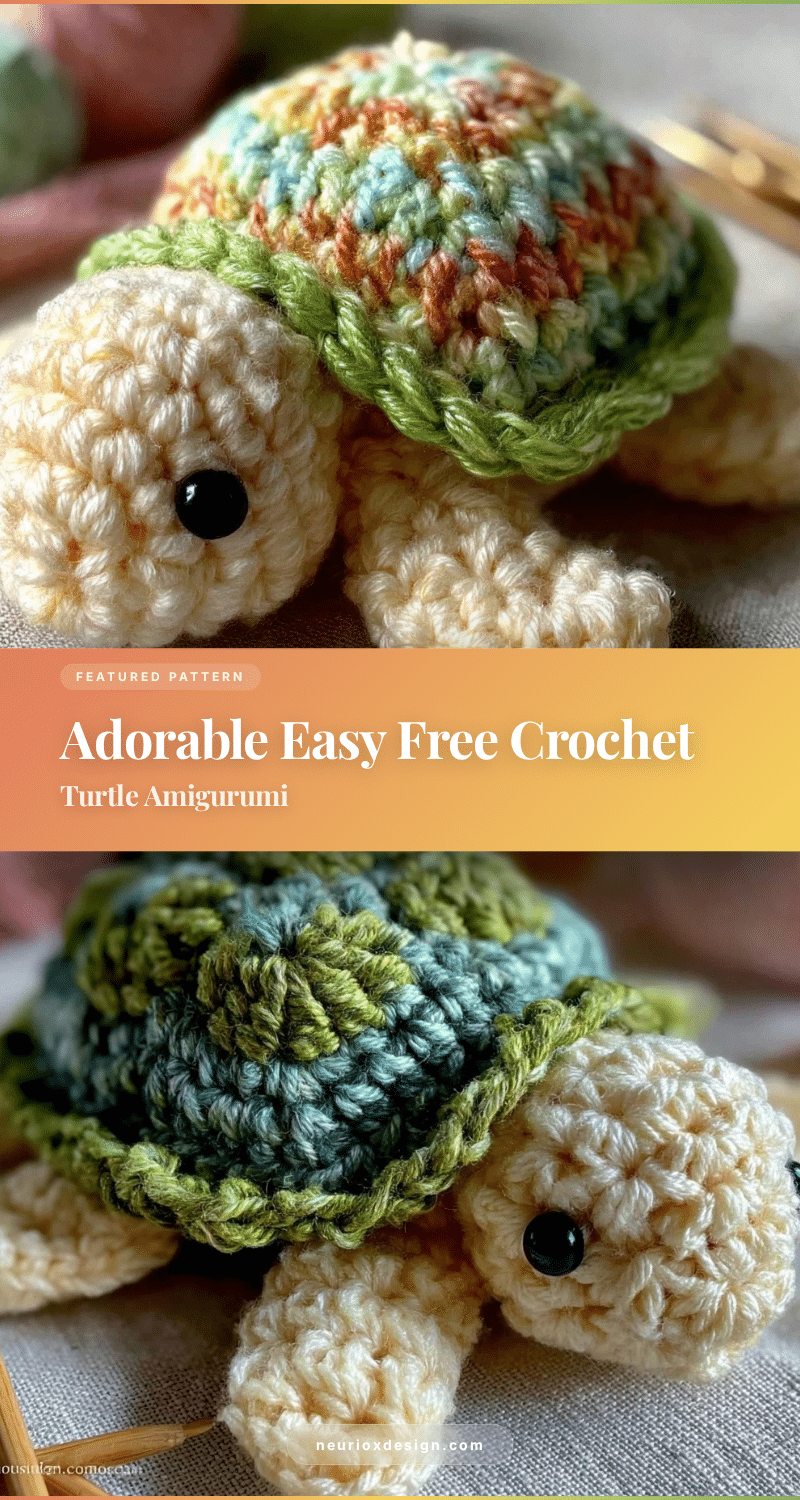
Easy Free Crochet Turtle Amigurumi Pattern for Beginners to Make Perfect Gifts
- Total Time: 2 hours
- Yield: 1 turtle amigurumi
Description
A beginner-friendly crochet pattern to create adorable turtle amigurumi, perfect for gifts or personal projects. This pattern is simple, quick, and satisfying to make.
Ingredients
- Worsted Weight Yarn (Medium 4), approx. 50g each in two colors (shell and body)
- Size G (4.0 mm) Crochet Hook
- Polyester Fiberfill Stuffing
- Tapestry Needle
- Safety Eyes (optional, size 9mm or 12mm) or black embroidery floss
- Stitch Marker
- Scissors
- Optional: Fabric Glue
- Optional: Embroidery Floss
Instructions
- Start with the Shell: Using darker yarn, create a magic ring and crochet 6 single crochets (sc) into it. Pull tight to close the ring.
- Increase Rounds: Work 2 sc in each stitch around (12 stitches total). Next round, alternate 1 sc and 2 sc in one stitch (18 stitches). Continue increasing evenly until you reach about 36 stitches around.
- Work Even Rounds: Crochet several rounds with 1 sc in each stitch (no increases) to build the shell height, usually 5-6 rounds.
- Start Decreasing: Begin to decrease by skipping stitches evenly to close the shell. Stuff lightly with fiberfill before fully closing.
- Make the Head: With lighter yarn, create a magic ring, crochet 6 sc, then increase to 12 stitches in the next round. Work even rounds to shape the head, then start decreasing and stuff before closing. Attach safety eyes before closing if using.
- Legs and Tail: Crochet small oval shapes for legs using 6-8 stitches per side, work a few rounds, stuff lightly, and close. The tail is a tiny cone shape worked in fewer stitches.
- Assembly: Sew the head, legs, and tail onto the shell using the tapestry needle. Position evenly and weave in all loose ends.
Notes
Keep tension consistent for best results. Use stitch markers to track rounds. Stuff firmly but not overstuffed to maintain shape. Pin pieces before sewing to avoid shifting. Magic ring technique recommended for a neat start. For vegan or allergy-friendly options, use plant-based stuffing and acrylic yarn.
- Prep Time: 10 minutes
- Cook Time: 1 hour 50 minutes
- Category: Craft
- Cuisine: N/A
Nutrition
- Serving Size: One small turtle ami
Keywords: crochet turtle, amigurumi, beginner crochet pattern, handmade gift, easy crochet, turtle toy, yarn craft
