

“You’ve got to try these strawberry cheesecake cups,” my friend texted me one sleepy Sunday afternoon. Honestly, I was more about a quick nap than dessert at that moment, but the idea of something fresh, cool, and no-fuss was oddly appealing. I wasn’t expecting much—just another sweet treat to pass the time. But, oh boy, these cups surprised me big time. The balance of creamy cheesecake filling with the bright, juicy strawberries was exactly what my tired brain and taste buds needed. No oven, no mess, just pure bliss in a cup.
It kind of became my go-to when I needed a little pick-me-up without a whole production in the kitchen. I even made it a few times in one week—once for myself, once for a friend who dropped by unexpectedly. It’s the kind of recipe that’s light enough to feel like a fresh snack but still hits that cheesecake craving perfectly. I guess what stuck with me was how easy it was to throw together and how it felt like a mini celebration every time I scooped a bite.
It’s funny how the simplest recipes sneak into your routine and become little moments of joy without any fuss. These strawberry cheesecake cups are just that—refreshing, quick, and honestly, a bit addictive. If you’re looking for a fresh treat that doesn’t require turning on the oven or waiting forever, this recipe might just quietly become your new favorite too.
Why You’ll Love This Recipe
From my own kitchen trials and countless happy bites, here’s why these easy no-bake strawberry cheesecake cups stand out:
- Quick & Easy: Comes together in about 15 minutes, no baking needed, perfect for last-minute dessert cravings or when you want something fresh without the fuss.
- Simple Ingredients: You probably have everything on hand—cream cheese, strawberries, a bit of sugar, and some graham crackers or cookies for the base.
- Perfect for Any Occasion: Whether it’s a casual family snack, a light dessert after dinner, or even a charming addition to brunch, these cups fit right in.
- Crowd-Pleaser: Kids and adults alike love the creamy texture paired with fruity sweetness. It’s one of those “can I have seconds?” recipes.
- Unbelievably Delicious: The velvety cheesecake filling with just the right tang, combined with fresh strawberries, creates a refreshing yet indulgent bite every time.
This recipe isn’t just your average no-bake cheesecake cup. The secret lies in whipping the cream cheese perfectly smooth and folding in just enough sweetness and zest to keep it lively, not heavy. Plus, layering it with fresh strawberries rather than jam makes a noticeable difference in brightness and texture. It’s a little tweak I picked up from testing other no-bake desserts, and honestly, it makes all the difference.
So, if you want a dessert that feels homemade, fresh, and fuss-free, this is it—the kind of recipe that makes you close your eyes after the first bite and smile quietly to yourself.
What Ingredients You Will Need
This recipe uses simple, wholesome ingredients to deliver bold flavor and satisfying texture without the fuss. Most are pantry staples or easy to find fresh at any market.
- Cream Cheese, softened (I prefer Philadelphia for its smoothness and reliable flavor)
- Heavy Whipping Cream, cold (for that perfect creamy lift)
- Granulated Sugar (balances the tang of the cream cheese)
- Vanilla Extract (adds warmth and depth to the cheesecake filling)
- Fresh Strawberries, hulled and sliced (the star of the show—choose ripe, juicy ones for best results)
- Graham Crackers or Digestive Biscuits, crushed (forms a crunchy base; use gluten-free crackers if needed)
- Butter, melted (to bind the crust together)
- Lemon Zest (optional but highly recommended for a fresh zing)
If you want to keep things dairy-free, you can swap the cream cheese with a plant-based alternative and use canned coconut cream instead of heavy cream. For a gluten-free option, almond flour mixed with crushed nuts can stand in for the graham cracker crust.
In summer, I like swapping half the strawberries with fresh blueberries for a little color pop and flavor variety. When berries aren’t in season, frozen ones can work too—just thaw and drain excess liquid before layering.
Equipment Needed
- Mixing Bowls: Two medium bowls—one for whipping the cream, another for blending the cream cheese mixture.
- Electric Mixer or Hand Mixer: Essential for getting that smooth, fluffy cheesecake filling.
- Measuring Cups and Spoons: For accuracy, especially with sugar and vanilla.
- Spoons or Spatulas: For folding and layering ingredients gently.
- Serving Cups or Small Jars: Clear glass cups work great to show off the layers.
- Food Processor or Ziplock Bag and Rolling Pin: To crush the graham crackers or cookies.
If you don’t have an electric mixer, a sturdy whisk and a bit of elbow grease can get you there, but the texture won’t be quite as airy. For budget-friendly gear, basic handheld mixers work wonderfully and don’t take up much space.
Preparation Method
- Crush the Graham Crackers: Measure 1 1/2 cups (150g) of graham crackers or digestive biscuits. Place them in a food processor and pulse until fine crumbs form. No processor? Toss them in a ziplock bag and crush with a rolling pin. Transfer crumbs to a bowl.
- Make the Crust Base: Add 5 tablespoons (70g) melted unsalted butter to the crumbs and mix until the crumbs are evenly coated and hold together when pressed. This should take about 3 minutes. Press a spoonful of this mixture into the bottom of each serving cup to form a thin crust layer.
- Whip the Cream: Pour 1 cup (240ml) cold heavy whipping cream into a chilled bowl. Beat on medium-high speed until stiff peaks form, about 3-4 minutes. Be careful not to overwhip—it should be light and airy, not grainy.
- Prepare the Cheesecake Filling: In another bowl, beat 8 ounces (225g) softened cream cheese with 1/2 cup (100g) granulated sugar and 1 teaspoon vanilla extract until smooth and creamy, about 2-3 minutes. Add 1 teaspoon finely grated lemon zest here if you’re using it.
- Fold in the Whipped Cream: Gently fold the whipped cream into the cream cheese mixture using a spatula. Do this carefully to keep the mixture light and fluffy, about 1-2 minutes of slow folding.
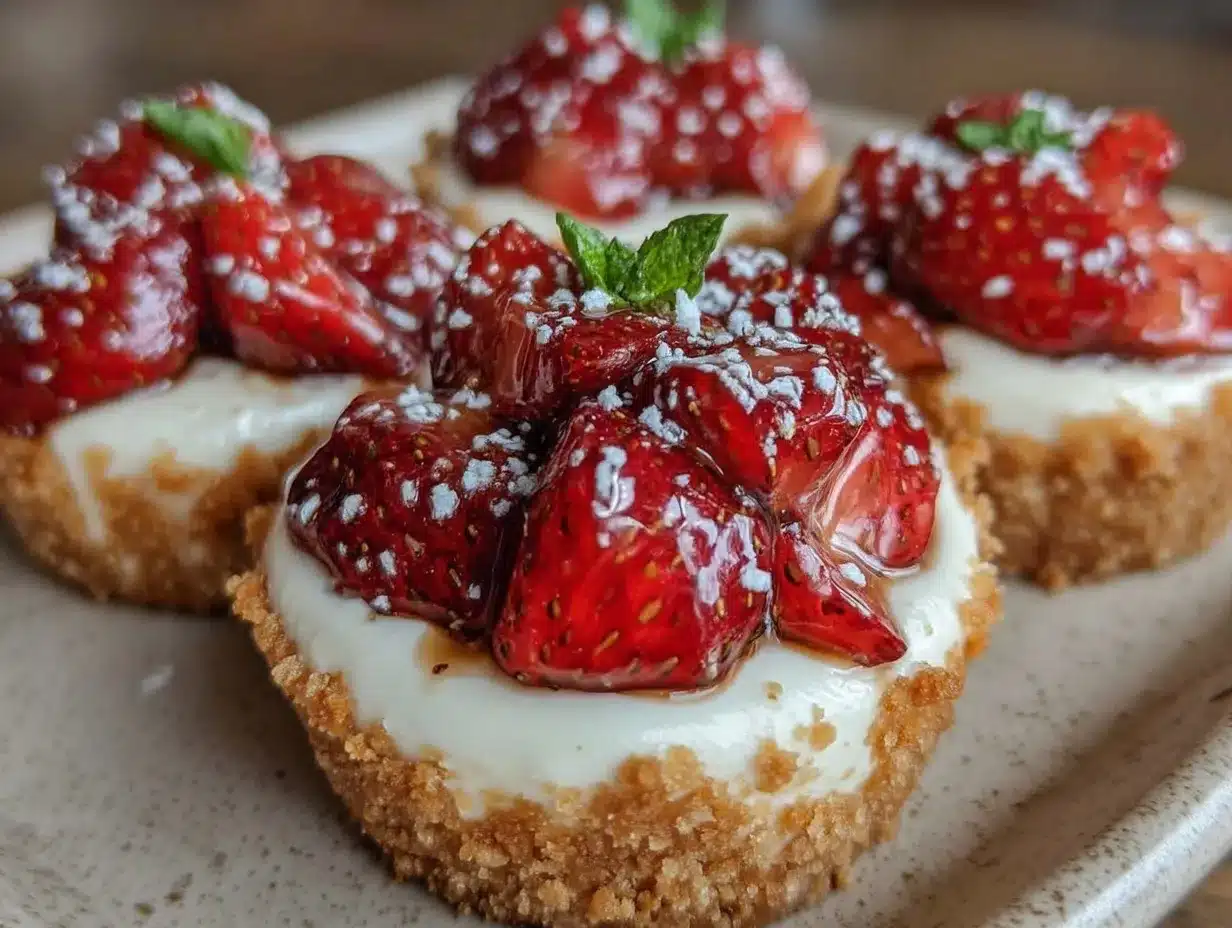
- Assemble the Cups: Spoon or pipe a layer of cheesecake filling over the crust in each cup, filling about half the cup. Then add a layer of sliced fresh strawberries (about 1/4 cup per cup). Repeat with another layer of filling and top with more strawberries.
- Chill: Cover the cups with plastic wrap or lids and refrigerate for at least 2 hours, preferably 4, so the filling firms up and flavors meld.
- Serve: Just before serving, garnish with a sprig of mint or a light dusting of powdered sugar if you’re feeling fancy. Serve chilled straight from the fridge.
Pro tip: If the mixture seems too stiff or dry when folding, a tablespoon of milk can smooth it out without thinning the texture noticeably. Also, make sure the cream cheese is fully softened for a smoother filling—cold lumps can ruin the texture.
Cooking Tips & Techniques
Getting that creamy, fluffy texture is key here, and knowing a few tricks can save you some frustration:
- Softening Cream Cheese: Don’t rush it in the microwave. Let it sit at room temperature for about 30 minutes. If you’re in a hurry, cut it into small cubes for quicker softening.
- Whipping Cream Perfectly: Chill your bowl and whisk in the freezer for 10-15 minutes before whipping. Cold tools help cream whip up faster and fluffier.
- Folding Technique: Use a gentle folding motion, scraping the sides and bottom of the bowl to blend without deflating the whipped cream.
- Strawberry Prep: Slice strawberries evenly so each cup has a consistent texture and look. If you find strawberries watery, pat them dry gently with paper towels to avoid soggy layers.
- Chilling Time: Don’t skip the chilling step. The cheesecake cups set better and taste more cohesive after a couple of hours in the fridge.
Believe me, I’ve learned the hard way that rushing through softening or skipping the chill can turn this creamy masterpiece into a sad, runny mess. Taking these small steps makes a big difference in the final texture and presentation.
Variations & Adaptations
This recipe is pretty flexible, so feel free to mix it up depending on what you have or your cravings:
- Berry Mix: Swap strawberries for raspberries, blueberries, or blackberries—or a combo for a colorful berry medley.
- Chocolate Lovers: Add a tablespoon of cocoa powder to the cream cheese filling for a subtle chocolate twist.
- Vegan Version: Use vegan cream cheese and coconut cream, and substitute the crust with crushed nuts mixed with coconut oil.
- Crunch Upgrade: Mix some toasted chopped almonds or pecans into the crust for extra texture.
- Flavor Boost: A splash of lemon juice or a pinch of cinnamon can add a fresh or warm note to the filling.
I once added a layer of homemade berry compote between the crust and the filling for a richer, jammy surprise. It took the cups to a slightly fancier level but kept the fresh vibe intact.
Serving & Storage Suggestions
These strawberry cheesecake cups are best served chilled, straight from the fridge. The cool temperature enhances the creamy texture and the fresh strawberry flavor.
For presentation, layering the strawberries on top adds a bright, inviting pop of color. A small fresh mint leaf or a light sprinkle of powdered sugar can add a nice touch if you’re serving guests.
They pair beautifully with a cup of coffee or a light, fruity iced tea, making them a perfect finish to brunch or a casual dinner. If you want to keep the fresh vibe going, try serving alongside a simple green salad like the Green Goddess Salad.
Store leftovers covered in the fridge for up to 3 days. The crust may soften slightly over time but still tastes great. When reheating, just let them sit at room temperature for about 10 minutes—no microwave needed.
The flavors actually deepen a bit if you let them rest overnight, so these cups make a great make-ahead dessert for entertaining.
Nutritional Information & Benefits
Each serving of these easy no-bake strawberry cheesecake cups contains roughly 250-300 calories, depending on portion size and crust thickness.
Key ingredients like strawberries provide vitamin C and antioxidants, while cream cheese offers calcium and protein. Using fresh fruit keeps the dessert light compared to heavier cakes, and since it’s no-bake, there’s no added oils or fats from baking processes.
If you want to reduce sugar, you can cut the granulated sugar by a third or swap it for natural sweeteners like honey or maple syrup. Just keep in mind this will slightly alter the texture and sweetness level.
This recipe fits nicely into gluten-free or low-carb diets with appropriate substitutions (gluten-free crackers or almond flour crust, sugar alternatives). Just watch out for dairy if you’re sensitive, and try the vegan version if needed.
Conclusion
In a world of complicated desserts, these easy no-bake strawberry cheesecake cups are a breath of fresh air. They come together quickly, require minimal ingredients, and deliver a bright, creamy treat that feels special without any stress.
Feel free to tweak the layers or berry choices based on what you love or have on hand—this recipe is forgiving and adaptable. I love how it’s become my little secret weapon for satisfying sweet cravings with something fresh and homemade.
If you try them, I’d love to hear how you made them your own or what moments you enjoyed them in. There’s something quietly joyful about a dessert that’s as simple as it is delicious, and this one fits that bill perfectly.
Frequently Asked Questions
Can I make these strawberry cheesecake cups ahead of time?
Yes! They actually taste better after chilling for a few hours or overnight. Just keep them covered in the fridge until serving.
What can I use instead of graham crackers for the crust?
You can use digestive biscuits, crushed cookies, or even crushed nuts mixed with a bit of melted butter for a gluten-free option.
How do I prevent the strawberries from making the crust soggy?
Pat the strawberries dry with a paper towel before layering, and avoid slicing them too thin. Also, placing the crust layer firmly and chilling helps keep it intact.
Can I use frozen strawberries?
Yes, but make sure to thaw and drain any excess liquid to avoid watery cups.
Is there a vegan alternative to the cream cheese filling?
Absolutely. Use vegan cream cheese and replace heavy cream with chilled coconut cream for a similar creamy texture.
Pin This Recipe!
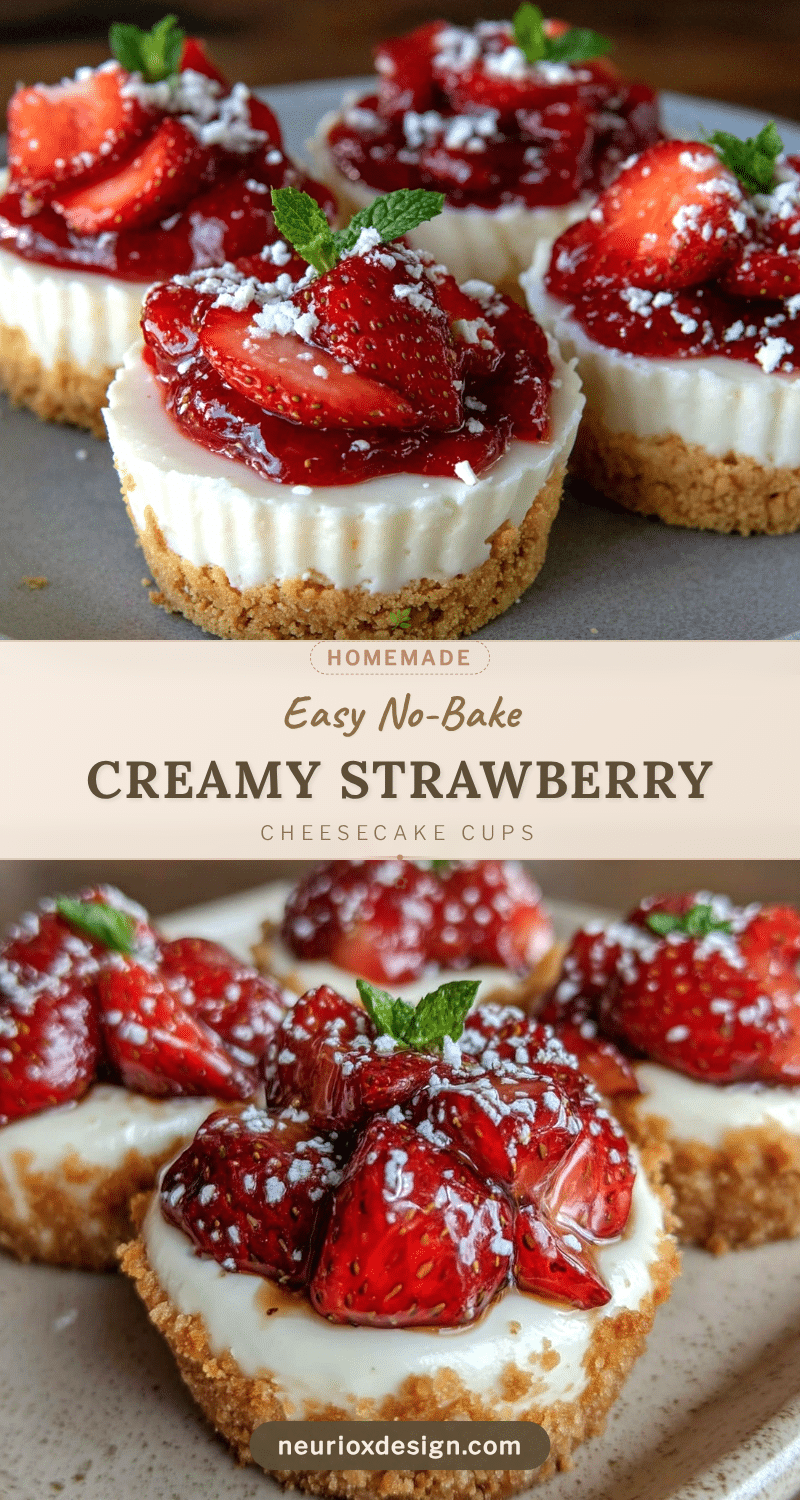

Easy No-Bake Strawberry Cheesecake Cups
- Total Time: 2 hours 15 minutes
- Yield: 6 servings 1x
Description
A quick and refreshing no-bake dessert featuring creamy cheesecake filling layered with fresh strawberries and a crunchy graham cracker crust. Perfect for a light treat without any oven fuss.
Ingredients
- 8 ounces (225g) cream cheese, softened
- 1 cup (240ml) heavy whipping cream, cold
- 1/2 cup (100g) granulated sugar
- 1 teaspoon vanilla extract
- 1 teaspoon finely grated lemon zest (optional)
- 1 1/2 cups (150g) graham crackers or digestive biscuits, crushed
- 5 tablespoons (70g) unsalted butter, melted
- 1 cup fresh strawberries, hulled and sliced (about 1/4 cup per serving cup)
Instructions
- Crush the graham crackers or digestive biscuits into fine crumbs using a food processor or by placing them in a ziplock bag and crushing with a rolling pin. Transfer crumbs to a bowl.
- Add melted unsalted butter to the crumbs and mix until evenly coated and the mixture holds together when pressed, about 3 minutes.
- Press a spoonful of the crust mixture into the bottom of each serving cup to form a thin crust layer.
- Pour cold heavy whipping cream into a chilled bowl and beat on medium-high speed until stiff peaks form, about 3-4 minutes. Avoid overwhipping.
- In another bowl, beat softened cream cheese with granulated sugar and vanilla extract until smooth and creamy, about 2-3 minutes. Add lemon zest if using.
- Gently fold the whipped cream into the cream cheese mixture using a spatula, folding slowly to keep the mixture light and fluffy, about 1-2 minutes.
- Spoon or pipe a layer of cheesecake filling over the crust in each cup, filling about half the cup.
- Add a layer of sliced fresh strawberries (about 1/4 cup per cup).
- Repeat with another layer of cheesecake filling and top with more strawberries.
- Cover the cups with plastic wrap or lids and refrigerate for at least 2 hours, preferably 4, to allow the filling to firm up and flavors to meld.
- Before serving, optionally garnish with a sprig of mint or a light dusting of powdered sugar. Serve chilled.
Notes
If the mixture seems too stiff or dry when folding, add a tablespoon of milk to smooth it out without thinning the texture noticeably. Make sure cream cheese is fully softened for a smooth filling. Chill the bowl and whisk before whipping cream for better results. Pat strawberries dry to avoid soggy crust. The cheesecake cups taste better after chilling for several hours or overnight.
- Prep Time: 15 minutes
- Cook Time: 0 minutes
- Category: Dessert
- Cuisine: American
Nutrition
- Serving Size: 1 cup serving
- Calories: 275
- Sugar: 14
- Sodium: 150
- Fat: 20
- Saturated Fat: 12
- Carbohydrates: 18
- Fiber: 1
- Protein: 4
Keywords: no-bake cheesecake, strawberry dessert, easy dessert, quick dessert, no oven dessert, cheesecake cups, fresh strawberries, summer dessert
