
When I first decided to revamp my workspace, I knew I wanted something that balanced functionality with a timeless aesthetic. That’s when I stumbled upon the idea of incorporating a DIY pegboard into a mid-century modern theme. The clean lines, warm wood tones, and practical storage solutions of this design style made it the perfect choice for creating a workspace that’s both chic and productive. Did you know that studies show a well-organized workspace can boost productivity by up to 20%? That stat alone was enough motivation to get started. Let me walk you through how you can create your own stunning DIY pegboard setup that complements a mid-century modern workspace while keeping everything within reach.
What Makes Mid-Century Modern Style So Iconic?
The mid-century modern style is all about simplicity, functionality, and beauty. This design aesthetic, which gained popularity in the mid-20th century, is characterized by clean lines, organic curves, and a focus on materials like wood, metal, and leather. It creates a sense of openness and warmth, making it a favorite for modern workspaces.
A mid-century modern workspace radiates sophistication while keeping things minimal. Think tapered wooden furniture, muted color palettes, and sleek finishes. It’s a design style that’s as much about practicality as it is about looks. Inspiration can be drawn from iconic designers like Charles and Ray Eames or homes featured in period dramas like “Mad Men.”
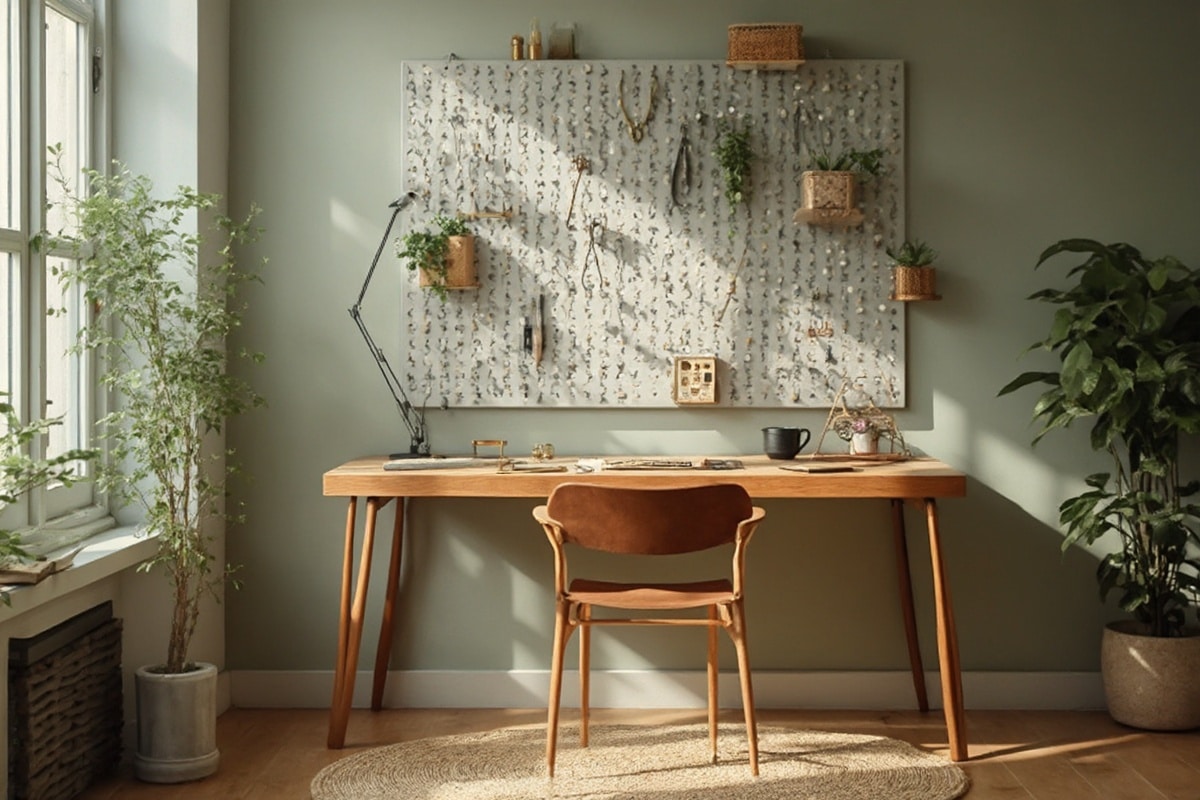
Incorporating a pegboard into this style adds a layer of retro charm while keeping your tools, office supplies, and decorative elements neatly organized. The pegboard itself can become a design feature, blending seamlessly with the mid-century modern aesthetic while serving as a functional focal point. It’s a win-win for design lovers and organization enthusiasts alike.
Planning Your Mid-Century Modern Pegboard Workspace

Before diving into any project, it’s always a good idea to step back and assess your space. Start by evaluating the size of your workspace and deciding where the pegboard will be most effective. Will it hang above your desk, or will it be a larger installation that spans an entire wall? Measure the area carefully and consider the layout of furniture and lighting in the room.
Next, define your goals for the pegboard. Are you using it primarily for storage, or do you want it to double as a decorative element? For a mid-century modern look, aim for a balance between form and function. Think about incorporating wooden shelves, metal hooks, and even a few potted plants to bring the design to life.
Once you’ve mapped out the logistics, create a mood board to refine your vision. Gather inspiration from Pinterest, design magazines, or even vintage furniture catalogs. Focus on elements that align with the mid-century modern style, such as walnut finishes, brass accents, and a muted color palette. This will help you stay focused when selecting materials and designing the layout of your pegboard.
One tip I’ve found helpful is to sketch out the pegboard design on paper or use free online tools to plan the arrangement of hooks, shelves, and other accessories. This step might take a little extra time, but it ensures you’ll be happy with the final look and functionality!
Materials and Shopping Guide

Here’s a list of materials you’ll need to create your stunning DIY pegboard setup:
- Plywood or pre-cut pegboard (choose birch or walnut for a mid-century look)
- Wood stain or paint (opt for warm tones like walnut or teak)
- Hooks, pegs, and brackets for hanging items
- Floating shelves or wooden dowels
- Drill, screws, and wall anchors
- Sandpaper (medium and fine grit)
- Measuring tape, level, and pencil
If you’re on a budget, check out local hardware stores or secondhand shops for affordable materials. Many online retailers also offer inexpensive hooks and brackets that work perfectly with pegboards. Keep an eye out for sales at home improvement stores, and don’t be afraid to repurpose materials you already have!
Step-by-Step Guide to Building Your DIY Pegboard

- Prepare the Pegboard: Sand the edges of your pegboard to ensure a smooth finish. If you’re working with plywood, drill evenly spaced holes using a pegboard template to maintain consistency.
- Stain or Paint: Apply a wood stain or paint that aligns with the mid-century modern aesthetic. Warm walnut or teak tones work beautifully. Let it dry completely before moving to the next step.
- Mark the Wall: Use a pencil and level to mark where the pegboard will be installed. Ensure it’s centered and at a comfortable height for access.
- Install Wall Anchors: Depending on the weight of your pegboard, use appropriate anchors to secure it. This step is crucial for stability.
- Mount the Pegboard: Drill the pegboard into place, checking with a level to ensure it’s perfectly straight.
- Add Accessories: Attach hooks, shelves, and brackets as desired. Play around with the arrangement until it feels balanced and functional.
- Style the Pegboard: Add office supplies, small plants, and decorative items that complement the mid-century modern theme. Less is more, so keep it clean and simple.
Styling Tips and Design Techniques
To achieve that magazine-worthy mid-century modern look, focus on balance and proportion. Avoid overcrowding the pegboard—leave some negative space to let the design breathe. Incorporate a mix of textures, such as wooden shelves, metal hooks, and ceramic planters, to add visual interest.
Layer items of different heights and sizes for a dynamic composition. For example, place taller objects like a small lamp or vase on the top shelf and smaller items like pens or paperclips on lower hooks. Consider adding a framed piece of art or a mirror to tie the look together.
One lesson I learned is that lighting plays a huge role in design. Position your workspace near natural light, and use a sleek desk lamp or a pendant light in brass or matte black to enhance the mid-century vibe.
Choosing Colors and Textures
For a mid-century modern pegboard setup, stick to a muted color palette with pops of accent colors. Neutral tones like beige, gray, and white pair well with warm wood finishes. Add a splash of color with teal, mustard yellow, or burnt orange accessories.
Mixing textures is key to creating depth. Combine smooth painted surfaces with the natural grain of wood, and introduce soft elements like a fabric notice board or woven baskets. The contrast of textures will make the space feel more dynamic and inviting.
Common Mistakes to Avoid
One common mistake is overloading the pegboard with too many items. This can make the workspace feel cluttered and chaotic. Stick to a few functional and decorative pieces to maintain a clean look.
Another pitfall is neglecting the proportions of the pegboard relative to the room. A pegboard that’s too small might look out of place, while one that’s too large can overwhelm the space. Always measure and plan carefully before installation.
Finally, don’t ignore lighting. A dim or improperly lit workspace can undermine all your design efforts. Ensure you have adequate lighting to highlight your pegboard and workspace.
Budget-Friendly Alternatives
If you’re working with a tight budget, consider upcycling materials. Old plywood can be sanded and stained to look brand new, and thrift stores often have affordable hooks and brackets. For decorative items, shop at dollar stores or try your hand at DIY projects like painting terra-cotta pots.
Splurge on items that are hard to DIY, like a high-quality desk lamp or ergonomic chair, and save on smaller decor pieces. A little creativity goes a long way in achieving a high-end look without breaking the bank.
Conclusion
Creating a mid-century modern workspace with a DIY pegboard setup is a rewarding project that combines style and functionality. By focusing on clean lines, warm materials, and thoughtful organization, you can transform your workspace into a productive and visually stunning environment.
Start small, perhaps with just a single pegboard panel, and build up as you feel more confident. The beauty of this project is in its versatility—it can grow and adapt with your needs.
Good design has the power to inspire and uplift, and there’s no better place to start than your own workspace. So, grab your tools and materials, and let the transformation begin!
FAQs About Mid-Century Modern Pegboard Workspaces
What size should my pegboard be?
The size depends on your workspace and needs. Measure your wall space and choose a size that complements your desk without overwhelming the room.
What materials work best for a mid-century modern pegboard?
Opt for plywood or pre-cut pegboards with a wood veneer finish. Warm tones like walnut or teak are ideal for achieving the mid-century look.
Can I paint my pegboard instead of staining it?
Yes! While wood stains are more traditional for mid-century modern design, muted paint colors like white, gray, or mustard can also work beautifully.
How do I keep the pegboard organized?
Group similar items together and use a mix of hooks, shelves, and containers. Regularly declutter to maintain a clean and functional space.
What’s the best way to style a mid-century modern workspace?
Focus on clean lines, warm wood tones, and minimal decor. Add pops of color with accessories and layer textures for a balanced, polished look.
