
If you’re anything like me, the kitchen island is more than just a prep space—it’s the heart of the home. When I first decided to tackle modern farmhouse kitchen organization, I had no idea how much a well-planned island command center could change my family’s daily routine. Now, I can’t imagine our mornings without it. From a simple spot for coffee to a fully functional hub for mail, homework, and meal planning, the right decor makes all the difference. Did you know that 68% of homeowners say their kitchen island is their most-used workspace? I believe it, and after transforming mine, I’ve helped friends and clients create their own stunning command centers. Today, I’m excited to share the ideas, tips, and lessons I’ve learned—so you can make your kitchen both beautiful and brilliantly organized.
Imagine walking into your kitchen and seeing a tidy, stylish island where everything has a place. No more lost permission slips, missing grocery lists, or cluttered counters. With the right approach to modern farmhouse decor, you can design an island command center that’s both practical and Pinterest-worthy. Whether you’re dreaming of a rustic, cozy vibe or a crisp, contemporary look, these ideas are for anyone who wants their kitchen to work as hard as they do. Let’s dive in and see how a few simple changes can transform your space—and maybe even your mornings.
What Defines Modern Farmhouse Kitchen Style?
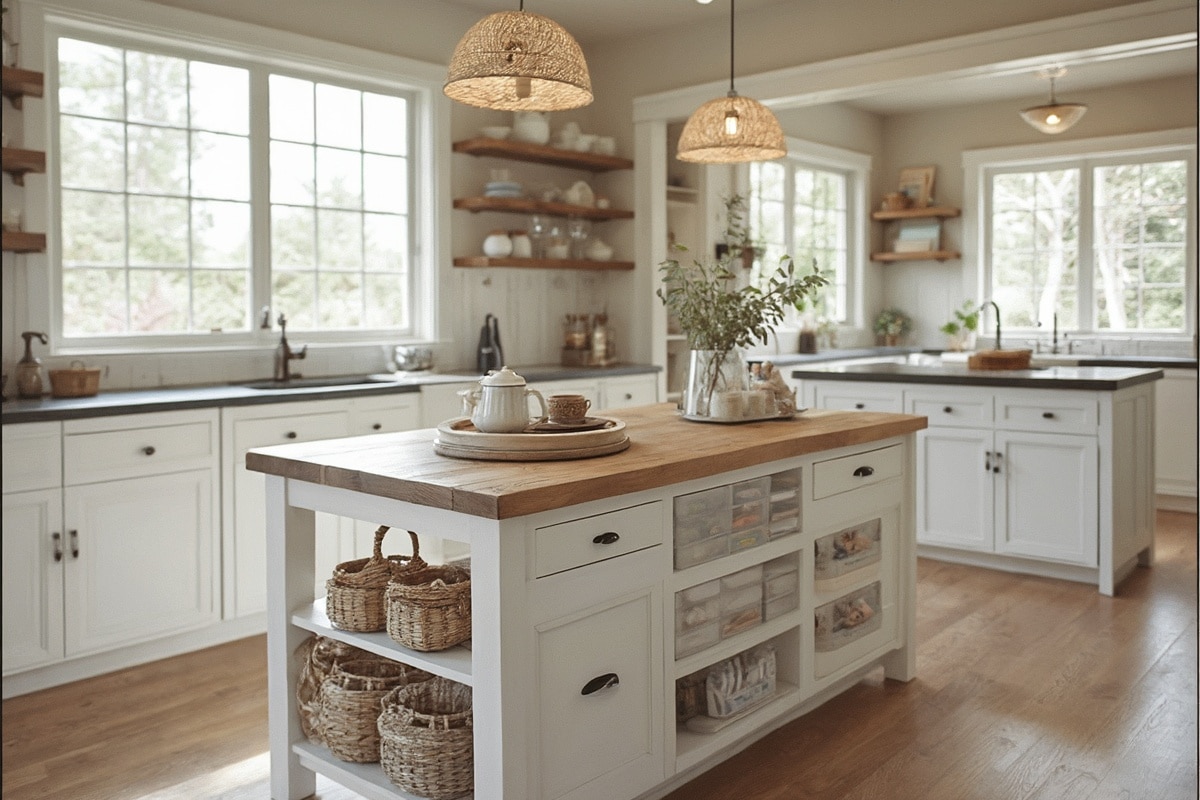
Modern farmhouse decor combines the warmth of country living with clean, contemporary lines. Think shiplap walls, matte black hardware, wide plank floors, and those charming apron-front sinks. But it’s not just about the big features—the little details, from woven baskets to antique-inspired lighting, all contribute to the laid-back but polished vibe.
The mood in a modern farmhouse kitchen is relaxed and welcoming. You’ll often see a mix of textures: smooth marble or quartz countertops set against reclaimed wood, soft linen runners on sturdy islands, and classic subway tile with a twist of bold grout. The look is timeless but fresh, never fussy. It’s inspired by rural homes, but it feels right at home in both country and urban settings.
This style has roots in traditional American farmhouses, where practicality was as important as beauty. Today, celebrities like Joanna Gaines and Reese Witherspoon showcase modern farmhouse kitchens with oversized islands, open shelving, and carefully chosen vintage finds. Open layouts and airy spaces are key, but so is personality—your decor should reflect your family’s life and routines.
Modern farmhouse remains a top trend, appearing in top design magazines and on social media feeds everywhere. What I love most is how flexible it is; you can go bold with deep navy cabinets (try Sherwin-Williams “Naval” #SW6244) or keep things soft with creamy whites and pale greys. Either way, the kitchen island is the anchor—a place to gather, organize, and create memories.
How Do You Plan a Modern Farmhouse Island Command Center?
Before you rearrange a single drawer, take a little time to assess your kitchen space. Measure your island: typical kitchen islands are 36-48 inches wide and 60-90 inches long. Make a quick sketch, noting outlets, lighting, and where you usually pile up mail or charge devices. This helps you see what’s working—and what isn’t.
Next, get clear on your goals. Are you desperate for a place to sort school papers? Dreaming of a coffee bar that doesn’t hog counter space? Maybe you want a hidden charging station or a weekly meal planning zone. Write down your must-haves and nice-to-haves. I like to use sticky notes so I can move ideas around on my sketch.
Creating a mood board is the fun part. Grab paint swatches, print Pinterest images, and collect samples of wood, metal, or fabric. Don’t overthink it—go with your gut. My first mood board for a client’s island command center had way too many ideas, but it helped us narrow down the essentials. Include decor keywords like “wire baskets,” “chalkboard labels,” or “galvanized trays” to keep your vision focused.
When making decisions, use the “zone method”: group similar functions together. For example, dedicate one end of the island to paperwork with a mail sorter and pen cup, and the other to snacks with jars or a fruit bowl. Think about vertical space, too: wall-mounted organizers or hooks can double your storage. I always recommend leaving 18-24 inches of open counter for food prep—even the most organized command center needs space to breathe.
Don’t forget to factor in your family’s habits. If your kids dump backpacks on the island every day, plan a spot for them. If you meal prep on Sundays, add a chalkboard or whiteboard for your weekly menu. The best decor solutions are the ones that fit your real life, not just the photos you see online.
What Materials and Tools Do You Need?
Building a modern farmhouse kitchen island command center doesn’t have to break the bank. Here are some staple items:
- Wire or woven baskets (12” x 8” or similar)
- Chalkboard or dry erase board (18” x 24” works well)
- Glass jars with lids for snacks or utensils
- Metal or wooden mail sorter
- Wall hooks or under-counter hooks for keys and bags
- Clip-on task lamp or pendant lighting
- Trays—galvanized metal or rustic wood
- Pen holder or divided utensil crock
- Charging station (outlet strip + cord organizer)
For budget-friendly alternatives, check out thrift stores for baskets and jars, or repurpose old wooden crates. Target, IKEA, and HomeGoods have great farmhouse-inspired finds. High-end pieces, like marble trays or custom-built organizers, are lovely but not essential. Watch for end-of-season sales—spring is perfect for baskets, while fall brings markdowns on storage bins. DIYers can paint old frames to make chalkboards or use peel-and-stick wallpaper for a pop of color on drawer fronts.
How Do You Set Up a Farmhouse Island Command Center? Step-by-Step Guide

- Declutter and Deep Clean (30-60 minutes):
Clear everything from your island. Wipe down all surfaces—don’t forget drawer interiors and cabinet doors. Toss broken pens, expired coupons, and lonely socks that have made their way here (trust me, it happens!).
- Map Your Zones (20 minutes):
Using your earlier sketch, mark areas for paperwork, snacks, tech, and meal planning. Place sticky notes or painters’ tape to visualize the layout. This helps you see if you’re cramming too much into one area.
- Install Organizers (30-45 minutes):
Add hooks under the island counter for keys or lunch bags. Mount a chalkboard or whiteboard on the end panel or nearby wall. Place baskets and mail sorters in their designated spots. If you’re using wall organizers, use a level for a neat, professional look.
- Set Up Charging Station (10-20 minutes):
Plug in a small outlet strip at the back of the island. Use a cord organizer or small basket to keep cords tidy. Label charging spots for each family member if needed. Troubleshooting tip: If outlets are limited, use a portable charging block tucked in a drawer.
- Organize Supplies (20-30 minutes):
Fill jars with snacks, pens, or utensils. Use trays to group items—snacks on one, paperwork on another. Label baskets with chalkboard tags or adhesive labels. This makes it easy for everyone to find things (and just as easy to put them back).
- Style and Personalize (15-25 minutes):
Add a small vase of fresh flowers or a faux plant for a touch of life. Display a favorite family photo or a cute kitchen quote. Layer in a linen runner (try 14” x 48”) for softness and texture.
- Maintain with a Weekly Reset (10-15 minutes):
Set a timer every Sunday evening to tidy the command center. Toss old mail, wipe down surfaces, and refill snacks if needed. This keeps clutter from creeping back and makes mornings a breeze.
Personal tip: When I first set up my island command center, I underestimated how much space school papers needed. Now I keep a file folder for each kid in a wire basket, and it’s a game-changer. Don’t be afraid to tweak your setup after a week or two—real life always reveals what works best.
What Are the Best Styling Tips and Design Techniques?

Professional designers know that the secret to a stunning kitchen island command center is all in the details. Here’s what I’ve learned:
- Layer textures: Mix a woven basket with a smooth ceramic jar and a wooden tray for that cozy farmhouse feel.
- Play with height: Stack a couple of cookbooks under your mail sorter or use a taller vase to balance shorter items.
- Stick to a color palette: Three main shades work best—try creamy white (#F8F5F2), charcoal black (#333333), and natural wood tones.
- Avoid overcrowding: Leave at least 18 inches of open space for food prep and serving.
- Edit ruthlessly: If you don’t use it every week, it doesn’t belong on your island.
One mistake I made early on was filling every inch with cute storage solutions. It looked busy, not beautiful. Less really is more. If something isn’t working—a basket that collects junk or a chalkboard no one writes on—swap it out. Design is about function first, then style. For a magazine-worthy look, add a statement pendant light above your island and keep clutter behind closed doors or in baskets.
How Do You Choose the Right Colors and Textures for Your Command Center?

Color and texture make your kitchen island command center come alive. My go-to modern farmhouse palette is a soft white base (try Benjamin Moore “White Dove” #OC-17), black metal accents, and natural wood. For contrast, add touches of sage green (#A3B18A) or deep navy (#223A5E). These shades work in every season and feel fresh year-round.
Mixing textures is key—combine rough-hewn wooden trays with smooth glass jars and matte black hardware. In spring, I swap in pastel linens or pale blue accents. For fall, I love adding copper or brass details and a chunky knit runner. Accent colors like mustard yellow (#FFD166) or dusty rose (#CFA9A6) can be rotated in with small items like kitchen towels or ceramic bowls.
Personal favorite: I once paired a reclaimed barn wood tray (sealed with clear varnish) with a set of white stoneware canisters—simple, but it made the whole island feel inviting. Remember, texture can come from unexpected places: woven placemats, hammered metal trays, even a basket of apples. The key is to keep the look balanced, not busy.
What Common Design Mistakes Should You Avoid?
Even the most stunning island command centers can go off the rails without a little planning. Here are a few mistakes I’ve made—and how to sidestep them:
- Overstuffing: Too many organizers crowd the island and leave no space for actual work. Limit yourself to three or four main storage solutions.
- Ignoring scale: Oversized trays or baskets can overwhelm a small island, while tiny containers get lost on a large one. Measure twice before buying.
- Bad lighting: A dark island feels cramped and uninviting. Add a pendant light or clip-on task lamp for a warm, functional glow.
- Blocking flow: Keep at least 36 inches of walkway around your island. Don’t let baskets or hooks jut into traffic paths.
I once bought a giant metal tray that looked perfect online but swallowed up half the island in person. Lesson learned: always check measurements before you shop. And don’t be afraid to return or repurpose anything that doesn’t fit your space.
How Can You Achieve a High-End Look on a Budget?
You don’t need a designer budget for stunning modern farmhouse kitchen organization. Try these ideas:
- DIY chalkboards: Paint an old frame with chalkboard paint for a custom look.
- Thrift store baskets: Spray paint mismatched finds matte black or white.
- Repurpose mason jars or tin cans as utensil holders.
- Save on splurges: Invest in a statement pendant light, but use budget-friendly trays and organizers.
- Upcycle wooden crates for rustic mail sorters or snack bins.
My favorite save: I scored four wire baskets for $2 each at a flea market and spray painted them black. They look just like the $30 versions in catalogs! High-end style is all about smart choices, not big spending.
Conclusion: Why Start Your Island Command Center Today?
A well-designed island command center brings order and beauty to your kitchen. It creates space for what matters—family dinners, morning coffee, and those little everyday moments. Whether you start with just a basket and a chalkboard or overhaul your whole island, every small change adds up. I’ve seen firsthand how a little decor and organization can change routines, reduce stress, and make your home feel more welcoming.
Don’t wait for the “perfect” moment or the perfect piece of decor. Start small—add a basket, label a jar, hang a hook. Trust your instincts, adjust as you go, and remember that real homes are made for living, not just for show. Your dream kitchen is closer than you think. Ready to get started? Go organize that island and make every day a little easier—and a whole lot more beautiful.
Frequently Asked Questions About Modern Farmhouse Island Command Centers
How do I keep my island command center from getting cluttered?
Use baskets and trays to group items, and set a weekly reminder to clear papers or expired items. A “one in, one out” rule works wonders—if something new lands on the island, something else needs to go.
What’s the best way to add charging stations without making the island look messy?
Use a small outlet strip tucked at the back of the island and a cord organizer. Store devices in a basket or drawer when not in use for a tidy look.
Can I create a command center on a small kitchen island?
Absolutely. Focus on vertical storage—wall-mounted mail sorters, hooks, and slim trays. Limit to the essentials and keep the rest of the island open for prep.
What are the best farmhouse decor items for organizing kids’ stuff?
Wire baskets for homework, labeled jars for snacks, and chalkboard tags for reminders. Hooks under the counter make great spots for backpacks or lunch bags.
How do I choose the right color scheme for my kitchen?
Start with your existing cabinets and counters. Add one or two accent colors in decor pieces—like sage green or navy blue. Stick to neutrals for large surfaces and have fun with accessories.
