
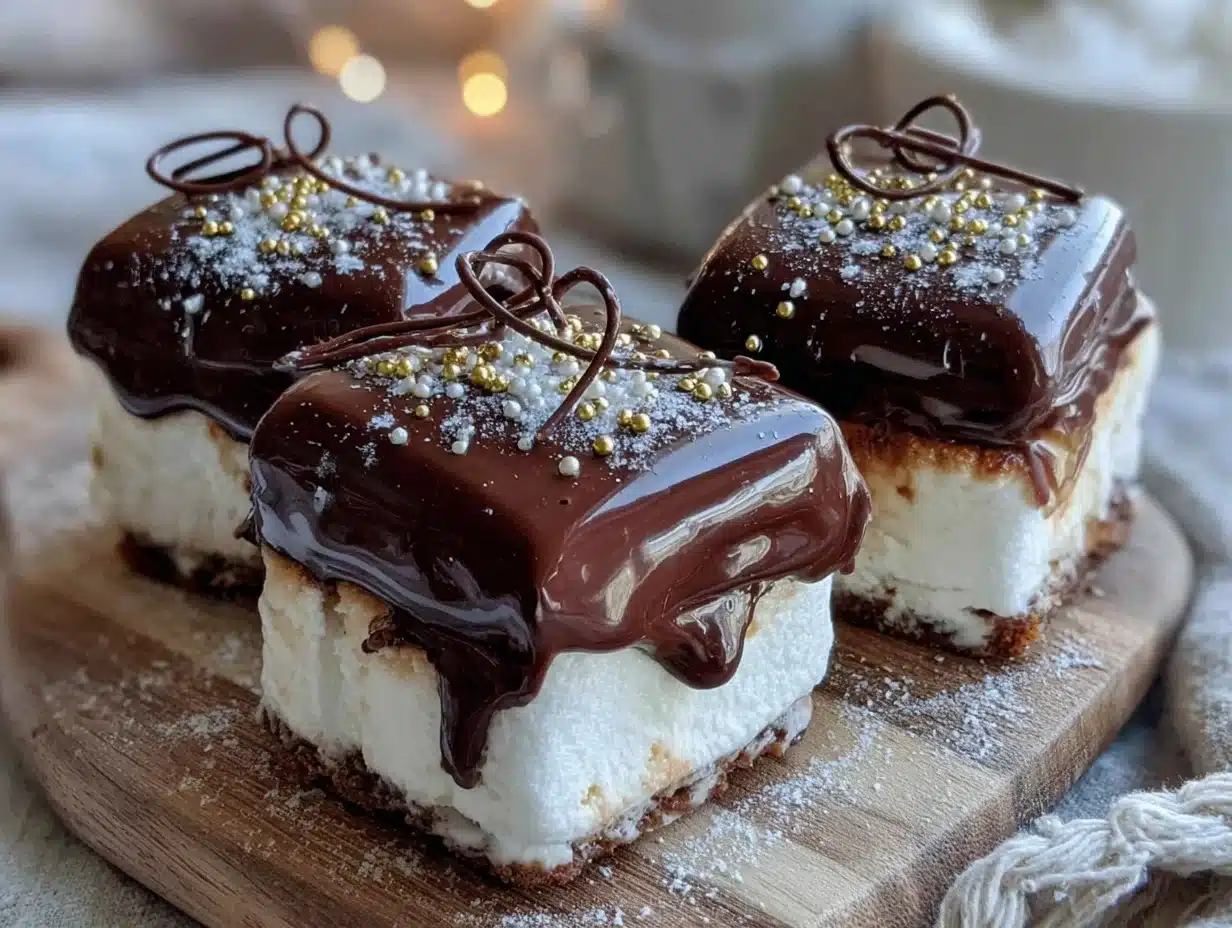
Let me tell you, the smell of melting chocolate mingling with toasted marshmallows is enough to make anyone’s mouth water, especially when it’s for something as fun and festive as these perfect chocolate graduation caps with marshmallow bases. The first time I made these little treats, I was knee-high to a grasshopper, literally watching my grandma whip up batches for family celebrations. Honestly, there’s something about the way the glossy chocolate top meets the pillowy marshmallow base that just feels like pure, nostalgic comfort wrapped in a festive package.
I stumbled upon this recipe years ago during a rainy weekend when I was trying to recreate a sweet I’d seen at a school party. It was the kind of moment where you pause, take a deep breath, and just smile because you know you’re onto something truly special. My family couldn’t stop sneaking them off the cooling rack (and I can’t really blame them). These treats have since become a staple for every graduation party, potluck, and gift basket I put together.
You know what? These perfect chocolate graduation caps are dangerously easy to make, and they brighten up any Pinterest cookie board with their charming look. Whether you’re celebrating your own grad or a loved one, this recipe hits all the right notes — fun, tasty, and memorable. I’ve tested this recipe more times than I can count in the name of research, of course, and trust me, you’re going to want to bookmark this one for your next celebration.
Why You’ll Love This Recipe
This recipe isn’t just another chocolate treat; it’s a crowd-pleaser that’s as quick as it is delicious. Here’s why you’ll want to make these perfect chocolate graduation caps with marshmallow bases ASAP:
- Quick & Easy: Comes together in under 30 minutes, perfect for last-minute celebrations or busy days.
- Simple Ingredients: No fancy grocery trips needed — you likely already have everything in your pantry and fridge.
- Perfect for Graduation Parties: These caps are festive and fun, making them an instant hit at any graduation event or get-together.
- Crowd-Pleaser: Kids and adults alike rave about the gooey marshmallow base paired with the rich chocolate top.
- Unbelievably Delicious: The contrast of textures and the smooth chocolate flavor hits that sweet spot every time.
What makes this recipe stand out? The secret is in the way the marshmallow base is perfectly soft yet sturdy enough to hold the chocolate cap without any sogginess. Plus, the chocolate is tempered just right to give a glossy finish with a satisfying snap. This isn’t just any chocolate cap — it’s the one you’ll want to bring out over and over again.
Honestly, these treats make you close your eyes after the first bite — you know it’s good. They’re comfort food with a celebratory twist, great for impressing guests without the stress. Whether you’re a seasoned baker or a casual cook, this recipe delivers memorable flavor and fun presentation every single time.
What Ingredients You Will Need
This recipe uses simple, wholesome ingredients to deliver bold flavor and satisfying texture without the fuss. Most of these are pantry staples, and substitutions are easy if you need them.
- Large Marshmallows: The base of your caps – soft, pillowy, and perfect for holding the chocolate top. I prefer using classic jumbo marshmallows for the perfect size.
- Semisweet Chocolate Chips or Chopped Chocolate: For the caps, choose a good quality brand like Ghirardelli or Valrhona for the best melting and shine.
- Unsalted Butter: About 2 tablespoons, softened – adds richness and helps the chocolate achieve that perfect glossy finish.
- Vanilla Extract: A teaspoon to add a subtle warmth and depth to the chocolate.
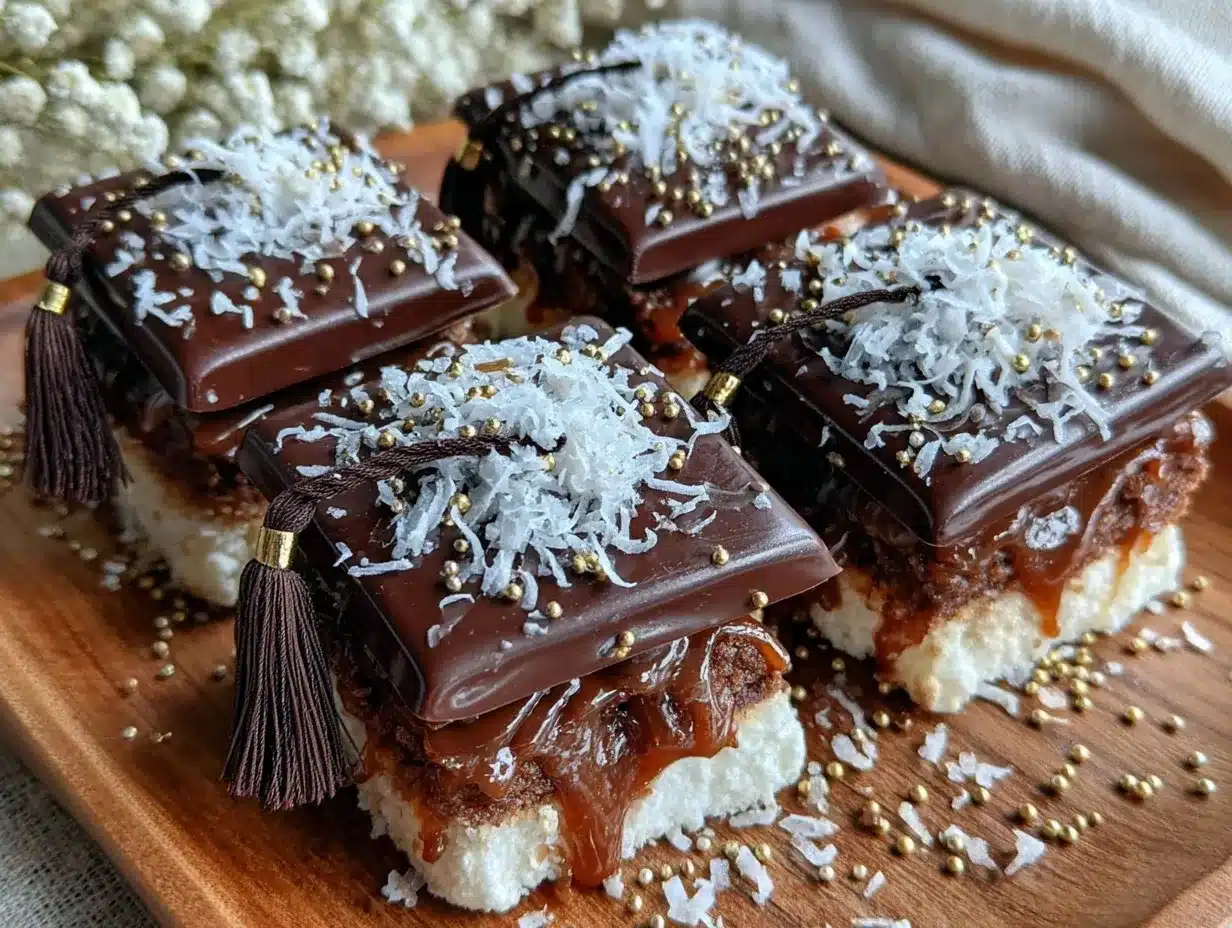
- Black Licorice Strings or Thin Black Candy Strips: For the tassel detail — you can find these in most candy aisles or specialty stores.
- Mini Marshmallows or Small Candy Dots: Optional, for decorating the top or adding a fun accent.
If you want a gluten-free option, this recipe works perfectly as is since none of the ingredients contain gluten. For a dairy-free version, swap butter with coconut oil and check for dairy-free chocolate chips. In summer, you could even add a sprinkle of edible glitter for extra sparkle!
Equipment Needed
- Double Boiler or Heatproof Bowl: For melting the chocolate gently without burning it. If you don’t have one, a microwave-safe bowl works fine with short bursts.
- Baking Sheet: To lay out the marshmallows and let the chocolate caps set.
- Parchment Paper or Silicone Baking Mat: Prevents sticking and makes cleanup a breeze.
- Small Spoon or Offset Spatula: To spread the melted chocolate evenly over the marshmallows.
- Tweezers or Tongs: Handy for placing the licorice tassels and small candy decorations precisely.
I’ve tried making these with just a microwave and a regular plate, and while it’s doable, the double boiler method really gives you the best control over melting. Plus, using parchment paper saved me from a sticky mess more than once — trust me on that!
Preparation Method
- Prepare Your Workspace: Line a baking sheet with parchment paper or a silicone mat. Arrange your jumbo marshmallows spaced about 1 inch apart. This usually takes about 5 minutes.
- Melt the Chocolate: In a double boiler or heatproof bowl set over simmering water, combine the semisweet chocolate chips and softened butter. Stir gently until smooth and glossy, about 5-7 minutes. If using a microwave, heat in 20-second intervals, stirring in between to avoid burning.
- Add Vanilla: Remove the chocolate from heat and stir in the vanilla extract. This step adds a subtle warmth to the chocolate flavor.
- Coat the Marshmallows: Using a small spoon or offset spatula, carefully spoon the melted chocolate over each marshmallow, covering the top completely to form the “cap.” The chocolate layer should be about 1/8 inch thick for the perfect bite. This step takes about 10 minutes.
- Add Tassels: While the chocolate is still wet, place a small piece of black licorice string or candy strip at the center of each cap to mimic the graduation tassel. Press gently to secure.
- Optional Decorations: If you’re using mini marshmallows or candy dots, add them now for extra flair before the chocolate sets.
- Set and Chill: Transfer the baking sheet to the refrigerator for at least 20 minutes, or until the chocolate caps are firm and glossy.
- Serve: Once set, carefully peel the marshmallow graduation caps off the parchment and arrange on a festive platter. Enjoy within 2 days for best freshness.
Pro tip: If your chocolate starts to thicken before you finish coating all marshmallows, gently rewarm it over the double boiler for a few seconds. Also, don’t rush the chilling step — that snap and shine come from proper setting!
Cooking Tips & Techniques
Working with chocolate and marshmallows can be a bit tricky if you’re new to it, but here are some tips I’ve learned the hard way:
- Melting Chocolate: Never let water get into the chocolate when melting; even a drop can cause it to seize up. Use a clean, dry bowl and stir gently.
- Consistency Matters: The chocolate should be thick enough to hold shape but still pourable. Adding butter helps with that glossy, smooth finish.
- Marshmallow Handling: Use jumbo marshmallows that are fresh and soft. Stale marshmallows won’t hold the chocolate well and can become crumbly.
- Work Quickly: Chocolate sets fast once off the heat, so spread it on marshmallows promptly. If it gets too thick, warm gently again.
- Chill Properly: The fridge setting step is key to getting that satisfying snap on the chocolate caps, so don’t skip it.
- Multitasking: While the chocolate melts, prep your marshmallows and decorations. This keeps the process smooth and avoids chocolate hardening too soon.
Variations & Adaptations
These graduation caps are super versatile and can be tweaked to fit different tastes and dietary needs:
- Flavored Chocolate Caps: Mix in a pinch of cinnamon or espresso powder to the melted chocolate for a new twist.
- White Chocolate Version: Swap semisweet chocolate for white chocolate and add a drop of food coloring to match school colors.
- Nutty Crunch: Sprinkle crushed toasted nuts or mini sprinkles on top of the chocolate before it sets for extra texture.
- Vegan Adaptation: Use dairy-free chocolate chips and vegan marshmallows — just make sure your licorice tassels are gelatin-free.
- Seasonal Themes: For winter graduations, dust with edible silver glitter or swap tassels for tiny candy canes for a festive touch.
Personally, I tried adding a pinch of cayenne to the chocolate once for a spicy surprise — it was a hit at a friend’s party! Feel free to get creative and make these caps your own.
Serving & Storage Suggestions
Serve these perfect chocolate graduation caps chilled or at room temperature — both ways are delicious. I like arranging them on a colorful platter with some fresh flowers or confetti for that extra celebration vibe.
Pair them with a cup of milk, coffee, or even a light sparkling beverage to balance the sweetness. They also make a charming addition to dessert tables or party favors.
Store any leftovers in an airtight container in the refrigerator for up to 3 days. If you want to save them longer, freeze the caps in a single layer with parchment paper between layers for up to a month. To enjoy, thaw in the fridge for a few hours before serving.
Fun fact: letting them sit at room temperature for a bit brings out the marshmallow’s softness even more, so feel free to experiment with serving temps.
Nutritional Information & Benefits
Each chocolate graduation cap with marshmallow base contains roughly 120-150 calories, depending on the size and chocolate used. The recipe is naturally gluten-free and can be adapted for dairy-free diets.
While these treats are definitely a sweet indulgence, the quality dark chocolate offers antioxidants and a mood-boosting effect. Marshmallows are mostly sugar, so these are perfect for special occasions rather than everyday snacking.
From a wellness perspective, enjoying a treat like this mindfully is part of what makes celebrations meaningful. Plus, the simple ingredients mean fewer additives than many store-bought sweets.
Conclusion
In short, these perfect chocolate graduation caps with marshmallow bases are a must-make for any graduation celebration. They’re simple, fun, and deliver a sweet, nostalgic bite that everyone loves. The recipe’s flexibility lets you customize colors, flavors, and decorations to match your personal style or school spirit.
Honestly, this recipe has a special place in my heart — it’s tied to family memories and the joy of celebrating milestones with those you love. I hope it becomes a favorite in your kitchen too.
If you make these, please drop a comment or share your own twists and photos. I’d love to hear how your perfect chocolate graduation caps turned out! Happy celebrating — you’re about to make some seriously sweet memories.
FAQs
Can I use store-bought marshmallows or should they be homemade?
Store-bought jumbo marshmallows work perfectly for this recipe. Homemade marshmallows are fine too but make sure they’re firm enough to hold the chocolate.
How do I prevent the chocolate from melting the marshmallow base?
Using melted chocolate mixed with a bit of butter and working quickly helps create a thin, firm shell without melting the marshmallow. Also, chilling promptly sets the chocolate before it can soften the base.
Can I make these ahead of time?
Yes! Prepare and store them in an airtight container in the fridge up to 3 days ahead. They also freeze well if you want to make them earlier.
What’s the best way to melt chocolate without burning it?
Melting chocolate over a double boiler is the safest method. If using a microwave, heat in short 20-second bursts, stirring in between to avoid burning.
Are there alternatives to licorice tassels for decoration?
Absolutely! You can use black candy melts piped into thin lines, thin strips of fruit leather, or even edible black icing to create tassels.
Pin This Recipe!
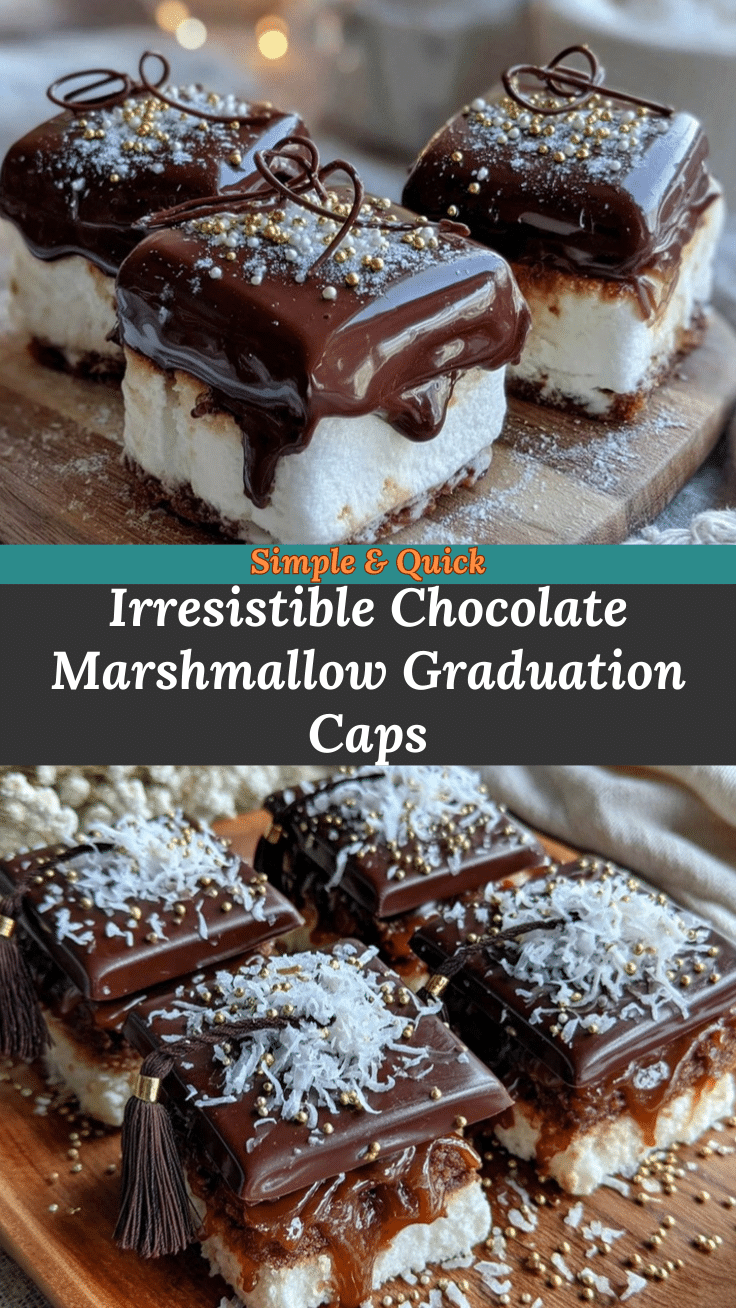

Perfect Chocolate Graduation Caps Recipe with Easy Marshmallow Bases
- Total Time: 30 minutes
- Yield: 24 servings 1x
Description
These perfect chocolate graduation caps feature a soft marshmallow base topped with a glossy, rich chocolate cap, making them a fun and festive treat for any graduation celebration.
Ingredients
- Large jumbo marshmallows
- Semisweet chocolate chips or chopped chocolate (good quality like Ghirardelli or Valrhona)
- 2 tablespoons unsalted butter, softened
- 1 teaspoon vanilla extract
- Black licorice strings or thin black candy strips (for tassels)
- Mini marshmallows or small candy dots (optional, for decoration)
Instructions
- Line a baking sheet with parchment paper or a silicone baking mat. Arrange jumbo marshmallows spaced about 1 inch apart.
- In a double boiler or heatproof bowl set over simmering water, combine semisweet chocolate chips and softened butter. Stir gently until smooth and glossy, about 5-7 minutes. Alternatively, melt in microwave in 20-second intervals, stirring between each.
- Remove chocolate from heat and stir in vanilla extract.
- Using a small spoon or offset spatula, spoon melted chocolate over each marshmallow, covering the top completely to form the cap about 1/8 inch thick.
- While chocolate is still wet, place a small piece of black licorice string or candy strip at the center of each cap to mimic the tassel. Press gently to secure.
- Optionally, add mini marshmallows or candy dots for decoration before chocolate sets.
- Transfer baking sheet to refrigerator and chill for at least 20 minutes until chocolate caps are firm and glossy.
- Carefully peel marshmallow graduation caps off parchment and arrange on a platter. Enjoy within 2 days for best freshness.
Notes
Use fresh jumbo marshmallows for best results. If chocolate thickens before coating all marshmallows, gently rewarm over double boiler. Chill properly to get a glossy snap on the chocolate caps. For dairy-free, substitute butter with coconut oil and use dairy-free chocolate chips. Store leftovers in airtight container in fridge up to 3 days or freeze up to 1 month.
- Prep Time: 10 minutes
- Cook Time: 10 minutes
- Category: Dessert
- Cuisine: American
Nutrition
- Serving Size: 1 chocolate graduati
- Calories: 135
- Sugar: 15
- Sodium: 25
- Fat: 7
- Saturated Fat: 4
- Carbohydrates: 18
- Fiber: 1
- Protein: 1
Keywords: graduation caps, chocolate treats, marshmallow desserts, easy chocolate recipe, party treats, festive desserts
