

“Are you serious? Pink velvet cake pops shaped like hearts with gold leaf?” my friend asked, raising an eyebrow when I sent her a photo of these little beauties. Honestly, I wasn’t sure if they’d turn out as dreamy as they looked in my head, especially since cake pops can be a bit finicky. But after a handful of late-night kitchen sessions (and yes, a few crumbs tossed in frustration), these pink velvet heart-shaped cake pops with gold leaf accents became my go-to for any occasion that needed a touch of charm.
It all started when I was scrambling to pull together a last-minute treat for a friend’s bridal shower. The usual cupcakes felt too clunky, and I wanted something sweet but elegant—a little bit whimsical but still easy to eat. I figured if I could get the pink velvet flavor right and add some sparkle with edible gold leaf, it might just hit the mark. The first batch wasn’t perfect, but the texture was spot on, and that subtle cocoa tang mixed with cream cheese frosting was exactly what I hoped for.
Since then, I’ve made these cake pops a dozen times, tweaking the shape and decoration, and honestly, they’ve gotten more requests than any other dessert I’ve shared. They’re like tiny edible tokens of affection, perfect for celebrations or just a little self-love moment. The gold leaf gives them that unexpected wow factor, without feeling over the top—just enough to make you pause and smile when you see one.
There’s something quietly satisfying about crafting these pink velvet heart-shaped cake pops with gold leaf accents. They’re a bit of art and a lot of comfort, wrapped into one sweet bite. And no matter how many times I make them, I still find myself marveling at how a few simple ingredients and a little patience can turn into something so special.
Why You’ll Love This Recipe
These perfect pink velvet heart-shaped cake pops with gold leaf accents aren’t just another sweet treat—they’re a little celebration in every bite. After testing this recipe many times, here’s why I keep coming back to it:
- Quick & Easy: You can have these ready in under 2 hours, including chilling time—ideal for when you want a homemade dessert without spending all day in the kitchen.
- Simple Ingredients: No exotic or hard-to-find items here. Most are pantry staples like cake mix, cream cheese, and basic baking supplies.
- Perfect for Special Occasions: Whether it’s Valentine’s Day, bridal showers, Galentine’s Day, or even a romantic dinner, these cake pops add a charming touch.
- Crowd-Pleaser: Kids adore the fun shape and color, while adults appreciate the sophisticated gold leaf finish.
- Unbelievably Delicious: The pink velvet base offers a subtle cocoa flavor, perfectly balanced with a smooth cream cheese frosting that keeps every bite moist and tender.
What sets this recipe apart? Well, it’s the heart-shaped mold that turns simple cake pops into keepsake-worthy treats. Plus, the edible gold leaf adds an elegant shimmer that’s surprisingly easy to apply, giving your pops a luxe feel without fuss. I also like to use a blend of homemade cake crumbs and frosting to get just the right texture—soft enough to shape but firm enough to hold.
Honestly, these cake pops make you pause after the first bite—like a little love note you can eat. They’re not just for show; they bring that warm, cozy feeling of comfort food with a sweet twist. And if you’re looking for a pretty presentation without the stress, this recipe has you covered.
What Ingredients You Will Need
This recipe uses simple, wholesome ingredients to deliver bold flavor and a satisfying texture without much fuss. All are easy to find and mostly pantry staples, so you can whip these up anytime the mood strikes.
- For the Cake:
- 1 box pink velvet cake mix (or red velvet cake mix with a few drops of pink food coloring)
- Ingredients called for on the cake mix box (usually eggs, oil, and water)
- For the Frosting & Binding:
- 8 oz cream cheese, softened (I use Philadelphia for its creamy texture)
- 1/4 cup unsalted butter, softened (adds richness)
- 1 to 1 1/2 cups powdered sugar (adjust for sweetness)
- 1 tsp vanilla extract
- For Decoration:
- Pink candy melts or white chocolate with pink food coloring (for dipping)
- Edible gold leaf sheets (available online or specialty baking stores)
- Heart-shaped silicone mold or cake pop molds
- Optional: sprinkles or edible glitter for extra sparkle
- Other Essentials:
- Wooden lollipop sticks
- Wax paper or parchment paper (for drying)
For the cake mix, I prefer brands like Betty Crocker or Pillsbury for consistent results. If you want to skip the boxed mix, you can bake a homemade pink velvet cake using cocoa powder, buttermilk, and a bit of red food coloring diluted to pink. For a dairy-free option, swap the cream cheese with a dairy-free cream cheese alternative and use dairy-free candy melts.
Equipment Needed
- Heart-shaped silicone mold or cake pop mold – This is key to getting that perfect heart shape. Silicone molds work best because the cake pops pop out smoothly without cracking.
- Mixing bowls – A medium-sized bowl for cake crumbs and another for frosting.
- Electric mixer or stand mixer – To cream the frosting until silky smooth. Hand mixing is possible but takes longer.
- Baking sheet lined with parchment paper – For drying dipped cake pops.
- Microwave-safe bowl – For melting candy melts or chocolate.
- Wooden lollipop sticks – Standard size works perfectly for holding the cake pops.
If you don’t have a heart-shaped mold, you can shape the cake pops by hand, but it takes a bit more patience. For a budget-friendly alternative, silicone ice cube trays with heart shapes can work in a pinch. I’ve found that cleaning and drying the molds immediately after use keeps them in great shape for many batches.
Preparation Method

- Bake the Cake: Prepare the pink velvet cake mix according to the package instructions (usually combining cake mix, eggs, oil, and water). Bake in a 9×13-inch pan at 350°F (175°C) for 25-30 minutes. Let it cool completely (about 1 hour) before handling.
Tip: A fully cooled cake is essential to avoid melting the frosting in the next step. - Crumble the Cake: Once cooled, crumble the cake into a large mixing bowl. You want fine crumbs without large chunks for smooth cake pops.
Note: It’s helpful to crumble with your hands to get the right texture. - Make the Cream Cheese Frosting: In a separate bowl, beat the softened cream cheese and butter together until smooth and creamy (about 2-3 minutes). Gradually add powdered sugar and vanilla extract, mixing until combined. Adjust powdered sugar to your preferred sweetness and consistency—frosting should be thick but spreadable.
- Combine Cake and Frosting: Add frosting to the cake crumbs a little at a time, mixing gently with a spatula or your hands until the mixture holds together but isn’t too sticky. You want it to be moldable but not wet.
Tip: If it feels too wet, add a bit more cake crumbs; too dry, add frosting. - Shape the Cake Pops: Press the cake mixture firmly into your heart-shaped silicone mold, smoothing the tops. Insert a wooden stick halfway through each heart. Freeze the mold for 30 minutes to firm up.
If you don’t have a mold: Roll the mixture into balls, then gently press each into a heart shape by hand before inserting sticks. - Prepare the Candy Coating: Melt pink candy melts or white chocolate with pink food coloring in a microwave-safe bowl in 30-second intervals, stirring until smooth. Let it cool slightly so it’s thick but still dip-able.
- Dip the Cake Pops: Remove cake pops from the freezer, dip each heart into the melted candy coating, letting excess drip off. Place on parchment-lined baking sheet.
Tip: If the coating is too thin, chill it a bit longer. If too thick, gently reheat. - Add Gold Leaf Accents: While the coating is still wet, carefully apply small pieces of edible gold leaf with a dry, clean brush or tweezers. The gold leaf sticks to the candy coating perfectly.
Warning: Gold leaf is delicate, so handle gently to avoid tearing. - Let Them Set: Allow the cake pops to dry completely at room temperature or in the fridge for about 30 minutes before serving.
Cooking Tips & Techniques
Working with cake pops can be a bit tricky, but a few tricks make all the difference. First, make sure the cake is fully cooled before mixing with frosting—warm crumbs can cause the mixture to become too soft and crumbly.
When mixing cake and frosting, go slow. Too much frosting and the pops become soggy; too little and they won’t hold their shape. I usually start with about half the frosting and add more only if needed. You’ll get a feel as you go.
Freezing the shaped cake pops before dipping is crucial. It helps the coating adhere better and minimizes the chance of the pops falling apart. Trust me, I learned this the hard way after a few pops melted on contact!
Melting candy melts can be finicky. Use short microwave bursts and stir often to avoid overheating, which can cause the coating to seize. If you’re coloring white chocolate, be sure to use oil-based food coloring designed for chocolate—water-based colors can cause clumping.
Applying gold leaf is a gentle process—too much handling and it tears. Use clean, dry tools and a light touch. If you want extra sparkle, a dusting of edible glitter helps, but the gold leaf alone is stunning.
Variations & Adaptations
While these pink velvet heart-shaped cake pops are perfect as is, here are some fun ways to mix it up:
- Flavor Variations: Swap the pink velvet cake for classic red velvet, chocolate, or even lemon-flavored cake. Each works well with cream cheese frosting and candy coating.
- Dietary Adaptations: Use gluten-free cake mix and dairy-free cream cheese to make these friendly for gluten-sensitive or vegan eaters. Almond or coconut flour mixes can work well too.
- Decoration Tweaks: Instead of gold leaf, try edible silver leaf, crushed freeze-dried strawberries, or a drizzle of dark chocolate for contrast. You can also experiment with different shapes using molds—stars or circles are fun alternatives.
- Cooking Method: If you prefer, bake the cake in mini muffin tins instead of a pan, then crumble and proceed the same way. It can reduce baking time and yield slightly denser crumbs.
- Personal Favorite: I once made a batch using cream cheese cheesecake filling folded into the crumbs for an extra creamy center. It was a total crowd-pleaser!
Serving & Storage Suggestions
Serve these cake pops chilled or at room temperature. They look lovely arranged in a decorative vase or on a pretty platter. Pair them with a cup of tea or a light sparkling wine for a sweet treat with a little sophistication.
Store leftover cake pops in an airtight container in the refrigerator for up to 4 days. Avoid leaving them out too long, as the candy coating can soften or sweat, especially in warmer kitchens. For longer storage, freeze cake pops before dipping, then freeze again after coating. To reheat, let them thaw in the fridge for a few hours before serving.
Flavors tend to deepen after a day, so if you can wait, letting them rest overnight in the fridge makes the cream cheese frosting meld beautifully with the cake crumbs.
Nutritional Information & Benefits
Each pink velvet heart-shaped cake pop is roughly 150-180 calories, depending on size and coating thickness. The cream cheese adds a touch of protein and calcium, while the cake provides carbohydrates for energy. These are definitely a treat—best enjoyed in moderation!
The use of cream cheese instead of buttercream frosting lowers the overall sugar content slightly and adds a creamy tang that balances the sweetness. If you use a boxed cake mix, watch for brands with lower artificial additives for a cleaner ingredient list.
For those with dietary needs, gluten-free and dairy-free swaps make these cake pops accessible without sacrificing texture or flavor. Just be sure to use compatible candy melts for coating.
Conclusion
These perfect pink velvet heart-shaped cake pops with gold leaf accents are a sweet reminder that sometimes, the simplest ingredients combined with a little patience can create something truly special. Whether you’re making them for a loved one or just treating yourself, their charm and taste never disappoint.
Feel free to experiment with flavors, shapes, and decorations—this recipe is flexible enough to handle your creative twists. I love how they bring a bit of sparkle and joy to any occasion, and I hope you’ll find the same pleasure in making and sharing them.
When you try this recipe, I’d love to hear how your cake pops turned out or what fun variations you came up with. Don’t hesitate to leave a comment or share your photos—these little hearts deserve to be admired!
FAQs About Perfect Pink Velvet Heart-Shaped Cake Pops
How do I prevent cake pops from falling apart?
Make sure your cake is fully cooled before mixing with frosting. Use just enough frosting to bind crumbs without making the mixture too wet. Freezing the shaped pops before dipping also helps them hold together better.
Can I use homemade cake instead of boxed mix?
Absolutely! Homemade pink velvet cake works wonderfully. Just be sure it’s moist but not too dense. Crumble it finely and mix with cream cheese frosting as in the recipe.
Is the gold leaf edible and safe?
Yes, edible gold leaf is made specifically for food use and is safe to eat. Just be sure to buy from a trusted supplier to avoid non-edible varieties.
Can I make these cake pops ahead of time?
Yes, you can make them a day in advance and store them in the fridge. For longer storage, freeze after coating and thaw in the fridge before serving.
What’s the best way to melt candy melts without seizing?
Heat the candy melts in short bursts (20-30 seconds), stirring well between each. Avoid overheating and keep water away from the melts to prevent clumping.
For more festive and fun dessert ideas, you might enjoy recreating the fluffy Dr. Seuss rainbow pancake stacks or the elegant chocolate-covered strawberry scone sandwiches—both perfect for special gatherings that call for a little extra whimsy.
Pin This Recipe!

Perfect Pink Velvet Heart-Shaped Cake Pops Easy Homemade Recipe with Gold Leaf Accents
- Total Time: 2 hours
- Yield: 24 cake pops 1x
Description
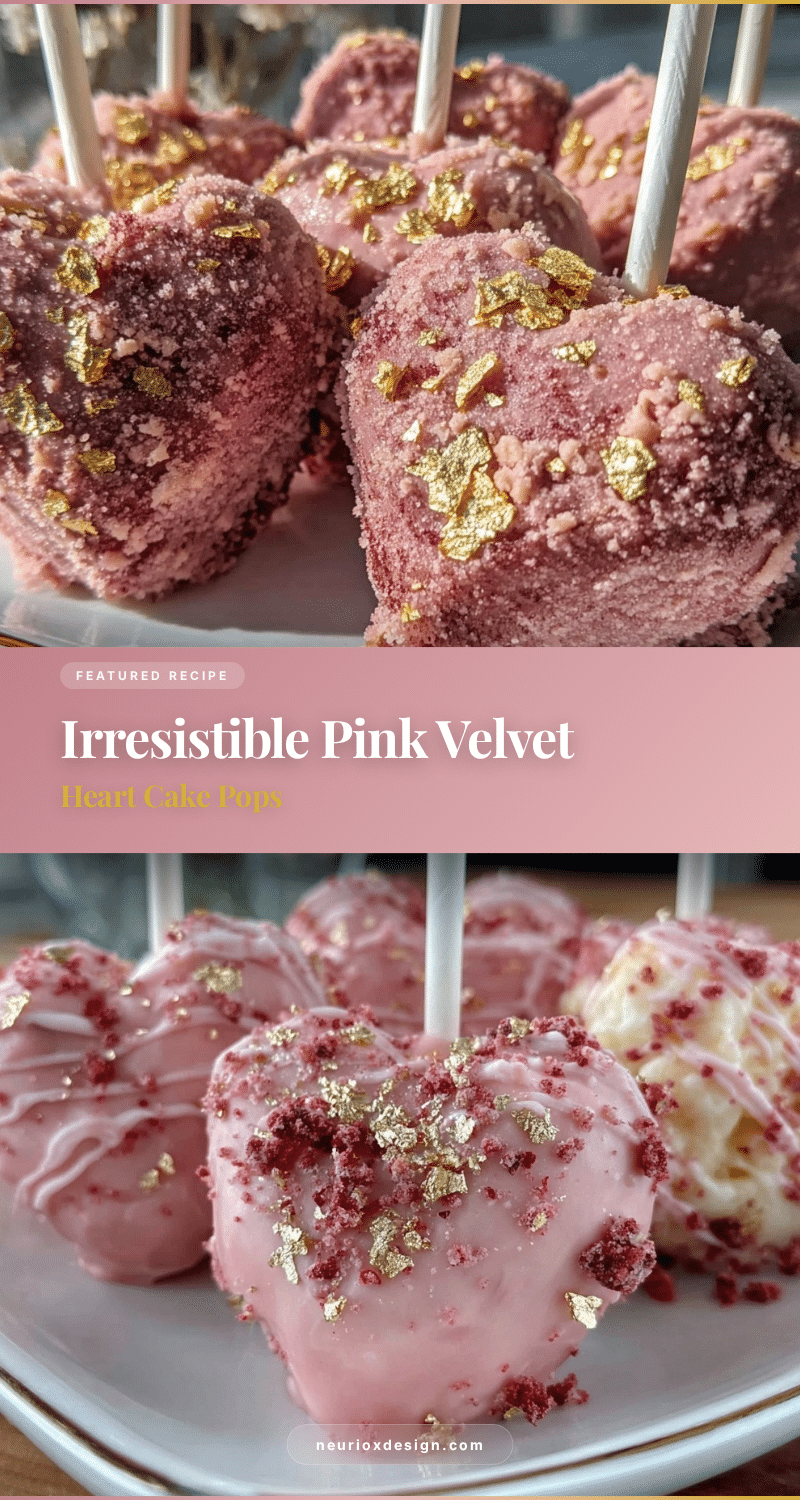
These pink velvet heart-shaped cake pops with gold leaf accents are a charming, elegant treat perfect for special occasions. They combine a subtle cocoa flavor with cream cheese frosting and a luxurious gold leaf finish.
Ingredients
- 1 box pink velvet cake mix (or red velvet cake mix with a few drops of pink food coloring)
- Ingredients called for on the cake mix box (usually eggs, oil, and water)
- 8 oz cream cheese, softened
- 1/4 cup unsalted butter, softened
- 1 to 1 1/2 cups powdered sugar
- 1 tsp vanilla extract
- Pink candy melts or white chocolate with pink food coloring (for dipping)
- Edible gold leaf sheets
- Heart-shaped silicone mold or cake pop molds
- Optional: sprinkles or edible glitter
- Wooden lollipop sticks
- Wax paper or parchment paper
Instructions
- Prepare the pink velvet cake mix according to package instructions (combine cake mix, eggs, oil, and water). Bake in a 9×13-inch pan at 350°F (175°C) for 25-30 minutes. Let cool completely (about 1 hour).
- Crumble the cooled cake into fine crumbs in a large mixing bowl.
- Beat softened cream cheese and butter together until smooth (2-3 minutes). Gradually add powdered sugar and vanilla extract, mixing until combined and thick but spreadable.
- Add frosting to cake crumbs gradually, mixing gently until mixture holds together but is not too sticky. Adjust with more crumbs or frosting as needed.
- Press cake mixture firmly into heart-shaped silicone mold, smoothing tops. Insert wooden stick halfway through each heart. Freeze mold for 30 minutes to firm up. Alternatively, shape by hand into hearts and insert sticks.
- Melt pink candy melts or white chocolate with pink food coloring in microwave-safe bowl in 30-second intervals, stirring until smooth. Let cool slightly to thick but dip-able consistency.
- Remove cake pops from freezer, dip each heart into melted candy coating, letting excess drip off. Place on parchment-lined baking sheet.
- While coating is wet, carefully apply small pieces of edible gold leaf with a dry, clean brush or tweezers.
- Allow cake pops to dry completely at room temperature or in fridge for about 30 minutes before serving.
Notes
Ensure cake is fully cooled before mixing with frosting to prevent soggy pops. Freeze shaped pops before dipping to help coating adhere and prevent falling apart. Use oil-based food coloring for coloring white chocolate to avoid clumping. Handle gold leaf gently to avoid tearing.
- Prep Time: 20 minutes
- Cook Time: 30 minutes
- Category: Dessert
- Cuisine: American
Nutrition
- Serving Size: 1 cake pop
- Calories: 165
- Sugar: 18
- Sodium: 110
- Fat: 8
- Saturated Fat: 4
- Carbohydrates: 22
- Fiber: 0.5
- Protein: 2
Keywords: pink velvet cake pops, heart-shaped cake pops, gold leaf cake pops, homemade cake pops, cream cheese frosting, Valentine's Day dessert, bridal shower treats
