
“You really think I can pull off a red velvet flag cookie cake for the Fourth of July?” my cousin texted me one July afternoon, half-joking but mostly serious. I was nursing a lukewarm cup of coffee, already imagining the chaos of summer cookouts and the usual scramble to find a dessert that’s both festive and fuss-free. Honestly, I hadn’t thought much about cookie cakes before that text, but something about the challenge stuck with me.
I’d never made a flag-shaped cookie cake, let alone one with the deep, rich color of red velvet. But the idea of combining that classic red velvet flavor with the fun, shareable vibe of a giant cookie was too tempting to ignore. What started as a casual experiment quickly became an obsession—I found myself baking and tweaking this red velvet flag cookie cake recipe multiple times in one week, testing frosting techniques and perfecting the crumb.
There’s something quietly satisfying about biting into a warm, chewy red velvet cookie, the cocoa notes balancing the sweet cream cheese frosting on top. And shaping it like a flag? Well, that’s the kind of festive detail that sparks conversation without being over the top. This recipe ended up being my go-to for celebrations when I want something that feels special but not complicated.
That little text from my cousin? It turned into this recipe you’re reading now—a perfect blend of nostalgic red velvet flavor, playful presentation, and easy enough for any home baker. The best part? It’s the kind of dessert that makes you pause and smile after the first bite, the kind that lingers in good memories long after the party’s over.
Why You’ll Love This Recipe
This perfect red velvet flag cookie cake recipe is one I’ve tested countless times, and honestly, it never fails to impress. Whether you’re throwing a festive bash or just want a show-stopping dessert, it’s got a little something for everyone.
- Quick & Easy: This cookie cake comes together in under an hour, which is a lifesaver when you’re juggling party prep or last-minute plans.
- Simple Ingredients: No need for specialty stores—most ingredients are pantry staples like cocoa powder, butter, and cream cheese.
- Perfect for Festive Occasions: The flag shape and bright red color make it ideal for the Fourth of July, Memorial Day, or any celebration calling for a bit of patriotic flair.
- Crowd-Pleaser: Kids and adults alike rave about the chewy texture and rich flavor combo. It’s not too sweet, just right.
- Unbelievably Delicious: The cream cheese frosting is smooth and tangy, complementing the subtle cocoa notes in the cookie perfectly.
What sets this recipe apart is the attention to detail—from the perfectly balanced cocoa and vinegar in the dough that give red velvet its signature tang, to the smooth frosting that isn’t overly sugary. Plus, the flag shape isn’t just for looks; it’s a fun way to bring everyone together over a shared treat. If you’ve ever been skeptical about making a cookie cake, this recipe might just turn you into a believer—much like I was after my first batch came out just right.
What Ingredients You Will Need
This red velvet flag cookie cake recipe uses simple, wholesome ingredients to deliver bold flavor and a satisfying texture without the fuss. Most of these are pantry staples or easy to find in any grocery store.
- For the Cookie Base:
- All-purpose flour – 2 ½ cups (315 g), sifted for a tender crumb
- Cocoa powder – 2 tablespoons, unsweetened (I prefer Valrhona for its rich flavor)
- Baking soda – 1 teaspoon
- Salt – ½ teaspoon
- Unsalted butter – 1 cup (227 g), softened
- Granulated sugar – 1 ¼ cups (250 g)
- Brown sugar – ¼ cup (50 g), packed (adds moisture and depth)
- Large eggs – 2, room temperature
- Vanilla extract – 2 teaspoons, pure
- Red food coloring – 2 tablespoons (gel color works best for vibrant hue)
- Distilled white vinegar – 1 teaspoon (classic red velvet ingredient for tang)
- Buttermilk – ½ cup (120 ml), room temperature (can substitute with milk + 1 tsp lemon juice)
- For the Cream Cheese Frosting:
- Cream cheese – 8 oz (225 g), softened (use full-fat for best texture)
- Unsalted butter – ½ cup (113 g), softened
- Powdered sugar – 3 cups (360 g), sifted to avoid lumps
- Vanilla extract – 1 teaspoon
- Pinch of salt
Feel free to swap buttermilk with dairy-free milk plus lemon juice if needed. For a gluten-free version, using a 1:1 gluten-free flour blend works well, though the texture will be slightly different. I’ve found that using gel food coloring keeps the cookie from becoming too wet, which can happen with liquid colors.
Equipment Needed
Making this red velvet flag cookie cake doesn’t require fancy gadgets, but having a few key tools makes the process smoother.
- Large mixing bowls for wet and dry ingredients
- Electric mixer or stand mixer – helps cream butter and sugar thoroughly for that perfect cookie texture (I use a handheld mixer for quick cleanup)
- Measuring cups and spoons – accuracy is key for baking
- Rubber spatula – great for folding and scraping the bowl clean
- Baking sheet or cookie pan – a rimmed rectangular or square pan about 9×13 inches works perfectly for the flag shape
- Parchment paper – prevents sticking and helps with easy cleanup
- Offset spatula or butter knife – for frosting the cookie evenly
- Cooling rack – lets your cookie cake cool properly to avoid sogginess
If you don’t have an offset spatula, a butter knife works just fine. For shaping the flag, you can use the pan edges as guides, or lightly mark the outline on parchment paper before baking. Keeping your mixer’s beaters clean and dry during frosting prep helps prevent clumpy cream cheese frosting, a tip I learned after a few bumpy batches.
Preparation Method
- Preheat your oven to 350°F (175°C). Line your baking pan with parchment paper, leaving some overhang for easy removal later. This step is key so the cookie doesn’t stick or break.
- Mix the dry ingredients: In a large bowl, sift together the all-purpose flour, cocoa powder, baking soda, and salt. Set aside.
- Cream the butter and sugars: Using your mixer, beat the softened butter, granulated sugar, and brown sugar on medium speed for about 3-4 minutes until light and fluffy. This aerates the dough and gives the cookie a tender crumb.
- Add eggs and flavorings: Beat in the eggs one at a time, making sure each is fully incorporated before adding the next. Mix in the vanilla extract and red food coloring until the dough turns a deep red shade.
- Combine wet and dry: Slowly add the dry ingredient mixture to the wet, alternating with the buttermilk and vinegar. Start and end with the dry ingredients. Mix on low speed just until combined—overmixing can make the cookie tough.
- Transfer dough to pan: Spread the dough evenly in your prepared pan, smoothing the top with a spatula. The dough will be thick but spreadable.
- Bake: Place in the oven and bake for 25-30 minutes. Start checking at 25 minutes by inserting a toothpick in the center; it should come out with a few moist crumbs but not wet batter. The edges will be slightly firm and the center soft.
- Cool completely: Remove from oven and let the cookie cake cool in the pan on a wire rack for at least 30 minutes. Cooling fully before frosting is crucial to avoid melting.
- Make the cream cheese frosting: Beat cream cheese and softened butter together until smooth and creamy. Gradually add powdered sugar, mixing well after each addition. Stir in vanilla extract and a pinch of salt. If frosting seems too thick, add a teaspoon of milk or cream.
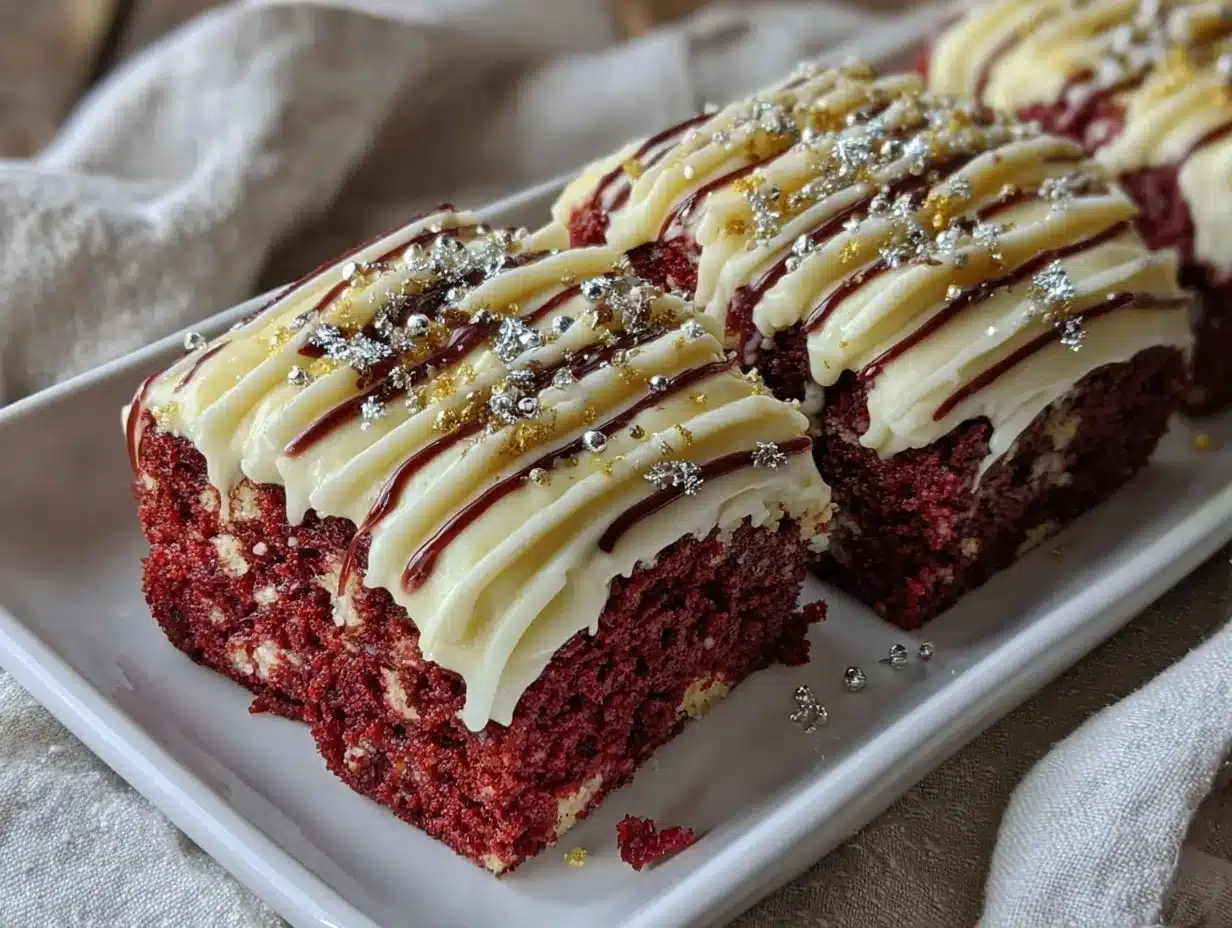
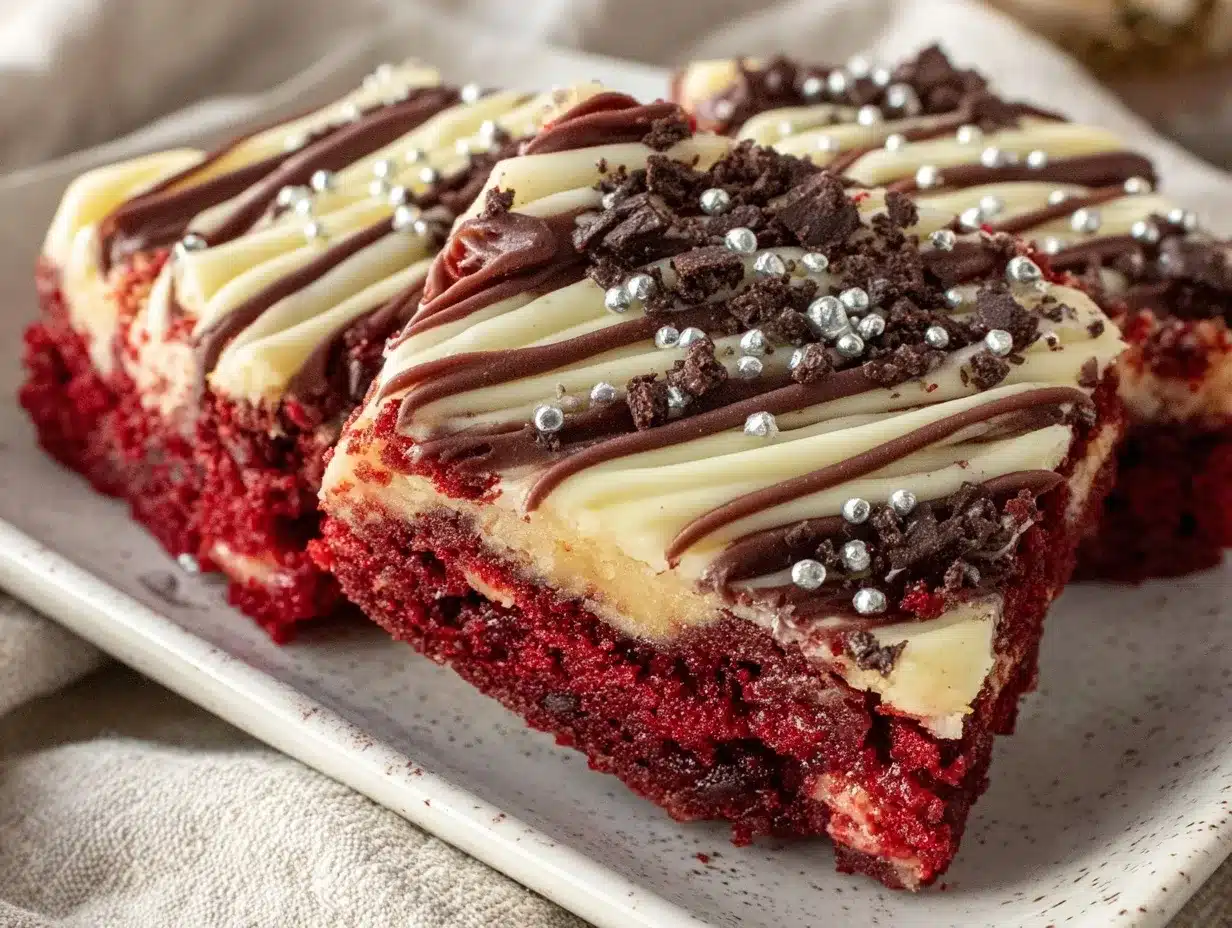
- Frost and decorate: Using an offset spatula or butter knife, spread the frosting evenly over the cooled cookie cake. For the flag design, pipe or spread white stripes with frosting and add little star shapes using extra frosting or edible decorations.
- Chill before serving: Refrigerate the cake for about 15-20 minutes to let the frosting set slightly, making slicing cleaner.
For a flawless flag cookie, I find marking the stripes lightly with a toothpick before piping helps keep the design neat. If your frosting gets too soft while decorating, pop it in the fridge for a few minutes to firm up.
Cooking Tips & Techniques
Getting the perfect chewy yet tender texture in a red velvet cookie cake can be tricky, but a few tricks make all the difference.
- Don’t skip sifting: Sifting the dry ingredients ensures the cocoa and flour mix evenly, preventing clumps and uneven coloring.
- Use room temperature ingredients: Eggs, butter, and buttermilk at room temp blend better, resulting in a smoother dough and consistent rise.
- Red food coloring choice matters: Gel or paste colors give a richer red without adding extra liquid, which can throw off the dough consistency.
- Watch the baking time: Overbaking dries out the cookie. The center should look just set but still soft when you take it out.
- Let the cookie cool fully: Frosting a warm cookie leads to runny frosting and a messy look. Patience here pays off.
- Frosting consistency: If your cream cheese frosting feels too stiff, a splash of milk helps without watering it down.
- Flag design tips: Use a piping bag or a resealable plastic bag with a tiny corner snipped for more control when creating stripes and stars.
I once tried using liquid food coloring and ended up with a dough that was too wet—lesson learned the hard way. Also, I like prepping the frosting while the cookie cools so I’m ready to decorate without rush. Multitasking like that keeps the process smooth and stress-free.
Variations & Adaptations
This red velvet flag cookie cake recipe is surprisingly versatile, so feel free to tweak it based on your dietary needs or flavor preferences.
- Gluten-Free: Swap all-purpose flour with a 1:1 gluten-free baking flour blend. The texture will be slightly more crumbly but still delicious.
- Vegan-Friendly: Use plant-based butter and cream cheese alternatives, replace eggs with flax eggs (1 tbsp flaxseed meal + 3 tbsp water per egg), and use a dairy-free milk for buttermilk substitute.
- Flavor Twists: Add a teaspoon of espresso powder to deepen the cocoa flavor or fold in white chocolate chips for a sweet surprise.
- Seasonal Adaptation: For winter holidays, swap the flag design for snowflake shapes in frosting and sprinkle edible silver stars on top.
- Personal Favorite: I once layered this cookie cake with a thin spread of raspberry preserves beneath the cream cheese frosting—such a lovely tangy contrast!
If you love the idea of red velvet but want single-serve options, check out my red velvet chocolate chip mug cake for two, which is just as satisfying but in a flash.
Serving & Storage Suggestions
Serve this perfect red velvet flag cookie cake chilled or at room temperature. The frosting tastes best when cool but not cold—too chilly and it can mute the flavors.
- Presentation-wise, slice into bars or squares and arrange on a festive platter to highlight the flag design.
- This cookie cake pairs beautifully with a simple glass of cold milk or a cup of coffee. For brunch celebrations, it complements fluffy stacks like the Dr. Seuss rainbow pancake stacks wonderfully.
- Store leftovers covered tightly in the refrigerator for up to 4 days—frosting keeps it moist and fresh.
- For longer storage, wrap individual pieces in plastic wrap and freeze up to 2 months. Thaw overnight in the fridge before serving.
- Flavors tend to mellow and meld after a day, so consider making it a day ahead for a more harmonious taste.
Nutritional Information & Benefits
Each serving of this red velvet flag cookie cake packs roughly 320 calories, with 15 grams of fat, 45 grams of carbohydrates, and 4 grams of protein. The cream cheese frosting adds richness but also a dose of calcium and vitamin A.
Key ingredients like cocoa powder bring antioxidants, while using real butter and cream cheese contributes to satisfying healthy fats that keep you full longer. If you prefer a lighter version, cutting back on sugar or swapping half the butter for unsweetened applesauce can reduce calories without sacrificing texture.
This recipe is naturally vegetarian and can be adapted for gluten-free or vegan diets, making it accessible for a wide range of guests. Just watch for food coloring sensitivities—natural beet-based dyes are a gentle alternative.
Conclusion
Honestly, this perfect red velvet flag cookie cake recipe has become one of my most reliable festive desserts. It’s approachable but makes a statement, combining the nostalgic flavor of red velvet with a fun, shareable cookie cake format. Whether you’re hosting a backyard barbecue or a holiday gathering, it’s the kind of treat that brings smiles and a few compliments without stress.
Feel free to customize the frosting designs or experiment with add-ins to suit your taste. I love how versatile it is—sometimes I make it just for a cozy weekend indulgence. If you try it, I’d love to hear how your cookie cake turns out or what unique twist you add to make it your own.
Making desserts like this reminds me that festive baking doesn’t have to be complicated to feel special. Here’s to sweet moments worth savoring, one slice at a time.
FAQs About the Perfect Red Velvet Flag Cookie Cake
Can I make this cookie cake ahead of time?
Yes! The cookie cake can be baked a day ahead and stored in the refrigerator, then frosted just before serving for the freshest look and taste.
What if I don’t have buttermilk?
You can make a quick buttermilk substitute by adding 1 teaspoon of lemon juice or white vinegar to ½ cup of milk. Let it sit for 5 minutes before using.
How do I store leftover cookie cake?
Wrap leftovers tightly and store in the fridge for up to 4 days. For longer storage, freeze slices individually and thaw in the fridge before eating.
Can I use natural food coloring instead of gel?
Natural options like beet juice powder or juice can work but may alter the dough’s moisture and flavor slightly. Gel color is best for vibrant, consistent red velvet color.
Is this recipe suitable for kids to help with?
Definitely! Kids can help with mixing, spreading the frosting, and decorating the flag design. Just keep an eye on the oven step for safety.
Pin This Recipe!
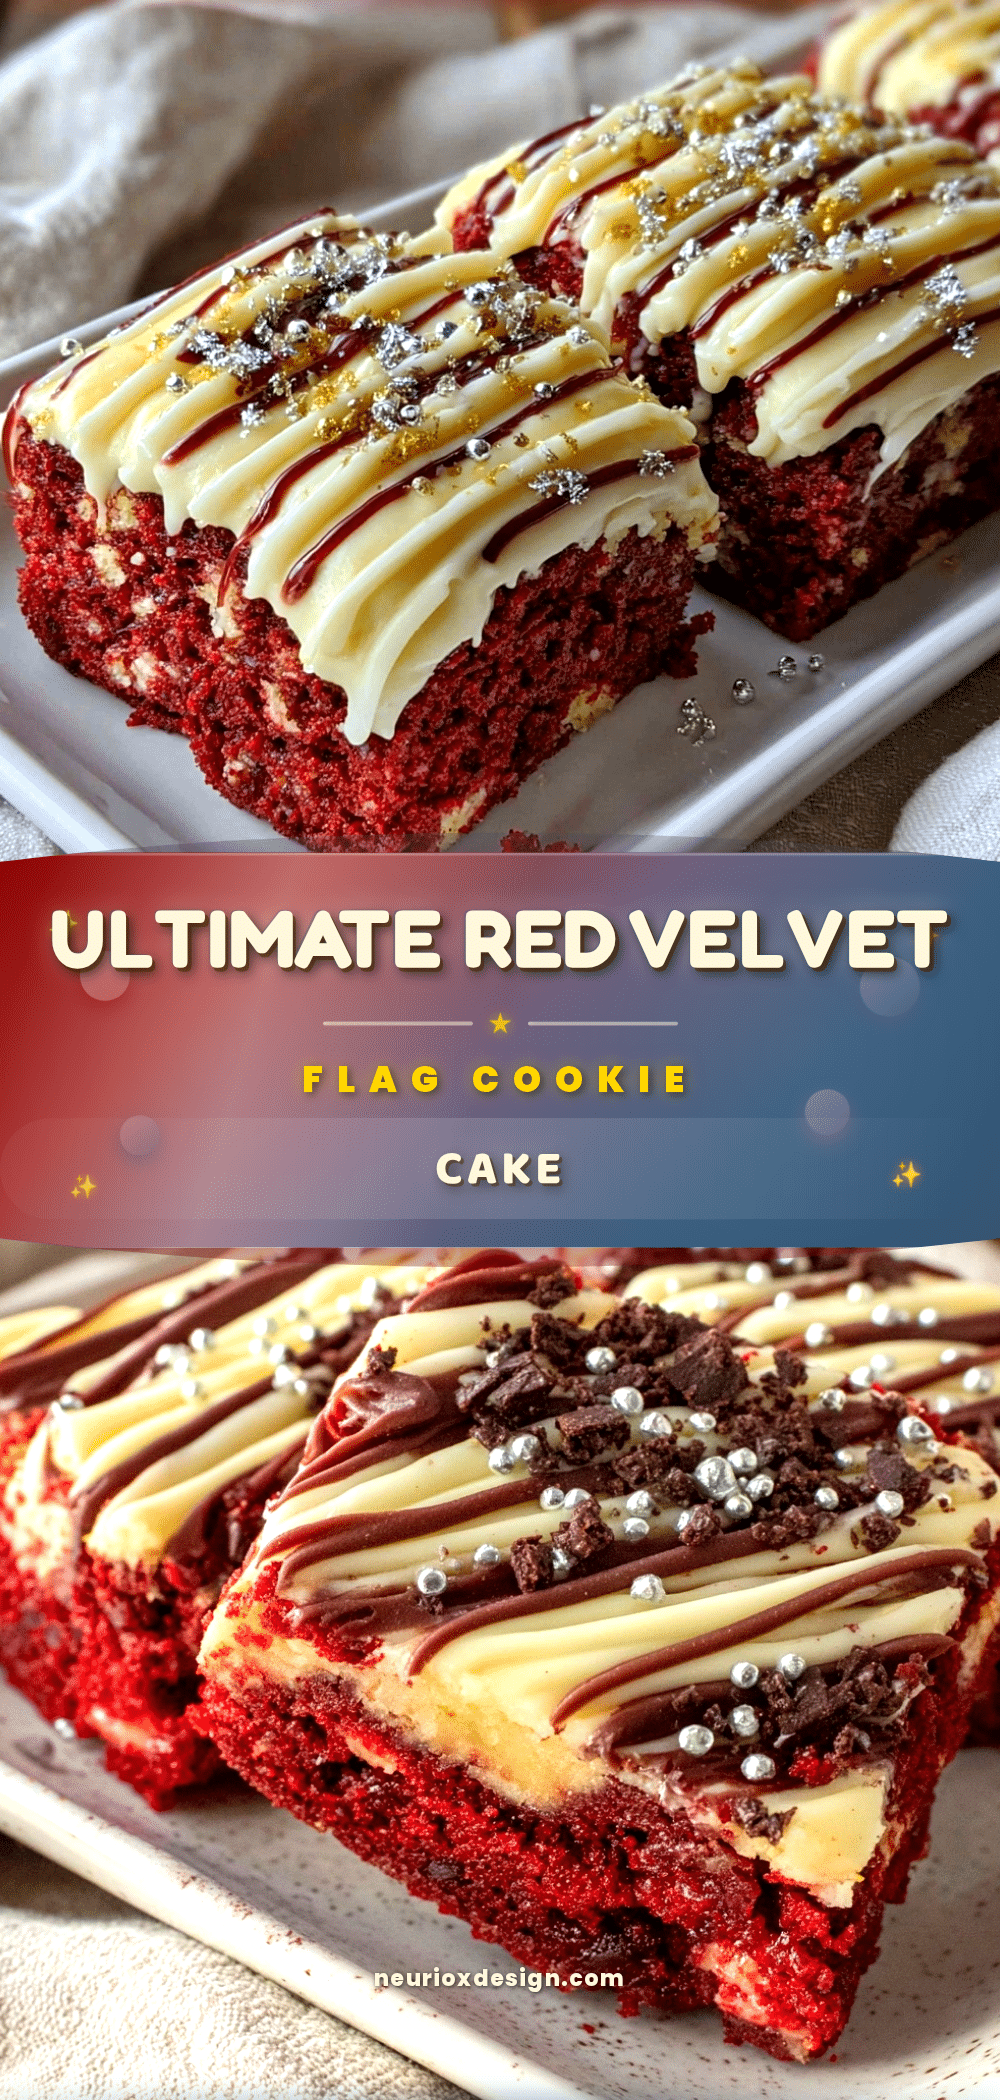

Perfect Red Velvet Flag Cookie Cake Recipe
- Total Time: 45 minutes
- Yield: 12 servings 1x
Description
A festive and easy-to-make red velvet flag cookie cake featuring a chewy texture and smooth cream cheese frosting, perfect for celebrations like the Fourth of July.
Ingredients
- 2 ½ cups all-purpose flour (315 g), sifted
- 2 tablespoons unsweetened cocoa powder
- 1 teaspoon baking soda
- ½ teaspoon salt
- 1 cup unsalted butter (227 g), softened
- 1 ¼ cups granulated sugar (250 g)
- ¼ cup packed brown sugar (50 g)
- 2 large eggs, room temperature
- 2 teaspoons pure vanilla extract
- 2 tablespoons red food coloring (gel color preferred)
- 1 teaspoon distilled white vinegar
- ½ cup buttermilk (120 ml), room temperature (or milk + 1 tsp lemon juice)
- 8 oz cream cheese (225 g), softened
- ½ cup unsalted butter (113 g), softened
- 3 cups powdered sugar (360 g), sifted
- 1 teaspoon vanilla extract
- Pinch of salt
Instructions
- Preheat oven to 350°F (175°C). Line a 9×13 inch baking pan with parchment paper, leaving overhang for easy removal.
- In a large bowl, sift together flour, cocoa powder, baking soda, and salt. Set aside.
- Using a mixer, beat softened butter, granulated sugar, and brown sugar on medium speed for 3-4 minutes until light and fluffy.
- Beat in eggs one at a time, fully incorporating each before adding the next. Mix in vanilla extract and red food coloring until dough is deep red.
- Slowly add dry ingredients to wet, alternating with buttermilk and vinegar, starting and ending with dry ingredients. Mix on low speed just until combined.
- Spread dough evenly in prepared pan, smoothing the top with a spatula.
- Bake for 25-30 minutes. Check at 25 minutes with a toothpick; it should come out with a few moist crumbs but no wet batter.
- Remove from oven and cool completely in pan on a wire rack for at least 30 minutes.
- Beat cream cheese and softened butter until smooth. Gradually add powdered sugar, mixing well after each addition. Stir in vanilla extract and salt. Add a teaspoon of milk if frosting is too thick.
- Spread frosting evenly over cooled cookie cake using an offset spatula or butter knife. Decorate with white stripes and stars using extra frosting or edible decorations.
- Refrigerate for 15-20 minutes to let frosting set before slicing and serving.
Notes
Use gel food coloring for vibrant red without adding extra moisture. Let cookie cool completely before frosting to avoid melting. For gluten-free, substitute flour with 1:1 gluten-free blend. For vegan, use plant-based butter and cream cheese, flax eggs, and dairy-free milk. Mark stripes lightly with a toothpick before piping frosting for neat design. Chill frosting if it becomes too soft while decorating.
- Prep Time: 15 minutes
- Cook Time: 30 minutes
- Category: Dessert
- Cuisine: American
Nutrition
- Serving Size: 1 slice (1/12 of cak
- Calories: 320
- Fat: 15
- Carbohydrates: 45
- Protein: 4
Keywords: red velvet, cookie cake, flag cookie, Fourth of July dessert, festive dessert, cream cheese frosting, patriotic dessert
