
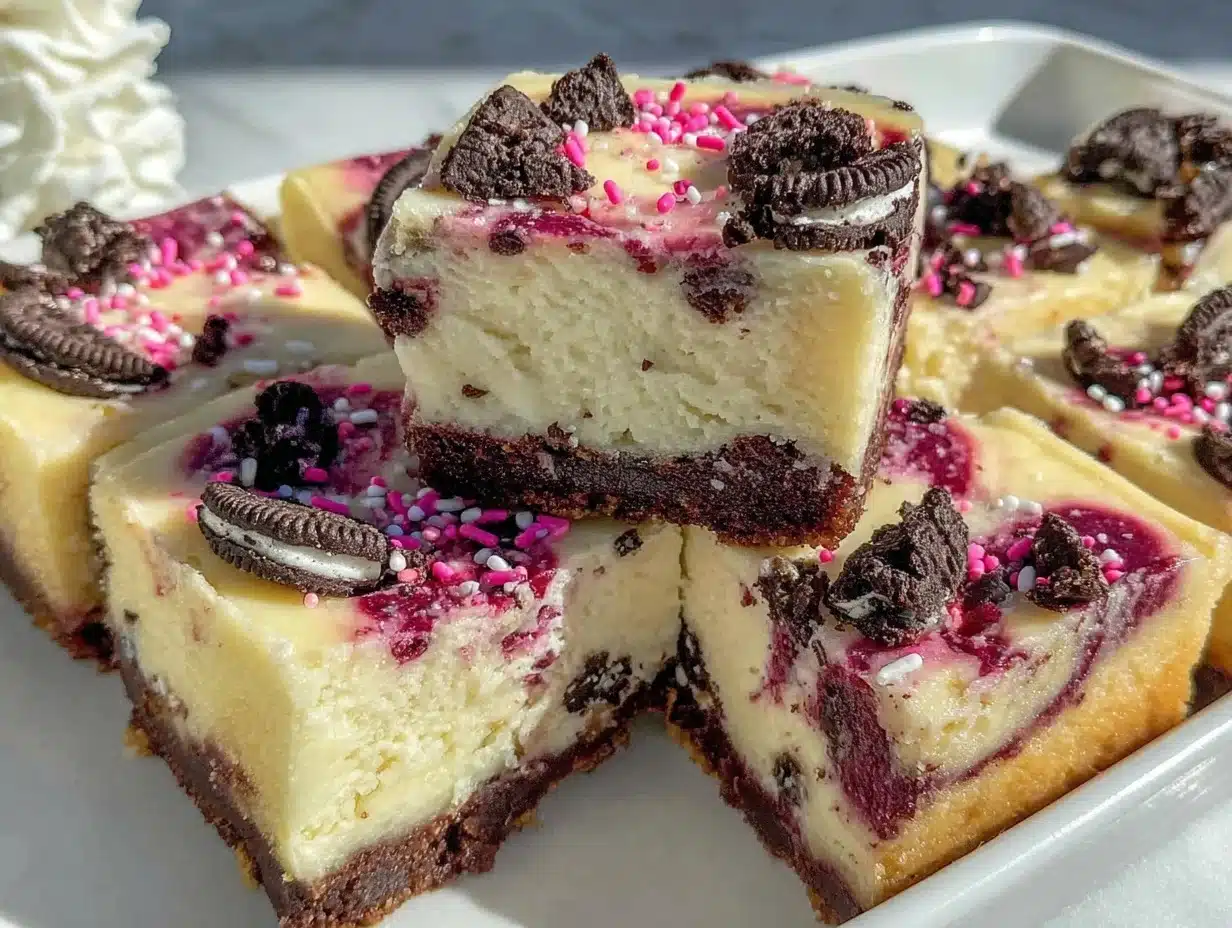
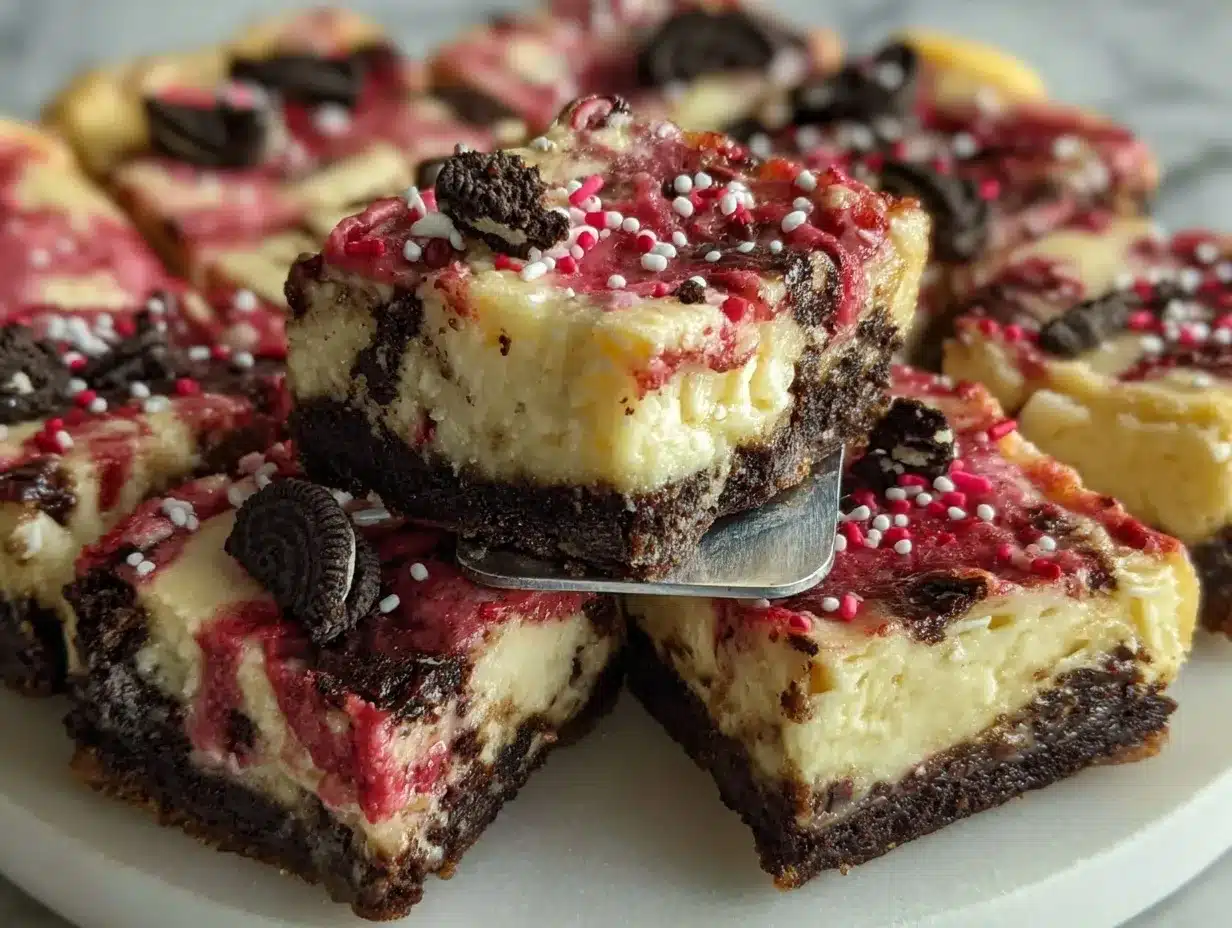
Imagine this: you open your oven, and the sweet scent of vanilla, cream cheese, and chocolatey Oreos fills your kitchen—it’s like a warm hug wrapped in the prettiest shade of pink. These Pink Velvet Oreo Cheesecake Bars aren’t just a dessert; they’re a mood, a celebration, and a whole lot of heart in every bite. The first time I made them was on a chilly February afternoon when snow was falling outside. I remember thinking, “Why haven’t I been baking pink velvet all my life?” The color alone made me smile, but the taste—oh my word—was pure, nostalgic comfort with a twist.
My grandma used to make classic velvet cakes for family gatherings, but she never tried pink (I wish she had!). When I stumbled onto the idea of swirling cream cheese and Oreos into velvet bars, it was a total lightbulb moment. Honestly, these bars are dangerously easy to whip up, and you probably already have most of the ingredients hiding in your pantry. My family couldn’t stop sneaking them off the cooling rack, and I totally get it. There’s something about that creamy cheesecake layer over a pink velvet base, with chunks of Oreo in every bite, that’s just irresistible.
Perfect for Valentine’s parties, Galentine’s get-togethers, or as a sweet treat for the kids after school, these bars have become my go-to for any celebration that needs a pop of pink and a dash of fun. They’re the star of every cookie tray and a guaranteed conversation starter (I’ve had people ask for the recipe before they even take the first bite!). After plenty of “research” and taste tests, I can say these Pink Velvet Oreo Cheesecake Bars are a staple in our house. They’re the kind of dessert that feels like a love letter from your kitchen—bookmark this one, you won’t regret it!
Why You’ll Love This Recipe
After years of tweaking and testing dessert bars for holidays, I can honestly say these Pink Velvet Oreo Cheesecake Bars are in a league of their own. I’ve made them for everything from little family dinners to big Valentine’s parties, and they always get rave reviews. Here’s why you’ll want to bake a batch (or two):
- Quick & Easy: You can have these bars mixed, baked, and cooling in under an hour—no fancy equipment or long chill times needed. Perfect for last-minute party prep or a spontaneous baking session with the kids.
- Simple Ingredients: No need for complicated ingredients or specialty shopping trips. If you’ve got Oreos, cream cheese, and basic baking staples, you’re good to go.
- Perfect for Celebrations: The pretty pink color makes these bars a showstopper for Valentine’s Day, birthday parties, or any occasion that needs a festive touch.
- Crowd-Pleaser: Kids and adults both go wild for the creamy cheesecake layer and surprise Oreo crunch. Even the “not a dessert person” folks in my family sneak seconds.
- Unbelievably Delicious: The combination of velvety, soft cake, smooth cheesecake, and crunchy Oreos is next-level. Seriously, you’ll want to savor every bite.
What sets this recipe apart? I use a little trick with the eggs and a hint of white vinegar in the velvet base to keep it tender and moist—no dry pink velvet here! Swirling the Oreos into the cheesecake gives every piece texture and a bit of chocolatey surprise. I’ve tried dozens of velvet and cheesecake bar recipes, and none come close to this balance of flavor and texture. It’s the kind of dessert that makes you close your eyes and sigh with happiness after the first bite.
These bars are comfort food with a twist—fun and playful, but still classic enough to remind you of family traditions and home. They’re perfect for impressing guests (with minimal stress!) or just making an ordinary day a little more special. Trust me, once you try them, they’ll be on your “special occasions” list for good.
What Ingredients You Will Need
This recipe uses simple, wholesome ingredients to deliver bold flavor, gorgeous color, and that signature Oreo crunch. Most of these are pantry staples, so you won’t have to hunt down anything fancy. Here’s the full rundown:
- For the Pink Velvet Base:
- 1 cup (125g) all-purpose flour
- 1/4 cup (30g) cornstarch (for extra tenderness)
- 1/2 cup (100g) granulated sugar
- 1/4 cup (55g) unsalted butter, melted and slightly cooled
- 2 large eggs, room temperature
- 2 tablespoons (30ml) buttermilk (or substitute with milk and a squeeze of lemon juice)
- 1 teaspoon pure vanilla extract
- 1/2 teaspoon white vinegar (keeps the crumb soft—don’t skip!)
- 1/4 teaspoon baking powder
- 1/8 teaspoon salt
- Pink gel food coloring (I recommend Americolor or Wilton for vivid pink)
- For the Oreo Cheesecake Layer:
- 8 oz (225g) cream cheese, softened (full-fat for best texture)
- 1/4 cup (50g) granulated sugar
- 1 large egg, room temperature
- 1/2 teaspoon pure vanilla extract
- 8 Oreo cookies, chopped (plus more for topping, if you like)
- Optional Toppings:
- Extra crushed Oreos
- Festive sprinkles (for that Pinterest-worthy finish!)
- Powdered sugar dusting (for a touch of elegance)
- White chocolate drizzle
Ingredient Tips: For the cream cheese, I always use Philadelphia brand—it gives the smoothest, creamiest result. If you want a gluten-free option, use a 1:1 gluten-free flour blend and gluten-free sandwich cookies. If you’re out of buttermilk, just stir 1/2 teaspoon lemon juice or vinegar into regular milk and let it sit for a minute. The pink food coloring is what makes these bars pop, so don’t be shy with it! For the Oreos, classic or double-stuf both work—sometimes I even use the Valentine’s edition with pink filling for extra fun. In the summer, I’ve swapped Oreos for golden sandwich cookies and added a handful of freeze-dried strawberries for a fruity twist. The base recipe is super forgiving—play around and make it yours!
Equipment Needed
You don’t need a fancy kitchen to make these Pink Velvet Oreo Cheesecake Bars—just a few basics and you’re set. Here’s what you’ll need:
- 8-inch square baking pan (metal or glass, both work—just line with parchment for easy removal)
- Mixing bowls (one medium for the velvet batter, one small for the cheesecake)
- Whisk or hand mixer (a hand mixer makes the cheesecake layer extra creamy, but you can whisk by hand if you work quickly)
- Measuring cups and spoons (accurate measurements make all the difference with baking!)
- Spatula (for scraping every bit of batter from the bowl—waste not, want not!)
- Parchment paper or foil (for lining the pan and easy lifting—trust me, it’s a lifesaver)
- Knife or offset spatula (for swirling and spreading the layers)
If you don’t have an 8-inch pan, a 9-inch will work—the bars will just be a bit thinner and may bake a few minutes faster. I’ve made these in glass pans and metal pans; metal gives a slightly crisper edge, while glass is more forgiving if you tend to overbake. For budget-friendly options, I’ve found affordable nonstick pans at Target and Walmart, and silicone spatulas from IKEA last surprisingly long. If your hand mixer is on its last leg (like mine was for years), you can beat the cheesecake layer with a fork—just make sure your cream cheese is super soft. Don’t skip the parchment lining; it makes lifting and slicing the bars a breeze (and cleanup is practically nothing).
How to Make Pink Velvet Oreo Cheesecake Bars
- Preheat and Prep: Preheat your oven to 350°F (175°C). Line an 8-inch (20cm) square baking pan with parchment paper, leaving a little overhang for easy lifting later. Lightly spray with cooking spray if you want extra insurance against sticking.
- Mix the Pink Velvet Batter: In a medium bowl, whisk together 1 cup (125g) all-purpose flour, 1/4 cup (30g) cornstarch, 1/2 cup (100g) granulated sugar, 1/4 teaspoon baking powder, and 1/8 teaspoon salt. In a separate small bowl, whisk 2 large eggs, 1/4 cup (55g) melted unsalted butter, 2 tablespoons (30ml) buttermilk, 1 teaspoon vanilla, 1/2 teaspoon white vinegar, and a few drops of pink gel food coloring. Pour the wet ingredients into the dry and mix until just combined—don’t overmix or you’ll lose that velvet texture. The batter should be thick, smooth, and bubblegum-pink.
- Spread the Velvet Base: Pour and spread the pink velvet batter into your prepared pan. Use a spatula to coax it into the corners—don’t worry if it seems like a thin layer, it’ll puff up as it bakes.
- Make the Oreo Cheesecake Layer: In a small bowl (or using a hand mixer), beat 8 oz (225g) softened cream cheese with 1/4 cup (50g) sugar until smooth and fluffy, about 2 minutes. Add 1 large egg and 1/2 teaspoon vanilla, then beat until fully incorporated and creamy. Stir in 8 chopped Oreo cookies, leaving a few extra for sprinkling on top if you like.
- Layer and Swirl: Dollop the cheesecake mixture evenly over the pink velvet base. Use a butter knife or offset spatula to gently swirl the layers—don’t over-swirl, or you’ll lose the pretty color contrast. Sprinkle a few extra Oreo chunks and festive sprinkles on top for good measure.
- Bake: Bake for 28-32 minutes, or until the edges are set and a toothpick inserted near the center comes out mostly clean (a few moist crumbs are perfect). The center may still jiggle slightly but will firm up as it cools. If you see the top browning too fast, lightly tent with foil at the 20-minute mark.
- Cool: Let the bars cool completely in the pan on a wire rack—this part takes patience! Once cool, chill them in the fridge for at least 1 hour for easiest slicing and best flavor. (Hot tip: I sometimes speed this up in the freezer for 20 minutes if I’m in a rush!)
- Slice and Serve: Use the parchment overhang to lift the bars out of the pan. Slice into 16 squares with a sharp knife, wiping the blade clean between cuts for tidy edges. Dust with powdered sugar or drizzle with melted white chocolate if you want to get fancy!
Common Issues & Fixes: If your cheesecake layer cracks, no worries—just cover with more Oreos or sprinkles. If the middle seems too soft, chill longer; they firm up beautifully. If the bars stick, double-check your parchment lining next time. And remember, don’t overbake—cheesecake likes a little wobble in the middle and sets as it cools.
Personal Tip: I prep the pink velvet base and cheesecake layer at the same time, so everything comes together fast. If you want a super-vivid pink, add a couple more drops of gel food coloring—just don’t use liquid, or the batter might get runny.
Cooking Tips & Techniques
I’ve made these Pink Velvet Oreo Cheesecake Bars more times than I can count, and I’ve learned a few things along the way. Here are my go-to tips for picture-perfect bars every time:
- Room Temperature Ingredients: Make sure your cream cheese and eggs are at room temperature—this helps everything blend smoothly, with no pesky lumps in the cheesecake layer.
- Don’t Overmix: Mix the batter until just combined. Overmixing develops gluten in the flour, which can turn your velvet base tough instead of tender. Trust me, I’ve made that mistake and regretted it!
- Cheesecake Swirl Technique: Use a gentle hand with swirling—about 3-4 figure-eight motions with a butter knife does the trick for a pretty marbled look.
- Parchment Paper is a Must: I skipped the parchment once and paid the price—sticky bars that wouldn’t budge from the pan. Don’t make my mistake; always line your pan.
- Watch Your Bake Time: All ovens are a little different. Start checking at 28 minutes; the edges should look set, and the center will have a slight jiggle. Overbaking dries out the bars.
- Chill for Clean Slices: I know it’s tempting to dig in right away, but chilling makes for neater slicing and better texture. If you’re impatient (like me), a quick chill in the freezer helps.
- Oreo Crunch: Chop the Oreos roughly for big chunks—don’t pulverize them. You want texture in every bite, not cookie dust.
If you’re multitasking, you can pre-measure ingredients ahead of time and let them come to room temperature while you prep your pan. If you ever forget to soften the cream cheese, microwave it in short 10-second bursts until soft but not melted. And if your batter looks a little dry, a splash of extra buttermilk does wonders. Remember, baking is as much about intuition as it is about measurements—trust your senses!
Variations & Adaptations
The best part about these Pink Velvet Oreo Cheesecake Bars? You can make them your own! Here are some fun twists I’ve tried (and loved):
- Gluten-Free Option: Swap the all-purpose flour for a 1:1 gluten-free blend and use gluten-free sandwich cookies. The texture is just as dreamy and no one will know the difference.
- Red Velvet Bars: For a classic Valentine’s twist, use red gel food coloring instead of pink, and add 1 tablespoon unsweetened cocoa powder to the velvet base for that signature red velvet flavor.
- Berry Swirl Cheesecake: Add 1/4 cup (60g) chopped freeze-dried strawberries to the cheesecake layer, or gently swirl in a few tablespoons of raspberry jam before baking for a fruity pop.
- Dairy-Free Adaptation: Use dairy-free cream cheese (like Kite Hill or Tofutti), non-dairy butter, and your favorite plant-based sandwich cookies. Substitute buttermilk with a non-dairy milk and lemon juice combo.
- Holiday Sprinkles: Change out the sprinkles for different holidays—red and green for Christmas, pastel for Easter, or all pink for baby showers.
- Personal Favorite: I’ve done a half-and-half pan, swirling half with regular Oreos and half with Golden Oreos—everyone loves picking their favorite flavor!
Adjustments for different pans: Double the recipe for a 9×13-inch pan, and check for doneness around 35-38 minutes. If you prefer mini bars, bake in a muffin tin with liners (reduce bake time to about 18-20 minutes). The possibilities are endless, and these bars are forgiving enough to handle your wildest flavor experiments. Got allergies? Sunflower seed butter works well as a nut-free velvet base, and you can use an egg replacer like flax eggs if needed—just note the texture will be a bit different, but still tasty.
Serving & Storage Suggestions
These Pink Velvet Oreo Cheesecake Bars are best served chilled or at room temperature, cut into neat squares or triangles for that classic bakery look. I love stacking them on a white platter with a scattering of heart-shaped sprinkles and extra Oreo crumbs—so Pinterest-worthy! For parties, wrap each bar in parchment and tie with a ribbon for individual treats (kids go wild for this at Valentine’s school parties).
Pair these bars with a mug of hot cocoa, a glass of cold milk, or a bubbly rosé if you’re celebrating with grown-ups. They also make a fun addition to a dessert board alongside chocolate-dipped strawberries, mini cupcakes, and marshmallow pops.
For storage, keep the bars in an airtight container in the fridge—they’ll stay fresh for up to 5 days (if they last that long). To freeze, layer bars between parchment in a freezer-safe box; thaw overnight in the refrigerator before serving. If you want to revive the texture, a quick 5-second zap in the microwave softens the cheesecake just enough. Pro tip: the flavors actually get even better on day two as everything melds together, so don’t be afraid to make these ahead for parties.
Nutritional Information & Benefits
Here’s a quick look at what you’re getting in each bar (based on 16 bars):
- Calories: approx. 190
- Fat: 9g
- Carbs: 24g
- Protein: 3g
- Sugar: 14g
The cream cheese adds a bit of calcium and protein, while using real butter and eggs means you get a richer flavor with some healthy fats. If you swap in Greek yogurt for part of the cream cheese, you’ll bump up the protein content even more. For gluten-free or dairy-free eaters, the substitutions above keep things allergy-friendly.
Of course, these are a sweet treat, but I believe in balanced indulgence—holidays are for celebrating, after all! Remember, Oreos do contain wheat and soy, so be mindful if anyone in your crowd has those allergies. And if you’re watching sugar, you can use a stevia baking blend, but the texture will be a touch different. In our house, we enjoy these as a once-in-a-while celebration, and they always spark plenty of smiles.
Conclusion
There’s just something magical about these Pink Velvet Oreo Cheesecake Bars. They’re fun, festive, and guaranteed to brighten up your Valentine’s Day—or really, any day you need a little extra color and cheer. I love how easy they are to make, how stunning they look on a party platter, and most of all, how happy they make everyone who tries them.
Don’t be afraid to play around with flavors, colors, or toppings—these bars are meant to be personalized to fit your celebration and your taste. Honestly, I’ve baked them for friends, family, and even for my own birthday, and they never let me down. If you make them, I’d love to hear how you put your own spin on them (drop a comment below or tag me on your favorite social channel!).
Happy baking, and may your Valentine’s be as sweet and colorful as these delicious cheesecake bars!
FAQs About Pink Velvet Oreo Cheesecake Bars
How do I get the best pink color in my bars?
Use a gel-based food coloring for the brightest pink—liquid dyes can make the batter runny and dull. Start with a few drops, mix, and add more until you get your perfect shade.
Can I make these ahead of time?
Absolutely! These bars taste even better after chilling overnight. Make them up to two days in advance, and store tightly covered in the fridge.
Can I use low-fat cream cheese?
Yes, you can, but full-fat cream cheese gives the creamiest, richest texture. If you use low-fat, the bars will still set but may be a little softer.
What’s the best way to cut clean bars?
Chill the bars well, then use a sharp knife wiped clean between each cut. For super tidy edges, dip your knife in hot water and dry before each cut.
Can I use other types of cookies instead of Oreos?
Definitely! Try Golden Oreos, chocolate sandwich cookies, or even graham crackers for a different twist. Just chop them into chunks and fold into the cheesecake layer as usual.
Pin This Recipe!
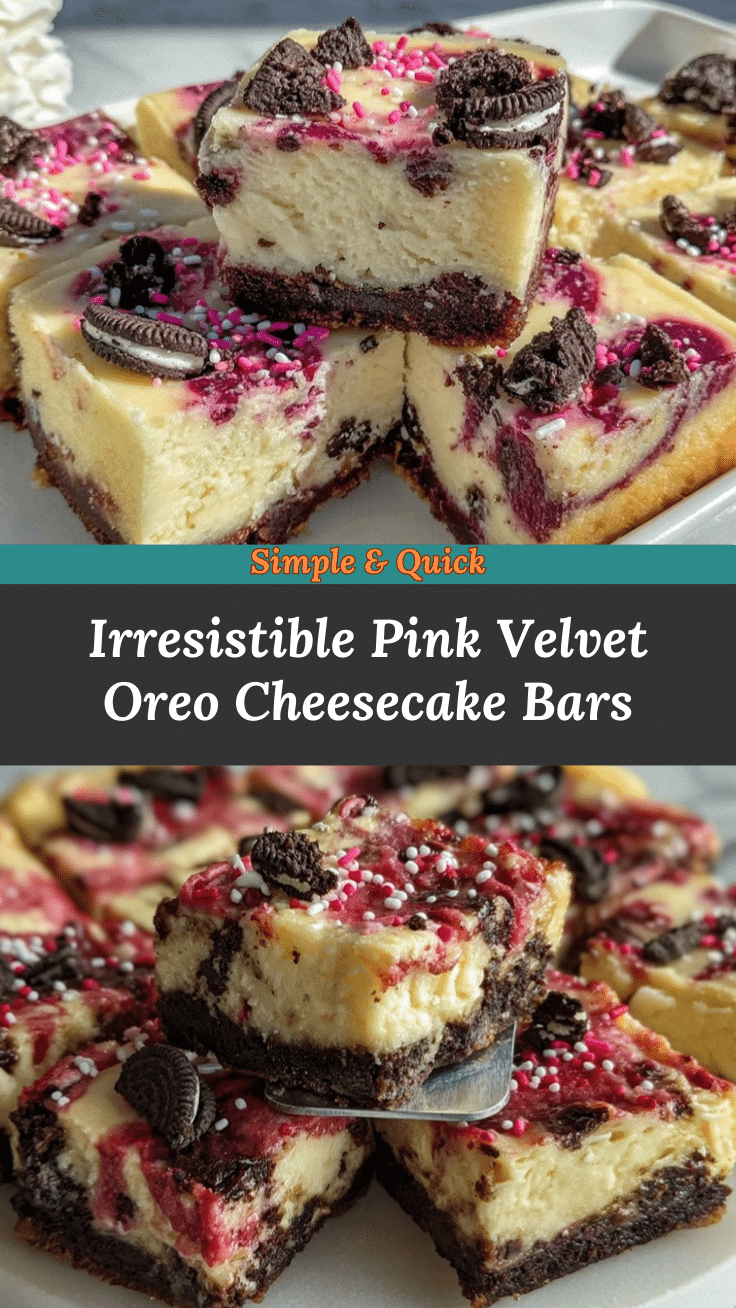

Pink Velvet Oreo Cheesecake Bars
- Total Time: 1 hour 10 minutes
- Yield: 16 bars 1x
Description
These festive cheesecake bars feature a tender pink velvet base topped with a creamy Oreo-studded cheesecake layer. Perfect for Valentine’s parties or any celebration, they’re easy to make and guaranteed to impress with their vibrant color and irresistible flavor.
Ingredients
- 1 cup all-purpose flour
- 1/4 cup cornstarch
- 1/2 cup granulated sugar
- 1/4 cup unsalted butter, melted and slightly cooled
- 2 large eggs, room temperature
- 2 tablespoons buttermilk (or milk + 1/2 teaspoon lemon juice)
- 1 teaspoon pure vanilla extract
- 1/2 teaspoon white vinegar
- 1/4 teaspoon baking powder
- 1/8 teaspoon salt
- Pink gel food coloring
- 8 oz cream cheese, softened
- 1/4 cup granulated sugar
- 1 large egg, room temperature
- 1/2 teaspoon pure vanilla extract
- 8 Oreo cookies, chopped (plus more for topping)
- Optional: extra crushed Oreos
- Optional: festive sprinkles
- Optional: powdered sugar dusting
- Optional: white chocolate drizzle
Instructions
- Preheat oven to 350°F (175°C). Line an 8-inch square baking pan with parchment paper, leaving an overhang for easy lifting. Lightly spray with cooking spray if desired.
- In a medium bowl, whisk together flour, cornstarch, sugar, baking powder, and salt.
- In a separate bowl, whisk eggs, melted butter, buttermilk, vanilla, vinegar, and pink gel food coloring.
- Pour wet ingredients into dry and mix until just combined. Do not overmix.
- Spread pink velvet batter evenly into prepared pan.
- In a small bowl, beat cream cheese and sugar until smooth and fluffy (about 2 minutes). Add egg and vanilla, beat until creamy. Stir in chopped Oreos.
- Dollop cheesecake mixture over velvet base. Swirl gently with a knife or offset spatula. Sprinkle extra Oreos and festive sprinkles on top if desired.
- Bake for 28-32 minutes, until edges are set and a toothpick inserted near the center comes out mostly clean. Center may jiggle slightly.
- Cool completely in pan on a wire rack, then chill in fridge for at least 1 hour before slicing.
- Lift bars out using parchment, slice into 16 squares. Dust with powdered sugar or drizzle with melted white chocolate if desired.
Notes
Use gel food coloring for the brightest pink. Chill bars before slicing for clean edges. For gluten-free, use a 1:1 gluten-free flour blend and gluten-free sandwich cookies. Bars can be made ahead and stored in the fridge for up to 5 days. Variations include using Golden Oreos, adding freeze-dried strawberries, or swapping in dairy-free ingredients.
- Prep Time: 20 minutes
- Cook Time: 30 minutes
- Category: Dessert
- Cuisine: American
Nutrition
- Serving Size: 1 bar
- Calories: 190
- Sugar: 14
- Sodium: 120
- Fat: 9
- Saturated Fat: 5
- Carbohydrates: 24
- Fiber: 0.5
- Protein: 3
Keywords: pink velvet, oreo cheesecake bars, valentine's dessert, party bars, easy cheesecake, festive baking, velvet cake bars, oreo dessert
