
The word “decor” always sparks a bit of excitement in me—especially when autumn rolls around and inspiration is everywhere. Last year, I was scrolling through my camera roll and spotted my old, forgotten wooden tray. Instead of letting it collect more dust, I decided to try a rustic farmhouse tray makeover and turn it into a cozy autumn centerpiece. What surprised me most? According to a recent survey by Houzz, nearly 65% of homeowners want to update their fall decor with creative DIY projects. I was right on trend without even knowing it! There’s something so satisfying about breathing new life into a simple decor tray and watching your dining table or coffee table transform. Over the past few seasons, I’ve learned that even small changes—a coat of chalk paint, a handful of mini pumpkins, or a sprig of dried wheat—can totally shift the mood of a room. In this post, I’ll walk you through seven beautiful and practical DIY autumn farmhouse tray centerpiece ideas, from my own successes (and a few hilarious fails) to quick wins that anyone can pull off. If you’ve ever wanted to create an autumn centerpiece that’s equal parts rustic charm and homemade pride, you’re in the right place.
What Makes Rustic Farmhouse Autumn Decor So Inviting?
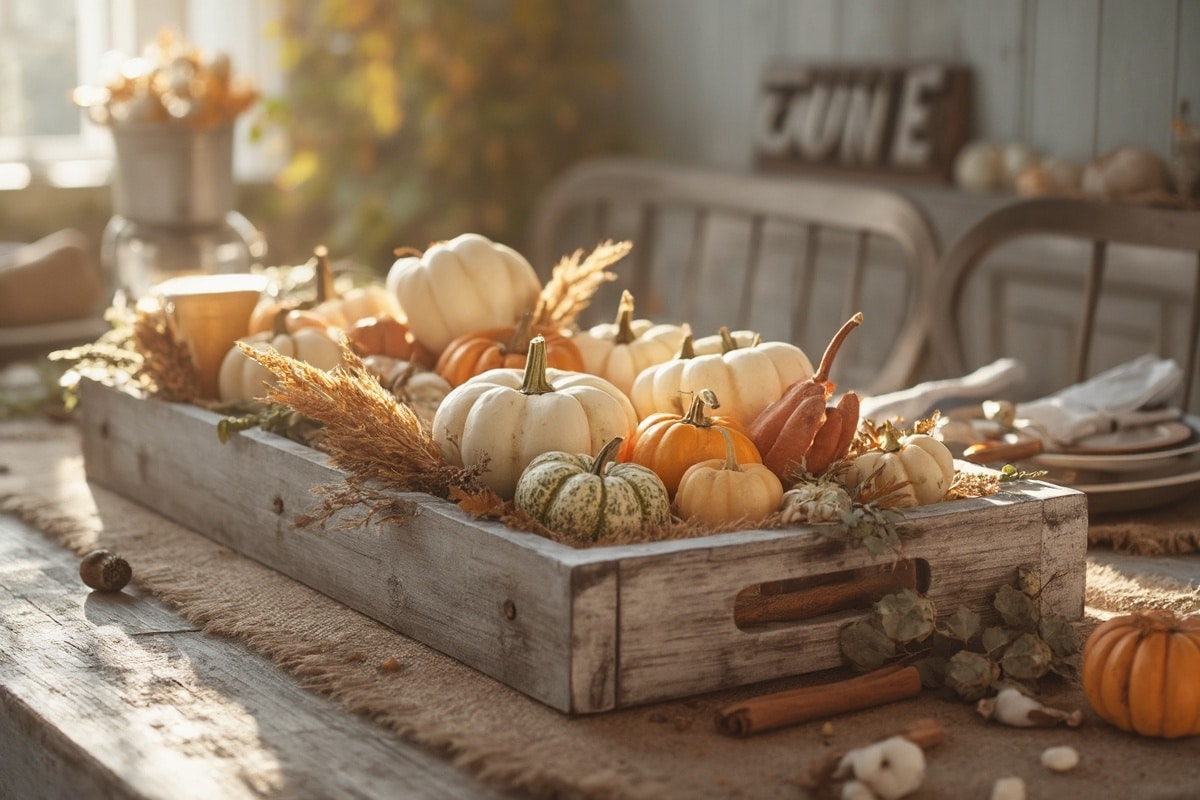
Rustic farmhouse decor feels warm, lived-in, and deeply comforting—especially as the weather cools and we all spend more time indoors. This style is rooted in natural textures, weathered woods, and cozy, layered looks. Think of whitewashed trays, chunky knit blankets, galvanized metal, and accents like burlap or jute. Farmhouse autumn centerpieces often feature earthy tones—burnt orange, sage green, wheat gold, and creamy whites—mixed with organic materials such as dried leaves, acorns, apples, and pumpkins. The overall vibe is relaxed and welcoming, like your favorite family gathering spot.
The farmhouse look originally drew inspiration from rural American homes, where practicality and beauty blended seamlessly. Over time, designers like Joanna Gaines have made this look a staple in modern homes, often pairing vintage finds with new pieces for that collected-over-time feeling. If you’ve ever admired Reese Witherspoon’s Nashville home or the pared-down autumn looks on Pinterest, you’ve seen the farmhouse trend in action. Lately, there’s been a surge in “cozy core” content on social media—candles, blankets, and all things tactile—which fits perfectly with autumn farmhouse decor. The best part? Anyone can achieve this look with a bit of creativity, a willingness to try, and a love for all things autumn.
How Do You Plan the Perfect DIY Farmhouse Tray Makeover?
The first step in any decor project is to really look at your space and think about your needs. Start by measuring your table or surface—will your tray fit comfortably, or will it crowd things? For my last autumn centerpiece, my tray was 16″ x 12″, which felt just right for a four-person table. Next, consider light sources and sight lines. If your centerpiece is too tall, it can block conversation or feel awkward. I like to keep tray arrangements under 12″ high for dining tables and up to 18″ on coffee tables.
Set your design goals. Do you want something bold and colorful, or subtle and neutral? Are you aiming for a centerpiece that’s kid-friendly, or more sophisticated? Grab a notebook or open your favorite digital mood board tool—Pinterest is my go-to—and collect images that catch your eye. Notice the repeated colors, textures, and shapes. Are you drawn to distressed wood and copper accents? Or maybe your eye goes to soft whites, dried florals, and soft greenery? I once made the mistake of mixing too many styles (a little boho, a little modern, a dash of farmhouse) and ended up with a look that was more chaotic than cozy. It taught me to stick to a clear vision.
When planning, I like to sketch a rough layout—placing taller items in the center or at the back, then layering smaller objects around them. I use sticky notes to label what goes where, so I’m not scrambling during assembly. My favorite decision-making trick: lay everything out on the tray before finalizing. Swap items in and out, step back, and snap a quick photo—sometimes what looks good in person feels different on camera. Above all, trust your gut and don’t be afraid of small imperfections—they add character and tell your story.
What Materials and Decor Items Do You Need for a Farmhouse Tray Centerpiece?

Here’s a practical shopping list to get you started. You can find most of these items at home stores, craft shops, thrift stores, or even in your own backyard. Mix and match based on your budget and style.
- Wooden tray (distressed or plain, minimum 14″ x 10″)
- Chalk or milk paint (antique white, sage green, or charcoal gray)
- Mini pumpkins (real or faux)
- Dried wheat, eucalyptus, or pampas grass
- Mason jars or small glass vases
- Battery-operated candles or tealights
- Burlap ribbon or jute twine
- Acorns, pinecones, or cinnamon sticks
- Small picture frames or wooden signs (optional)
- Hot glue gun, paintbrushes, sandpaper
For budget-friendly options, check thrift stores for trays and vases, or look for end-of-season clearance at Target and Michaels. Repurpose old jars and upcycle baskets or tins. I always keep an eye out for local farmers’ markets for affordable dried florals and real mini pumpkins. Seasonal sales around Labor Day and early October can save you a bundle. And don’t overlook dollar stores—they’re goldmines for accent decor!
How Do You Create a DIY Farmhouse Tray Centerpiece? (Step-by-Step Guide)

- Prep Your Tray (30 minutes – 1 hour)
Sand down any rough edges and clean the surface. If you want a distressed farmhouse look, paint your tray with chalk paint (try Annie Sloan “Old White” or Rust-Oleum “Linen White”). Let dry for 30–45 minutes, then gently sand corners and edges for that worn-in charm. - Layer Your Base (15 minutes)
Lay down a piece of burlap, a runner, or jute twine in the bottom of the tray. This adds depth and prevents items from sliding around. - Arrange Tall Elements (10 minutes)
Place your tallest items (bottle vases or mason jars filled with dried wheat or eucalyptus) toward the back or center. This creates a focal point and anchors your arrangement. - Add Medium Accents (15 minutes)
Tuck in mini pumpkins, small lanterns, or chunky candle holders around the tall pieces. Vary the heights for a natural, collected look. - Incorporate Small Decorative Items (10 minutes)
Scatter pinecones, cinnamon sticks, or faux berries in the empty spaces. These fill gaps and add texture. - Layer in Soft Lighting (5 minutes)
Add battery-operated candles or fairy lights for that autumn glow. I usually tuck lights under the burlap or loop them around vases for a subtle shimmer. - Add Final Touches and Personal Details (10 minutes)
Slip in a framed quote, a mini chalkboard with a seasonal greeting (“Give Thanks”), or a small family photo. These touches make the centerpiece uniquely yours.
Troubleshooting tips: If your tray looks cluttered, remove one or two items and step back. If it feels flat, add more height with taller branches or a stack of books underneath a vase. When I first started, I always overloaded my tray—now, I stick to a “less is more” mantra.
Before-and-after photos are the most motivating part of any project. Take a quick photo of your tray before you start, and another when you’re finished. You’ll be amazed by how a few simple decor choices can totally transform a tired tray into a farmhouse autumn highlight.
Personal tip: Set a timer for each step. I give myself 10 minutes per layer, so the whole process stays fun and doesn’t feel overwhelming. Plus, if you want to change things up for Thanksgiving or Halloween, just swap out a few accents—no need to start from scratch!
What Are the Best Styling Tips and Design Tricks for a Rustic Farmhouse Tray?

One of the biggest lessons I’ve learned: balance is everything. Try to stagger tall and short elements so your tray doesn’t look lopsided. Keep odd numbers in mind—three pumpkins, five pinecones—since this feels more natural and less staged. Layer textures by mixing rough burlap, smooth glass, and soft faux fur for a cozy, inviting look.
A common mistake is overcrowding. I used to think more was better, but the most beautiful trays have a bit of breathing room. If you’re struggling with placement, use the “triangle trick”—arrange your tallest, most eye-catching items in a triangle shape for visual interest. Don’t forget about scale—a tiny tray can’t handle oversized lanterns, while a large tray can look sparse with just a few small items.
Add height by stacking books or using a small cake stand. Use risers to lift candles or vases off the tray for dimension. If you’re unsure which colors to use, stick to two main shades and one accent. For a magazine-worthy finish, tuck in unexpected touches—like a sprig of rosemary or a small vintage key—that add character and a story to your decor.
My worst fail? I once used a real candle without a holder, and wax dripped everywhere. Since then, I always pick battery-operated candles for safety and a mess-free experience. Small tweaks make a big difference!
How Do You Combine Colors and Textures for Autumn Decor?
For a classic farmhouse autumn tray, I love starting with a base of warm neutrals: creamy whites (Benjamin Moore “Simply White”, HEX #F8F8F6), tan, and soft gray. Then, layer in burnt orange (HEX #CC5500), muted sage green (HEX #A3B18A), and mustard yellow (HEX #FFD166) for autumn vibrance.
Texture is key. Pair rough burlap with smooth ceramics, fuzzy faux fur, and sleek glass jars. Add a few sprigs of eucalyptus or dried lavender for a soft, organic touch. For fall, I like to bring in chunky knits or plaid napkins for extra coziness—especially when the weather turns chilly.
Accent colors can shift with the season. In early autumn, play up oranges and golds; by late November, swap in deeper reds or forest greens. For a subtle pop, use metallics like brushed gold or copper in candleholders or trays. My personal favorite combo: a whitewashed tray, sage green vases, and a cluster of small orange pumpkins. It’s timeless and still feels fresh year after year.
Remember, if a color feels too bold, use it in small doses—just a ribbon or a single accent piece can make all the difference.
What Design Mistakes Should You Avoid with Farmhouse Tray Decor?
It’s easy to get carried away and fill every inch of your tray. Crowding makes the arrangement look messy, not curated. Stick to 5-7 items for a medium tray—any more, and it gets hard to see each piece.
Don’t ignore scale or proportion. Oversized candles on a small tray can look clunky, while tiny accents on a large tray disappear. Always step back and check your arrangement from a few angles.
Lighting can make or break your centerpiece. If your tray sits in a dimly lit spot, add battery candles or fairy lights. Skip real candles if you have kids or pets—safety first! Another common pitfall: using too many similar textures. Mix it up for visual interest.
One lesson I learned the hard way: always test your layout before gluing or committing to anything permanent. Moving pieces around first saves time, money, and frustration.
How Can You Create a Farmhouse Tray Centerpiece on a Budget?
You don’t need to spend a fortune for a stunning farmhouse tray. Try these budget-friendly tips:
- Paint or sand an old tray for a fresh look—skip buying new.
- Use thrifted mason jars, bottles, or tin cans as vases.
- Collect pinecones, acorns, and branches from your yard or local park.
- DIY mini pumpkins with fabric scraps or yarn.
- Shop end-of-season sales for faux florals and candles.
- Repurpose old scarves or napkins as tray liners.
My favorite budget win: I once used a $2 thrifted tray, spray painted it white, and filled it with dollar store pumpkins and candles. The whole project cost less than $10 and looked straight out of a magazine!
Conclusion: Why Try a DIY Farmhouse Tray Makeover This Autumn?
A rustic farmhouse tray centerpiece brings instant warmth and personality to your autumn decor. With just a few thoughtful touches and a little creativity, you can turn everyday items into a cozy, welcoming focal point—no design degree required. Start small: swap in a few new accents or try painting your tray. The transformation always surprises me (and my guests) and proves that good design doesn’t have to be complicated or expensive.
If you’ve ever doubted your DIY skills, let this be your sign to give it a try. Your home deserves beautiful, personal touches—ones you can be proud of. So pull out that old tray, gather your favorite autumn pieces, and make something wonderful. You’ll be amazed at how even the simplest project can light up your space and your spirits. Happy decorating!
FAQs: DIY Rustic Farmhouse Tray Decor
How do I keep my farmhouse tray centerpiece stable?
Use a non-slip liner like a piece of felt or shelf liner under your tray, and group heavier items at the center. This keeps everything in place, even if little hands or pets bump the table.
What’s the best way to clean a painted wooden tray?
Wipe gently with a damp cloth. Avoid soaking or using harsh cleaners, which can damage paint or finish. For stubborn spots, a little baking soda paste works wonders.
How can I store my autumn decor items after the season?
Wrap delicate items in paper or bubble wrap, and store in a labeled bin. Keep faux florals and fabric items in sealed bags to prevent dust or moisture. I always include a lavender sachet for a fresh scent next year!
Can I use fresh flowers or greenery in my tray?
Absolutely! Just use small jars or vases for water, and swap out wilted stems every few days. For longer-lasting decor, mix a few real sprigs with faux greenery.
What’s the quickest way to switch my tray from autumn to winter?
Remove pumpkins and orange tones, and add pinecones, evergreen sprigs, and white or silver accents. Swap out candles for ones in wintery scents like pine or vanilla for an instant seasonal refresh.
