

“You wouldn’t believe it, but the first time I made these Easy No-Bake Oreo Dirt Cup Desserts was actually a total last-minute scramble. It was the afternoon of my niece’s graduation party, and the dessert table was looking a bit bare. I glanced around the kitchen, saw a half-empty pack of Oreos, some pudding mix, and whipped cream in the fridge. Honestly, I wasn’t expecting much, but I threw it all together while juggling a chatty seven-year-old underfoot and somehow ended up with a crowd-pleaser. You know that feeling when you try something almost by accident and it totally steals the show? That’s exactly what happened here.
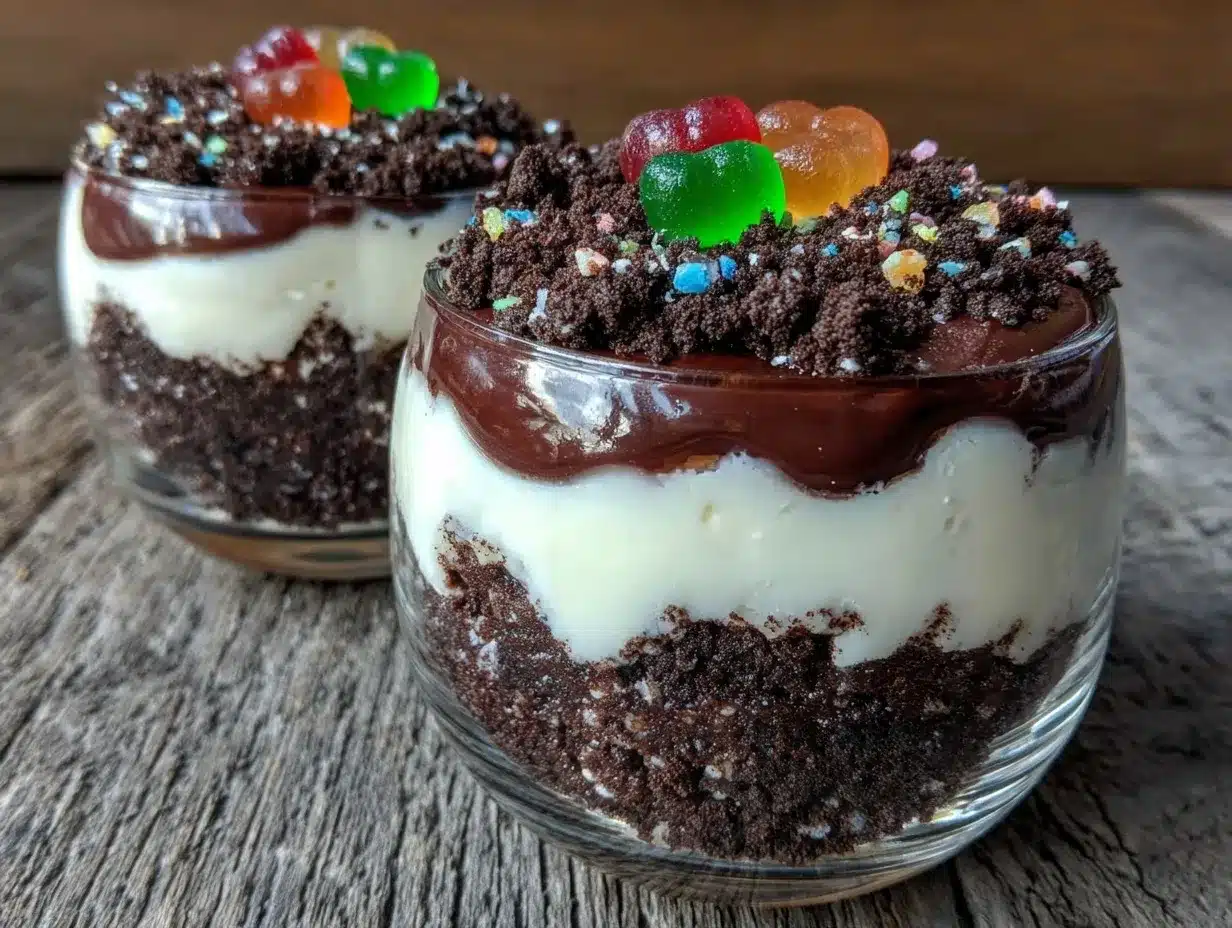
Maybe you’ve been there—needing a dessert that screams fun but without the stress or fancy ingredients. These Oreo Dirt Cups fit that bill perfectly. The way the crushed cookies mimic garden soil, layered with creamy pudding and topped off with gummy worms, always gets laughs and second servings. I remember my nephew’s eyes lighting up as he dug into his cup, declaring it the “best dirt ever.” It’s funny how something so simple can bring out such joy.
What really makes this recipe stick with me is how effortlessly it comes together, even when life’s a little chaotic—as it often is during party prep. Plus, it’s not just about the taste; it’s about the memories that get made around these cups. So, if you’re looking for an easy, crowd-pleasing dessert that’s perfect for grad parties (or any celebration, really), stick around. I promise, this recipe will be your new go-to.
Why You’ll Love This Recipe
Honestly, this Easy No-Bake Oreo Dirt Cup Recipe is a gem for so many reasons:
- Quick & Easy: Whip it up in under 20 minutes, which is a total win when you’re juggling party prep and last-minute errands.
- Simple Ingredients: No need for specialty stores—Oreos, pudding, and a few pantry staples are all you need.
- Perfect for Grad Parties: Fun, festive, and totally Instagram-worthy, these cups fit right in at any celebration.
- Crowd-Pleaser: Kids and adults alike love digging into these playful desserts—it’s a guaranteed hit.
- Unbelievably Delicious: The combo of crunchy cookie crumbs with silky pudding is just the right balance of texture and flavor.
What sets this recipe apart? Well, it’s the no-bake aspect paired with a perfectly layered look that mimics real dirt—complete with gummy worms for that cheeky touch. I like to blend the pudding just right so it’s smooth and creamy without being too runny, and picking Oreos with the right crunch makes all the difference. It’s not just another Oreo pudding cup; it’s the best version you’ll ever make, honestly.
Plus, it’s that kind of dessert that makes you want to close your eyes after the first bite—comfort food, but with a playful twist. Whether you’re impressing a crowd or just making a simple treat for family, these dirt cups bring a little magic to the table without any fuss.
What Ingredients You Will Need
This recipe uses simple, wholesome ingredients to deliver bold flavor and that classic “dirt cup” look without any hassle. You probably have most of these in your pantry already, which makes it even better for last-minute celebrations.
- Oreo Cookies: About 25 whole Oreos, crushed finely (I prefer Nabisco for the perfect crunch and flavor)
- Instant Chocolate Pudding Mix: 2 packets (3.9 oz each) – makes the creamy base
- Milk: 3 cups (720 ml), preferably whole milk for creaminess, but 2% works fine too
- Whipped Topping: 1 cup (240 ml), either store-bought or homemade whipped cream
- Gummy Worms: A handful for fun decoration and that classic dirt-cup vibe
- Vanilla Extract: 1 teaspoon, to add depth to the pudding
- Optional Extras: Mini chocolate chips or crushed peanuts for extra texture (great if you want to jazz it up)
If you’re feeling adventurous or have dietary needs, you can swap the Oreos for gluten-free chocolate sandwich cookies, or use dairy-free pudding and whipped topping alternatives. I’ve found that the texture changes a bit but the flavor stays just as satisfying. In summer, I sometimes add fresh berries on top for a fruity twist that balances the richness.
Equipment Needed
- Mixing Bowls: One large bowl for mixing pudding and another for whipping cream or combining layers.
- Electric Mixer or Whisk: For smooth pudding and fluffy whipped topping. A handheld mixer works wonders here.
- Food Processor or Plastic Bag and Rolling Pin: To crush the Oreos finely. I’ve used a zip-top bag and a wooden rolling pin when pressed for time—works just fine!
- Measuring Cups and Spoons: Essential for precise pudding consistency.
- Serving Cups or Mason Jars: Clear cups help show off those layers beautifully. I like 8-ounce (240 ml) cups for portion control.
If you don’t have an electric mixer, no worries—whisking by hand takes a bit longer but you’ll get there. Also, investing in a good-quality food processor really speeds up cookie crushing, but a sturdy plastic bag will do in a pinch. Keeping your bowls chilled before whipping cream helps it fluff up faster—trust me, it’s a neat trick I learned the hard way after a few floppy batches!
Preparation Method
- Crush the Oreos: Place about 25 Oreo cookies in a food processor and pulse until you get fine crumbs, about 30 seconds. If you don’t have a food processor, put the cookies in a zip-top bag and crush them with a rolling pin until fine but with a bit of texture—aim for a dirt-like look.
- Make the Chocolate Pudding: In a large bowl, whisk together 2 packets of instant chocolate pudding mix with 3 cups (720 ml) of cold milk and 1 teaspoon of vanilla extract. Whisk for about 2 minutes until the pudding thickens. If you’re using a mixer, medium speed works great here. Let it set for 5 minutes for best texture.
- Prepare the Whipped Topping: If using store-bought whipped topping, give it a gentle stir. For homemade, whip 1 cup (240 ml) of heavy cream until soft peaks form. This adds a light, creamy layer to balance the chocolate pudding.
- Layer the Ingredients: Start by spooning a generous 2 tablespoons (30 g) of crushed Oreos into the bottom of each serving cup. Next, add about 1/3 cup (80 ml) of pudding, followed by a dollop (about 2 tablespoons) of whipped topping. Repeat the layers until the cup is nearly full, ending with a final Oreo crumb layer on top.
- Add the Gummy Worms: Place 2 or 3 gummy worms on top of each cup, letting them peek out like critters in the dirt. This is the fun part that always gets smiles!
- Chill the Cups: Refrigerate the dirt cups for at least 1 hour before serving. This helps the flavors meld and the pudding to firm up perfectly.
Pro tip: If your pudding seems too runny, whisk it a little longer or add a bit less milk next time—consistency is key. Also, layering the cups carefully gives that satisfying look and makes it easier to eat. I once accidentally mixed the layers all at once (talk about a muddy mess), so take your time with this step!
Cooking Tips & Techniques
Making the perfect Oreo Dirt Cup is surprisingly simple, but a few tricks can take it from good to great:
- Cookie Crumbs Texture: Don’t pulverize the Oreos into powder. Keep some texture for that authentic dirt look and a nice crunch.
- Pudding Consistency: Instant pudding sets quickly, but don’t rush the whisking. Whisking for a full 2 minutes helps it thicken evenly and prevents lumps.
- Whipped Topping: Whip cream just until soft peaks form—overwhipping can lead to butter (yikes!). If you use store-bought, fold it gently to keep it light.
- Layering: Use a small spoon or piping bag for neat layers, especially if you want that Pinterest-worthy look.
- Multitasking: While pudding sets in the fridge, crush your Oreos and prep gummy worms. It’s a great way to save time.
- Common Mistake: Avoid making the pudding too far in advance or it can get watery. I learned this the hard way at a party once—no one wants soggy dirt cups!
Variations & Adaptations
This recipe is super flexible and fun to tweak depending on what you’ve got or who you’re making it for:
- Dietary Swap: Use gluten-free chocolate sandwich cookies for a gluten-free version. Swap dairy milk with almond or oat milk and use dairy-free whipped topping for a vegan twist.
- Seasonal Flair: Add fresh mint leaves or sprinkle mini chocolate chips on top for extra texture. During spring, swap gummy worms with edible flowers for a garden-fresh look.
- Flavor Twist: Mix in a tablespoon of peanut butter or cream cheese into the pudding for a richer flavor profile. I once tried adding a dash of espresso powder to the pudding mix—it gave a subtle mocha kick that was surprisingly good!
- Cooking Method Change: Instead of individual cups, layer the ingredients in a trifle bowl for a party centerpiece. Just scoop out servings as needed.
Serving & Storage Suggestions
These Oreo Dirt Cups are best served chilled, straight from the fridge. The cold temperature keeps the pudding firm and the cookie crumbs delightfully crunchy. I like to arrange them on a colorful tray with extra gummy worms scattered around for a festive look.
Pair these with a light citrus punch or a cold glass of milk for the perfect party combo. If you want to get fancy, a scoop of vanilla ice cream on the side never hurts.
Store leftover cups covered tightly in the refrigerator for up to 3 days. The flavors actually deepen after a few hours, but the cookie crumbs might lose a bit of their crispness overnight—still delicious, just a little softer.
To reheat (if you must), let them sit at room temperature for 10 minutes—microwaving is not recommended as it will melt the pudding and whipped topping.
Nutritional Information & Benefits
Each serving of these Oreo Dirt Cups contains roughly 250-300 calories, depending on portion size and specific ingredients. They offer a good balance of carbohydrates from the cookies and pudding, with some fat from the whipped topping.
While these are definitely a treat, using real milk and whipping your own cream adds some calcium and protein to the mix. For those mindful of allergens, be aware that Oreos contain wheat and dairy, and the whipped topping may contain dairy as well.
For a lighter option, try using sugar-free pudding mix and light whipped topping, or substitute with Greek yogurt to boost protein content. I find that these little tweaks make the dessert feel a bit more balanced without losing the fun factor.
Conclusion
If you’re searching for a dessert that’s fun, fuss-free, and guaranteed to get smiles at your grad party, these Easy No-Bake Oreo Dirt Cup Desserts are a solid choice. They combine nostalgic flavors with a playful presentation, and honestly, they’re just plain fun to eat.
Feel free to make them your own—add your favorite toppings, swap ingredients, or turn them into a big trifle. I love how this recipe brings people together, whether it’s a last-minute save or a thoughtfully planned treat.
Give it a try, and don’t forget to share your creative twists in the comments below. I can’t wait to hear how your dirt cups turn out!
Happy celebrating and happy digging!
FAQs
Can I make these Oreo Dirt Cups ahead of time?
Yes! They’re best made a few hours in advance and kept refrigerated. Try to consume within 3 days to enjoy the best texture and flavor.
What if I don’t have instant pudding mix?
You can make homemade chocolate pudding from scratch, but it requires cooking and cooling time, which makes it less quick. Instant mix is preferred for this easy no-bake recipe.
Can I use a different type of cookie instead of Oreos?
Absolutely! Chocolate sandwich cookies work best, but chocolate wafer cookies or even crushed chocolate graham crackers can work for a different twist.
Are these dirt cups gluten-free?
Traditional Oreos contain gluten, but there are gluten-free cookie options available that work well here. Just substitute accordingly.
What are some fun topping ideas besides gummy worms?
Try mini chocolate chips, crushed nuts, rainbow sprinkles, or edible flowers. Fresh berries or mint leaves add a nice fresh contrast too.
Pin This Recipe!
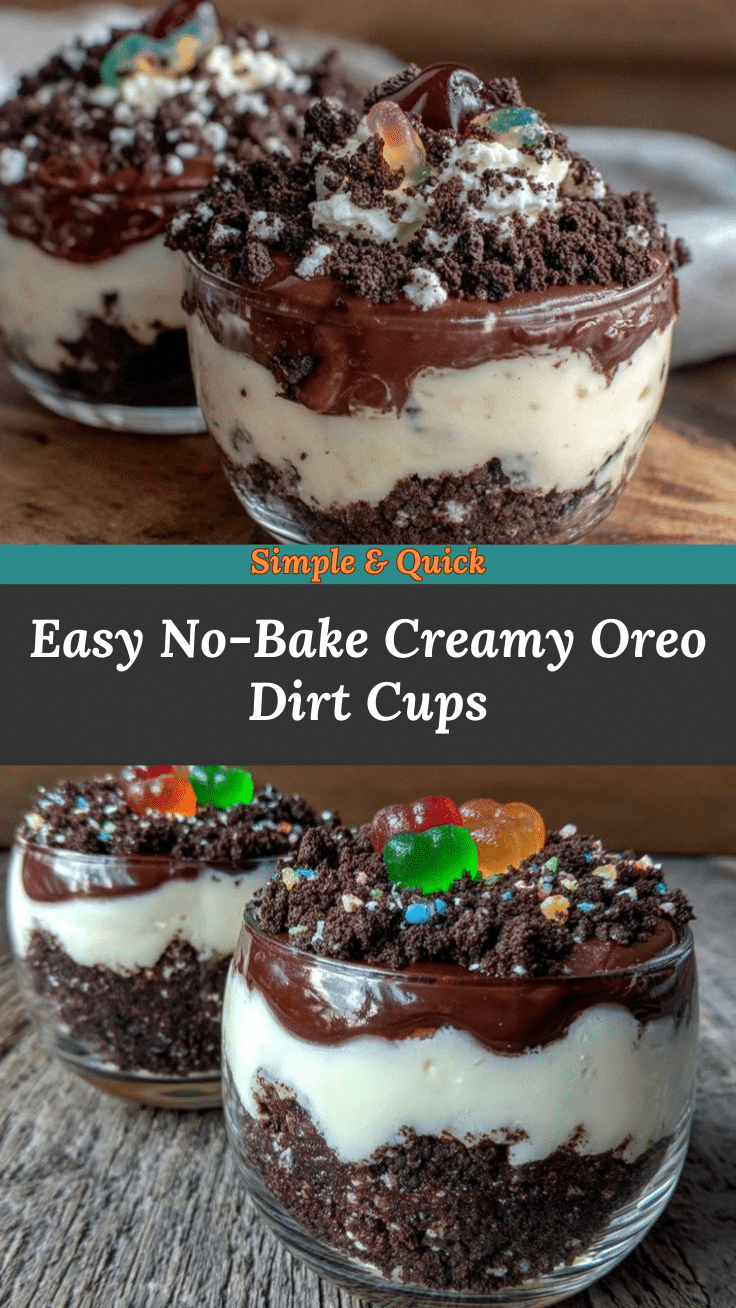

Easy No-Bake Oreo Dirt Cup Recipe Perfect for Grad Party Desserts
- Total Time: 1 hour 15 minutes
- Yield: 8 servings 1x
Description
A quick and fun no-bake dessert featuring layers of crushed Oreos, creamy chocolate pudding, whipped topping, and gummy worms, perfect for celebrations and grad parties.
Ingredients
- About 25 whole Oreo cookies, crushed finely
- 2 packets (3.9 oz each) instant chocolate pudding mix
- 3 cups (720 ml) milk, preferably whole milk or 2%
- 1 cup (240 ml) whipped topping, store-bought or homemade whipped cream
- A handful of gummy worms for decoration
- 1 teaspoon vanilla extract
- Optional: mini chocolate chips or crushed peanuts for extra texture
Instructions
- Crush about 25 Oreo cookies in a food processor until fine crumbs form, or place cookies in a zip-top bag and crush with a rolling pin until fine with some texture.
- In a large bowl, whisk together 2 packets of instant chocolate pudding mix, 3 cups cold milk, and 1 teaspoon vanilla extract for about 2 minutes until thickened. Let set for 5 minutes.
- If using homemade whipped topping, whip 1 cup heavy cream until soft peaks form. If store-bought, gently stir before use.
- Layer the dessert by spooning 2 tablespoons of crushed Oreos into the bottom of each serving cup, followed by 1/3 cup pudding, then 2 tablespoons whipped topping. Repeat layers until cups are nearly full, finishing with Oreo crumbs on top.
- Place 2 or 3 gummy worms on top of each cup for decoration.
- Refrigerate the dirt cups for at least 1 hour before serving to allow flavors to meld and pudding to firm up.
Notes
Do not pulverize Oreos into powder; keep some texture for authentic dirt look. Whisk pudding mix for full 2 minutes for best consistency. Whip cream until soft peaks form to avoid butter. Layer carefully for neat presentation. Chill at least 1 hour before serving. Store leftovers covered in refrigerator up to 3 days. Avoid microwaving to prevent melting.
- Prep Time: 15 minutes
- Cook Time: 0 minutes
- Category: Dessert
- Cuisine: American
Nutrition
- Serving Size: 1 cup (8 oz)
- Calories: 275
- Sugar: 28
- Sodium: 210
- Fat: 12
- Saturated Fat: 7
- Carbohydrates: 38
- Fiber: 1
- Protein: 3
Keywords: Oreo dirt cups, no-bake dessert, easy dessert, grad party dessert, Oreo pudding cups, gummy worms dessert
